
Flutter, Google’s revolutionary UI toolkit, has taken the software development world by storm. Its ability to enable developers to build natively compiled applications for mobile, web, and desktop from a single codebase has democratized app creation, making it more accessible and efficient than ever before. Whether you’re a seasoned developer looking to expand your toolkit, a budding entrepreneur aiming to launch your next big app idea, or a tech enthusiast curious about the latest trends in software development, understanding how to install and set up Flutter is your crucial first step.

This comprehensive guide will walk you through the entire process of installing Flutter, ensuring you’re ready to harness its power. We’ll cover everything from checking system requirements to setting up your development environment, making the journey as smooth as possible.
Understanding Flutter’s Ecosystem and Getting Started
Before diving into the installation process, it’s beneficial to grasp what Flutter is and why it’s gaining so much traction. Flutter’s core strength lies in its “write once, run anywhere” philosophy. This means you write your application’s code once using Dart, Flutter’s programming language, and then compile it into highly performant native code for various platforms, including iOS, Android, web browsers, and desktop operating systems like Windows, macOS, and Linux.
This cross-platform capability offers significant advantages:
- Reduced Development Time and Cost: Instead of maintaining separate codebases for iOS and Android, developers can work on a single project, drastically cutting down on development time and the associated costs.
- Consistent User Experience: Flutter’s rich set of pre-designed widgets and its rendering engine ensure a consistent look and feel across all target platforms, leading to a unified brand experience for your users.
- Expressive and Flexible UI: Flutter provides a highly customizable UI toolkit, allowing for the creation of beautiful and engaging user interfaces that stand out.
- Fast Development Cycles: Features like hot-reload allow developers to see the impact of their code changes almost instantly, accelerating the iterative development process.
With these benefits in mind, let’s move on to the essential prerequisites and the installation steps.
Prerequisites for Flutter Installation
To ensure a seamless installation, it’s important to have a few things in place:
System Requirements
Flutter supports a wide range of operating systems, but there are specific requirements for each.
- Operating System: Flutter SDKs are available for Windows, macOS, and Linux.
- Disk Space: You’ll need a reasonable amount of free disk space. The Flutter SDK itself is relatively small, but the development tools, emulators, and dependencies can add up. It’s recommended to have at least 10 GB of free space.
- Version Control System (Git): Flutter relies on Git for managing its source code. Ensure you have Git installed on your system. You can download it from git-scm.com.
Essential Tools
Depending on your target platform(s), you’ll need to install specific development tools:
-
For Android Development:
- Android Studio: This is the official IDE for Android development and includes the Android SDK, Android Virtual Device (AVD) manager, and other essential tools. Download it from developer.android.com/studio.
- Android SDK: Flutter requires certain Android SDK packages to build Android apps. These are usually installed as part of Android Studio.
- Android Emulator: To test your Android apps without a physical device, you’ll need to set up an Android emulator through the AVD Manager in Android Studio.
-
For iOS Development (macOS only):
- Xcode: This is Apple’s integrated development environment (IDE) for macOS, iOS, iPadOS, watchOS, and tvOS. It’s required for building and running Flutter apps on iOS simulators and devices. Download it from the Mac App Store.
- CocoaPods: A dependency manager for Swift and Objective-C Cocoa projects. It’s crucial for managing Flutter’s iOS dependencies. You can install it via RubyGems:
sudo gem install cocoapods.
-
For Web Development:
- Chrome Browser: While Flutter can target other browsers, Chrome is recommended for development and debugging due to its robust developer tools.
-
For Desktop Development (Windows, macOS, Linux):
- Windows: Visual Studio with the “Desktop development with C++” workload installed.
- macOS: Xcode and CocoaPods.
- Linux: Standard C++ build tools and development libraries.
Installing the Flutter SDK
The installation process for the Flutter SDK itself is straightforward. We’ll cover the general steps, which are similar across different operating systems, with specific nuances mentioned where necessary.
Downloading the Flutter SDK
The first step is to download the latest stable release of the Flutter SDK.
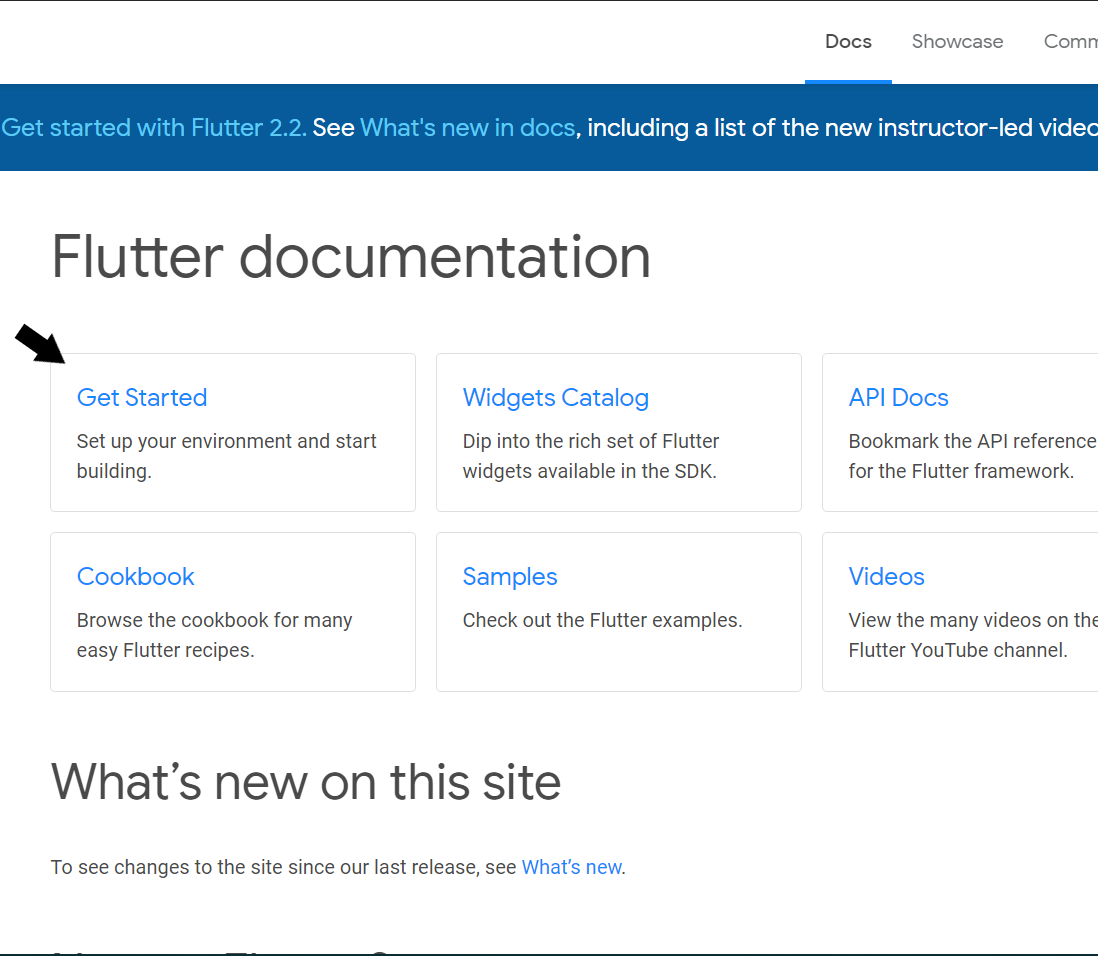
- Visit the Official Flutter Website: Go to the Flutter documentation website.
- Select Your Operating System: Choose the download link corresponding to your operating system (Windows, macOS, or Linux).
- Download the SDK: Download the ZIP archive for Windows or the tarball for macOS/Linux.
Extracting the Flutter SDK
Once downloaded, you need to extract the SDK to a desired location on your machine.
-
Windows:
- Navigate to the folder where you downloaded the ZIP file.
- Right-click on the ZIP file and select “Extract All…”.
- Choose a permanent location for the extracted files (e.g.,
C:srcflutter). Avoid installing Flutter in directories with restricted permissions likeC:Program Files.
-
macOS and Linux:
- Open your terminal.
- Navigate to the directory where you downloaded the tarball.
- Extract the tarball using the following command (replace
[flutter_version].tar.xzwith the actual filename):
bash

tar xf [flutter_version].tar.xz
- Move the extracted
flutterdirectory to a permanent location (e.g.,$HOME/development/flutter).
Adding Flutter to Your PATH Environment Variable
This is a critical step that allows you to run Flutter commands from any directory in your terminal or command prompt.
-
Windows:
- Open the Start menu and search for “environment variables”.
- Click on “Edit the system environment variables”.
- In the System Properties window, click the “Environment Variables…” button.
- Under “User variables” or “System variables” (user variables are generally preferred for individual users), find the
Pathvariable. - Select
Pathand click “Edit…”. - Click “New” and add the full path to the
bindirectory within your Flutter SDK installation (e.g.,C:srcflutterbin). - Click “OK” on all open windows to save the changes.
- Important: Close and reopen any command prompt or terminal windows you currently have open for the changes to take effect.
-
macOS and Linux:
- Open your terminal.
- You’ll need to edit your shell’s configuration file. The most common ones are:
~/.bash_profile(for Bash shell)~/.zshrc(for Zsh shell, the default on recent macOS versions)
- Open the appropriate file using a text editor (e.g.,
nano ~/.zshrc). - Add the following line at the end of the file, replacing
/path/to/flutterwith the actual path to your Flutter SDK:
bash

export PATH="$PATH:/path/to/flutter/bin"
- Save the file (Ctrl+O, then Enter in nano) and exit the editor (Ctrl+X in nano).
- To apply the changes without restarting your terminal, run:
bash

source ~/.zshrc  # or source ~/.bash_profile
Verifying Your Flutter Installation
After adding Flutter to your PATH, you can verify the installation by running the flutter doctor command.
- Open a new terminal or command prompt window.
- Type:
bash

flutter doctor
- This command checks your environment and reports the status of your Flutter installation, along with any dependencies that are missing or need configuration. It will guide you on how to resolve any issues.
Understanding flutter doctor Output
The output of flutter doctor is crucial. It will typically look something like this:
- Flutter (channel stable, …): Indicates that the Flutter SDK is recognized.
- Android toolchain: Shows whether you have the Android SDK and its necessary components installed and configured. It will often prompt you to install missing SDK components or licenses.
- Xcode (macOS only): Checks if Xcode is installed, up-to-date, and configured for Flutter development. It might also prompt you to install Xcode command-line tools and potentially update CocoaPods.
- Chrome: Verifies if Chrome is installed, which is needed for web development.
- Android Studio: Checks if Android Studio is installed and can detect its SDK.
- VS Code: Checks if Visual Studio Code is installed and suggests installing the Flutter and Dart extensions.
- Connected device: Lists any physical devices or emulators connected and recognized by Flutter.
If flutter doctor reports any issues (indicated by a red [X] or yellow [!]), follow the on-screen instructions to resolve them. This might involve running flutter doctor --android-licenses, installing specific SDK components, or updating your IDEs.
Setting Up Development Tools and Emulators
With the Flutter SDK installed and verified, the next step is to set up your development environment and the tools for running your applications.
Installing an IDE for Flutter Development
While you can technically develop Flutter apps with just a text editor and the command line, using an Integrated Development Environment (IDE) significantly enhances productivity. The two most popular IDEs for Flutter development are Android Studio and Visual Studio Code.
Android Studio
- Install Android Studio: If you haven’t already, download and install Android Studio from developer.android.com/studio. Follow the setup wizard.
- Install Flutter and Dart Plugins:
- Open Android Studio.
- Go to
File > Settings(on Windows/Linux) orAndroid Studio > Preferences(on macOS). - In the Settings/Preferences dialog, navigate to
Plugins. - Search for “Flutter” in the marketplace and click “Install”.
- When prompted to install the Dart plugin as well, accept it.
- Restart Android Studio after installation.
Visual Studio Code (VS Code)
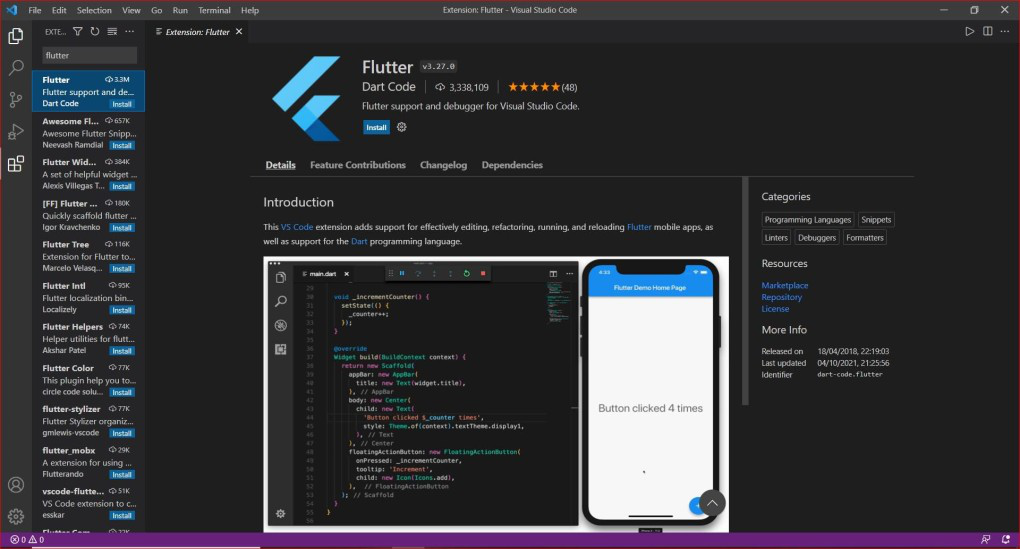
- Install VS Code: Download and install VS Code from code.visualstudio.com.
- Install Flutter and Dart Extensions:
- Open VS Code.
- Click on the Extensions icon in the Activity Bar on the side of the window (it looks like four squares).
- Search for “Flutter” and install the official Flutter extension by Dart Code.
- This extension will automatically install the Dart extension as a dependency.
- Reload VS Code when prompted.
Setting Up Emulators and Devices
To test your Flutter applications, you’ll need either a physical device or an emulator.
Android Emulator Setup
- Open Android Studio:
- Launch AVD Manager: Go to
Tools > AVD Manager(or find the AVD Manager icon in the toolbar). - Create Virtual Device: Click “+ Create Virtual Device…”.
- Select Hardware: Choose a device definition (e.g., Pixel 6).
- Select System Image: Download a system image for an Android version (e.g., Android 12.0 – SnowCone). You might need to click the “Download” link next to the desired API level.
- Configure and Finish: Give your virtual device a name and click “Finish”.
- Launch Emulator: In the AVD Manager, click the green play button next to your newly created virtual device to launch it.
iOS Simulator Setup (macOS Only)
- Open Xcode:
- Launch Simulator:
- Open a Flutter project in Xcode (usually by navigating to the
iosfolder within your Flutter project and opening the.xcworkspacefile). - Alternatively, you can launch the Simulator directly from Xcode by going to
Xcode > Open Developer Tool > Simulator. - Choose a device and iOS version from the Simulator menu.
- Open a Flutter project in Xcode (usually by navigating to the
Physical Devices
- Android:
- Enable Developer Options and USB Debugging on your Android device. The exact steps vary by device manufacturer, but generally involve going to
Settings > About phoneand tapping the “Build number” seven times. Then, go toSettings > System > Developer options. - Connect your device to your computer via USB.
- On your device, authorize the computer for USB debugging when prompted.
- Enable Developer Options and USB Debugging on your Android device. The exact steps vary by device manufacturer, but generally involve going to
- iOS:
- Connect your iPhone or iPad to your Mac via USB.
- Open your Flutter project in Xcode.
- Select your physical device from the device dropdown menu in Xcode.
- You might need to trust the developer profile on your iPhone/iPad (
Settings > General > Device ManagementorSettings > General > VPN & Device Management).
Running Your First Flutter App
Now that everything is set up, let’s run a sample Flutter app to confirm everything is working correctly.
-
Create a New Flutter Project:
- Using Command Line:
bash

flutter create my_first_app

cd my_first_app
- Using Android Studio:
- Go to
File > New > Project.... - Select “Flutter” from the project types on the left.
- Choose “Flutter Application” and click “Next”.
- Enter your project name (e.g.,
my_first_app), select a project location, and choose your desired language (Dart). - Click “Finish”.
- Go to
- Using VS Code:
- Open the Command Palette (
Ctrl+Shift+PorCmd+Shift+P). - Type “Flutter: New Project” and select it.
- Choose “Application”.
- Select a folder to create your project in and enter your project name.
- Open the Command Palette (
- Using Command Line:
-
Select a Device:
- In your IDE (Android Studio or VS Code), you should see a device selector in the toolbar.
- Choose your connected physical device or the running emulator/simulator.
-
Run the App:
- Using Command Line:
bash

flutter run
- Using Android Studio:
- Click the green “Run” button (a triangle) in the toolbar.
- Using VS Code:
- Press
F5or go toRun > Start Debugging.
- Press
- Using Command Line:
You should see the default Flutter counter app launch on your selected device or emulator. Congratulations, you’ve successfully installed Flutter and are ready to start building amazing cross-platform applications!
Conclusion: Your Journey into Cross-Platform Development Begins
Installing Flutter is the first, albeit critical, step in your journey to becoming a proficient cross-platform developer. By following these comprehensive steps, you’ve successfully set up your development environment, installed the necessary tools, and even run your first Flutter application.
The power of Flutter lies not just in its ease of installation but in its ability to streamline the entire development process. With a single codebase, you can reach a vast audience on multiple platforms, reducing complexity and accelerating time-to-market.
As you delve deeper into Flutter development, remember to leverage the official documentation, the vibrant Flutter community, and the extensive resources available online. Whether you’re building a personal brand’s mobile app, a corporate tool, or a revolutionary new gadget’s companion app, Flutter provides the foundation for your success. Happy coding!
aViewFromTheCave is a participant in the Amazon Services LLC Associates Program, an affiliate advertising program designed to provide a means for sites to earn advertising fees by advertising and linking to Amazon.com. Amazon, the Amazon logo, AmazonSupply, and the AmazonSupply logo are trademarks of Amazon.com, Inc. or its affiliates. As an Amazon Associate we earn affiliate commissions from qualifying purchases.