In the rapidly evolving landscape of technology, efficiency, scalability, and consistency are paramount. Whether you’re a seasoned developer, a budding tech enthusiast, or a business aiming to optimize its operations, understanding and leveraging modern tools is crucial. Among these, Docker stands out as a transformative technology, revolutionizing how applications are developed, shipped, and run. This comprehensive guide will walk you through the process of installing Docker on your Linux system, empowering you to unlock its full potential.
Our digital world thrives on innovation, and the ability to quickly deploy applications without worrying about “it works on my machine” syndrome is a game-changer. Docker provides precisely that – a standardized, lightweight environment for packaging and running applications. For anyone navigating the complexities of software development, system administration, or even just exploring new tech, Docker is an indispensable tool, aligning perfectly with the core principles of the Tech section of our website, emphasizing software, tutorials, and productivity.
Understanding Docker: The Foundation of Modern Containerization
Before diving into the installation process, it’s essential to grasp what Docker is and why it has become an industry standard. Docker is an open-source platform that enables developers to automate the deployment of applications inside lightweight, portable containers. These containers encapsulate an application and all its dependencies, ensuring it runs uniformly across various computing environments.
Why Docker Matters for Developers and Businesses
Docker’s impact resonates across multiple facets, from individual developer productivity to large-scale business operations, touching upon our website’s themes of Tech, Productivity, Brand, and even Money.
For developers, Docker simplifies dependency management, eliminates environment discrepancies, and speeds up the development lifecycle. Imagine needing to set up a specific version of a database, a particular programming language runtime, and a web server for a project. Without Docker, this can be a tedious, error-prone process that consumes valuable time. With Docker, these components can be defined in a Dockerfile and spun up in isolated containers in minutes, dramatically enhancing productivity. This consistency means less debugging related to environment issues and more focus on writing actual code.
From a business perspective, Docker offers significant advantages. It facilitates continuous integration and continuous deployment (CI/CD) pipelines, allowing for faster release cycles and more reliable deployments. This agility translates directly into a stronger brand image, as companies can respond quicker to market demands and deliver high-quality, stable products. Furthermore, Docker’s efficient resource utilization means you can run more applications on the same infrastructure compared to traditional virtual machines, leading to substantial cost savings (impacting Business Finance under the Money topic). Startups and freelancers, in particular, can leverage Docker to build and deploy their projects more efficiently, accelerating their path to online income or a successful side hustle. By ensuring applications run consistently from development to production, Docker contributes to the overall reliability and professional identity of a project or company.
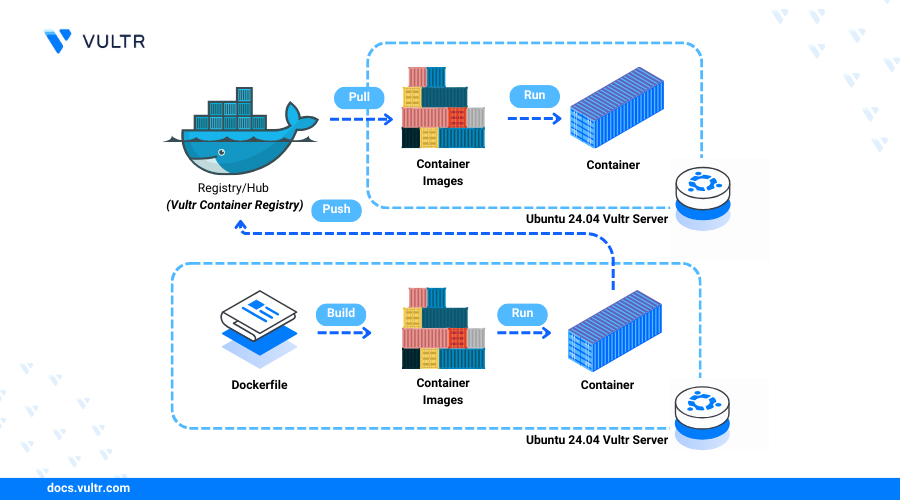
Key Concepts: Images, Containers, Docker Engine
To effectively use Docker, familiarize yourself with its core components:
- Docker Engine: This is the heart of Docker. It’s the client-server application that runs on your Linux machine, comprising a daemon (the
dockerdprocess), a REST API that specifies interfaces for programs to talk to the daemon, and a command-line interface (CLI) client (docker). The engine handles building, running, and managing containers. - Docker Images: An image is a lightweight, standalone, executable package that includes everything needed to run a piece of software, including the code, a runtime, system tools, system libraries, and settings. Images are read-only templates from which Docker containers are launched. Think of an image as a blueprint for a house.
- Docker Containers: A container is a runnable instance of an image. You can create, start, stop, move, or delete a container using the Docker API or CLI. A container is an isolated environment, but it shares the host OS kernel. Continuing the analogy, a container is the actual house built from the blueprint.
Understanding these concepts is foundational to leveraging Docker effectively, making your development workflow more streamlined and robust.
Prerequisites for Docker Installation on Linux
Before proceeding with the installation, ensure your Linux system meets the basic requirements and is properly updated. This preparation step is crucial for a smooth installation process, preventing common pitfalls and ensuring compatibility.
System Requirements and Supported Distributions
Docker Engine is compatible with a wide range of Linux distributions. The officially supported distributions include:
- Debian and its derivatives (like Ubuntu, Linux Mint)
- Fedora
- CentOS/RHEL
- Arch Linux
While the steps might vary slightly between distribution families (e.g., using apt for Debian/Ubuntu vs. dnf/yum for Fedora/CentOS), the core principles remain the same. This guide will primarily focus on Debian-based systems (like Ubuntu), which are widely used by developers and align with our focus on practical tutorials for the Tech community.
For optimal performance, your system should have:
- A 64-bit architecture.
- At least 2GB of RAM (4GB or more recommended, especially for running multiple containers).
- Sufficient disk space (Docker images can consume significant space over time).
- Kernel version 3.10 or higher.
Updating Your System
It’s always a best practice to update your system’s package index and installed packages before installing new software. This ensures you have the latest security patches and dependency updates, which can prevent compatibility issues.
Open your terminal and run the following commands:
sudo apt update
sudo apt upgrade -y
sudo apt update: Refreshes the list of available packages from your configured repositories.sudo apt upgrade -y: Installs the newer versions of packages you currently have installed. The-yflag automatically confirms any prompts.
This step is a fundamental aspect of maintaining system hygiene and is a common recommendation in any software installation tutorial, contributing to the Digital Security and Productivity aspects of our Tech category.
Step-by-Step Installation Methods
While multiple ways exist to install Docker on Linux, we’ll focus on the most recommended and robust method: installing from Docker’s official repository. This approach ensures you receive timely updates and stable versions directly from the source. We’ll also briefly touch upon other methods for completeness.
Method 1: Installing Docker from the Official Repository (Recommended)
This method involves setting up Docker’s official repository on your system and then installing Docker Engine from it. It’s the preferred way for production environments and continuous maintenance.
1. Install Necessary Dependencies
First, install some packages that allow apt to use packages over HTTPS:
sudo apt install ca-certificates curl gnupg lsb-release -y
ca-certificates: Allows web browsers and other programs to check the authenticity of SSL/TLS certificates.curl: A tool for transferring data with URLs, often used to download GPG keys.gnupg: Enablesaptto verify packages using GPG signatures.lsb-release: A utility that provides LSB (Linux Standard Base) information, sometimes used by scripts to identify the distribution.
2. Add Docker’s Official GPG Key
Docker provides a GPG key to verify the authenticity of the packages you download from their repository. You should always add this key to your system’s keyring.
sudo mkdir -p /etc/apt/keyrings
curl -fsSL https://download.docker.com/linux/ubuntu/gpg | sudo gpg --dearmor -o /etc/apt/keyrings/docker.gpg
sudo mkdir -p /etc/apt/keyrings: Creates the directory to store GPG keys if it doesn’t already exist.curl -fsSL ... | sudo gpg --dearmor -o ...: Downloads the GPG key from Docker’s server, then processes it withgpg --dearmorto convert it into a formataptcan use, and saves it to the specified file.
3. Set Up the Docker Repository
Now, add the Docker repository to your apt sources. This command will determine your Linux distribution’s codename (e.g., jammy for Ubuntu 22.04, bullseye for Debian 11) and add the appropriate repository URL.
echo
  "deb [arch=$(dpkg --print-architecture) signed-by=/etc/apt/keyrings/docker.gpg] https://download.docker.com/linux/ubuntu
  $(lsb_release -cs) stable" | sudo tee /etc/apt/sources.list.d/docker.list > /dev/null
- This command dynamically constructs the
debline for yoursources.list.dfile, ensuring it targets your specific architecture and distribution codename. signed-by=/etc/apt/keyrings/docker.gpg: Specifies the GPG key to use for verifying packages from this repository.stable: Indicates that you want to pull packages from the stable channel. Docker also offerstestandnightlychannels for more experimental versions.
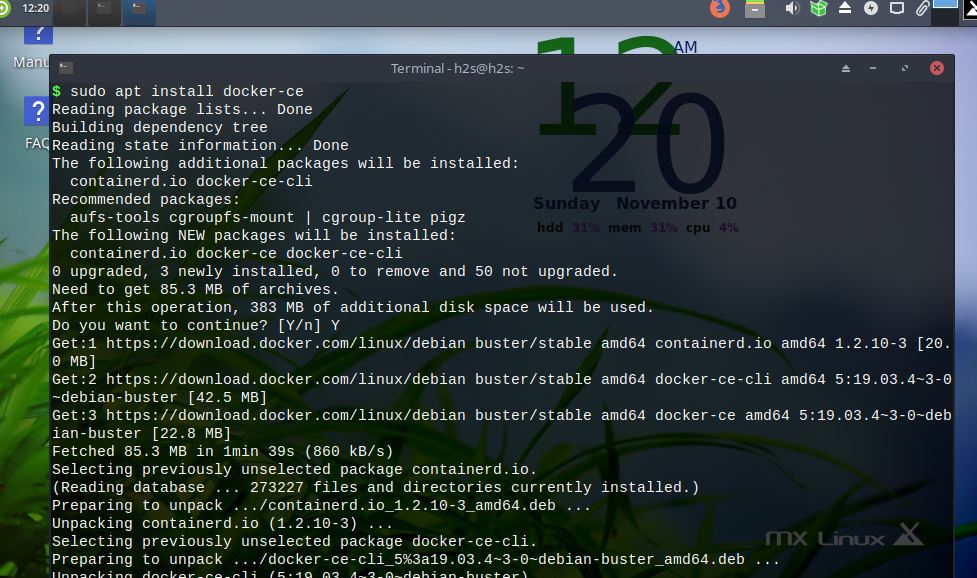
4. Install Docker Engine, CLI, and Containerd
After adding the repository, update your apt package index again to include the new Docker packages, then install Docker Engine, Docker CLI, and Containerd.
sudo apt update
sudo apt install docker-ce docker-ce-cli containerd.io docker-buildx-plugin docker-compose-plugin -y
docker-ce: The community edition of the Docker Engine.docker-ce-cli: The command-line interface for Docker.containerd.io: A high-level container runtime that Docker Engine uses.docker-buildx-pluginanddocker-compose-plugin: These are optional but highly recommended plugins that enhance Docker’s functionality, especially for multi-container applications (Docker Compose) and multi-platform image building.
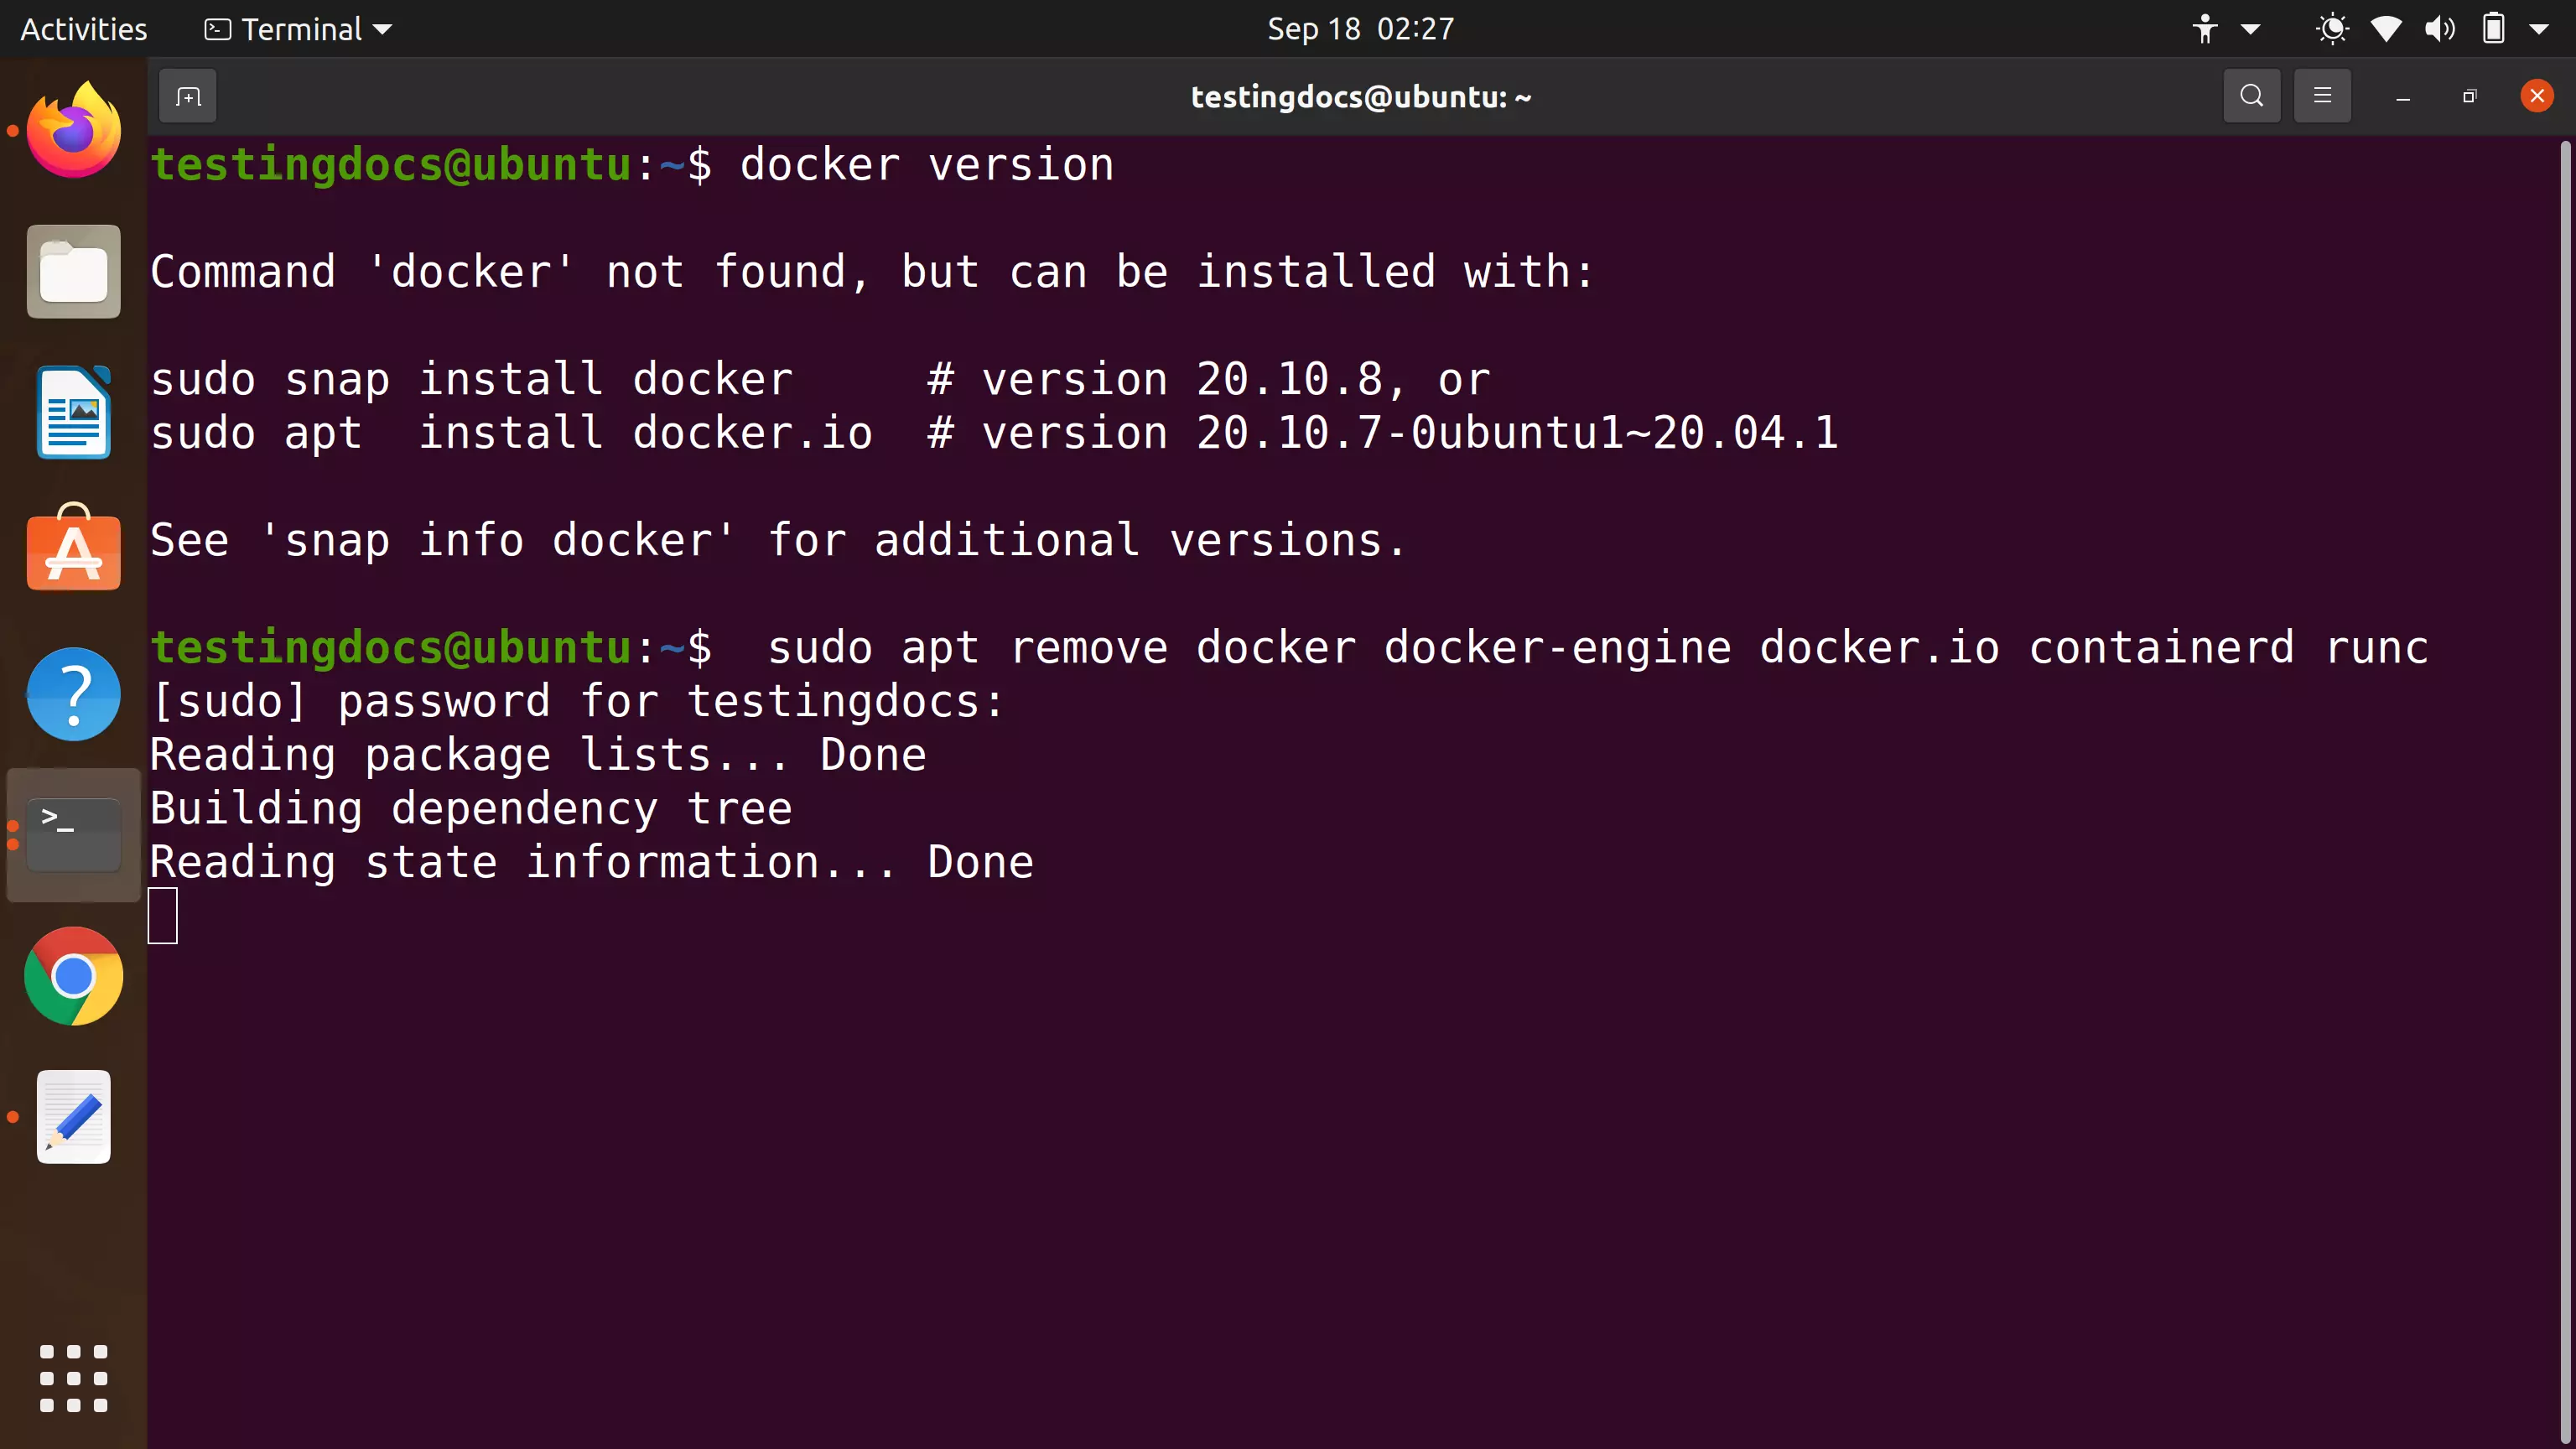
5. Verify the Installation
To verify that Docker Engine is installed correctly and running, you can run the hello-world container:
sudo docker run hello-world
If everything is set up correctly, you will see a message indicating that Docker is working and a “Hello from Docker!” message. This initial success is a crucial step for boosting your productivity and confidence in using this powerful tech tool.
Method 2: Installing Docker using the Convenience Script (Quick but Less Recommended for Production)
Docker provides a convenience script that automatically installs Docker on your system. While quick and easy, this method is generally not recommended for production environments as it might not give you full control over the installation process and dependencies. It’s often used for development or testing environments where rapid setup is prioritized over granular control.
curl -fsSL https://get.docker.com -o get-docker.sh
sudo sh get-docker.sh
This script detects your operating system and installs the latest stable version of Docker. After running, you’ll still need to perform post-installation steps.
Method 3: Manual Installation (Advanced Users)
For advanced users or specific enterprise environments, Docker can be installed manually by downloading the binary packages directly. This method offers the highest degree of control but requires a deeper understanding of Linux system administration and Docker’s internal workings. Given the complexity and the focus of this guide on general users, we won’t delve into the specifics here, but it’s worth noting its existence for those with specialized needs.
Post-Installation Configuration and Best Practices
Installing Docker is just the beginning. To truly integrate it into your workflow and ensure secure, efficient operation, some post-installation steps are highly recommended. These practices enhance digital security and productivity, core tenets of our Tech section.
Managing Docker as a Non-Root User (Security, Productivity)
By default, running Docker commands requires sudo privileges. While functional, repeatedly using sudo can be cumbersome and poses a slight security risk. Docker allows you to add your user to the docker group, which grants non-root users the ability to execute Docker commands.
sudo usermod -aG docker $USER
sudo usermod -aG docker $USER: Adds your current user ($USER) to thedockergroup (-aG).
After running this command, you need to log out and log back in, or restart your system, for the changes to take effect. Alternatively, you can use newgrp docker to apply the group changes without logging out, though a full logout/login is more reliable.
Once applied, you should be able to run Docker commands without sudo:
docker run hello-world
This significantly improves productivity by removing the need for sudo on every command and enhances digital security by minimizing root operations where not strictly necessary.
Configuring Docker to Start on Boot
Docker Engine is typically configured to start automatically when your system boots. You can verify its status and enable it if it’s not already.
To check if Docker is active and running:
sudo systemctl status docker
If it’s not enabled or running, you can start it and enable it to run on boot:
sudo systemctl start docker
sudo systemctl enable docker
This ensures that your containerized applications are ready to go whenever your system starts, crucial for maintaining application uptime and overall system reliability.
Testing Your Docker Installation
Beyond the hello-world container, a common way to comprehensively test your Docker installation is to run a more complex image, such as an Nginx web server.
docker run -d -p 80:80 --name my-nginx nginx
-d: Runs the container in detached mode (in the background).-p 80:80: Maps port 80 of your host machine to port 80 inside the container.--name my-nginx: Assigns a readable name to your container.nginx: Specifies the Docker image to use.
After running this, open your web browser and navigate to http://localhost. You should see the default Nginx welcome page. To stop and remove the container:
docker stop my-nginx
docker rm my-nginx
This practical test confirms that Docker is fully operational and capable of handling real-world applications.
Basic Docker Usage: Your First Container
Now that Docker is installed and configured, let’s explore some fundamental commands to get you started with using containers. This section serves as a quick start guide, further cementing Docker’s role as a tool for tech exploration and productivity.
Running a Simple ‘Hello-World’ Container
We already used this for verification, but let’s re-emphasize its importance. When you execute docker run hello-world:
- The Docker client contacts the Docker daemon.
- The Docker daemon pulls the
hello-worldimage from Docker Hub (the default registry) if it’s not already available locally. - The Docker daemon creates a new container from that image and runs an executable that produces the “Hello from Docker!” output.
- The Docker daemon streams that output back to the Docker client, which displays it in your terminal.
- The container then exits.
This simple command illustrates the entire lifecycle of running a basic container.
Pulling and Running Other Images
Docker Hub hosts millions of publicly available images. You can search for images and pull them to your local machine.
To search for an image:
docker search ubuntu
To pull an image (e.g., the latest Ubuntu image):
docker pull ubuntu
To run a shell inside an Ubuntu container:
docker run -it ubuntu bash
-it: This combines-i(interactive) and-t(allocate a pseudo-TTY). These flags allow you to interact with the container’s shell.ubuntu: The image to use.bash: The command to execute inside the container (starts a bash shell).
You’ll find yourself inside the Ubuntu container’s bash prompt. You can explore the container’s file system, install packages (within the container), and experiment without affecting your host system. Type exit to leave the container.
These basic commands are your gateway to a world of containerized applications, enabling you to rapidly set up development environments, test software, and even deploy production services with unprecedented ease.
Troubleshooting Common Docker Installation Issues
Even with a detailed guide, you might encounter issues during or after installation. Here are some common problems and their solutions, aimed at helping you quickly resolve hurdles and maintain your productivity.
Service Not Starting
If sudo systemctl status docker shows that the Docker service is not active or has failed:
- Check logs: Use
journalctl -xeu docker.serviceto inspect the Docker daemon logs for error messages. - Permissions: Ensure the Docker daemon has the necessary permissions.
- Conflicting services: Check if other applications are using Docker’s default ports or conflicting with its operation.
- Restart: Sometimes a simple restart helps:
sudo systemctl restart docker.
Permissions Errors
If you get “permission denied” errors when running Docker commands without sudo, it’s almost certainly because your user is not in the docker group, or the changes haven’t taken effect:
- Verify group membership: Run
groups $USER. Ensuredockeris listed. - Relogin: Log out and log back into your session (or reboot) to apply the group changes. As a temporary workaround, use
newgrp docker.
Connectivity Problems
If docker pull or docker run commands fail with network-related errors:
- Internet connection: Verify your host machine has a stable internet connection.
- Proxy settings: If you are behind a corporate proxy, Docker needs to be configured to use it. You’ll need to create or modify
/etc/systemd/system/docker.service.d/http-proxy.confandhttps-proxy.conffiles, specifying your proxy server. - DNS issues: Ensure your DNS settings are correct. You can configure Docker to use specific DNS servers in
/etc/docker/daemon.json.
By addressing these common issues, you can minimize downtime and keep your Docker environment running smoothly, safeguarding your productivity and allowing you to focus on your actual development tasks.
Conclusion: Empowering Your Development Workflow with Docker
Installing Docker on Linux is a foundational step toward modernizing your development practices and maximizing your technological capabilities. From ensuring consistent environments for software delivery to streamlining deployment pipelines, Docker offers unparalleled advantages that resonate deeply with the core themes of our website.
By embracing Docker, you’re not just installing a piece of software; you’re adopting a methodology that enhances productivity, bolsters digital security through isolation, and aligns with cutting-edge technology trends. For businesses, it translates into faster time-to-market, significant cost savings, and a more robust brand built on reliable applications. For individuals, whether you’re building a personal project, exploring a side hustle, or advancing your career, Docker provides the flexible, powerful environment needed to turn ideas into reality, potentially opening doors to new online income streams or enhancing your personal brand in the competitive tech landscape.
As you embark on your Docker journey, remember that this installation is merely the first chapter. The true power of Docker lies in its ecosystem of tools (like Docker Compose, Docker Swarm, Kubernetes) and its vibrant community. Continue to explore, experiment, and integrate Docker into your workflow, and you’ll discover a world where software development is more efficient, reliable, and enjoyable than ever before. Your Linux machine is now a powerful launchpad for innovation, ready to host an endless array of containerized applications.
aViewFromTheCave is a participant in the Amazon Services LLC Associates Program, an affiliate advertising program designed to provide a means for sites to earn advertising fees by advertising and linking to Amazon.com. Amazon, the Amazon logo, AmazonSupply, and the AmazonSupply logo are trademarks of Amazon.com, Inc. or its affiliates. As an Amazon Associate we earn affiliate commissions from qualifying purchases.