
Cyberpunk 2077, CD Projekt Red’s sprawling dystopian RPG, offers an incredibly rich world from the moment you step into Night City. Yet, for many players, the journey doesn’t end with the vanilla experience. The vibrant modding community has taken it upon themselves to elevate the game, offering everything from crucial bug fixes and performance enhancements to stunning visual overhauls, quality-of-life improvements, and entirely new gameplay mechanics. Diving into the world of Cyberpunk 2077 mods can transform your playthrough, allowing you to tailor V’s adventure precisely to your preferences, making Night City truly your own.
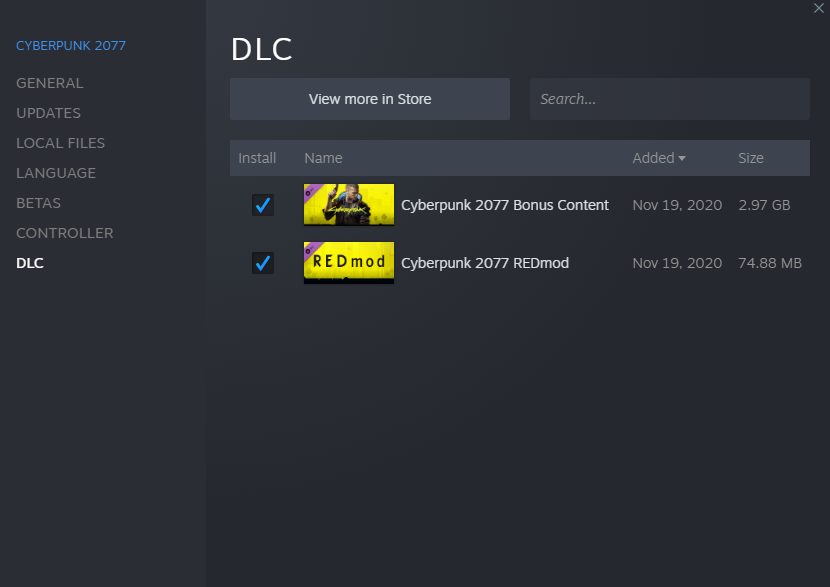
This guide, rooted deeply in the “Tech” ethos of digital customization and optimization, will walk you through the essential tools, installation methods, and best practices for safely and effectively modding Cyberpunk 2077. Whether you’re a seasoned modder or a curious newcomer, preparing to augment your game with community-created enhancements, we’ll ensure you have the knowledge to navigate the complex, yet rewarding, landscape of Night City’s modding scene. Get ready to supercharge your Cyberpunk experience, leveraging the innovation of its dedicated player base to unlock the game’s full potential.
I. Why Dive Into Cyberpunk 2077 Modding? Unleashing Night City’s Potential
Modding is far more than just tweaking game files; it’s about extending the life, improving the quality, and personalizing the experience of a beloved title. For a game as ambitious and evolving as Cyberpunk 2077, the benefits of modding are particularly compelling, aligning perfectly with the digital freedom and innovation celebrated in the tech world.
A. Enhancing Immersion and Gameplay: Beyond the Vanilla Experience
From its launch, Cyberpunk 2077 presented a breathtaking vision, but also areas ripe for community refinement. Modders have diligently worked to address these, contributing countless enhancements that significantly boost immersion and gameplay fluidity. These include critical bug fixes that predate official patches, performance optimizations that help lower-end PCs or push high-end rigs further, and quality-of-life improvements that streamline inventory management, UI navigation, or NPC behavior. Imagine more realistic traffic, deeper gang interactions, or even overhauled combat mechanics that truly make you feel like the ultimate cyber-psycho hunter. Modding allows for a game experience that feels more polished, more responsive, and ultimately, more engaging, offering a level of technological refinement often beyond the scope of official development cycles for specific aspects.
B. Personalizing Your Night City Saga: Crafting Your Unique Narrative
One of the most appealing aspects of modding, especially for an RPG, is the ability to profoundly personalize your experience. This goes beyond simple cosmetic changes, although those are plentiful and transformative, allowing you to alter V’s appearance, clothing, cyberware, and even vehicles to an unprecedented degree. Beyond aesthetics, mods can introduce new weapons, expand character customization options, or even integrate entirely new lore-friendly quests and narratives, albeit less common than pure cosmetic or gameplay tweaks. This deep level of personalization allows players to carve out a unique “brand” for their V within Night City, reflecting their preferred playstyle and aesthetic choices, thereby enriching their personal narrative within the game’s expansive universe. It’s about taking the core offering and molding it into something that resonates perfectly with your individual vision.
C. The Community-Driven Evolution of a Masterpiece: Sustaining a Digital World
The modding community acts as a powerful, distributed development team, constantly innovating and adapting. For Cyberpunk 2077, this has meant a continuous evolution of the game, fostering longevity and deepening player engagement. Modders contribute their time and expertise, often using sophisticated programming and design skills, to fill gaps, add desired features, and push the boundaries of what the game engine can do. This collaborative spirit not only benefits individual players but also reinforces the game’s “Brand” value, demonstrating a vibrant, active ecosystem around the title. It transforms a single-player experience into a shared passion project, where the collective ingenuity of thousands of enthusiasts ensures that Night City remains fresh, exciting, and perpetually evolving, long after the official content releases slow down.
II. Essential Tools and Foundations for Cyberpunk 2077 Modding
Before you begin downloading every cool mod you find, understanding the foundational tools and platforms is crucial. These components are the building blocks that enable mods to function correctly and are vital for a stable and efficient modding experience, reflecting the organized approach to “Tech” projects.
A. The Cornerstone: Nexus Mods
When it comes to sourcing Cyberpunk 2077 mods, Nexus Mods is unequivocally the central hub. It’s the most reputable and comprehensive repository, offering tens of thousands of mods, ranging from simple texture replacements to complex script injects. Nexus Mods provides a robust platform for modders to upload their creations and for users to download them, complete with descriptions, installation instructions, user comments, and often compatibility notes. Always prioritize downloading from Nexus Mods to ensure you’re getting files from a trusted source, minimizing digital security risks associated with unverified downloads. Creating a free account is highly recommended as it simplifies tracking downloaded mods and managing endorsements.
B. Core Modding Frameworks: The Underpinnings of Customization
Many of Cyberpunk 2077’s most impactful mods rely on a series of fundamental frameworks that enable deeper interaction with the game’s engine and assets. These aren’t mods themselves in the traditional sense, but rather the essential infrastructure that allows other mods to function. Installing these first is paramount.
- 1. Cyber Engine Tweaks (CET): This is arguably the most critical framework. CET provides an in-game console for executing commands, a performance-boosting feature, and, most importantly, the necessary hooks for many script-based mods to run. It’s often the first thing you’ll install.
- 2. Redscript: Redscript is a scripting language framework that allows modders to create custom scripts for Cyberpunk 2077, enabling a vast array of gameplay changes and additions that wouldn’t be possible otherwise. Many complex mods depend on it.
- 3. ArchiveXL & TweakXL: These two frameworks work in tandem. ArchiveXL enables the game to load custom archives (packed game assets) from specific mod folders, allowing for new clothing, weapons, and other assets to be added. TweakXL expands the game’s tweak system, allowing modders to inject custom values and modify existing game parameters, opening up extensive customization possibilities.
- 4. REDmod: This is CD Projekt Red’s official modding tool, released to provide a more stable and integrated platform for mod creation and implementation. While not all mods use REDmod, an increasing number do, especially newer ones. It’s designed to streamline the modding process and reduce compatibility issues, signifying a step towards officially supported “Tech” customization. Mods that utilize REDmod typically install into a specific folder structure (
/redmod/DLC).
C. Streamlining Your Process: Mod Managers
While manual installation is possible, using a mod manager is highly recommended for efficiency and to minimize human error, aligning with “Productivity” principles.
- Vortex: Developed by Nexus Mods, Vortex is the most popular mod manager for Cyberpunk 2077. It simplifies the installation, updating, and uninstallation of mods by automating file placement, managing load orders, and detecting conflicts. Vortex significantly reduces the complexity of modding, especially when dealing with a large number of mods. Its conflict resolution system is a lifesaver for maintaining game stability.
- Manual Management: For those who prefer direct control or are only installing a handful of simple mods, manual installation involves dragging and dropping files into specific game directories. This method requires a strong understanding of Cyberpunk 2077’s folder structure and meticulous attention to detail to avoid issues. While more time-consuming and prone to errors, it offers complete oversight.
III. Step-by-Step Mod Installation Guide: Augmenting Your Night City
Now that you understand the “why” and “what” of modding, let’s delve into the “how.” This section provides a practical, step-by-step guide to installing mods, ensuring a smooth and secure process.
A. Prerequisites: Preparing Your Game for Mods
Before touching any mod files, ensure your game is ready:
- Fresh Installation (Recommended): If you’ve had issues with mods before or want a clean slate, consider uninstalling and reinstalling Cyberpunk 2077. This guarantees no lingering mod files are present.
- Update Your Game: Ensure your game is fully updated to the latest version. Mods are often version-specific, and outdated game files can cause crashes or prevent mods from working.
- Verify Game Files: Use your game launcher (Steam, GOG, Epic Games Store) to verify the integrity of your game files. This checks for corrupt or missing vanilla files and replaces them.
- Backup Your Saves: This is CRITICAL. Modding carries inherent risks. Before installing any mods, make a copy of your save game folder (
%USERPROFILE%Saved GamesCD Projekt RedCyberpunk 2077) and store it in a safe location. This prevents potential data loss. This practice is a cornerstone of digital “Productivity” and “Security.”
B. Installing Core Frameworks First

These are typically installed manually, even if you plan to use a mod manager for other mods, as they establish deep hooks into the game.
- Download from Nexus Mods: Navigate to each framework’s page (Cyber Engine Tweaks, Redscript, ArchiveXL, TweakXL, REDmod) on Nexus Mods and download the latest version. Always check the “Requirements” tab on a mod page to see which frameworks it needs.
- Extract Files: Most framework downloads are
.zipor.rararchives. Use a program like 7-Zip or WinRAR to extract their contents. - Follow Instructions Carefully: Each framework will have specific installation instructions, usually in a “README” file or on its Nexus Mods page. Generally, this involves copying the extracted files into your Cyberpunk 2077 installation directory (the folder containing
Cyberpunk2077.exe).- Cyber Engine Tweaks (CET): Typically goes into
Cyberpunk 2077/bin/x64. - Redscript: Often places files in
Cyberpunk 2077/r6/scripts. - ArchiveXL & TweakXL: Often place files in
Cyberpunk 2077/archive/pc/modandCyberpunk 2077/redmod/dlc. - REDmod: Its files usually go directly into your root game directory, setting up its own
redmodfolder.
- Cyber Engine Tweaks (CET): Typically goes into
- Launch the Game: After installing each framework (especially CET), launch the game once to ensure it initializes correctly. CET, for example, will usually prompt you to bind a hotkey for its overlay.
C. Integrating Your Chosen Mods
Once the foundations are laid, you can start adding actual content mods.
1. Using a Mod Manager (Recommended)
This is the most efficient and safest method for managing a large mod list. We’ll use Vortex as the example.
- Install Vortex: Download and install Vortex from Nexus Mods.
- Set Up Cyberpunk 2077: Launch Vortex, navigate to the “Games” tab, find Cyberpunk 2077, and click “Manage.” Vortex will usually auto-detect your game installation.
- Download Mods with “Mod Manager Download”: On Nexus Mods, when viewing a mod, look for the “Mod Manager Download” button on the “Files” tab. Clicking this will automatically download and add the mod to Vortex.
- Install and Enable: In Vortex, go to the “Mods” tab. Your downloaded mods will appear. Click “Install” for each one, then “Enable.”
- Resolve Conflicts (If Any): Vortex is excellent at detecting file conflicts between mods. If conflicts arise, Vortex will guide you through resolution, often recommending which mod’s files should “win” based on established rules or user preference. Understanding and resolving these is a key “Tech” skill in modding.
- Deploy Mods: After installing and enabling mods, click the “Deploy” button (or allow Vortex to auto-deploy). This copies the mod files into your game directory.
- Launch Game: Launch Cyberpunk 2077 through Vortex or your game launcher to test the mods.
2. Manual Installation Methods
For mods without Mod Manager support, or if you prefer manual control, you’ll need to place files directly.
- Download “Manual Download”: On Nexus Mods, select the “Manual Download” option for the mod.
- Extract and Identify: Extract the mod’s contents. Read the mod’s description and “README” file carefully to understand where its files need to go. Common locations include:
Cyberpunk 2077/archive/pc/mod(for.archivefiles – textures, models, sound, some gameplay tweaks)Cyberpunk 2077/bin/x64/plugins(for.dllfiles – script extenders, complex code injections)Cyberpunk 2077/r6/scripts(for.redsor.luascript files)Cyberpunk 2077/redmod/dlc(for mods packaged for REDmod that aren’t using the official REDmod installer)
- Copy Files: Copy the mod’s files into the specified directory within your Cyberpunk 2077 installation folder. If a target folder doesn’t exist (e.g.,
mod), you may need to create it. - Check for Overwrites: Be cautious if a mod asks to overwrite existing files. This is where conflicts can arise. Always back up the original files before overwriting.
3. Understanding REDmod Installations
Mods specifically built with REDmod will typically come with .archive and .json files within a unique folder named after the mod (e.g., my_cool_mod).
- Download and Extract: Download the REDmod-compatible mod and extract it.
- Place in
redmod/dlc: Copy the mod’s specific folder (e.g.,my_cool_mod) into yourCyberpunk 2077/redmod/dlcdirectory. - Enable in Launcher (Sometimes): Some REDmod mods may need to be explicitly enabled via the game’s launcher. Launch Cyberpunk 2077’s official launcher, navigate to the “Mods” tab, and ensure the mod is checked.
IV. Navigating Common Challenges and Best Practices
Modding, while rewarding, can present challenges. Understanding how to troubleshoot and maintain your setup is key to a stable and enjoyable modded experience, reflecting sound “Digital Security” and “Productivity” principles.
A. Troubleshooting Mod Conflicts and Crashes
Crashes, missing textures, or unexpected behavior are often signs of mod conflicts or incorrect installations.
- Read Mod Pages Thoroughly: Many mods list known conflicts or specific installation quirks. Read these before installing.
- Install One Mod at a Time: For manual installs, add mods one by one and test the game after each addition. This helps pinpoint the problematic mod.
- Check Load Order: If using a mod manager, ensure your load order is optimized. Some mods need to load before others. Vortex often handles this automatically.
- Remove Recent Additions: If your game crashes, remove the last few mods you installed. If the game stabilizes, you’ve found the culprit.
- Reinstall Frameworks: Sometimes, core frameworks can become corrupted. Reinstalling CET, Redscript, etc., can resolve issues.
- Verify Game Files (Again): After removing mods or if issues persist, verifying game files through your launcher can repair any vanilla files inadvertently damaged.
B. Keeping Your Mods and Game Updated
The world of Cyberpunk 2077 is dynamic, with official patches and new mod releases constantly emerging.
- Official Game Patches: Major game updates often break mods, especially script-based ones. It’s usually best to disable all mods before updating the game. Then, wait for mod authors to update their creations, especially core frameworks. This period of waiting is essential for stability.
- Updating Frameworks: Always keep your core modding frameworks (CET, Redscript, etc.) up to date. Newer mods will often require the latest versions of these.
- Updating Mods: Periodically check Nexus Mods for updates to your installed mods. Mod authors frequently release bug fixes, performance improvements, or new features. A mod manager like Vortex simplifies this process significantly by notifying you of updates.
C. Digital Security and Safe Modding Habits
Protecting your system and game saves is paramount in any “Tech” endeavor involving third-party software.
- Download from Reputable Sources: Stick exclusively to Nexus Mods or other widely recognized, secure modding sites. Avoid downloading mods from random forums or untrusted websites, as they may contain malware.
- Scan Downloaded Files: Run a virus scan on any downloaded mod archive before extracting or installing it. While Nexus Mods vets uploads, vigilance is always wise.
- Backup Your Saves (Routinely): Beyond the initial backup, consider regularly backing up your save files, especially before installing significant new mods or game updates.
- Understand Mod Permissions: Be cautious of mods that require excessive system permissions or ask you to disable essential security features.

D. Maximizing Your Modding Productivity
Effective mod management can save you countless hours and enhance your overall experience.
- Organize Your Mod Files: If manually installing, keep a well-organized folder structure for your downloaded mod archives, noting versions and authors.
- Document Your Mod List: Maintain a simple text file or spreadsheet listing your installed mods, their versions, and any specific notes (e.g., dependencies, special installation steps). This is invaluable for troubleshooting or when rebuilding your mod list.
- Utilize Community Resources: The Nexus Mods forums, Discord servers dedicated to Cyberpunk 2077 modding, and Reddit communities (
r/cyberpunkmods) are fantastic resources for advice, troubleshooting, and discovering new mods. Learning from the collective experience of the community is a highly productive approach.
Modding Cyberpunk 2077 opens up a universe of possibilities, allowing you to fine-tune your Night City experience to an extraordinary degree. By following this comprehensive guide, embracing the foundational tools, and adhering to best practices for installation and maintenance, you can confidently transform your game. Remember that modding is an iterative process, sometimes requiring patience and troubleshooting, but the reward of a perfectly tailored, enhanced adventure in the neon-soaked streets of Night City is truly worth the effort. Go forth, choom, and build your ultimate V!
aViewFromTheCave is a participant in the Amazon Services LLC Associates Program, an affiliate advertising program designed to provide a means for sites to earn advertising fees by advertising and linking to Amazon.com. Amazon, the Amazon logo, AmazonSupply, and the AmazonSupply logo are trademarks of Amazon.com, Inc. or its affiliates. As an Amazon Associate we earn affiliate commissions from qualifying purchases.