In an increasingly interconnected digital world, a reliable, fast, and secure web browser is an indispensable tool for everyone, from casual internet users to seasoned professionals. Google Chrome, with its robust feature set, extensive extension ecosystem, and seamless integration across Google services, has established itself as a dominant force in the browser market. While traditionally associated with Windows and macOS, Chrome offers a fully-fledged experience for Linux users, empowering them with a powerful gateway to the internet.
For those operating within the vibrant and flexible Linux ecosystem – a choice often made by developers, tech enthusiasts, and privacy-conscious individuals – integrating a feature-rich browser like Chrome can significantly enhance productivity, streamline workflows, and ensure compatibility with a vast array of web applications. This guide will walk you through the process of installing Google Chrome on various Linux distributions, ensuring you can leverage its capabilities for everything from managing personal finances and exploring online income opportunities to staying abreast of the latest tech trends and securing your digital footprint.

Why Google Chrome on Linux? Unlocking Potential in a Dynamic Ecosystem
Choosing Google Chrome on a Linux machine isn’t just about picking a browser; it’s about opting for a specific set of advantages that align well with the demands of modern computing and professional work. Linux users often value control, customization, and performance, and Chrome, while proprietary, delivers on several fronts.
Firstly, Performance and Speed are critical. Chrome is engineered for speed, offering quick page loads and efficient handling of complex web applications. This is vital for tasks ranging from intensive web development to managing multiple tabs for research, online trading platforms, or graphic design tools accessible via the web. In the context of a highly optimized Linux system, Chrome can truly shine, providing a fluid browsing experience that complements the OS’s inherent efficiency.
Secondly, the Vast Extension Ecosystem is a significant draw. Chrome’s Web Store offers thousands of extensions that can transform the browser into a powerhouse for productivity, digital security, and niche tasks. Whether you need password managers, ad blockers, SEO tools, grammar checkers, or specialized extensions for online income generation or financial tracking, Chrome likely has a solution. This extensibility makes Chrome a versatile tool that can be tailored to individual needs, directly contributing to personal branding and efficient work habits.
Thirdly, Seamless Google Integration is a major benefit for users deeply embedded in the Google ecosystem. Syncing bookmarks, history, passwords, and extensions across devices (including Android phones and Chromebooks) simplifies the digital experience. This integration extends to services like Gmail, Google Drive, Google Calendar, and Google Meet, making it an excellent choice for collaboration and communication – essential for both personal and corporate identity management in today’s remote-work environment.
Finally, Digital Security and Updates are paramount. Google regularly updates Chrome, patching vulnerabilities and introducing new security features. While the browser’s privacy practices are a frequent topic of debate, its continuous security updates and sandboxing technology provide a robust defense against many online threats. On Linux, integrating Chrome ensures you receive these critical updates, helping to safeguard your data and maintain a secure online presence, which is a cornerstone of responsible digital security.
Preparing Your Linux System for Installation: The Foundation for Success
Before diving into the installation process, it’s crucial to prepare your Linux system. This ensures a smooth installation, resolves potential dependency issues beforehand, and guarantees that your system is up-to-date with the latest security patches and software versions. This foundational step is akin to laying the groundwork for any significant software deployment and is a best practice for maintaining a healthy and secure operating system.
The primary preparation involves two key actions: updating your system’s package list and upgrading all installed packages. This helps prevent conflicts with new software, particularly when installing a major application like Google Chrome that might rely on specific versions of system libraries.
1. Updating Your Package List and Upgrading Installed Software:
This step refreshes your system’s knowledge of available packages and installs any pending updates for your currently installed software. The commands vary slightly depending on your Linux distribution:
-
For Debian-based systems (Ubuntu, Linux Mint, Debian, Pop!_OS):
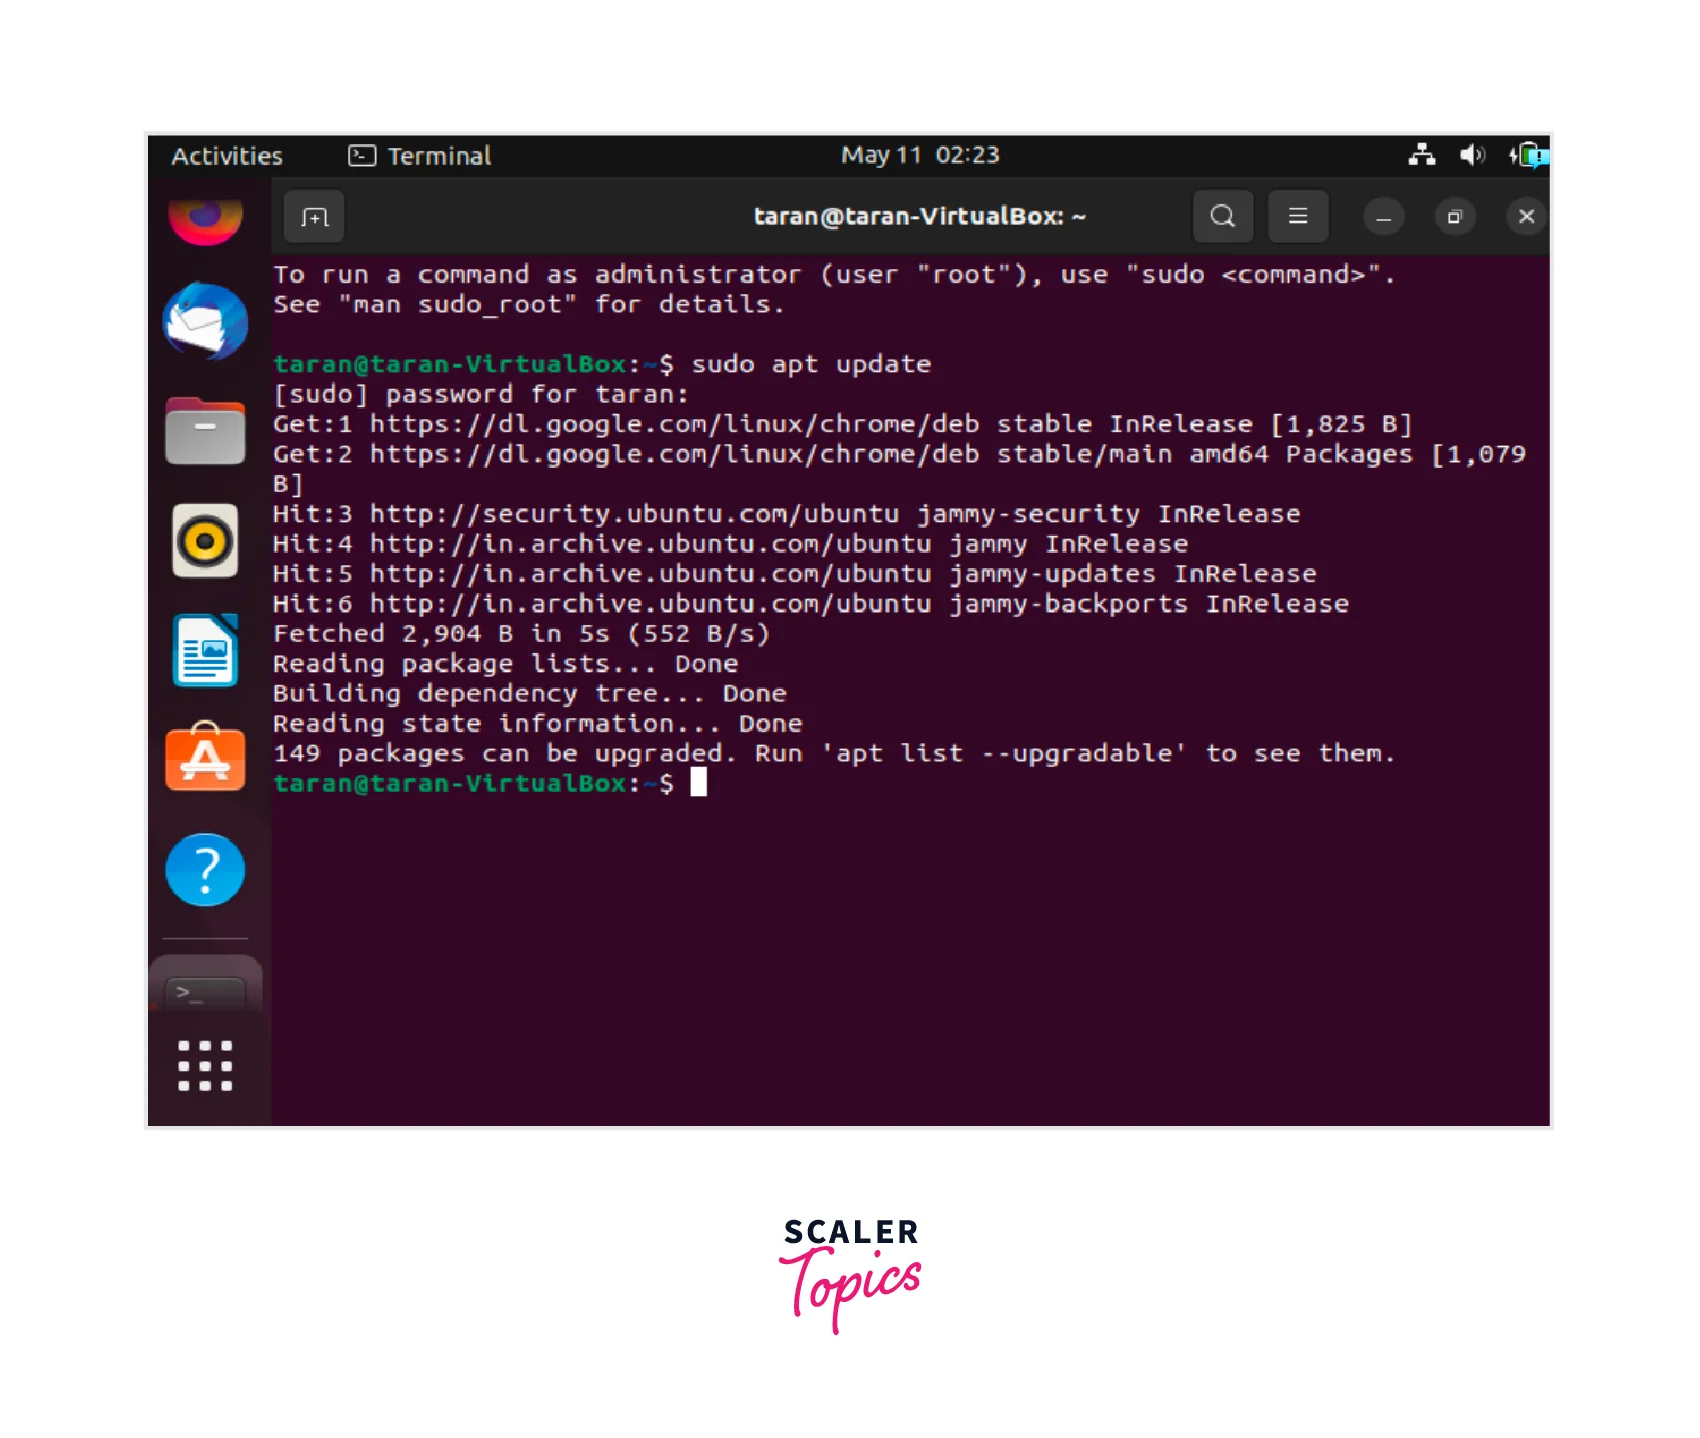
Open your terminal (usually by pressingCtrl + Alt + T) and enter the following commands:sudo apt update sudo apt upgradesudo(SuperUser Do) grants administrative privileges,apt updatefetches the latest package information from your configured repositories, andapt upgradeinstalls the newest versions of all packages currently installed on your system. You might be prompted to enter your password and confirm the upgrade (pressYand Enter). -
For Red Hat-based systems (Fedora, CentOS, RHEL, AlmaLinux, Rocky Linux):
Open your terminal and use thednforyumpackage manager:
bash

sudo dnf update # For Fedora, RHEL 8+, CentOS Stream 8+

# OR

sudo yum update # For older CentOS/RHEL versions
Similar toapt,dnf update(oryum update) will update your system’s package index and upgrade all installed packages to their latest versions.
Performing these updates ensures that your system has all necessary dependencies in place and is running the most stable software environment, which is particularly important for a browser that interacts heavily with web technologies and security protocols.
2. Checking Your System Architecture (Optional but Recommended):
While Google Chrome generally provides 64-bit packages, it’s good practice to know your system’s architecture. Most modern Linux installations are 64-bit (x86_64 or amd64). You can check this with the command:
uname -m
This command will output x86_64 for a 64-bit system, which is what Chrome supports. If you were running an older 32-bit system (i686), you would not be able to install the latest Chrome versions, but 32-bit Linux is increasingly rare.
With your system prepared, you are now ready to proceed with the installation of Google Chrome using one of the following methods, tailored to your specific Linux distribution.
Step-by-Step Installation Methods for Google Chrome
Installing Google Chrome on Linux can be accomplished through several methods, each suitable for different distributions and user preferences. We will cover the most common and recommended approaches: using the official .deb package for Debian-based systems, the official .rpm package for Red Hat-based systems, and the method of adding Google’s official repository, which is generally the most robust for long-term maintenance.
Method 1: Installing via .deb Package (Debian/Ubuntu/Mint)
This method involves downloading the official Chrome .deb package and installing it using your system’s package manager. This is a straightforward approach, ideal for a one-time installation.
1. Download the Google Chrome .deb Package:
Open your web browser (e.g., Firefox, which is usually pre-installed on Ubuntu/Debian) and navigate to the official Google Chrome download page: https://www.google.com/chrome/.
Click on the “Download Chrome” button. On the download page, you will typically be prompted to “Choose your package.” Select “64 bit .deb (For Debian/Ubuntu/Mint)” and click “Accept and Install.” Save the .deb file to your “Downloads” directory or another easily accessible location.
Alternatively, you can download the package directly from the terminal using wget:
wget https://dl.google.com/linux/direct/google-chrome-stable_current_amd64.deb
This command uses wget to retrieve the latest stable 64-bit Chrome .deb package and saves it in your current directory.
2. Install the .deb Package:
Once the download is complete, navigate to the directory where you saved the .deb file using the terminal (e.g., cd ~/Downloads). Then, install it using the dpkg command:
sudo dpkg -i google-chrome-stable_current_amd64.deb
dpkg is the package manager for Debian-based systems. The -i flag stands for “install.”
3. Resolve Dependencies (If Necessary):
It’s common for dpkg to report dependency errors after the initial installation attempt, as it only handles the package file itself, not its external dependencies. To resolve these, use apt --fix-broken install:
sudo apt --fix-broken install
This command instructs apt to find and install any missing dependencies that dpkg couldn’t handle, effectively completing the Google Chrome installation. After this, Google Chrome should be successfully installed on your system.
Method 2: Installing via .rpm Package (Fedora/CentOS/RHEL)
For Red Hat-based distributions, the process is similar but uses .rpm packages and dnf (or yum) for installation.
1. Download the Google Chrome .rpm Package:
Go to the official Google Chrome download page: https://www.google.com/chrome/.
Choose “64 bit .rpm (For Fedora/openSUSE)” and click “Accept and Install.” Save the .rpm file to your “Downloads” directory.
Or, use wget in the terminal:
wget https://dl.google.com/linux/direct/google-chrome-stable_current_x86_64.rpm
This downloads the latest stable 64-bit Chrome .rpm package.
2. Install the .rpm Package:
Navigate to the download directory in your terminal and install the package using dnf (recommended for Fedora/RHEL 8+):
sudo dnf install google-chrome-stable_current_x86_64.rpm
# OR for older CentOS/RHEL with yum:
# sudo yum localinstall google-chrome-stable_current_x86_64.rpm
dnf install (or yum localinstall) will install the .rpm package and automatically handle any required dependencies. You’ll be prompted to confirm the installation (type Y and Enter).
Once the process completes, Google Chrome will be installed and ready to use on your Fedora, CentOS, or RHEL system.
Method 3: Adding Google’s Official Repository (Recommended for Updates)
This method is generally the most recommended approach because it not only installs Google Chrome but also adds Google’s official repository to your system’s package sources. This means that Google Chrome will automatically receive updates alongside your other system software, ensuring you always have the latest features, performance enhancements, and crucial security patches – vital for digital security and a smooth user experience.
1. Download and Import the Google Signing Key:
Google signs its packages to verify their authenticity. You need to import this GPG key to allow your system to trust packages from Google’s repository.
-
For Debian-based systems (Ubuntu, Mint):
wget -q -O - https://dl.google.com/linux/linux_signing_key.pub | sudo gpg --dearmor -o /etc/apt/keyrings/google-chrome.gpgThis command downloads the public signing key, “dearmors” it (converts it to a binary format), and saves it to the
/etc/apt/keyrings/directory, which is the modern and secure location for GPG keys onaptsystems. -
For Red Hat-based systems (Fedora, CentOS, RHEL):
bash

sudo rpm --import https://dl.google.com/linux/linux_signing_key.pub
This command directly imports the GPG key into RPM’s keyring, allowing your system to verify Google’s packages.
2. Add the Google Chrome Repository:
Now, you need to tell your package manager where to find Google Chrome packages.
-
For Debian-based systems (Ubuntu, Mint):
echo "deb [arch=amd64 signed-by=/etc/apt/keyrings/google-chrome.gpg] https://dl.google.com/linux/chrome/deb/ stable main" | sudo tee /etc/apt/sources.list.d/google-chrome.listThis command adds a new line to
sources.list.d, creating a file namedgoogle-chrome.list. This line specifies the Google Chrome repository for stable, 64-bit packages, linking it to the GPG key you just imported. -
For Red Hat-based systems (Fedora, CentOS, RHEL):
bash

sudo tee /etc/yum.repos.d/google-chrome.repo <<EOF

[google-chrome]

name=google-chrome

baseurl=https://dl.google.com/linux/chrome/rpm/stable/x86_64

enabled=1

gpgcheck=1

gpgkey=https://dl.google.com/linux/linux_signing_key.pub

EOF
This creates a repository file/etc/yum.repos.d/google-chrome.repothat points yourdnforyumpackage manager to Google’s RPM repository, specifying the base URL, enabling it, and referencing the GPG key for verification.
3. Update Your Package List and Install Google Chrome:
After adding the repository, you need to refresh your system’s package list so it recognizes the new source, and then you can install Chrome.
-
For Debian-based systems (Ubuntu, Mint):
sudo apt update
sudo apt install google-chrome-stable
The
apt updatecommand will now discover the Google Chrome packages, andapt install google-chrome-stablewill install the latest stable version of Chrome. -
For Red Hat-based systems (Fedora, CentOS, RHEL):
bash

sudo dnf install google-chrome-stable # For Fedora, RHEL 8+, CentOS Stream 8+

# OR

sudo yum install google-chrome-stable # For older CentOS/RHEL versions
These commands will fetch and install Google Chrome, along with any necessary dependencies, directly from Google’s repository.
This repository method ensures that your Chrome installation remains current and secure with minimal manual intervention, aligning perfectly with digital security best practices.
Post-Installation: Launching, Updating, and Uninstalling Chrome
Once Google Chrome is successfully installed, you’ll want to know how to launch it, keep it updated, and, if ever necessary, how to remove it from your system. These are crucial steps for managing any software on Linux, ensuring a productive and secure computing environment.
Launching Google Chrome
After installation, you can launch Google Chrome in a couple of ways:
- From the Application Menu/Dash: Most Linux desktop environments (GNOME, KDE Plasma, XFCE, Cinnamon, MATE, etc.) will add an entry for Google Chrome to your application menu or dash. Search for “Chrome” or “Google Chrome” and click on its icon to start the browser.
- From the Terminal: You can also launch Chrome directly from the terminal by typing:
bash

google-chrome-stable
This is particularly useful for scripting or for users who prefer command-line interfaces. The first time you launch Chrome, it will ask if you want to make it your default browser and if you’d like to send usage statistics to Google. Configure these preferences as you see fit.
Keeping Chrome Up-to-Date
One of the significant advantages of installing Chrome via Google’s official repository (Method 3) is that updates are handled automatically by your system’s package manager. When you run your regular system update commands, Chrome will be updated alongside other installed software.
- For Debian-based systems:
bash

sudo apt update && sudo apt upgrade
- For Red Hat-based systems:
bash

sudo dnf update # Or sudo yum update
Regularly running these commands is a cornerstone of maintaining digital security and performance. It ensures you have the latest features, bug fixes, and critical security patches, protecting you from emerging web threats and keeping your online income activities secure.
If you installed Chrome using the .deb or .rpm package directly (Method 1 or 2) without adding the repository, you would need to manually download and install a new package each time an update is released. This is cumbersome and less secure, highlighting why Method 3 is highly recommended.
Uninstalling Google Chrome
Should you ever decide to remove Google Chrome from your Linux system, the process is straightforward using your distribution’s package manager.
-
For Debian-based systems (Ubuntu, Mint):
To remove thegoogle-chrome-stablepackage and its configuration files:sudo apt remove google-chrome-stable sudo apt autoremove # Removes any automatically installed dependency packages no longer neededIf you also want to remove Google’s repository entry and GPG key:
sudo rm /etc/apt/sources.list.d/google-chrome.list sudo rm /etc/apt/keyrings/google-chrome.gpg sudo apt update # Refresh your package list -
For Red Hat-based systems (Fedora, CentOS, RHEL):
To remove thegoogle-chrome-stablepackage:
bash

sudo dnf remove google-chrome-stable # Or sudo yum remove google-chrome-stable
To remove Google’s repository entry:
bash

sudo rm /etc/yum.repos.d/google-chrome.repo
Uninstalling removes the browser executable and its libraries. Your user data (bookmarks, history, cache, etc.) is typically stored in your home directory (e.g., ~/.config/google-chrome/) and is not removed by these commands. If you wish to remove that as well, you would manually delete that directory.
Troubleshooting Common Issues & Exploring Alternatives
Even with detailed instructions, users might encounter minor hitches during software installation. It’s also valuable to be aware of alternative browsers, as personal preferences and specific needs for digital security, privacy, or performance can vary.
Common Installation Challenges and Solutions
-
“Permission Denied” Errors:
- Issue: You might see errors indicating you don’t have permission to perform an action.
- Solution: Ensure you are using
sudobefore commands that require administrative privileges (e.g.,sudo apt install,sudo dnf update). Always provide your password when prompted.
-
Dependency Errors (especially with
dpkg):- Issue: After running
sudo dpkg -i, you get messages about missing dependencies. - Solution: As mentioned in Method 1, run
sudo apt --fix-broken installimmediately after. This command is designed to resolve such issues on Debian-based systems. For RPM-based systems,dnf install(oryum localinstall) typically handles dependencies automatically.
- Issue: After running
-
GPG Key Errors / Untrusted Repository:
- Issue: Your package manager warns about untrusted packages or repositories when using Method 3.
- Solution: Double-check that you correctly imported the Google signing key as described in Method 3, step 1. Ensure the
gpgkeyorsigned-bypath in your repository configuration (.listor.repofile) is correct and points to the imported key.
-
“File Not Found” for .deb/.rpm:
- Issue: When using
dpkg -iordnf installwith a downloaded file, the terminal says the file doesn’t exist. - Solution: Verify that you are in the correct directory where you downloaded the file (e.g.,
cd ~/Downloads) and that the filename matches exactly. Uselsto list files in the current directory to confirm.
- Issue: When using
-
Slow Download Speeds:
- Issue: Downloading the
.debor.rpmpackage takes a long time. - Solution: This is often due to network issues. Try again later, or ensure your internet connection is stable. In most cases, the download should be quick given the file size.
- Issue: Downloading the
Exploring Browser Alternatives for Linux Users
While Google Chrome is a popular choice for its features and Google ecosystem integration, the Linux landscape offers several excellent browser alternatives, each with its own philosophy regarding privacy, open-source principles, and specific functionalities. Exploring these can be beneficial for specific brand strategies or personal preferences in digital security.
-
Mozilla Firefox:
- Overview: Often the default browser on many Linux distributions, Firefox is a strong contender for its balance of features, performance, and commitment to user privacy. It’s fully open-source and developed by a non-profit organization.
- Why choose it: Excellent privacy controls, a robust extension ecosystem, and strong support for web standards. It’s a prime example of open-source software that directly competes with proprietary solutions.
-
Brave Browser:
- Overview: Built on the Chromium engine (the open-source project behind Chrome), Brave focuses heavily on privacy by blocking ads and trackers by default. It also features a unique Basic Attention Token (BAT) reward system for users who opt to view privacy-respecting ads.
- Why choose it: Superior privacy out-of-the-box, faster loading times due to ad blocking, and an innovative approach to online content monetization. Ideal for users highly concerned with digital security and minimizing their data footprint.
-
Opera:
- Overview: Another Chromium-based browser known for its unique features like a built-in VPN, ad blocker, and various productivity tools (e.g., workspaces, messengers integrated into the sidebar).
- Why choose it: Excellent for productivity enhancements, built-in VPN for enhanced privacy (though the company behind it is owned by a Chinese consortium, raising some privacy questions for certain users), and efficient resource usage.
-
Vivaldi:
- Overview: Also built on Chromium, Vivaldi is designed for power users who crave extreme customization. It offers an incredible array of settings, tab management features, built-in mail client, calendar, and RSS reader.
- Why choose it: Unparalleled customization options, ideal for those who want their browser to be an extension of their workflow. Great for managing complex research tasks or multiple online income streams.
Each of these alternatives offers a compelling web browsing experience on Linux. Your choice will ultimately depend on your priorities: whether it’s deep integration with Google services, stringent privacy controls, open-source ideals, or extensive customization capabilities.

Conclusion: Embracing a Seamless Browsing Experience
Installing Google Chrome on your Linux system opens up a world of possibilities, bringing a highly performant, feature-rich, and widely compatible browser to your fingertips. Whether you’re a developer coding the next big AI tool, a digital marketer refining a brand strategy, or an entrepreneur managing online income streams, Chrome’s robust capabilities and vast extension library can significantly enhance your productivity and streamline your digital workflow.
By following the detailed steps outlined in this guide – from preparing your system to choosing the most suitable installation method (with the repository method being highly recommended for ongoing security and updates) – you can seamlessly integrate Chrome into your Linux environment. Remember that digital security is an ongoing process, and keeping your browser and operating system updated is a fundamental step in protecting your data and maintaining a secure online presence.
While Google Chrome stands out for its extensive features and ecosystem integration, the vibrant Linux community also offers a diverse array of browser alternatives, each with unique strengths in areas like privacy, open-source commitment, or customization. The flexibility of Linux empowers you to choose the tools that best align with your personal and professional needs. Ultimately, by successfully installing and leveraging Google Chrome (or an alternative browser), you are not just setting up software; you are investing in a more efficient, secure, and productive gateway to the ever-evolving digital landscape, empowering you to thrive in the world of technology, branding, and finance.
aViewFromTheCave is a participant in the Amazon Services LLC Associates Program, an affiliate advertising program designed to provide a means for sites to earn advertising fees by advertising and linking to Amazon.com. Amazon, the Amazon logo, AmazonSupply, and the AmazonSupply logo are trademarks of Amazon.com, Inc. or its affiliates. As an Amazon Associate we earn affiliate commissions from qualifying purchases.