In an increasingly remote and distributed work landscape, efficient project management and seamless team collaboration are no longer luxuries but absolute necessities. For professionals relying on the robust performance and intuitive interface of their new MacBooks, integrating powerful productivity tools is key to staying ahead. Among the myriad of options available, Basecamp has consistently stood out as a favored choice for teams seeking a straightforward yet comprehensive platform to manage projects, communicate effectively, and keep everyone on the same page.
Basecamp’s philosophy revolves around simplicity, clarity, and focused work. It’s designed to cut through the noise of endless emails and scattered documents, consolidating all project-related information—from to-dos and schedules to files and discussions—into one central hub. For a new MacBook user, getting Basecamp up and running means unlocking a powerful organizational ally that can transform the way you tackle projects, whether you’re a solo freelancer, a startup founder, or part of a larger enterprise. This guide will walk you through the entire process of installing Basecamp on your new MacBook, ensuring a smooth setup so you can dive into productive work without delay. We’ll also explore why Basecamp is a prime fit for the macOS ecosystem and how it can contribute to both your technical productivity and your overall brand and financial objectives.
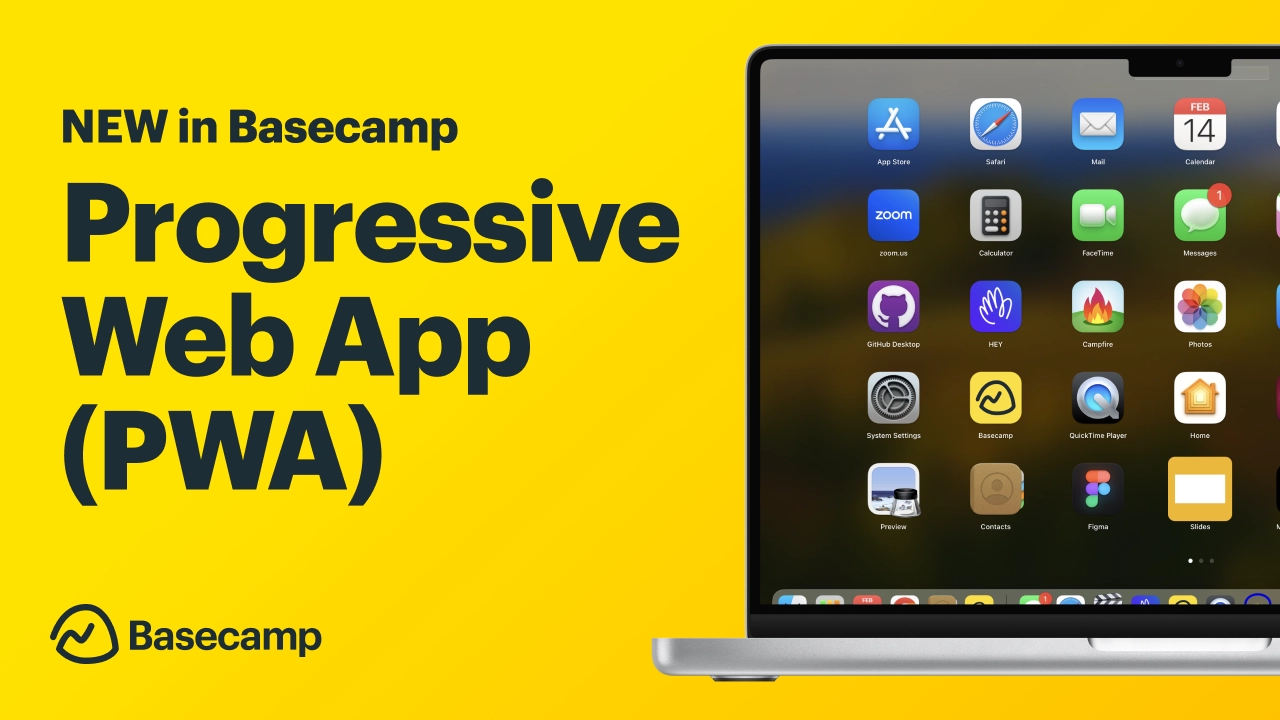
Why Basecamp Stands Out for MacBook Users
The choice of project management software can significantly impact a team’s efficiency and overall output. For those operating within the Apple ecosystem, especially with the latest generation of MacBooks, Basecamp offers a compelling proposition, blending powerful features with a user-friendly design that complements macOS perfectly.
Streamlined Project Management and Collaboration
Basecamp excels at simplifying complex project workflows. Instead of juggling multiple applications for different tasks—email for communication, spreadsheets for tracking, cloud storage for files—Basecamp centralizes everything. Each project gets its own dedicated space, complete with message boards, to-do lists, schedules, document storage, and real-time chat. This integrated approach dramatically reduces context-switching, a notorious productivity killer, allowing team members to focus on their work rather than searching for information. For new MacBook users, accustomed to a smooth and integrated experience, Basecamp’s consolidated design immediately feels intuitive. It fosters transparent communication, ensuring that every team member, regardless of their location, has access to the most up-to-date project information, fostering a culture of clarity and accountability that is crucial for both tech and brand-focused initiatives.
Native macOS Experience and Integration
While Basecamp is primarily a web-based application, its dedicated desktop app for macOS provides an enhanced experience that feels native to the platform. This isn’t just a wrapper around a web page; the Basecamp desktop application is optimized for macOS, leveraging system-level features to provide a more responsive and integrated user experience. This means better notification handling, seamless integration with system-wide services, and often, improved performance compared to running it solely in a web browser. For new MacBooks, especially those powered by Apple Silicon, the desktop app is designed to take full advantage of the hardware’s capabilities, offering snappier performance and better resource management. This commitment to a native experience is a significant draw for tech-savvy users who appreciate applications that feel tailor-made for their device, enhancing overall productivity and user satisfaction.
Boosting Productivity for Teams and Individuals
At its core, Basecamp is a productivity powerhouse. By eliminating the typical project management friction points—misplaced files, missed deadlines, unclear responsibilities—it empowers teams to accomplish more with less effort. Features like automatic check-ins ensure that everyone provides updates without the need for constant meetings, freeing up valuable time. The “Hill Charts” provide a visual representation of progress, making it easy to see what’s on track and what needs attention. For individuals, the “My Stuff” section consolidates all assigned tasks and upcoming events, providing a personalized dashboard to manage their workload effectively. This focus on practical productivity tools directly translates into financial benefits, as reduced overheads, faster project completion, and fewer errors contribute to increased profitability and better resource allocation. Ultimately, Basecamp helps teams achieve their goals more efficiently, allowing them to focus on innovation and delivering high-quality results that strengthen their brand and bottom line.
Preparing Your MacBook for Basecamp Installation
Before you dive into the installation process, a few preparatory steps can ensure a smooth and hassle-free experience on your new MacBook. While Basecamp is designed to be lightweight and compatible with a wide range of macOS versions, a quick check can prevent potential issues down the line.
Checking System Requirements
Basecamp’s desktop application is generally well-optimized and doesn’t demand excessive system resources. However, it’s always good practice to confirm your MacBook meets the basic requirements for optimal performance. Typically, Basecamp supports recent versions of macOS. For example, if you’re on a brand new MacBook, you’re likely running macOS Sonoma, Ventura, or Monterey, all of which are fully compatible.
To check your macOS version:
- Click the Apple menu () in the top-left corner of your screen.
- Select “About This Mac.”
- The window that appears will display your macOS version, processor type (e.g., Apple M1, M2, M3, or Intel), and memory.
Ensure you have sufficient free disk space. While the Basecamp app itself is small, it will store some data and cache files over time. A few gigabytes of free space are usually more than enough. If your storage is critically low, consider clearing out old files or applications you no longer use. This simple tech check ensures that your system is ready to handle Basecamp without any performance hiccups, contributing to a fluid workflow.
Essential Pre-Installation Checks
Beyond system requirements, a couple of quick checks can streamline the installation process:
- Internet Connection: A stable internet connection is crucial for downloading the Basecamp desktop application and for its ongoing operation, as it syncs all project data to the cloud. Ensure your MacBook is connected to a reliable Wi-Fi network or via an Ethernet cable.
- Security Settings: macOS has robust security features, particularly Gatekeeper, which protects your system from potentially malicious software. When you download an application from the internet that isn’t from the App Store, you might encounter a security prompt during installation.
- To prepare, go to System Settings (or System Preferences on older macOS versions) > Privacy & Security.
- Under the “Security” section, make sure “Allow applications downloaded from:” is set to “App Store and identified developers.” Basecamp is from an identified developer (37signals), so this setting will allow its installation. If it were from an “unidentified developer,” you might need to temporarily allow it via a prompt, but this is unlikely with Basecamp.
- Administrator Privileges: You’ll need administrator privileges on your MacBook to install new applications. If you’re the primary user of your new MacBook, you almost certainly have these. If not, you may need to consult with your IT department or the user who set up the computer.
By taking these small but important steps, you set the stage for a smooth and efficient Basecamp installation, minimizing potential roadblocks and getting you to the productivity phase faster.
Step-by-Step Guide to Installing Basecamp on macOS
Installing Basecamp on your new MacBook is a straightforward process, designed to be as user-friendly as the application itself. Follow these steps to get Basecamp up and running.
Downloading the Official Basecamp Desktop App
The first and most crucial step is to obtain the official Basecamp desktop application for macOS. Always download software from the developer’s official website to ensure you receive the legitimate, most up-to-date, and secure version.
- Open your web browser: Launch Safari, Chrome, Firefox, or your preferred browser on your MacBook.
- Navigate to the Basecamp website: Go to
basecamp.com. - Locate the download link: Look for a “Download,” “Apps,” or “Desktop Apps” link, usually found in the footer of the homepage or within a “Products” or “Resources” section. Basecamp prominently features links to its desktop apps.
- Select the macOS version: On the downloads page, you’ll typically find options for various operating systems. Click on the link specifically for “macOS” or “Mac.” This will initiate the download of a
.dmg(Disk Image) file, which is the standard format for macOS application installers. - Save the file: Your browser will likely ask where you want to save the
.dmgfile. The “Downloads” folder is the default and most convenient location. Once the download is complete, you’ll see the Basecamp.dmgfile in your Downloads folder or your browser’s download list.

The Installation Process
With the .dmg file downloaded, you can now proceed with the installation:
- Open the
.dmgfile: Navigate to your Downloads folder and double-click theBasecamp.dmgfile. This action will mount the disk image, opening a new Finder window that typically displays the Basecamp application icon and an “Applications” folder alias. - Drag and Drop: The most common and easiest way to install applications on macOS is by dragging the application icon into the Applications folder.
- Click and drag the “Basecamp” application icon from the
.dmgwindow to the “Applications” folder shortcut (or directly to your/Applicationsfolder in the Finder sidebar). - This action copies the application to your MacBook’s Applications folder, making it available for all users on your system.
- Click and drag the “Basecamp” application icon from the
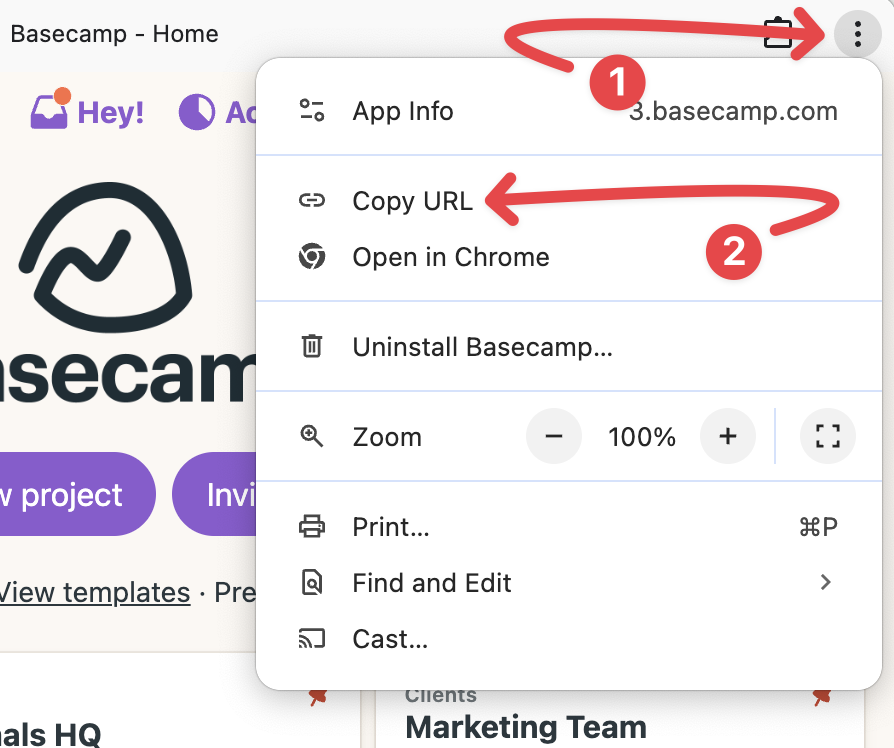
- Eject the Disk Image: After the copy process is complete, it’s good practice to eject the disk image. You can do this by:
- Dragging the “Basecamp” disk image icon from your Desktop to the Trash (the Trash icon will change to an eject symbol).
- Right-clicking (or Control-clicking) the “Basecamp” disk image icon on your Desktop or in the Finder sidebar and selecting “Eject ‘Basecamp’.”
Basecamp is now installed on your MacBook! You can find it in your Applications folder, in Launchpad, or by using Spotlight Search (Command + Spacebar and type “Basecamp”).
Initial Setup and Logging In
The final step is to launch Basecamp and log in to your account.
- Launch Basecamp:
- Go to your Applications folder and double-click the “Basecamp” icon.
- Alternatively, open Launchpad and click the “Basecamp” icon.
- The very first time you launch an app downloaded from the internet, macOS Gatekeeper might ask you to confirm that you want to open it, as it’s an application downloaded from an “identified developer.” Click “Open” to proceed.
- Log In to Your Basecamp Account:
- The Basecamp application will now open and present you with a login screen.
- Enter your email address and password associated with your Basecamp account. If your organization uses Single Sign-On (SSO) or Google Sign-In, there will usually be an option to use those credentials.
- If you’re new to Basecamp and don’t have an account, you’ll be prompted to sign up for a new account or join an existing company’s account.
- Access Your Projects: Once successfully logged in, Basecamp will load your dashboard, displaying all the projects you are currently involved in. You are now ready to start collaborating, managing tasks, and leveraging the full power of Basecamp on your new MacBook. This seamless integration from installation to daily use underscores Basecamp’s commitment to user-centric tech design.
Optimizing Your Basecamp Experience on macOS
Installing Basecamp is just the beginning. To truly harness its power and maximize your productivity, it’s beneficial to optimize its usage within the macOS environment. This involves leveraging native macOS features and understanding how to troubleshoot common minor issues.
Leveraging Notifications and Shortcuts
macOS provides excellent control over application notifications, which is crucial for a communication-heavy tool like Basecamp.
- Customizing Notifications: Go to System Settings > Notifications on your MacBook. Find “Basecamp” in the list. Here, you can customize how alerts appear (banners, alerts), whether they play sounds, show badges, and if they appear on your Lock Screen or in Notification Center. For project managers, it might be essential to see all notifications immediately, while for team members, a summary might suffice, reducing digital clutter. Fine-tuning these settings ensures you stay informed without being overwhelmed, striking a balance between constant updates and focused work.
- Keyboard Shortcuts: While Basecamp offers its own in-app shortcuts, mastering a few macOS-level shortcuts can further streamline your workflow. For instance, using
Command + Tabto quickly switch between Basecamp and other applications, orCommand + Spacebarfor Spotlight to launch Basecamp rapidly. Additionally, if you have a MacBook with a Touch Bar, Basecamp (or macOS generally) might offer contextual shortcuts, speeding up common actions. Explore Basecamp’s internal help sections for a list of its specific keyboard shortcuts to navigate projects, create to-dos, or reply to messages with greater speed.
Integrating with Other Productivity Tools
While Basecamp aims to be an all-in-one solution, it often works synergistically with other specialized tools in your productivity stack.
- Calendar Integration: Basecamp’s schedule feature can often be synced with your macOS Calendar app or other external calendars (like Google Calendar, Outlook Calendar). This allows you to see project milestones and deadlines alongside your personal appointments, providing a holistic view of your commitments. Look for integration options within Basecamp’s project settings or account preferences.
- File Storage: While Basecamp includes file storage, many teams rely on dedicated cloud storage solutions like Dropbox, Google Drive, or iCloud Drive. Basecamp allows you to link directly to files stored on these platforms, ensuring that even large files or those needing specific version control remain accessible within the context of your projects, without duplicating efforts or consuming excessive Basecamp storage space.
- System Services: Leverage macOS’s built-in sharing options. For example, if you need to quickly share a screenshot related to a Basecamp discussion, you can use macOS’s screenshot tool (
Shift + Command + 3orShift + Command + 4), and then easily drag and drop the image directly into a Basecamp message or comment, enhancing visual communication and feedback loops.
Common Troubleshooting Tips
Even with a smooth installation, minor issues can sometimes arise. Here are quick fixes for common Basecamp for macOS problems:
- App Not Responding: If Basecamp becomes unresponsive, try forcing it to quit: Press
Command + Option + Esc, select “Basecamp” from the list, and click “Force Quit.” Then, relaunch the app. - Syncing Issues: If data isn’t updating, ensure your MacBook has a stable internet connection. If the connection is fine, try quitting Basecamp and relaunching it. Sometimes, clearing the app’s cache (usually found in
~/Library/Caches/com.37signals.Basecamp/) can resolve persistent syncing problems, though this is less common for typical users. - Notifications Not Appearing: Double-check your Basecamp notification settings within macOS System Settings, as described above. Also, ensure you haven’t enabled “Do Not Disturb” or Focus modes, which can temporarily silence notifications.
- Outdated Version: Ensure you’re running the latest version of the Basecamp desktop app. Basecamp usually prompts you for updates, but you can manually check for updates within the app’s preferences or by reinstalling the latest version from their website. Keeping your software updated is a fundamental tech practice for security and performance.
The Broader Impact: Basecamp on Your Brand and Bottom Line
Beyond mere installation and technical functionality, integrating Basecamp into your workflow on a new MacBook carries significant implications for your professional brand and, ultimately, your financial success. Efficient project management isn’t just about getting tasks done; it’s about doing them smartly, collaboratively, and profitably.
Enhancing Team Cohesion and Brand Reputation
A well-managed project is a hallmark of a professional and reliable organization. Basecamp facilitates transparent communication and clear accountability, which are critical for building strong, cohesive teams. When every team member understands their roles, has easy access to all project resources, and can communicate effectively, it reduces friction, stress, and misunderstandings. This internal efficiency translates directly into a stronger external brand image.
- Improved Client Relationships: Clients appreciate punctuality, clear communication, and consistent updates. By using Basecamp to manage client projects, you can share progress, gather feedback, and address concerns in a structured manner, projecting an image of professionalism and reliability. This reinforces trust, encourages repeat business, and strengthens your brand’s reputation for dependability and excellence. Case studies often show that companies with streamlined internal operations deliver better client outcomes, indirectly boosting their brand equity.
- Attracting and Retaining Talent: A smooth, organized work environment is a significant factor in employee satisfaction and retention. Tech professionals, especially, are drawn to companies that embrace modern, efficient tools. By providing a platform like Basecamp, you demonstrate a commitment to supporting your team with the best resources, fostering a positive work culture that helps attract and retain top talent, which is invaluable for any brand.
Driving Efficiency and Financial Savings
Time is money, and inefficiencies are costly. Basecamp’s core strength lies in its ability to dramatically improve project efficiency, leading to tangible financial benefits.
- Reduced Overheads and Time Waste: Think of the hours saved from fewer unnecessary meetings, reduced email clutter, and eliminating the search for scattered documents. Basecamp centralizes all these, freeing up valuable time for productive work. For freelancers, this means more billable hours; for businesses, it translates to lower operational costs and better resource utilization. The streamlined workflows directly reduce the “hidden costs” of poor communication and disorganization.
- Faster Project Completion and Higher Profit Margins: By keeping projects on track, ensuring clear deadlines, and facilitating quick decision-making, Basecamp helps accelerate project completion. Finishing projects on time (or even ahead of schedule) can lead to early client payments, quicker revenue recognition, and the capacity to take on more projects. This direct impact on project velocity and success directly boosts profit margins, making Basecamp a valuable financial tool.
- Better Resource Allocation: With clear visibility into who is doing what and where projects stand, managers can make more informed decisions about resource allocation. This prevents bottlenecks, avoids over-allocation or under-utilization of team members, and ensures that financial resources are directed towards the most impactful tasks, optimizing expenditure and maximizing return on investment. In essence, Basecamp provides the data and structure needed for smarter financial planning and execution within your projects.
Conclusion
Installing Basecamp on your new MacBook is a straightforward process that unlocks a world of enhanced productivity and seamless collaboration. By following the simple steps outlined, you can quickly move from setup to actively managing your projects and communicating with your team.
But Basecamp is more than just another piece of software; it’s a strategic tool that aligns perfectly with the demands of modern work, especially for tech-savvy MacBook users. Its streamlined approach to project management not only boosts individual and team productivity but also contributes significantly to building a stronger brand reputation through reliable project delivery and fostering a positive work culture. Furthermore, by driving efficiency and reducing organizational friction, Basecamp directly impacts your bottom line, translating saved time and improved workflows into tangible financial benefits. Embrace Basecamp on your new MacBook, and watch your projects, teams, and overall professional success reach new heights.
aViewFromTheCave is a participant in the Amazon Services LLC Associates Program, an affiliate advertising program designed to provide a means for sites to earn advertising fees by advertising and linking to Amazon.com. Amazon, the Amazon logo, AmazonSupply, and the AmazonSupply logo are trademarks of Amazon.com, Inc. or its affiliates. As an Amazon Associate we earn affiliate commissions from qualifying purchases.