In an increasingly digitized world, the way we manage our finances and make purchases is constantly evolving. Cash is giving way to cards, and physical cards are, in turn, yielding to the convenience and security of digital wallets. At the forefront of this financial revolution stands Apple Pay, a contactless payment system that transforms your Apple devices into secure payment tools. Far more than just a novelty, Apple Pay embodies the perfect synergy of technology, brand commitment to user experience, and smart financial management. It allows users to make secure purchases in stores, within apps, and on the web with just a tap or a glance, eliminating the need to carry physical cards or even a wallet.
For anyone embedded in the Apple ecosystem, or simply seeking a more streamlined and secure way to handle transactions, installing Apple Pay is a fundamental step. This comprehensive guide will walk you through everything you need to know, from understanding its core benefits and prerequisites to a detailed, step-by-step setup across all your compatible Apple devices. We’ll also delve into how to effectively use Apple Pay, manage your cards, and leverage its robust security features, ensuring you can embrace this powerful financial tool with confidence and ease.
The Digital Wallet Revolution: Understanding Apple Pay
Apple Pay isn’t merely an alternative payment method; it represents a significant leap in digital security and transactional efficiency. Launched by Apple Inc., it allows users to add credit, debit, and prepaid cards to the Wallet app on their iPhones, Apple Watches, iPads, and Macs. Once configured, these devices can then be used to make purchases at compatible point-of-sale terminals, within apps, and on websites that support Apple Pay, leveraging Near Field Communication (NFC) technology for in-person transactions and secure online protocols.
The allure of Apple Pay extends beyond mere convenience. It’s deeply intertwined with Apple’s brand philosophy of delivering intuitive, secure, and integrated experiences. For those tracking technology trends, Apple Pay is a prime example of how everyday gadgets are becoming central to our financial lives, pushing the boundaries of what a smartphone or smartwatch can do. From a “Money” perspective, it simplifies personal finance by centralizing payment options and often providing digital receipts, contributing to better tracking of expenditures. From a “Tech” standpoint, it showcases advanced encryption and tokenization, making it a benchmark for digital security.
More Than Just a Payment Method: Security and Convenience
The primary drivers behind Apple Pay’s widespread adoption are its unparalleled security features and the sheer convenience it offers. On the security front, Apple Pay doesn’t store your actual card numbers on your device or on Apple servers. Instead, when you add a card, a unique Device Account Number is created, encrypted, and stored in a dedicated chip called the Secure Element on your device. Each transaction is authorized with a one-time unique dynamic security code, meaning your actual card number is never shared with merchants. This tokenization process significantly reduces the risk of fraud compared to traditional card payments, where your full card details are exposed. Furthermore, every purchase requires authentication via Face ID, Touch ID, or your device passcode, adding another robust layer of protection, ensuring that only you can authorize payments.
From a convenience perspective, Apple Pay dramatically streamlines the checkout process. Imagine leaving your wallet at home, yet still being able to buy groceries, coffee, or pay for public transport. With Apple Pay, your iPhone or Apple Watch is all you need. In stores, a quick tap of your device near a contactless reader is all it takes. Online and in apps, a simple authentication replaces the tedious process of entering card numbers, expiry dates, and security codes. This efficiency isn’t just a time-saver; it enhances the entire purchasing experience, making transactions feel effortless and secure. It also aligns perfectly with modern productivity trends, allowing users to focus on what matters rather than fumbling with physical cards.
Prerequisites for a Seamless Setup: Device, iOS, and Bank Compatibility
Before diving into the installation process, it’s crucial to ensure your Apple devices and financial institutions are compatible with Apple Pay. Meeting these prerequisites will guarantee a smooth setup and a hassle-free experience.
1. Compatible Apple Devices:
Apple Pay is designed to work across a range of modern Apple hardware. You’ll need one of the following:
- iPhone: iPhone 6 or later models.
- Apple Watch: All Apple Watch models (paired with an iPhone 5 or later).
- iPad: iPad Pro, iPad Air, iPad, and iPad mini models with Touch ID or Face ID.
- Mac: Mac models with Touch ID (MacBook Air 2018 or later, MacBook Pro 2016 or later) for web purchases, or any Mac introduced in 2012 or later (when paired with an Apple Pay-enabled iPhone or Apple Watch) for completing purchases on websites.
2. Up-to-Date iOS/watchOS/macOS:
For optimal performance and security, your device’s operating system should be running a recent version.
- iPhone/iPad: iOS 8.1 or later (though newer versions are highly recommended for the latest features and security updates).
- Apple Watch: watchOS 1.0 or later (again, latest version is best).
- Mac: macOS Sierra or later.
Keeping your software updated is a cornerstone of digital security and ensures access to the newest features and bug fixes.
3. Supported Financial Institutions:
While Apple Pay is widely supported globally, not all banks and card issuers participate. Before attempting to add your card, it’s wise to check if your bank supports Apple Pay. Most major banks and credit unions across North America, Europe, Asia, and other regions do. You can usually find a list of participating banks on Apple’s official Apple Pay website or by contacting your bank directly. If your bank isn’t listed, you might consider alternatives or contacting them to express interest.
4. Apple ID Signed In:
You must be signed in to iCloud with your Apple ID on your device. This is essential for syncing your cards and settings securely across your Apple ecosystem.
Ensuring these conditions are met will pave the way for a straightforward and successful Apple Pay setup, allowing you to quickly unlock the benefits of this advanced payment system.
A Step-by-Step Guide to Adding Your Cards
Once you’ve confirmed your devices and bank are compatible, the process of adding your cards to Apple Pay is remarkably intuitive, designed with Apple’s signature user-friendliness. The steps vary slightly depending on whether you’re using an iPhone, Apple Watch, or Mac, but the underlying principle remains the same: securely integrating your financial information into your digital wallet.
Setting Up Apple Pay on Your iPhone or iPad
The iPhone and iPad are the most common platforms for Apple Pay, offering convenience for both in-store and online transactions.
- Open the Wallet App: Locate and tap the “Wallet” app icon on your device’s Home screen. It typically looks like a brown wallet with colorful cards peeking out.
- Add a Card: Tap the “+” button (plus icon) in the upper right-hand corner of the Wallet app. This will initiate the “Add Card” process.
- Introduction Screen: An introductory screen for Apple Pay will appear. Tap “Continue.”
- Choose Card Type: You’ll be prompted to choose the type of card you want to add. Most commonly, you’ll select “Debit or Credit Card.” You might also see options for Transit Cards, Rewards Cards, or Apple Card if applicable.
- Scan Your Card: Position your physical credit or debit card within the camera frame. Your device will automatically detect and capture the card number and expiry date. If the camera struggles, or if you prefer, you can tap “Enter Card Details Manually” and type in the information.
- Enter Security Code: After scanning (or manual entry), you’ll need to enter the card’s security code (CVV/CVC), usually a three- or four-digit number found on the back of your card.
- Agree to Terms and Conditions: Your bank’s terms and conditions for Apple Pay will be presented. Read them thoroughly and tap “Agree” to proceed.
- Verify Your Card: To ensure you are the legitimate cardholder, your bank will require verification. This typically involves:
- Text Message: Receiving a code via SMS to your phone number on file with the bank.
- Email: Receiving a code via email.
- Bank App: Opening your bank’s official app for verification.
- Phone Call: A direct call to your bank.
Choose your preferred method and follow the prompts to complete the verification.
- Card Ready: Once verified, your card is successfully added to Apple Pay! You’ll see it appear in your Wallet app, ready for use. By default, the first card you add often becomes your primary card for transactions, but you can change this later.
Integrating Apple Pay with Your Apple Watch
Using Apple Pay on your Apple Watch offers unparalleled convenience for quick payments, especially when your phone isn’t easily accessible. The setup is managed through the companion Watch app on your iPhone.
- Open the Watch App on iPhone: On your iPhone, open the “Watch” app.
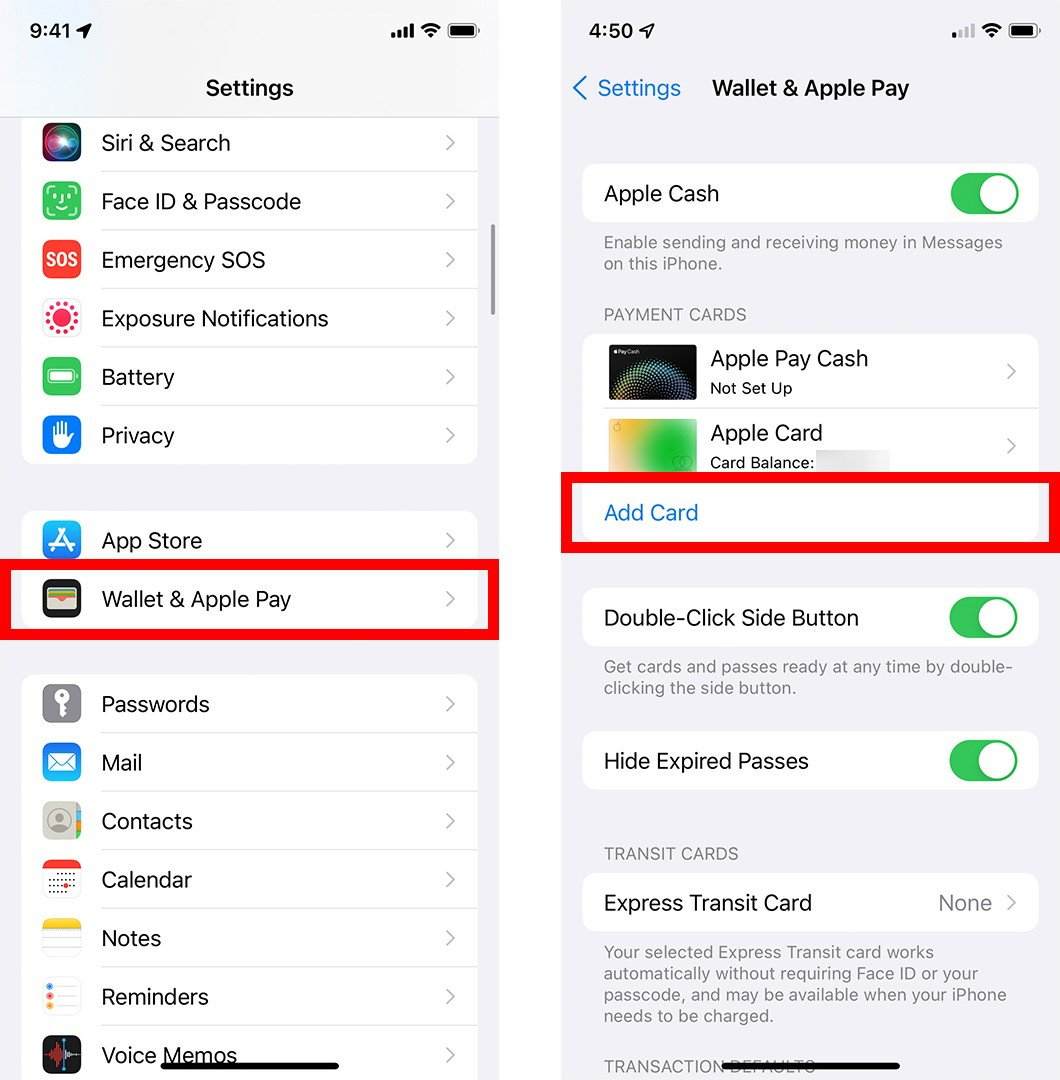
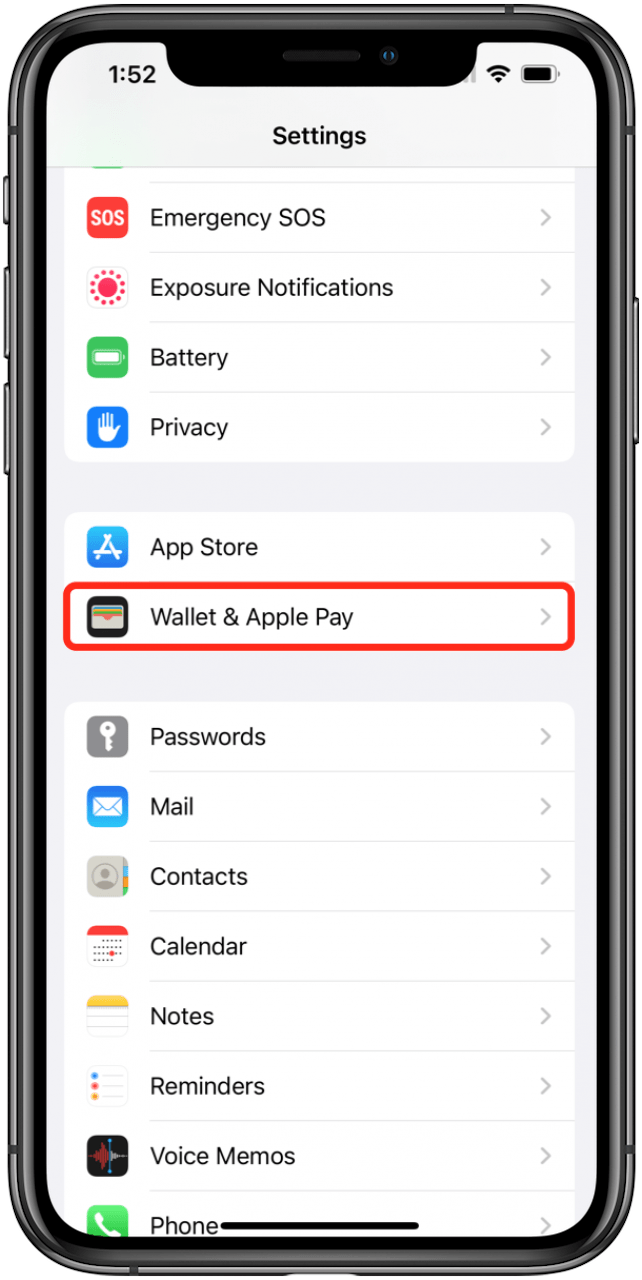
- Navigate to Wallet & Apple Pay: Scroll down and tap “Wallet & Apple Pay.”
- Add a Card: If you’ve already added cards to your iPhone, you might see them under “Cards On Your Phone,” with an “Add” button next to them. If not, tap “Add Card.”
- Introduction Screen: Tap “Continue” on the Apple Pay introduction screen.
- Choose Card Type: Select “Debit or Credit Card.”
- Add Existing or New Card:
- For Cards Already on iPhone: If a card is already on your iPhone, you can select it from the list. You’ll likely just need to enter its security code.
- For New Cards: If you’re adding a new card, you’ll go through the same scanning or manual entry process as you did for the iPhone.
- Enter Security Code (if applicable): Provide the card’s security code.
- Agree to Terms and Conditions: Read and agree to your bank’s terms.
- Verify Your Card: As with the iPhone setup, your bank will require verification via text, email, bank app, or phone call. Complete this step.
- Card Ready: Your card is now added to your Apple Watch! You can access it by double-clicking the side button on your Watch.
Enabling Apple Pay for Your Mac
Apple Pay on Mac is primarily used for secure online purchases through Safari. The setup depends on whether your Mac has Touch ID.
For Macs with Touch ID (e.g., MacBook Pro 2016+, MacBook Air 2018+):
- Open System Settings (or System Preferences on older macOS): Click the Apple menu in the top-left corner of your screen and select “System Settings” (or “System Preferences”).
- Go to Wallet & Apple Pay: In the sidebar (or main window), click on “Wallet & Apple Pay.”
- Add Card: Click the “Add Card…” button.
- Choose Card Type: Select “Debit or Credit Card.”
- Scan or Enter Details:
- If you have a FaceTime camera, you might be able to scan your card.
- Otherwise, enter your card details manually.
- If you have cards already linked to your Apple ID on other devices, you might see them available for quick addition.
- Enter Security Code: Input the card’s security code.
- Agree to Terms and Conditions: Review and accept the terms.
- Verify Your Card: Complete the bank verification process.
- Card Ready: Your card is now active for Apple Pay on your Mac, primarily for online purchases in Safari.
For Macs without Touch ID (requires an iPhone or Apple Watch):
If your Mac doesn’t have Touch ID, you can still use Apple Pay for online purchases, but you’ll need a nearby iPhone or Apple Watch that has Apple Pay enabled and is signed in to the same Apple ID. The Mac doesn’t store the card details directly but leverages your authenticated device.
- Ensure Continuity is Enabled: Make sure Wi-Fi and Bluetooth are on for both your Mac and your iPhone/Apple Watch, and that they are signed into the same Apple ID.
- Add Cards to iPhone/Apple Watch: Ensure your desired cards are already set up in Apple Pay on your iPhone or Apple Watch (as described above).
- No Direct Setup on Mac: You don’t “install” cards directly onto a non-Touch ID Mac. When you make a purchase on a website that supports Apple Pay, your Mac will prompt you to complete the payment using your nearby iPhone or Apple Watch.
With these steps, your credit and debit cards will be securely integrated into your Apple ecosystem, ready for a new era of digital payments.
Mastering Apple Pay: Using Your Digital Wallet
Once your cards are installed, the real magic of Apple Pay begins. Understanding how to use it effectively, whether in a physical store, within an app, or on a website, is key to fully leveraging its convenience and security. Beyond making payments, knowing how to manage your cards within the Wallet app further enhances your control over your personal finance.
Making Payments In-Store and On-the-Go

The most iconic use of Apple Pay is for contactless payments at point-of-sale terminals. Look for the contactless payment symbol (four curved lines) or the Apple Pay logo at checkout.
On iPhone:
- For Face ID iPhones (iPhone X and later): Double-click the side button on the right. Glance at your iPhone to authenticate with Face ID.
- For Touch ID iPhones (iPhone 6 to iPhone 8/SE): Rest your finger on the Home button to authenticate with Touch ID.
- For Passcode: If Face ID or Touch ID is not used or fails, you might be prompted for your passcode.
- Hold Near Reader: Once authenticated, hold the top of your iPhone near the contactless reader until you see “Done” and a checkmark on the screen.
On Apple Watch:
- Double-click Side Button: Double-click the side button (the flat oval button below the Digital Crown). Your default card will appear. Swipe to select a different card if needed.
- Hold Near Reader: Hold the face of your Apple Watch near the contactless reader until you feel a gentle tap and hear a chime, confirming the payment.
It’s that simple. There’s no need to open an app or wake your device first; just authenticate and tap. This seamless experience is a testament to Apple’s brand focus on intuitive user interaction.
Seamless Online and In-App Transactions
Apple Pay also revolutionizes online shopping, removing the friction of manual card entry and enhancing security.
In Apps:
- Look for Apple Pay Button: When checking out in a compatible app, look for the “Buy with Apple Pay” button.
- Confirm Details: Tap the button. A sheet will slide up displaying your default card, shipping address, and contact information (pre-filled from your Wallet settings). Review these details.
- Authenticate:
- iPhone/iPad with Face ID: Double-click the side button, then glance at your device.
- iPhone/iPad with Touch ID: Rest your finger on the Home button.
- iPad with Passcode: Enter your passcode.
- Payment Complete: Once authenticated, the transaction will be processed, and you’ll receive a confirmation.
On Websites (using Safari):
- Look for Apple Pay Button: On a website compatible with Apple Pay, select “Apple Pay” at checkout.
- Confirm Details: A payment sheet will appear with your default card, shipping, and billing information. Verify the details and select a different card or address if necessary.
- Authenticate:
- Mac with Touch ID: Place your finger on the Touch ID sensor on your keyboard.
- Mac without Touch ID: You’ll be prompted to complete the purchase on your nearby iPhone or Apple Watch. Unlock your iPhone/Apple Watch with Face ID/Touch ID/passcode to confirm.
- Payment Complete: The transaction will be finalized, and you’ll receive confirmation on your Mac.
This integration across devices highlights the “Tech” prowess of the Apple ecosystem, making financial transactions feel interconnected and effortless.
Managing Your Cards and Default Settings in Wallet
The Wallet app isn’t just for adding cards; it’s your central hub for managing them and customizing your Apple Pay experience.
Changing Your Default Card:
- On iPhone/iPad: Open the Wallet app, tap and hold the card you want to set as default, then drag it to the front of the stack. Alternatively, go to “Settings” > “Wallet & Apple Pay,” and under “Transaction Defaults,” tap “Default Card” and choose your preferred card.
- On Apple Watch: Open the Watch app on your iPhone, go to “Wallet & Apple Pay,” tap “Default Card,” and select your choice.
- On Mac with Touch ID: Go to “System Settings” > “Wallet & Apple Pay,” and from the “Default Card” dropdown menu, choose your preferred card.
Rearranging Cards:
- On iPhone/iPad: In the Wallet app, tap and hold any card, then drag it to your desired position in the stack.
Removing a Card:
- On iPhone/iPad: Open the Wallet app, tap the card you wish to remove, then tap the three-dot menu icon (…) in the top right corner. Scroll down and tap “Remove Card.”
- On Apple Watch: Open the Watch app on your iPhone, go to “Wallet & Apple Pay,” tap the card, then tap “Remove Card.”
- On Mac with Touch ID: Go to “System Settings” > “Wallet & Apple Pay,” select the card, and click “Remove Card.”
Viewing Recent Transactions:
- On iPhone/iPad: In the Wallet app, tap a specific card. You’ll often see a list of recent transactions associated with that card (if your bank supports this feature). This is incredibly useful for personal finance management and tracking your spending.
Updating Billing/Shipping Information:
- On iPhone/iPad: Go to “Settings” > “Wallet & Apple Pay,” then under “Transaction Defaults,” you can update your default “Shipping Address” and “Contact Info.” This ensures that when you use Apple Pay online, your details are always up-to-date.
Effectively managing these settings gives you greater control over your “Money” transactions and ensures a personalized and secure payment experience every time you use Apple Pay.
Beyond Installation: Security, Troubleshooting, and Best Practices
Installing and using Apple Pay is just the beginning. To truly harness its power and maintain peace of mind, it’s essential to understand its underlying security architecture, know how to address common issues, and adopt best practices for maximizing your digital wallet experience. This deeper dive touches upon crucial “Tech” aspects, reinforces Apple’s “Brand” commitment to privacy, and provides practical “Money” tips for secure transactions.
Fortifying Your Finances: Apple Pay’s Advanced Security Features
Apple Pay isn’t merely a convenient way to pay; it’s engineered with multiple layers of security designed to protect your financial data far beyond what a physical card can offer.
- Tokenization (Device Account Number): As mentioned, your actual card number is never stored on your device or Apple servers. Instead, when you add a card, a unique, encrypted Device Account Number (token) is assigned to it. This token is what’s transmitted during a transaction, making it useless to fraudsters even if intercepted.
- Secure Element: This dedicated, certified chip within your Apple device securely stores the Device Account Number and cryptographic keys. It’s isolated from the device’s operating system, making it extremely difficult for malware or unauthorized access to compromise your card data.
- Biometric Authentication (Face ID/Touch ID) or Passcode: Every single transaction requires your explicit authorization through Face ID, Touch ID, or your device passcode. This ensures that even if your device is lost or stolen, no one else can make purchases with your cards. For Apple Watch, your passcode is required upon wearing the watch if it’s been removed, meaning if it’s stolen, it locks down.
- No Merchant Data Storage: Merchants only receive the Device Account Number and a transaction-specific dynamic security code, not your actual card details. This significantly reduces the risk of your data being compromised during a merchant data breach.
- Privacy: Apple doesn’t store any transaction information that can be tied back to you. Your purchases are private. Apple only retains anonymous transaction data to improve Apple Pay and related services.
- Find My iPhone Integration: If your device is lost or stolen, you can use “Find My iPhone” to remotely suspend or entirely remove the ability to pay with Apple Pay from that device, providing immediate financial protection.
These intertwined security measures make Apple Pay one of the most secure payment methods available today, giving users a robust shield against fraud.
Common Issues and Quick Solutions
While Apple Pay is generally reliable, you might occasionally encounter minor hiccups. Here’s how to troubleshoot some common issues:
-
“Could Not Add Card” Error:
- Check Bank Compatibility: Ensure your bank supports Apple Pay.
- Internet Connection: Make sure you have a stable Wi-Fi or cellular data connection during setup.
- Card Information: Double-check that all card details (number, expiry, CVV) are entered correctly.
- Contact Bank: Sometimes, your bank might have specific restrictions or need to activate Apple Pay for your account. A quick call to their customer service can resolve this.
-
Payment Not Going Through In-Store:
- Check for Apple Pay/Contactless Symbol: Ensure the merchant accepts Apple Pay and has a compatible NFC reader.
- Authentication: Verify that you’ve successfully authenticated with Face ID, Touch ID, or your passcode.
- Device Position: Hold your device close to the reader, often at the top. Sometimes it needs to be held for a moment longer.
- Default Card: Ensure your default card has sufficient funds or credit.
- Terminal Issues: Occasionally, the payment terminal itself might be faulty or require the merchant to restart it.
-
“Card Not Activated” or “Verification Required”:
- Complete Verification: If you skipped the bank verification step during setup, go back to the Wallet app, tap the card, and follow the prompts to complete verification (e.g., enter SMS code).
- Bank Restrictions: Some banks impose temporary limits until the card is fully verified.
-
No Apple Pay Option Online/In-App:
- Merchant Support: The website or app must explicitly support Apple Pay as a payment option.
- Safari Only (for websites): On Macs, Apple Pay primarily works through the Safari browser.
- Compatibility: Ensure your device and macOS/iOS versions are up to date.
-
Lost or Stolen Device:
- Immediately Use Find My: Log into iCloud.com/find or use the “Find My” app on another Apple device.
- Erase or Suspend Apple Pay: You can remotely erase your device (which removes all cards) or specifically suspend Apple Pay. This is the fastest way to secure your financial information.
Tips for Maximizing Your Apple Pay Experience
To truly make Apple Pay an indispensable part of your digital life and streamline your financial operations, consider these best practices:
- Add Multiple Cards: Don’t just add one. Having multiple credit and debit cards from different banks ensures you always have a backup, especially useful for diverse spending categories or in case one card issuer is temporarily down.
- Set a Default Card: Choose your most frequently used or rewards-earning card as your default for maximum efficiency.
- Understand Transaction History: Regularly check the transaction history within the Wallet app for each card. This provides a quick overview of your spending and helps you monitor for any unauthorized activity, aligning with good personal finance habits.
- Keep Your Software Updated: Always ensure your iPhone, Apple Watch, iPad, and Mac are running the latest version of their respective operating systems. Updates often include security patches and performance improvements for Apple Pay.
- Use a Strong Passcode: While Face ID and Touch ID are excellent, having a strong, unique passcode for your device adds an extra layer of security, especially if biometrics fail or are temporarily unavailable.
- Enable Find My: Ensure “Find My” is enabled on all your Apple Pay-enabled devices. This is your primary defense against lost or stolen devices and is crucial for remote security actions.
- Explore Rewards and Transit Cards: Beyond standard credit/debit cards, Apple Pay often supports loyalty programs and transit cards in various cities. Explore these options to further consolidate your wallet.
- Educate Yourself on Merchant Acceptance: While widely accepted, not every retailer supports contactless payments. Knowing where you can and cannot use Apple Pay will save you time and hassle.
By embracing these tips, you’ll not only enjoy the unparalleled convenience of Apple Pay but also maximize its security features, making it a robust and reliable tool for managing your “Money” in a “Tech”-savvy world, all while reinforcing the seamless experience associated with the “Brand” of Apple.
In conclusion, installing Apple Pay is a straightforward process that unlocks a world of secure, convenient, and efficient transactions. By understanding its foundational technology, following the simple setup steps across your devices, and adopting best practices for usage and security, you can confidently navigate the future of digital payments. Apple Pay isn’t just about making purchases; it’s about integrating your financial life seamlessly into your digital ecosystem, offering peace of mind and unparalleled ease, truly making your Apple device your most powerful financial tool.
aViewFromTheCave is a participant in the Amazon Services LLC Associates Program, an affiliate advertising program designed to provide a means for sites to earn advertising fees by advertising and linking to Amazon.com. Amazon, the Amazon logo, AmazonSupply, and the AmazonSupply logo are trademarks of Amazon.com, Inc. or its affiliates. As an Amazon Associate we earn affiliate commissions from qualifying purchases.