In an increasingly connected world, the security of our homes and businesses has never been more paramount. From deterring potential threats to providing crucial evidence, security cameras stand as a vigilant guardian, offering peace of mind in an era of constant flux. While the thought of installing a robust surveillance system might seem like a daunting task, requiring specialized skills, the truth is that with the right guidance and a methodical approach, a DIY installation is entirely achievable for most tech-savvy individuals. This comprehensive guide will walk you through every step of the process, transforming you from a security novice into a confident system installer, ensuring your property is protected with cutting-edge technology.
As a platform dedicated to demystifying Tech trends, offering insightful Tutorials, and exploring essential aspects of Digital Security, we believe in empowering our readers to take control of their security infrastructure. Installing your own security cameras isn’t just about saving on professional fees; it’s about understanding your system intimately, configuring it to your exact needs, and maintaining a robust digital defense against evolving threats. Let’s delve into the strategic planning, physical setup, digital configuration, and ongoing optimization required to establish a formidable security perimeter.
Phase 1: Strategic Planning and Preparation
The foundation of any successful security camera installation lies in meticulous planning. Rushing into the process without a clear strategy can lead to blind spots, wiring nightmares, and a less-than-optimal surveillance system. This initial phase is crucial for making informed decisions about your equipment and its placement.
Assessing Your Security Needs: Wired vs. Wireless, Indoor vs. Outdoor
Before selecting any gadgets, it’s vital to assess the specific requirements of your property. Consider the following:
- Indoor vs. Outdoor: Outdoor cameras demand weatherproofing (look for IP65, IP66, or IP67 ratings), robust mounts, and often, more advanced night vision capabilities. Indoor cameras are generally simpler, focusing on discreet design and features like two-way audio.
- Wired vs. Wireless: This is a fundamental decision with significant implications for installation complexity and performance.
- Wired Systems (e.g., PoE – Power over Ethernet): Offer superior reliability, consistent power, and often higher bandwidth for crystal-clear footage. They are less susceptible to Wi-Fi interference or battery drain. However, installation requires running Ethernet cables, which can be more labor-intensive and may involve drilling through walls. This provides excellent digital security through a stable, dedicated connection.
- Wireless Systems (Wi-Fi): Provide flexibility in placement, easier installation, and are ideal for renters or those who prefer minimal drilling. They communicate wirelessly but still require a power source, which might mean running power cables or relying on battery power (requiring periodic recharging). Their performance can be affected by Wi-Fi signal strength, router congestion, and potential interference.
- Coverage Areas: Identify critical areas you need to monitor. This typically includes entry points (doors, windows), high-value areas (garage, living room with valuables), and any blind spots around the perimeter.
Selecting the Right Camera System: Features, Resolution, Storage
The market is flooded with various camera gadgets, each boasting different features. Choosing the right one requires understanding what truly matters for your security posture.
- Camera Types:
- Bullet Cameras: Highly visible, often used outdoors, with a long, cylindrical shape.
- Dome Cameras: Discreet, vandal-resistant, often used indoors or in public-facing outdoor areas.
- Turret Cameras (Eyeball Cameras): A hybrid, offering the adjustability of domes without the glare issues under their domes.
- PTZ (Pan-Tilt-Zoom) Cameras: Offer remote control over direction and zoom, ideal for monitoring large areas but often more expensive.
- Resolution: This determines the clarity of your footage. While 1080p (Full HD) is a good baseline, 2K (1440p) and 4K (2160p) cameras offer significantly more detail, which can be crucial for identifying faces or license plates. Higher resolution requires more storage and bandwidth.
- Key Features:
- Night Vision: Infrared (IR) night vision is standard, providing black-and-white images in low light. Starlight sensors offer color night vision in very dim conditions, a significant technology trend.
- Motion Detection: Essential for triggering recordings and alerts. Look for cameras with advanced, AI-powered motion detection that can differentiate between people, vehicles, and animals to reduce false alarms. This leverages AI Tools for smarter surveillance.
- Two-Way Audio: Allows you to listen in and speak through the camera, useful for package deliveries or deterring intruders.
- Wide Dynamic Range (WDR): Helps balance bright and dark areas in challenging lighting conditions, preventing silhouetting.
- Storage Options:
- Local Storage: SD cards (for individual cameras), or Network Video Recorders (NVRs) / Digital Video Recorders (DVRs) with hard drives (for multi-camera wired systems). NVRs are used with IP cameras, DVRs with analog.
- Cloud Storage: Many cameras offer subscription-based cloud storage, providing off-site backup, which is vital if your local equipment is stolen or damaged. This offers another layer of digital security.
- Ecosystem Compatibility: Consider if the cameras integrate with your existing smart home setup (e.g., Alexa, Google Home) and if their accompanying apps are user-friendly and reliable.
Mapping Out Camera Placement and Coverage
With your cameras chosen, it’s time to plan their precise locations. This is where a sketch of your property comes in handy.
- Sketch Your Layout: Draw a simple floor plan of your home or business, including all entry points, windows, and areas of concern.
- Identify Critical Views: Mark where you want each camera to face. Aim for overlapping fields of view to minimize blind spots.
- Consider Light Sources: Avoid pointing cameras directly into strong light sources (like direct sunlight or streetlights) as this can wash out images.
- Wiring Routes (for Wired Systems): Plan the shortest and most discreet routes for your cables. This might involve running them through attics, crawl spaces, or along baseboards.
- Legal and Ethical Considerations: Be mindful of privacy laws. Ensure your cameras are pointed only at your property and do not infringe on neighbors’ privacy.
Gathering Your Essential Tools and Materials
A well-prepared toolkit makes the installation process smoother and safer.
- Basic Tools: Drill (with various bits for pilot holes and anchors), screwdriver set, ladder, tape measure, pencil, stud finder (for mounting to studs), level.
- Specific Tools (for Wired Systems): Wire strippers/crimpers, Ethernet cable tester, fish tape (for pulling cables through walls), cable ties or clips.
- Materials: Your chosen cameras, mounting hardware (usually included, but sometimes stronger anchors are needed), appropriate cables (Ethernet, power extensions), NVR/DVR (if applicable), a monitor (for initial NVR/DVR setup), surge protectors.
Phase 2: The Physical Installation Process
With thorough planning complete, you’re ready to get hands-on. This phase focuses on the physical placement, mounting, and wiring of your security cameras.
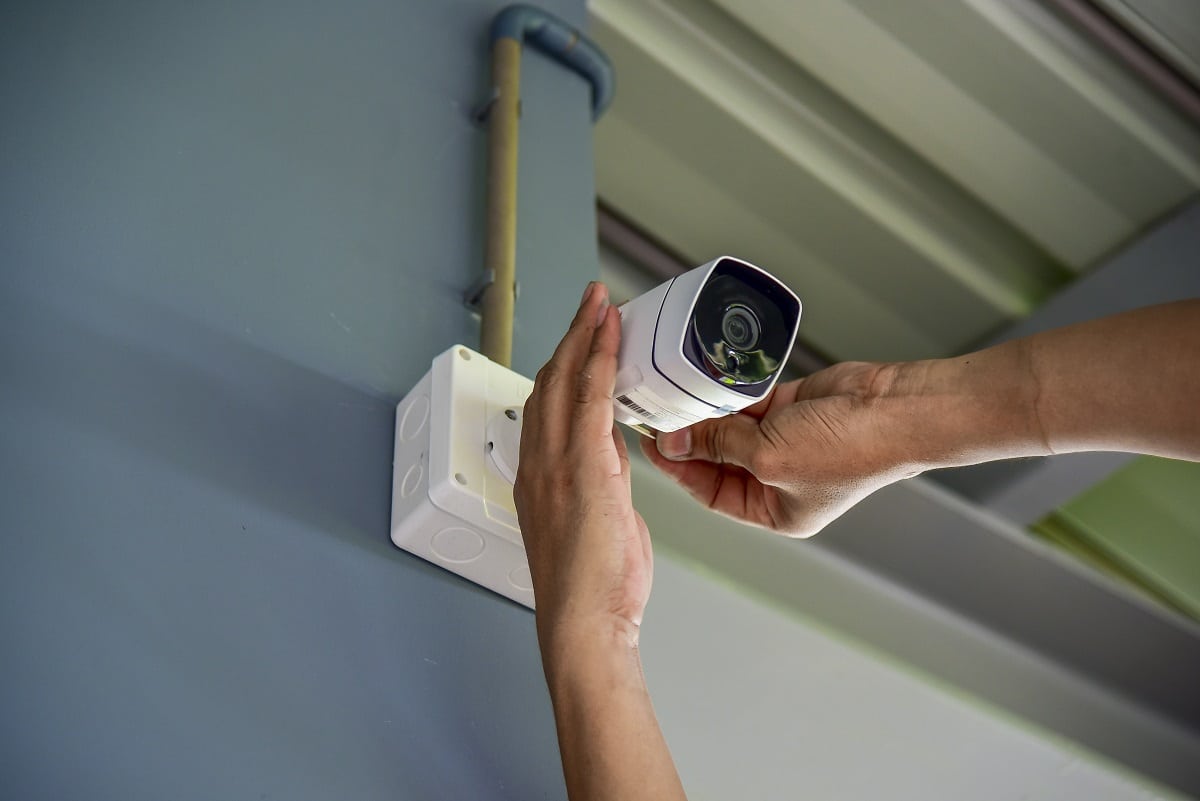
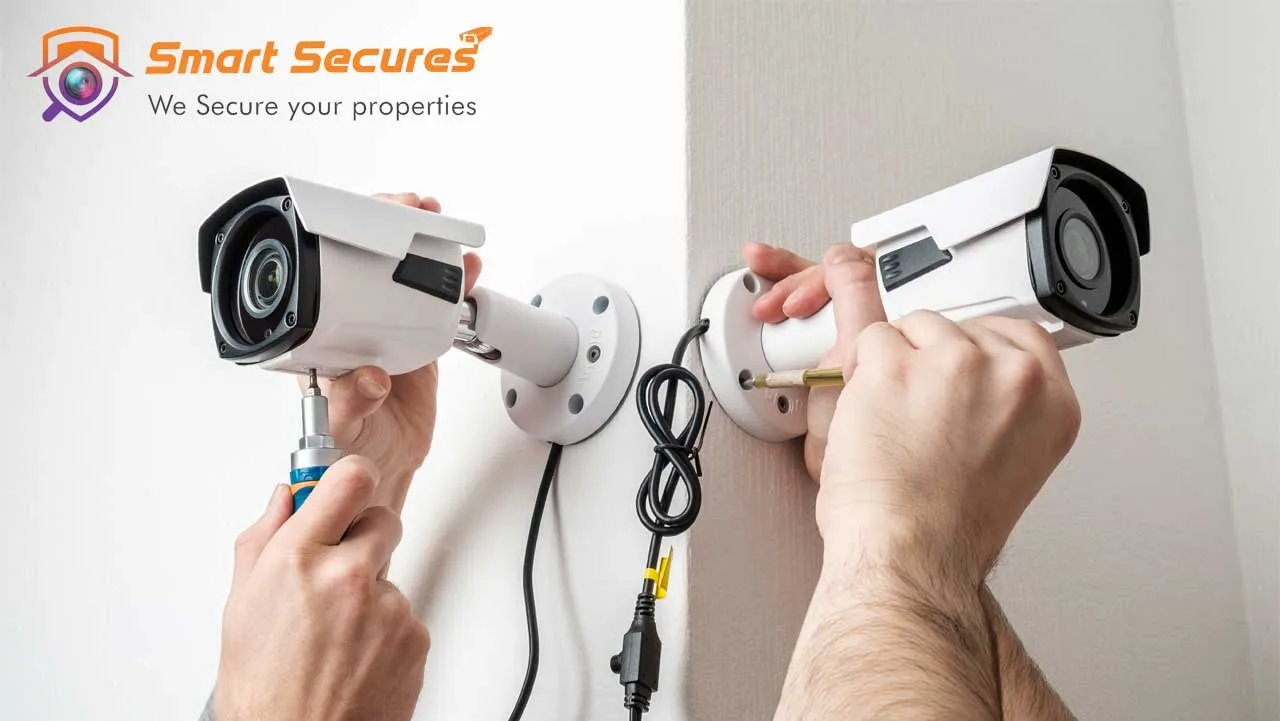
Mounting Your Cameras Securely
Correct mounting ensures your cameras are stable, protected, and provide the optimal view.
- Mark and Drill: At your predetermined locations, use a pencil to mark the drill holes for the camera mount. Use a level to ensure it’s straight. Drill pilot holes appropriate for your screws and anchors. If drilling into masonry or brick, use a masonry drill bit.
- Install Anchors: Insert wall anchors into the pilot holes. These provide a secure base for the screws, especially in drywall.
- Attach the Mount: Screw the camera mount firmly to the surface.
- Attach the Camera: Secure the camera to its mount. Many cameras have adjustable joints, allowing you to fine-tune the angle later.
- Weatherproofing (Outdoor Cameras): For outdoor units, ensure all cable entry points are sealed with silicone sealant to prevent water infiltration. Angle the camera slightly downwards to prevent rain pooling on the lens.
Navigating Wiring and Power Connections (for Wired Systems)
This is often the most challenging part of a wired installation but is crucial for system reliability.
- Run Cables: Carefully route your Ethernet or power cables from your NVR/DVR or power source to each camera location.
- Concealment: Whenever possible, run cables through walls, attics, basements, or conduits to protect them from weather, pests, and tampering. This also vastly improves aesthetics.
- Safety: When drilling through walls or floors, be aware of existing electrical wires, plumbing, and HVAC ducts. Use a stud finder to locate studs and avoid drilling into utilities.
- PoE Advantage: If using PoE cameras, a single Ethernet cable provides both power and data, simplifying wiring significantly.
- Make Connections:
- Power: Connect the power adapter to the camera (if not PoE) and plug it into an appropriate outlet. Use surge protectors for all electronics.
- Data (Ethernet): Connect one end of the Ethernet cable to the camera and the other end to a PoE switch or directly to your NVR/DVR’s PoE port. Ensure connections are snug.
- Wireless Cameras: Simply connect the power adapter to the camera and an outlet. Ensure it’s within range of your Wi-Fi network.
Setting Up Your NVR/DVR or Base Station

The NVR/DVR acts as the brain of your wired system, while a base station serves a similar role for some wireless camera brands.
- Strategic Placement: Choose a secure, cool, and well-ventilated location for your NVR/DVR, away from direct sunlight or excessive moisture. This is typically near your router and a power outlet.
- Connections:
- Power: Connect the NVR/DVR to a power source.
- Monitor: Connect an HDMI or VGA cable from the NVR/DVR to a monitor for initial setup and local viewing.
- Network: Connect an Ethernet cable from the NVR/DVR to your home router or network switch.
- Hard Drive: If your NVR/DVR didn’t come with a pre-installed hard drive, follow the manufacturer’s instructions to install one. This is crucial for local video storage.
Phase 3: Digital Configuration and Network Integration
With the physical hardware in place, the next phase is to bring your system to life through digital configuration and network integration. This involves leveraging software and apps to control your new gadgets.
Connecting Your System to the Network and Internet
This step enables remote viewing and ensures your cameras can communicate effectively.
- Wired NVR/DVR Systems: Ensure the Ethernet cable from your NVR/DVR is securely connected to an active port on your router. The NVR/DVR should automatically obtain an IP address via DHCP.
- Wireless Cameras/Base Stations:
- Base Station: Connect the base station to your router via an Ethernet cable. Then, follow the manufacturer’s instructions (usually via their dedicated app) to pair your wireless cameras with the base station.
- Direct Wi-Fi Cameras: For cameras that connect directly to your Wi-Fi, download the manufacturer’s app on your smartphone. The app will guide you through the process of connecting the camera to your home Wi-Fi network by entering your Wi-Fi credentials. Ensure strong signal strength at each camera location.
- Firmware Updates: Immediately after connecting to the internet, check for and install any available firmware updates. These often contain critical security patches and performance improvements, vital for digital security.
Initializing and Configuring Camera Settings via App or Software
This is where you customize your surveillance system to meet your specific security requirements, acting as a crucial tutorial for your new system.
- Install the App/Software: Download and install the manufacturer’s official app on your smartphone or tablet, or the dedicated client software on your computer.
- Account Creation and Device Addition: Follow the prompts to create an account and add your NVR/DVR or individual cameras to the app. This usually involves scanning a QR code on the device or entering its serial number.
- Initial Setup Wizard: Most systems will have an initial setup wizard that guides you through basic configurations:
- Change Default Passwords: This is paramount for digital security. Immediately change the default usernames and passwords of all devices (cameras, NVR/DVR, app account) to strong, unique ones.
- Time Zone and Date: Set these accurately for correct timestamping of footage.
- Video Quality: Adjust resolution, frame rate, and compression settings based on your network bandwidth and storage capacity.
- Recording Schedule: Define when cameras should record (e.g., continuously, only during specific hours, or only upon motion detection).
- Storage Configuration: Format the hard drive in your NVR/DVR and configure how footage is stored and overwritten. For cloud storage, set up your subscription.
- Remote Access: Configure remote access through the app, allowing you to view live feeds, playback recordings, and manage settings from anywhere with an internet connection.
Fortifying Your Digital Security: Passwords and Privacy
In the age of connected devices, digital security is as important as physical security. A compromised camera system can become a gateway for cybercriminals.
- Strong, Unique Passwords: Beyond changing defaults, use complex passwords (a mix of uppercase, lowercase, numbers, and symbols) for your cameras, NVR/DVR, and your monitoring app. Use a password manager to keep track.
- Two-Factor Authentication (2FA): Enable 2FA on your account if the system supports it. This adds an extra layer of security, requiring a code from your phone in addition to your password.
- Network Security: Secure your home Wi-Fi network with a strong password (WPA2/WPA3 encryption). Consider creating a separate guest network for smart devices if your router supports it, isolating your cameras from your main network.
- Regular Firmware Updates: As mentioned, always keep your camera firmware up to date. Manufacturers release updates to patch vulnerabilities and improve performance.
- Privacy Settings: Understand what data your cameras collect and how it’s stored. Be aware of cloud storage privacy policies. Disable features you don’t use.
- Firewall: Ensure your router’s firewall is active to prevent unauthorized access to your internal network.
Phase 4: Testing, Optimization, and Ongoing Maintenance
Installation isn’t truly complete until you’ve thoroughly tested and optimized your system. Long-term reliability also hinges on routine maintenance. This final phase ensures your investment in digital security provides continuous, effective protection.
Thorough System Testing and Troubleshooting
Before declaring your system fully operational, put it through its paces.
- Live View Verification: Check the live feed from each camera on your monitor, smartphone, and computer. Ensure image quality is clear, colors are accurate, and there are no glitches or dropped frames. Adjust camera angles for optimal coverage.
- Recording Test: Verify that cameras are recording according to your schedule or upon motion detection. Play back recorded footage to ensure it’s accessible and plays smoothly.
- Motion Detection Test: Walk through the camera’s field of view to trigger motion detection. Check if alerts are received promptly on your phone via the app.
- Network Connectivity: If any camera frequently goes offline or has choppy video, troubleshoot network issues. For wireless cameras, this might mean repositioning your router or adding a Wi-Fi extender. For wired, check cable connections and power.
- Night Vision Test: Test the night vision capabilities in complete darkness. Ensure the IR illuminators are working and provide adequate illumination.
Optimizing Motion Detection and Alert Preferences
False alarms can quickly lead to alert fatigue, diminishing the effectiveness of your security system. Fine-tuning these settings is key to productivity in managing your security.
- Sensitivity Adjustment: Adjust motion detection sensitivity levels. Start with a medium setting and fine-tune based on your environment. Too sensitive, and swaying trees or passing cars will trigger alerts. Too low, and genuine events might be missed.
- Activity Zones (Motion Zones): Most modern cameras and apps allow you to define specific “activity zones” or “motion zones” within the camera’s field of view. This is incredibly useful for ignoring areas like busy sidewalks while focusing on your doorway or driveway.
- Smart Alerts: Leverage AI Tools if your cameras support them, such as person detection, vehicle detection, or package detection. These greatly reduce irrelevant notifications.
- Notification Management: Customize how you receive alerts (push notifications to your app, email, etc.) and set schedules for when you want to receive them. For example, you might only want motion alerts when you’re away from home.
Sustaining Your Security System for Long-Term Reliability
A security system is only as good as its maintenance. A little ongoing effort goes a long way in ensuring continuous protection.
- Regular Physical Checks: Periodically inspect your cameras. Clean lenses to remove dirt, dust, or spiderwebs that can obscure vision. Ensure mounts are still secure, especially for outdoor cameras exposed to weather. Check cable connections for wear and tear.
- Firmware Updates: Make it a habit to check for and apply firmware updates for your cameras and NVR/DVR. These often fix bugs, improve performance, and address new digital security vulnerabilities.
- Storage Management: For local storage, ensure your hard drive has enough space and that old footage is being correctly overwritten or archived. For cloud storage, periodically review your subscription and storage limits.
- Battery Management (for Wireless Cameras): Keep an eye on battery levels for battery-powered cameras and charge them as needed. Consider backup power solutions (UPS) for wired systems to maintain recording during power outages.
- Review Footage: Occasionally review recorded footage to ensure everything is working as expected and to familiarize yourself with the system’s interface and features. This can help you identify potential blind spots or areas needing adjustment.
By diligently following these steps, you not only install a functional security camera system but also gain a deep understanding of its operation, allowing you to maximize its effectiveness. In the realm of Tech, empowering yourself with such tutorials contributes significantly to your overall digital security and peace of mind.
In conclusion, installing security cameras is a highly rewarding DIY project that offers tangible benefits for your property’s safety. While it demands careful planning and execution, the process is well within the reach of most individuals. By understanding your needs, choosing the right gadgets, meticulously installing them, and diligently configuring their software and apps, you create a robust surveillance system tailored to your unique environment. This journey into enhanced digital security not only protects your assets but also empowers you with the knowledge and control to maintain a vigilant watch over what matters most. Embrace the technology trends and take charge of your security today!
aViewFromTheCave is a participant in the Amazon Services LLC Associates Program, an affiliate advertising program designed to provide a means for sites to earn advertising fees by advertising and linking to Amazon.com. Amazon, the Amazon logo, AmazonSupply, and the AmazonSupply logo are trademarks of Amazon.com, Inc. or its affiliates. As an Amazon Associate we earn affiliate commissions from qualifying purchases.