
In an increasingly digital world, where entertainment is just a click away, streaming devices like Roku have revolutionized how we consume media. Roku, a pioneer in the streaming industry, offers an intuitive and expansive platform that grants access to a vast universe of content, from blockbuster movies and binge-worthy TV shows to live sports, news, and even niche interest channels. But the true power of your Roku device lies in its ability to install and manage “apps,” or what Roku refers to as “channels.” Understanding how to effectively add these channels is the key to unlocking the full potential of your streaming gadget and tailoring your entertainment experience precisely to your preferences.
This comprehensive guide will walk you through everything you need to know about installing, managing, and optimizing apps on your Roku device. Whether you’re a new Roku owner just setting up your device or a seasoned streamer looking to explore advanced features and troubleshooting tips, this tutorial, deeply rooted in the “Tech” aspects of software, apps, and gadgets, will equip you with the knowledge to navigate the Roku ecosystem with confidence and ease. We’ll delve into the various methods of installation, discuss common challenges, and share best practices to ensure your Roku remains a powerhouse of personalized entertainment.
Understanding Roku: Your Gateway to Endless Entertainment
Roku has firmly established itself as a leading player in the competitive streaming device market, lauded for its user-friendly interface, diverse hardware options, and an unparalleled selection of content. Before diving into the mechanics of app installation, it’s beneficial to grasp what makes Roku tick and why its channel ecosystem is so pivotal to its appeal.
What is Roku and Why Apps are Essential
At its core, Roku is a series of digital media player devices that allow you to stream content over the internet to your television. From compact Roku Express sticks to powerful Roku Ultra boxes and integrated Roku TVs, there’s a device for every budget and need. Unlike traditional cable television, Roku operates on an app-based model, where each “channel” (e.g., Netflix, Hulu, Disney+, YouTube, Spotify, or even local news apps) functions as a standalone application that delivers its specific content library.
These apps are not merely add-ons; they are the very fabric of the Roku experience. Without them, your Roku device would be little more than a fancy paperweight. Each channel opens a unique portal, granting access to a specific streaming service’s catalog. The beauty lies in the freedom it offers: you only install the channels you want, creating a curated content library that truly reflects your viewing habits. This modular approach to entertainment not only puts you in control but also aligns perfectly with modern “Technology Trends” that emphasize personalization and on-demand access. Whether you’re interested in indie films, fitness tutorials, or cutting-edge AI tools for productivity showcased through specific channels, the app-centric design ensures your Roku device can adapt to virtually any digital content need.
The Roku Channel Store: A Treasure Trove of Content
Central to the Roku experience is the Roku Channel Store, often referred to as the “hub” for all available applications. Think of it as an expansive digital marketplace, similar to an app store on your smartphone, but exclusively dedicated to streaming content. This store boasts thousands of free and paid channels across an incredibly diverse range of categories, including movies & TV, news, sports, music, international, lifestyle, educational, and even games.
Navigating the Roku Channel Store is designed to be intuitive. Channels are often organized into logical categories, and a robust search function allows you to quickly find specific apps by name. Furthermore, Roku frequently highlights trending channels, new releases, and curated collections, making it easy to discover new content tailored to popular interests or “Technology Trends” in media consumption. The sheer volume and variety mean that no matter your preference, there’s almost certainly a channel—or several—waiting to be installed, transforming your Roku into a personalized entertainment dashboard. The continuous updates to the store, reflecting evolving “Software” and “Apps,” ensure that users always have access to the latest streaming options, making the Roku Channel Store a dynamic and ever-expanding treasure trove.
Step-by-Step Guide to Installing Channels on Roku
Installing an app (channel) on your Roku device is a straightforward process, designed for simplicity. There are primarily two methods to accomplish this: directly through your Roku device’s interface or via the Roku website/mobile app. Both methods achieve the same goal but offer flexibility depending on your preference and situation. This section provides a detailed “Tutorials” breakdown for each.
Method 1: Installing via Your Roku Device
This is the most common and often preferred method, as it allows you to manage your channels directly from your television screen using your Roku remote.
- Power On Your Roku Device and TV: Ensure your Roku is connected to your TV and powered on.
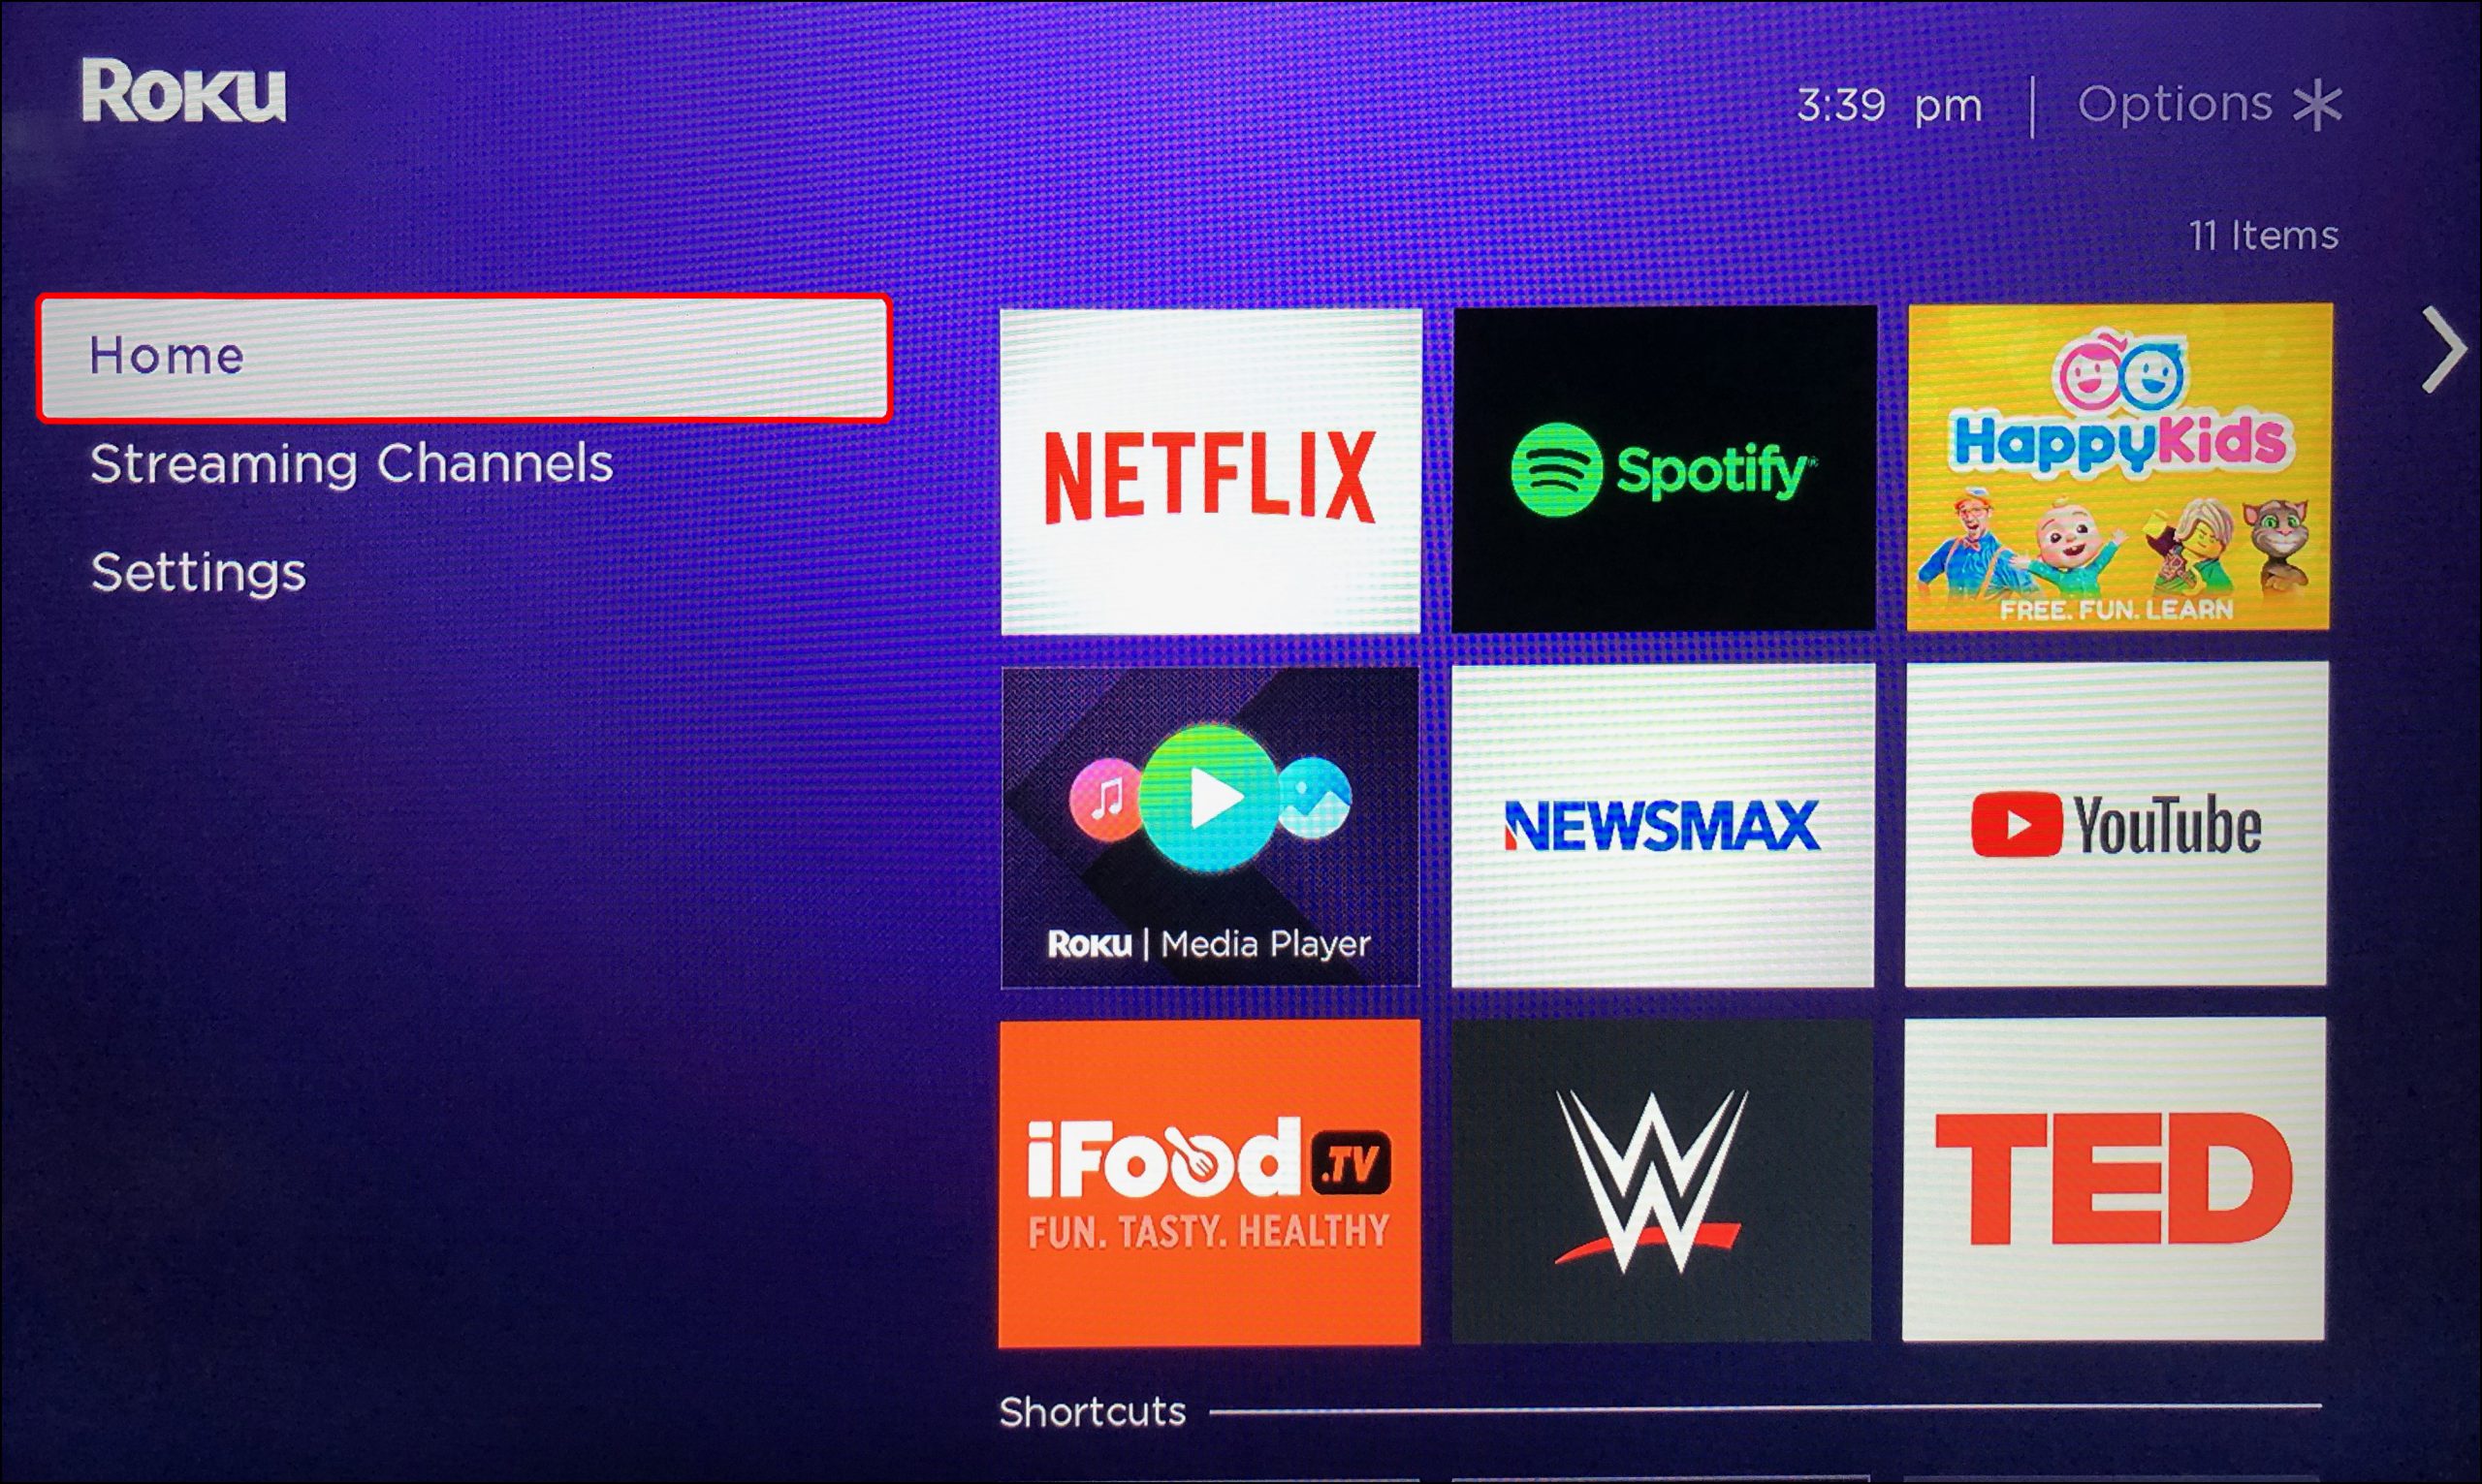
- Navigate to the Home Screen: Using your Roku remote, press the “Home” button to return to the main interface.
- Access the “Streaming Channels” Menu: On the left-hand navigation menu, scroll down and select “Streaming Channels.” This will open the Roku Channel Store.
- Browse or Search for Channels:
- Browse: You’ll see categories like “Featured,” “New & Notable,” “Free,” and specific genres (Movies & TV, Sports, Music, etc.). You can scroll through these categories to discover new apps.
- Search: If you know the name of the app you want (e.g., “Netflix” or “Plex”), scroll down to “Search Channels.” Use the on-screen keyboard to type in the name. As you type, relevant results will appear.
- Select the Desired Channel: Once you find the app you want to install, highlight it and press the “OK” button on your remote. This will open the channel’s information page.
- Add the Channel: On the channel’s info page, you’ll see details about the app, including screenshots and a brief description. Select the “Add Channel” button.
- Confirmation: Roku will then download and install the channel. A confirmation message will appear once it’s successfully added, usually stating “Channel added.”
- Access the New Channel: After installation, the new channel will typically appear at the bottom of your home screen channel list. You can then select “Go to channel” or “OK” to launch it immediately, or “Move channel” to reorganize its position later.
Method 2: Installing via the Roku Website or Mobile App
This method offers convenience, especially if you’re away from your TV or prefer using a keyboard for searching. It requires you to have a Roku account linked to your device.
- Open the Roku Website or Mobile App:
- Website: Go to www.roku.com on your computer or mobile browser and log in to your Roku account.
- Mobile App: Download and open the official Roku mobile app (available for iOS and Android) on your smartphone or tablet, and ensure you’re logged into the same Roku account linked to your device.
- Navigate to the Channel Store:
- Website: Click on “What to Watch” or “Channel Store” in the navigation menu.
- Mobile App: Tap the “Channels” icon (often represented by a grid or a play button) at the bottom or find the “Channel Store” option.
- Find the Desired Channel: Similar to the on-device method, you can browse categories or use the search bar to locate the app you wish to install.
- Add the Channel:
- Website: On the channel’s info page, click the “+ Add channel” button.
- Mobile App: Tap the “Add channel” button.
- Confirm Installation: If you have multiple Roku devices linked to your account, you might be asked to select which device you want to add the channel to. Confirm your selection.
- Sync with Your Roku Device: The channel will be added to your Roku account and will automatically appear on your Roku device(s) within a few minutes (sometimes you may need to go to
Settings > System > System update > Check nowon your Roku device to force a refresh, though this is rarely necessary).
Post-Installation: Organizing Your Channels
Once you’ve installed several channels, you might want to organize them for easier access. Roku allows you to move channels around on your home screen.
- Highlight the Channel: On your Roku home screen, navigate to the channel you wish to move.
- Press the Star (*) Button: On your Roku remote, press the
*(Star) button. This opens a small options menu. - Select “Move channel”: From the options, choose “Move channel.”
- Reposition and Confirm: Use the directional pad on your remote to move the channel to your desired location. Press “OK” to confirm its new position.
Many users prefer to group their most frequently used apps, creating a more “Productivity”-oriented interface for their entertainment hub.
Exploring Advanced Roku Features and App Management

Beyond basic installation, Roku offers several features for managing your channels, exploring niche content, and troubleshooting common issues. Understanding these aspects is crucial for a robust and smooth streaming experience, aligning with the “Gadgets” and “Software” aspects of effective device management.
Discovering Private Channels (or Non-Certified Channels)
While the Roku Channel Store is vast, there’s another layer of content available: “private channels.” These are channels that are not officially listed in the public Roku Channel Store, often due to being in beta testing, serving a very niche audience, or containing content that doesn’t meet Roku’s strict guidelines for public distribution. Accessing them typically requires a specific code, often called an “invite code.”
To install a private channel:
- Obtain the Channel Code: You’ll need the unique 4-5 digit code for the private channel you wish to add. These codes are usually found on third-party websites, forums, or directly from the content provider.
- Visit the Roku Website: Go to my.roku.com/account/add on your computer or mobile browser and log in to your Roku account.
- Enter the Code: In the “Add a channel with a code” section, enter the private channel code.
- Add Channel: Click “Add Channel” and follow any on-screen prompts, which may include acknowledging that the channel is not certified by Roku.
- Confirm and Update: The channel will be added to your Roku account and should appear on your Roku device shortly. Again, a manual system update (Settings > System > System update > Check now) can sometimes speed up the process.
It’s important to exercise caution with private channels, as they are not vetted by Roku and may sometimes be unstable, contain inappropriate content, or even pose minor “Digital Security” risks if sourced from untrustworthy sites. Always ensure you trust the source providing the private channel code.
Troubleshooting Common App Installation Issues
Even with Roku’s user-friendly design, you might occasionally encounter hiccups during app installation or while using an app. Here are some common problems and their solutions:
- Channel Not Appearing After Installation:
- Wait a Few Minutes: Sometimes it takes a moment for the channel to sync.
- Check Roku Account: Ensure you’re logged into the correct Roku account on your device and the website/app.
- Force Update: Go to
Settings > System > System update > Check nowon your Roku device. - Reboot Roku: A simple restart (Settings > System > Power > System restart or unplugging the device for 10 seconds) often resolves minor glitches.
- App Freezing or Crashing:
- Restart the App: Go back to the Roku home screen and relaunch the app.
- Remove and Re-add: Delete the problematic channel (see below) and then reinstall it. This often fixes corrupted installations.
- Clear Cache (Limited Option): Roku devices don’t have a direct “clear cache” button for individual apps like smartphones. Removing and re-adding the app is the closest equivalent.
- Check Internet Connection: Ensure your Wi-Fi is stable and strong. Weak signals can cause streaming issues.
- Update Roku OS: Make sure your Roku device’s operating system is up to date (
Settings > System > System update > Check now). App issues can sometimes stem from OS compatibility.
- “Not Available in Your Region” Error: Some apps are geographically restricted due to licensing agreements. A VPN (Virtual Private Network) might circumvent this, but Roku’s built-in support for VPNs is limited, often requiring router-level configuration – a more advanced “Digital Security” and networking topic.
- Payment/Subscription Issues: If an app requires a subscription and isn’t working, verify your payment method and subscription status directly with the service provider (e.g., Netflix, Hulu), not Roku.
Deleting and Moving Roku Channels
Managing your channel lineup is just as important as installing them. Over time, you might install channels you no longer use or want to reorder them for better accessibility.
Deleting a Channel:
- Highlight the Channel: On your Roku home screen, navigate to the channel you wish to remove.
- Press the Star (*) Button: Press the
*(Star) button on your Roku remote. - Select “Remove channel”: From the options menu, choose “Remove channel.”
- Confirm: A confirmation prompt will appear. Select “Remove” again to confirm. The channel and its associated data will be deleted from your Roku device. Note that deleting an app does not cancel any subscriptions you may have to that service; you must do that directly with the service provider.
Moving a Channel:
As described earlier, moving channels is simple:
- Highlight the Channel.
- Press the Star (*) Button.
- Select “Move channel”.
- Use the directional pad to place it where you want, then press “OK.”
Effective channel management contributes to a more streamlined and “Productivity”-focused streaming environment, ensuring your most valued content is always within easy reach.
Maximizing Your Roku Experience: Tips and Best Practices
To truly master your Roku device and ensure you’re getting the most out of your investment, it’s worth delving into some broader tips and best practices. These go beyond mere app installation, touching upon essential settings, security, and future trends that impact your streaming enjoyment, aligning with “Reviews,” “Tutorials,” and “Digital Security” aspects of technology.
Beyond the Basics: Essential Roku Settings
A well-configured Roku can significantly enhance your viewing experience. Don’t just install apps and forget about the settings menu.
- Display Type: Navigate to
Settings > Display type. Ensure your Roku is set to detect your TV’s optimal display resolution (e.g., 4K HDR), especially if you have a modern TV. This ensures you’re getting the best picture quality. - Audio Settings: Under
Settings > Audio, you can configure various audio modes (e.g., Stereo, Dolby Digital, DTS) to match your sound system, providing a richer auditory experience. - Bandwidth Saver: Located under
Settings > Network > Bandwidth saver. This feature can automatically stop streams after a period of inactivity to prevent excessive data usage, which is useful for those with data caps. - Theme and Screen Saver: Personalize your Roku’s look under
Settings > ThemeandSettings > Screen saver. You can choose different visual themes and add custom screen savers. - Guest Mode (Hotel & Dorm Connect): For those with guests or taking their Roku on the go,
Settings > System > Guest Modeallows temporary account access without revealing your personal information or permanent subscriptions. - Remote & Devices: Under
Settings > Remotes & devices, you can pair new remotes, headphones, or even a Roku Voice Remote, expanding the “Gadgets” connected to your system.
Regularly reviewing these settings ensures your Roku performs optimally, aligning with your preferences and the capabilities of your entertainment setup.
Digital Security and Privacy on Roku
In an era of increasing cyber concerns, “Digital Security” and privacy are paramount, even for streaming devices. While Roku is generally secure, there are steps you can take to protect your account and data:
- Strong Roku Account Password: Use a unique, complex password for your Roku account, and consider enabling two-factor authentication if available, just as you would for any important online account.
- PIN for Purchases: Set up a PIN for purchases and channel additions (
Settings > PIN entry for purchases) to prevent unauthorized access, especially if children use the device. This is crucial for managing “Money” spent on content. - Review Connected Accounts: Periodically check which streaming services (Netflix, Hulu, etc.) are linked to your Roku and ensure they are legitimate and still needed. Unlink any unused services.
- Privacy Settings: Roku collects data on your viewing habits to personalize recommendations and serve ads. You can adjust some privacy settings under
Settings > Privacy(e.g., Limit Ad Tracking, Smart TV Experience) to control how your data is used. Be aware of Roku’s privacy policy. - Beware of Phishing: Be cautious of emails or messages pretending to be from Roku asking for account details. Always verify the sender and go directly to the official Roku website if you need to manage your account.
- Secure Wi-Fi: Ensure your home Wi-Fi network is secured with a strong password (WPA2/WPA3 encryption) to prevent unauthorized access to your network and, by extension, your Roku device.
Taking these security measures helps safeguard your personal information and maintain control over your streaming environment, aligning with broader “Digital Security” best practices for all “Gadgets” and “Software” you use.
Future-Proofing Your Roku Entertainment
The world of technology is constantly evolving, and streaming is no exception. Staying abreast of “Technology Trends” can help you make informed decisions about your Roku use:
- Regular Updates: Always allow your Roku device to install system updates. These often include new features, performance improvements, security patches, and support for the latest streaming technologies.
- Hardware Lifespan: While Roku devices are durable, technology advances rapidly. Keep an eye on new Roku models that offer enhanced performance (faster processors, more RAM), support for newer standards (Wi-Fi 6, HDMI 2.1), or advanced picture/audio formats (Dolby Vision, Dolby Atmos) to ensure your streaming experience remains cutting-edge.
- Explore New Content Formats: Roku frequently adds support for new interactive channels or content types. Keep an eye on “New & Notable” sections in the Channel Store to discover innovative ways to consume media.
- Integrate with Smart Home: Modern Roku devices can often integrate with smart home ecosystems like Google Assistant or Amazon Alexa, allowing for voice control over your TV and streaming. This is an exciting “Technology Trend” that enhances “Productivity” through convenience.
By keeping these tips in mind, you not only ensure a smooth and secure streaming experience today but also position yourself to adapt to the exciting developments in digital entertainment tomorrow. Your Roku, armed with the right apps and settings, will continue to be a central hub for all your entertainment needs.
aViewFromTheCave is a participant in the Amazon Services LLC Associates Program, an affiliate advertising program designed to provide a means for sites to earn advertising fees by advertising and linking to Amazon.com. Amazon, the Amazon logo, AmazonSupply, and the AmazonSupply logo are trademarks of Amazon.com, Inc. or its affiliates. As an Amazon Associate we earn affiliate commissions from qualifying purchases.