
In our increasingly connected world, a robust and reliable WiFi signal isn’t just a luxury – it’s a necessity. From streaming 4K movies and engaging in video conferences to smart home automation and online gaming, every aspect of modern life hinges on a strong wireless connection. Yet, many of us still grapple with frustrating WiFi “dead zones,” stuttering video calls, and glacial download speeds in certain areas of our homes or offices. This is where a WiFi extender becomes an invaluable ally.
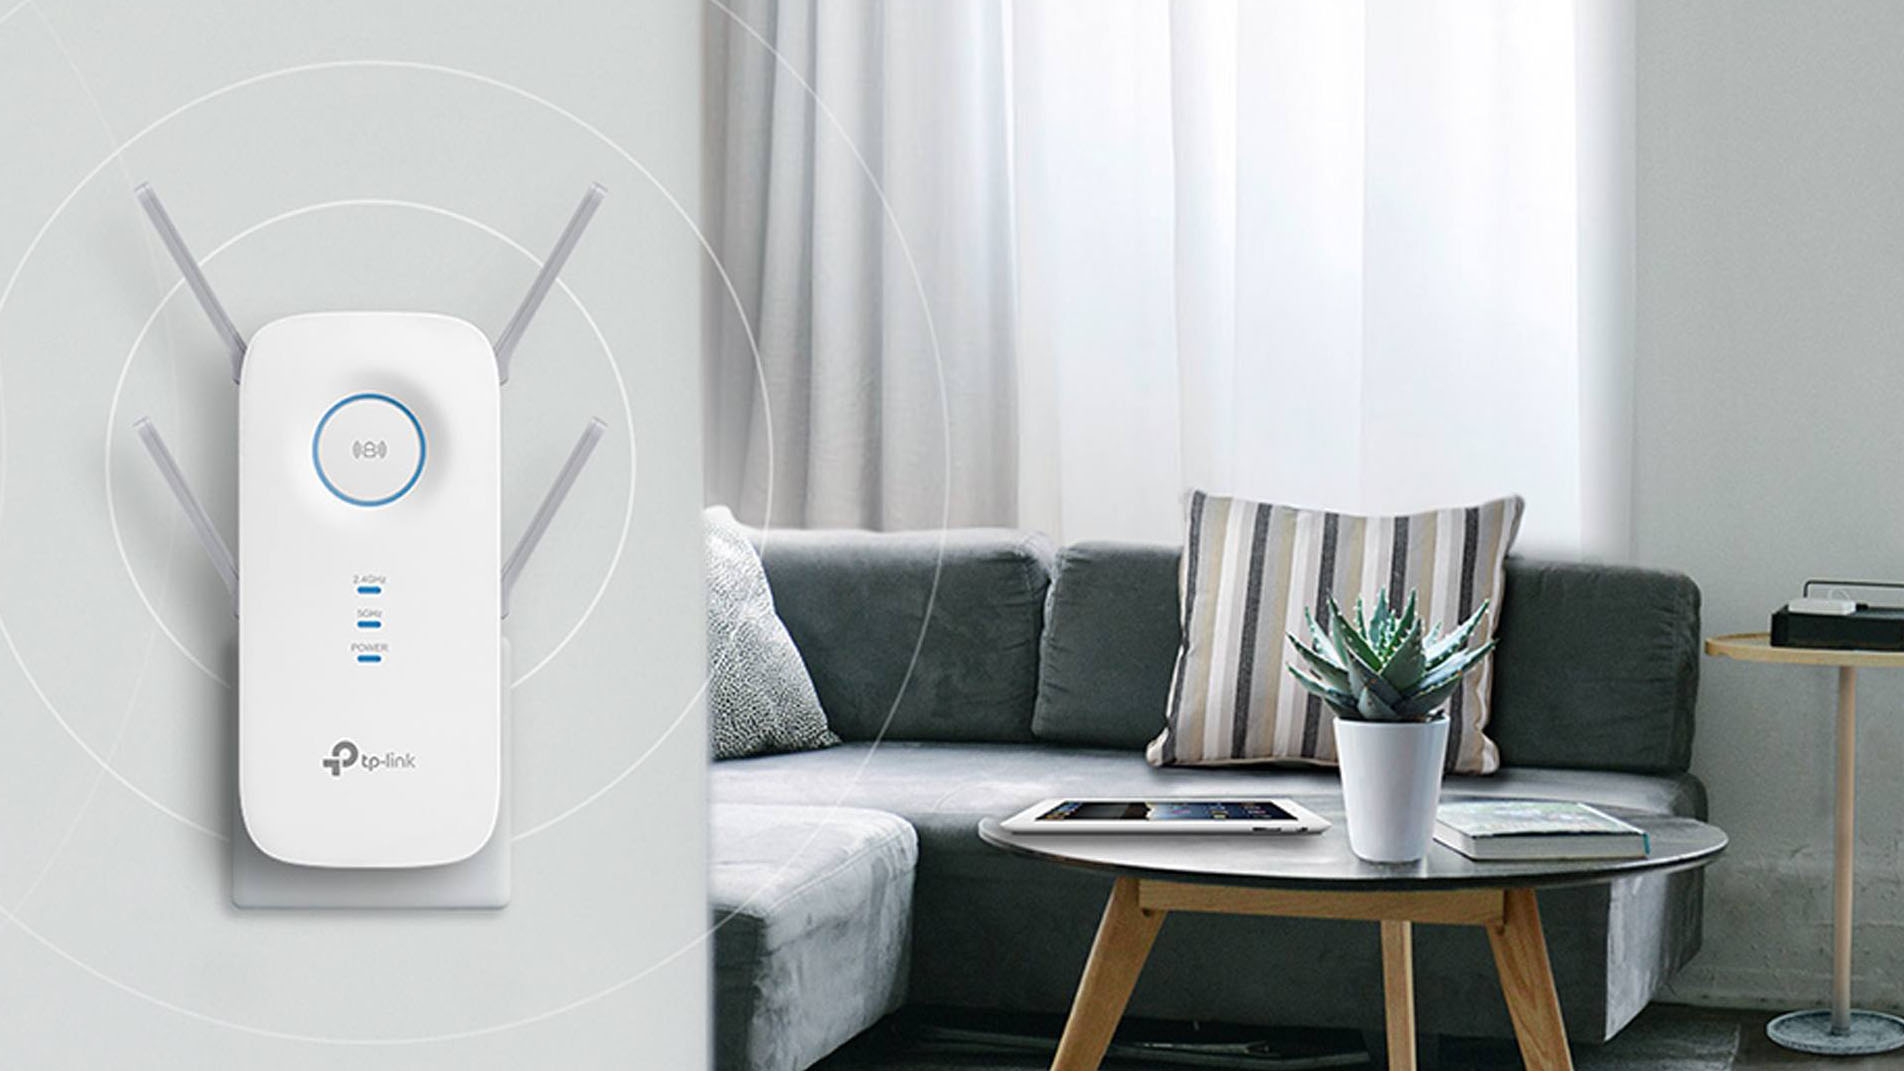
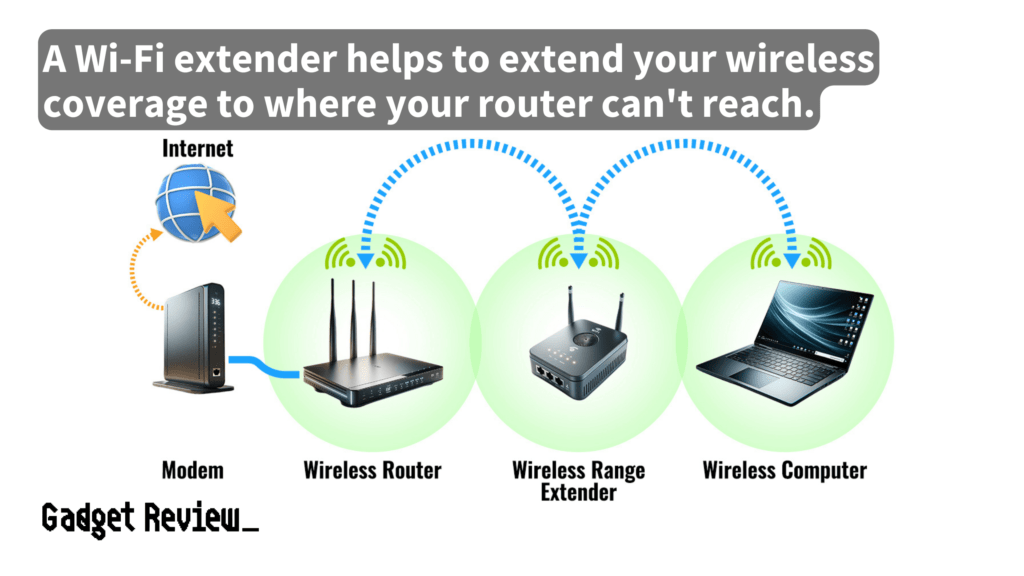
A WiFi extender, also known as a range extender or WiFi booster, is a device designed to expand the coverage of your existing wireless network. It works by picking up the signal from your primary router, amplifying it, and then retransmitting it to provide a stronger, more reliable connection in areas where your router’s signal might be weak or non-existent. Think of it as a digital relay race runner, taking the baton (your WiFi signal) and carrying it further and faster to reach its destination.
This comprehensive guide will walk you through the entire process of installing a WiFi extender, ensuring you can banish those annoying dead zones and enjoy seamless connectivity across your entire property. We’ll cover everything from understanding the technology and preparing for installation to detailed setup methods and post-installation optimization, empowering you to take control of your home network.
The Foundation: Understanding WiFi Extenders and Your Network
Before diving into the installation process, it’s crucial to understand what a WiFi extender does and how it interacts with your existing network. A little foundational knowledge goes a long way in ensuring a smooth setup and optimal performance.
What is a WiFi Extender and Why Do You Need One?
At its core, a WiFi extender is a bridge. It bridges the gap between your main router’s signal and devices located far away, or through obstacles like thick walls, multiple floors, or large distances. Your router broadcasts a wireless signal, but this signal weakens over distance and can be absorbed or reflected by various materials and interferences (microwaves, cordless phones, even large metal objects).
You likely need a WiFi extender if you experience any of the following:
- WiFi Dead Zones: Areas in your home or office where the WiFi signal is either non-existent or extremely weak, leading to dropped connections or inability to connect.
- Slow Speeds in Certain Rooms: While your internet speed might be fast near the router, it significantly degrades as you move further away, making tasks like streaming or large file downloads frustratingly slow.
- Frequent Disconnections: Devices constantly lose their WiFi connection, requiring manual reconnection.
- Multiple Devices Competing for Bandwidth: With an increasing number of smart devices, phones, tablets, and computers, your router might be struggling to provide adequate coverage to all of them, especially at the edges of its range.
- Outdoor Coverage Needs: You want to extend your WiFi to a patio, garage, or garden area where the main router’s signal doesn’t reach.
An extender essentially creates a secondary access point, repeating the primary network’s signal, often with a slightly different network name (SSID) or sometimes the same, depending on the model and configuration. This allows your devices to seamlessly switch to the stronger signal provided by the extender, ensuring consistent connectivity.
Types of WiFi Extenders and Optimal Placement
While “WiFi extender” is a common umbrella term, there are a few variations in how these devices work and integrate with your network:
- Traditional Range Extenders (Wireless Repeaters): These are the most common type. They connect wirelessly to your main router, capture the signal, and then rebroadcast it. They are typically plug-and-play devices that you plug into a wall outlet. Their performance can be impacted by the strength of the signal they receive from the main router.
- Powerline Adapters: These utilize your home’s existing electrical wiring to transmit network data. One adapter connects to your router via an Ethernet cable and plugs into a wall outlet. Another adapter plugs into an outlet in the desired “dead zone,” and can then provide an Ethernet port for a wired connection or broadcast its own WiFi signal. They are great for bypassing physical obstacles but are dependent on the quality of your electrical wiring.
- Mesh WiFi Systems: While not strictly extenders, mesh systems are an advanced solution for whole-home WiFi coverage. They consist of multiple units (nodes) that work together as a single, unified network. Each node communicates with the others to create a seamless, self-optimizing network, offering superior performance and coverage compared to traditional extenders, albeit at a higher cost.
For traditional range extenders, optimal placement is paramount. The general rule of thumb is to place the extender roughly halfway between your wireless router and the WiFi dead zone. If it’s too close to the router, it won’t effectively extend the range. If it’s too far, it will receive a weak signal from the router and thus only rebroadcast a weak, slow signal. Look for a location where your device still receives at least 2-3 bars of WiFi signal from the main router.
Also, consider factors like:
- Line of Sight: Try to minimize physical obstructions between the extender and both your router and the devices it needs to serve.
- Away from Interference: Keep the extender away from large metal objects, microwaves, cordless phones, and other electronics that can interfere with wireless signals.
- Power Outlet Accessibility: Extenders need to be plugged into an electrical outlet. Avoid using surge protectors or power strips if possible, as some extenders perform best when plugged directly into a wall socket.
Pre-Installation Checklist: Getting Ready for Seamless Setup
A little preparation can save you a lot of headaches during the installation process. Before you even unbox your new WiFi extender, take a few moments to gather essential information and make strategic decisions.
Essential Preparations Before You Begin
- Locate Your Router’s Information: You’ll need your main WiFi network’s name (SSID) and password. These are usually found on a sticker on the bottom or back of your router. If you’ve changed them, make sure you have the updated credentials.
- Understand Your Extender’s Default Credentials: Your extender will often come with its own default network name, password, and an administration address (an IP address like 192.168.0.254 or a web address like
extender.link). This information is typically printed on a label on the extender itself, in the quick start guide, or on the packaging. - Check for a WPS Button: Many modern routers and extenders feature a WPS (Wi-Fi Protected Setup) button. This button allows for a quick, push-button connection without needing to manually enter passwords. Identify if both your router and extender have this feature, as it can significantly simplify the setup.
- Charge Your Mobile Device (If Using an App): If your extender supports app-based setup, ensure your smartphone or tablet is fully charged and has the necessary app downloaded from your app store (e.g., TP-Link Tether, Netgear Nighthawk).
- Unbox and Inspect: Carefully unbox your extender. Ensure all components are present (extender unit, quick start guide, Ethernet cable if included). Familiarize yourself with the buttons and LED indicators on the device – they often provide crucial feedback during setup.
Choosing the Best Spot for Your Extender
As discussed earlier, optimal placement is key. Here’s a refined approach to selecting the ideal location:
- Start with the “Mid-Point” Principle: Begin by identifying the areas with weak WiFi signal. Then, find a power outlet that’s roughly halfway between your main router and the closest dead zone.
- Test the Signal Strength: Before committing, use your smartphone or a WiFi analyzer app (available for free on app stores) to check the signal strength from your main router at this potential location. You want a signal that is strong enough for the extender to reliably pick up and rebroadcast effectively (typically -50 dBm to -65 dBm is good, or at least 2-3 bars on your phone). If the signal is too weak, move closer to the router. If it’s very strong, you might be too close.
- Avoid Obstacles and Interference: Place the extender in an open area, away from large metal objects (refrigerators, filing cabinets), concrete walls, microwave ovens, cordless phones, and other devices operating on similar frequencies (2.4 GHz).
- Consider Vertical Placement: If you have a multi-story home, try placing the extender on an upper floor, or strategically between floors, to cover both levels more effectively.
- Power Outlet Direct Plug-in: Whenever possible, plug the extender directly into a wall outlet rather than a power strip or extension cord. This minimizes potential power fluctuations or interference that can impact performance.
Step-by-Step Installation Guides: Connecting Your Extender
With preparations complete, you’re ready to connect your WiFi extender. There are typically a few primary methods, and your extender’s specific model might favor one over the others. We’ll cover the most common approaches.
Method 1: The Quick WPS Setup
WPS (Wi-Fi Protected Setup) is by far the simplest and quickest way to connect your extender if both your router and extender support it.

- Power On the Extender: Plug your WiFi extender into an electrical outlet near your main router. The closer, the better for initial setup, as it ensures a strong signal. Wait for the power indicator light on the extender to become stable.
- Press the WPS Button on the Extender: Locate the WPS button on your extender (it might be labeled “WPS,” “Repeater,” or have a WPS icon, which looks like two arrows chasing each other). Press this button. The WPS light on the extender should start blinking. You typically have about two minutes for the next step.
- Press the WPS Button on Your Router: Within two minutes of pressing the extender’s WPS button, locate and press the WPS button on your main WiFi router. The WPS light on your router should also start blinking.
- Wait for Connection: The WPS lights on both devices should blink for a short period (usually 30 seconds to 2 minutes) as they establish a connection. Once they are successfully paired, the WPS light on the extender should turn solid (or turn green/blue, depending on the model), indicating a successful connection to your router. You might also see a “Signal Strength” or “Router” LED illuminate.
- Reposition and Test: Unplug the extender and move it to your optimal location (the mid-point you identified earlier). Plug it back in and wait for it to power on and reconnect. The signal strength indicator on the extender should show a good connection (typically 2-3 bars or a green/blue light). Connect a device (phone, laptop) to the extender’s network (it usually uses the same name as your main WiFi or appends “EXT” or “R” to it) and test the internet speed and connectivity.
Troubleshooting WPS: If the WPS setup fails, ensure both devices have WPS enabled, they are close enough for initial pairing, and you’re pressing the buttons within the time limit. If it still doesn’t work, proceed to the web browser method.
Method 2: Detailed Web Browser Configuration
This method offers more control and is universally compatible with most WiFi extenders. It involves connecting directly to the extender’s own temporary network and configuring it through a web interface.
- Power On the Extender: Plug the extender into an outlet near your main router for initial setup. Wait for the power indicator light to become stable.
- Connect to the Extender’s Default Network:
- On your computer, smartphone, or tablet, open your WiFi settings.
- Look for a new WiFi network broadcast by the extender. It might be named something like “TP-LinkExtender,” “NetgearExt,” “Linksys_Setup,” or similar, often without a password.
- Connect to this network. If it requires a password, check the extender’s label or manual for the default password.
- Access the Extender’s Setup Page:
- Open a web browser (Chrome, Firefox, Edge, Safari).
- In the address bar, type the extender’s default setup IP address or web address. This is typically found on the extender’s label or in the quick start guide (e.g.,
192.168.0.254,192.168.1.254,tplinkrepeater.net,mywifiext.net). - Press Enter.
- Log In: You’ll likely be prompted to create an admin username and password (for first-time setup) or enter the default admin credentials (also found on the label or manual). It’s highly recommended to change the default admin password for security reasons.
- Follow the Setup Wizard:
- Most extenders will launch a “Quick Setup Wizard” or “Installation Assistant.”
- The wizard will scan for available WiFi networks. Select your main home WiFi network (SSID) from the list.
- Enter the password for your main WiFi network.
- Configure the Extender’s Network Name (SSID): You’ll usually have two options:
- Keep the same SSID: The extender will use the same network name as your main router. Your devices will automatically roam between the router and extender without needing to switch networks manually. This is generally recommended for a seamless experience, but some older devices might struggle with it.
- Create a new SSID: The extender will broadcast its own unique network name (e.g., “MyHomeWiFi_EXT”). You will manually connect devices to this network when in the extended coverage area. This provides clarity on which network you’re connected to.
- Set a Password for the Extended Network: If you chose a new SSID, you’ll set a new password. If you kept the same SSID, the extender will typically use your main router’s password.
- Review and Apply Settings: Double-check all your configurations and click “Apply,” “Save,” or “Finish.” The extender will then reboot.
- Reposition and Test: Once the extender reboots and the indicator lights show a successful connection (e.g., solid green signal light), unplug it and move it to your chosen optimal location. Plug it back in and wait for it to establish a connection. Then, connect a device to the extended network (either your main SSID or the new “_EXT” SSID) and verify internet access and speed.
Method 3: App-Based Installation (If Applicable)
Many newer extenders, especially from major brands like TP-Link, Netgear, and Linksys, offer convenient app-based setup. This streamlines the process using your smartphone or tablet.
- Download the App: Search for the official app for your extender brand (e.g., TP-Link Tether, Netgear Nighthawk, Linksys Connect) in your device’s app store. Download and install it.
- Power On and Connect: Plug in your extender near your router. Open the app and create an account or log in if prompted. The app will usually guide you to connect your phone/tablet to the extender’s default WiFi network (similar to step 2 of the web browser method).
- Follow In-App Instructions: The app will then walk you through a simple, intuitive setup wizard. This typically involves:
- Discovering your extender.
- Selecting your main WiFi network from a list.
- Entering your main WiFi password.
- Configuring the extended network’s name and password (usually defaulting to _EXT or allowing you to merge with the main SSID).
- Applying settings.
- Reposition and Test: Once the app confirms successful setup, unplug the extender, move it to its final optimal location, plug it back in, and test your extended network’s performance. The app often provides tools to help you find the best placement based on signal strength.
Post-Installation Optimization and Troubleshooting
Installing your extender is the first step; optimizing its performance and knowing how to troubleshoot common issues ensures you get the most out of your investment.
Verifying Your Connection and Fine-Tuning Placement
After installation, it’s crucial to confirm that your extender is working as intended:
- Check Extender Indicator Lights: Refer to your extender’s manual to understand what each LED light indicates. Typically, a solid green or blue “Signal” or “Router” light means a strong connection to your main router. An orange or red light often signifies a weak connection, suggesting the extender is too far from the router.
- Test Speeds and Coverage:
- Go to an area that was previously a dead zone.
- Connect your device to the extended network (or your main SSID if you merged them).
- Run an internet speed test using a reliable service like Speedtest.net or Fast.com. Compare these speeds to what you get near your main router. While an extender will generally have slightly lower speeds due to the nature of repeating signals, it should still provide a significant improvement over no signal or a very weak one.
- Walk around your extended coverage area to ensure consistent connectivity.
- Adjust Placement if Necessary: If you’re still experiencing weak signals or slow speeds, consider micro-adjustments to your extender’s placement. Even a few feet in one direction or a slightly different angle can make a difference. Use the extender’s signal indicator lights or your WiFi analyzer app to help you find the sweet spot. Sometimes, moving it slightly closer to the router, or higher up, can improve performance.
Common Issues and How to Solve Them
Even with careful setup, you might encounter some common problems. Here’s how to address them:
- Extender Won’t Connect to Router:
- Check distance: Is the extender too far from the router? Move it closer for initial setup, then reposition.
- Incorrect Password: Did you enter the correct password for your main WiFi network during setup? Double-check.
- WPS Timeout: If using WPS, ensure you press both buttons within the allowed time frame.
- Router Settings: Some routers have security features (like MAC filtering) that might block new devices. Temporarily disable them during setup, then re-enable and add the extender’s MAC address to the whitelist.
- Reset Extender: Perform a factory reset on the extender (usually a small button you hold for 10-15 seconds) and try the setup again.
- Connected to Extender, But No Internet:
- Router Internet Connection: Verify your main router has an active internet connection.
- Extender-Router Link: Check the extender’s indicator lights to ensure it’s successfully connected to the router. If not, re-run the setup process.
- IP Conflicts: In rare cases, the extender might assign an IP address that conflicts with your router. Resetting both the router and extender can sometimes resolve this, or ensure the extender is set to obtain an IP address automatically (DHCP).
- Slow Speeds Even with Extender:
- Weak Signal to Extender: Your extender might be placed too far from the router and receiving a weak signal to begin with. Reposition it closer to the router.
- Interference: Ensure the extender is not near common sources of interference.
- Bandwidth Halving: Traditional single-band extenders often halve the available bandwidth because they use the same radio to receive and transmit. If your extender is dual-band, ensure your devices are connecting to the appropriate band (5 GHz for higher speeds, 2.4 GHz for longer range).
- Network Congestion: If you have many devices, consider if your internet plan or main router is the bottleneck.
- Extender Keeps Disconnecting:
- Firmware: Ensure your extender’s firmware is up to date (see next section).
- Overheating: Ensure the extender has proper ventilation and isn’t covered.
- Power Issues: Try plugging it into a different wall outlet directly.
Maximizing Your Extended Network: Advanced Tips and Security
Once your WiFi extender is up and running, there are additional steps you can take to enhance its performance, security, and longevity.
Firmware Updates and Secure Network Management
Keeping your network devices up-to-date is crucial for performance, stability, and security.
- Update Extender Firmware:
- Periodically check the manufacturer’s website for firmware updates for your specific extender model.
- Firmware updates often include performance improvements, bug fixes, and critical security patches.
- Typically, you’ll download the firmware file, log into your extender’s web administration page, and navigate to a “Firmware Update” or “System Tools” section to upload and install it. Always follow the manufacturer’s instructions carefully to avoid bricking your device.
- Change Default Admin Credentials: During setup, you likely set or were prompted to change the default username and password for logging into the extender’s web interface. If you haven’t, do so immediately. Default credentials are a major security vulnerability. Use a strong, unique password.
- Use Strong WiFi Passwords: Ensure both your main WiFi network and the extended network (if it has a separate SSID) use strong, WPA2/WPA3 encrypted passwords. Avoid easily guessable passwords.
- Consider Unique SSID for Troubleshooting: While merging SSIDs (Smart Connect, OneMesh, etc.) is convenient, having a distinct SSID for your extender (e.g., “MyHomeWiFi_EXT”) can sometimes simplify troubleshooting. If you experience issues, you’ll know precisely whether you’re connected to the router or the extender.
- Disable Unused Features: If your extender has features you don’t use (like a guest network if you only need the main extension), disabling them can sometimes free up resources and slightly improve performance.
When an Extender Isn’t Enough: Exploring Alternatives
While WiFi extenders are excellent for many scenarios, they are not a magic bullet for all WiFi problems. There are inherent limitations due to the way they repeat signals, which can sometimes lead to reduced bandwidth or increased latency. If you find your extender isn’t fully solving your connectivity woes, it might be time to consider more robust solutions:
- Upgrade Your Router: An older or low-end router might be the primary bottleneck. Investing in a newer, more powerful router with better range, faster speeds (e.g., WiFi 6 or 6E), and advanced features can sometimes negate the need for an extender entirely.
- Invest in a Mesh WiFi System: As mentioned earlier, Mesh WiFi systems are designed for seamless whole-home coverage. They consist of multiple nodes that work together as a single, unified network, providing consistent speeds and intelligent device roaming. While more expensive than a single extender, they offer a superior user experience for larger homes or those with very demanding network needs.
- Consider Powerline Adapters with WiFi: If your home has good electrical wiring but thick walls or multiple floors impede wireless signals, a powerline adapter with built-in WiFi might be a better choice. They bypass wireless interference by using your electrical circuits for data transmission.
- Wired Backhaul: Some advanced extenders and most mesh systems support “wired backhaul,” meaning the extender/node can connect to the main router via an Ethernet cable. This dedicates the wireless connection for your devices, offering significantly better performance as the extender isn’t simultaneously receiving and transmitting wirelessly. If you can run an Ethernet cable to your dead zone, this is often the best solution.
Ultimately, the goal is to create a seamless and efficient home network that supports all your digital activities. By understanding your options and carefully evaluating your needs, you can choose the right solution to keep every corner of your space connected.
With this guide, you now possess the knowledge and steps to confidently install and optimize your WiFi extender, turning those frustrating dead zones into areas of uninterrupted connectivity. Enjoy a faster, more reliable internet experience throughout your entire home or office!
aViewFromTheCave is a participant in the Amazon Services LLC Associates Program, an affiliate advertising program designed to provide a means for sites to earn advertising fees by advertising and linking to Amazon.com. Amazon, the Amazon logo, AmazonSupply, and the AmazonSupply logo are trademarks of Amazon.com, Inc. or its affiliates. As an Amazon Associate we earn affiliate commissions from qualifying purchases.