
In an increasingly interconnected world, where digital threats loom large and online privacy is constantly under siege, securing your internet connection is paramount. While individual VPN applications offer device-specific protection, installing a Virtual Private Network (VPN) directly on your router takes your digital security to an entirely new level. This comprehensive guide will walk you through the why and how, ensuring your entire home or office network is shielded, protecting every connected device automatically.
This is more than just a tech tutorial; it’s an investment in your digital freedom, privacy, and peace of mind, aligning perfectly with the core principles of robust digital security and efficient tech management that are central to our discussions on technology trends and productivity.
Understanding the Power of a Router-Level VPN
Before diving into the technicalities, it’s crucial to grasp why a router-level VPN is not just a convenience but a strategic move for anyone serious about their online presence, whether for personal use, professional productivity, or safeguarding sensitive financial information.
What is a VPN and Why Install it on Your Router?
A Virtual Private Network (VPN) creates a secure, encrypted tunnel over a public network, allowing you to browse the internet anonymously and securely. It masks your IP address, encrypts your data, and bypasses geo-restrictions, making your online activities private and your data inaccessible to snoopers, ISPs, and cybercriminals.
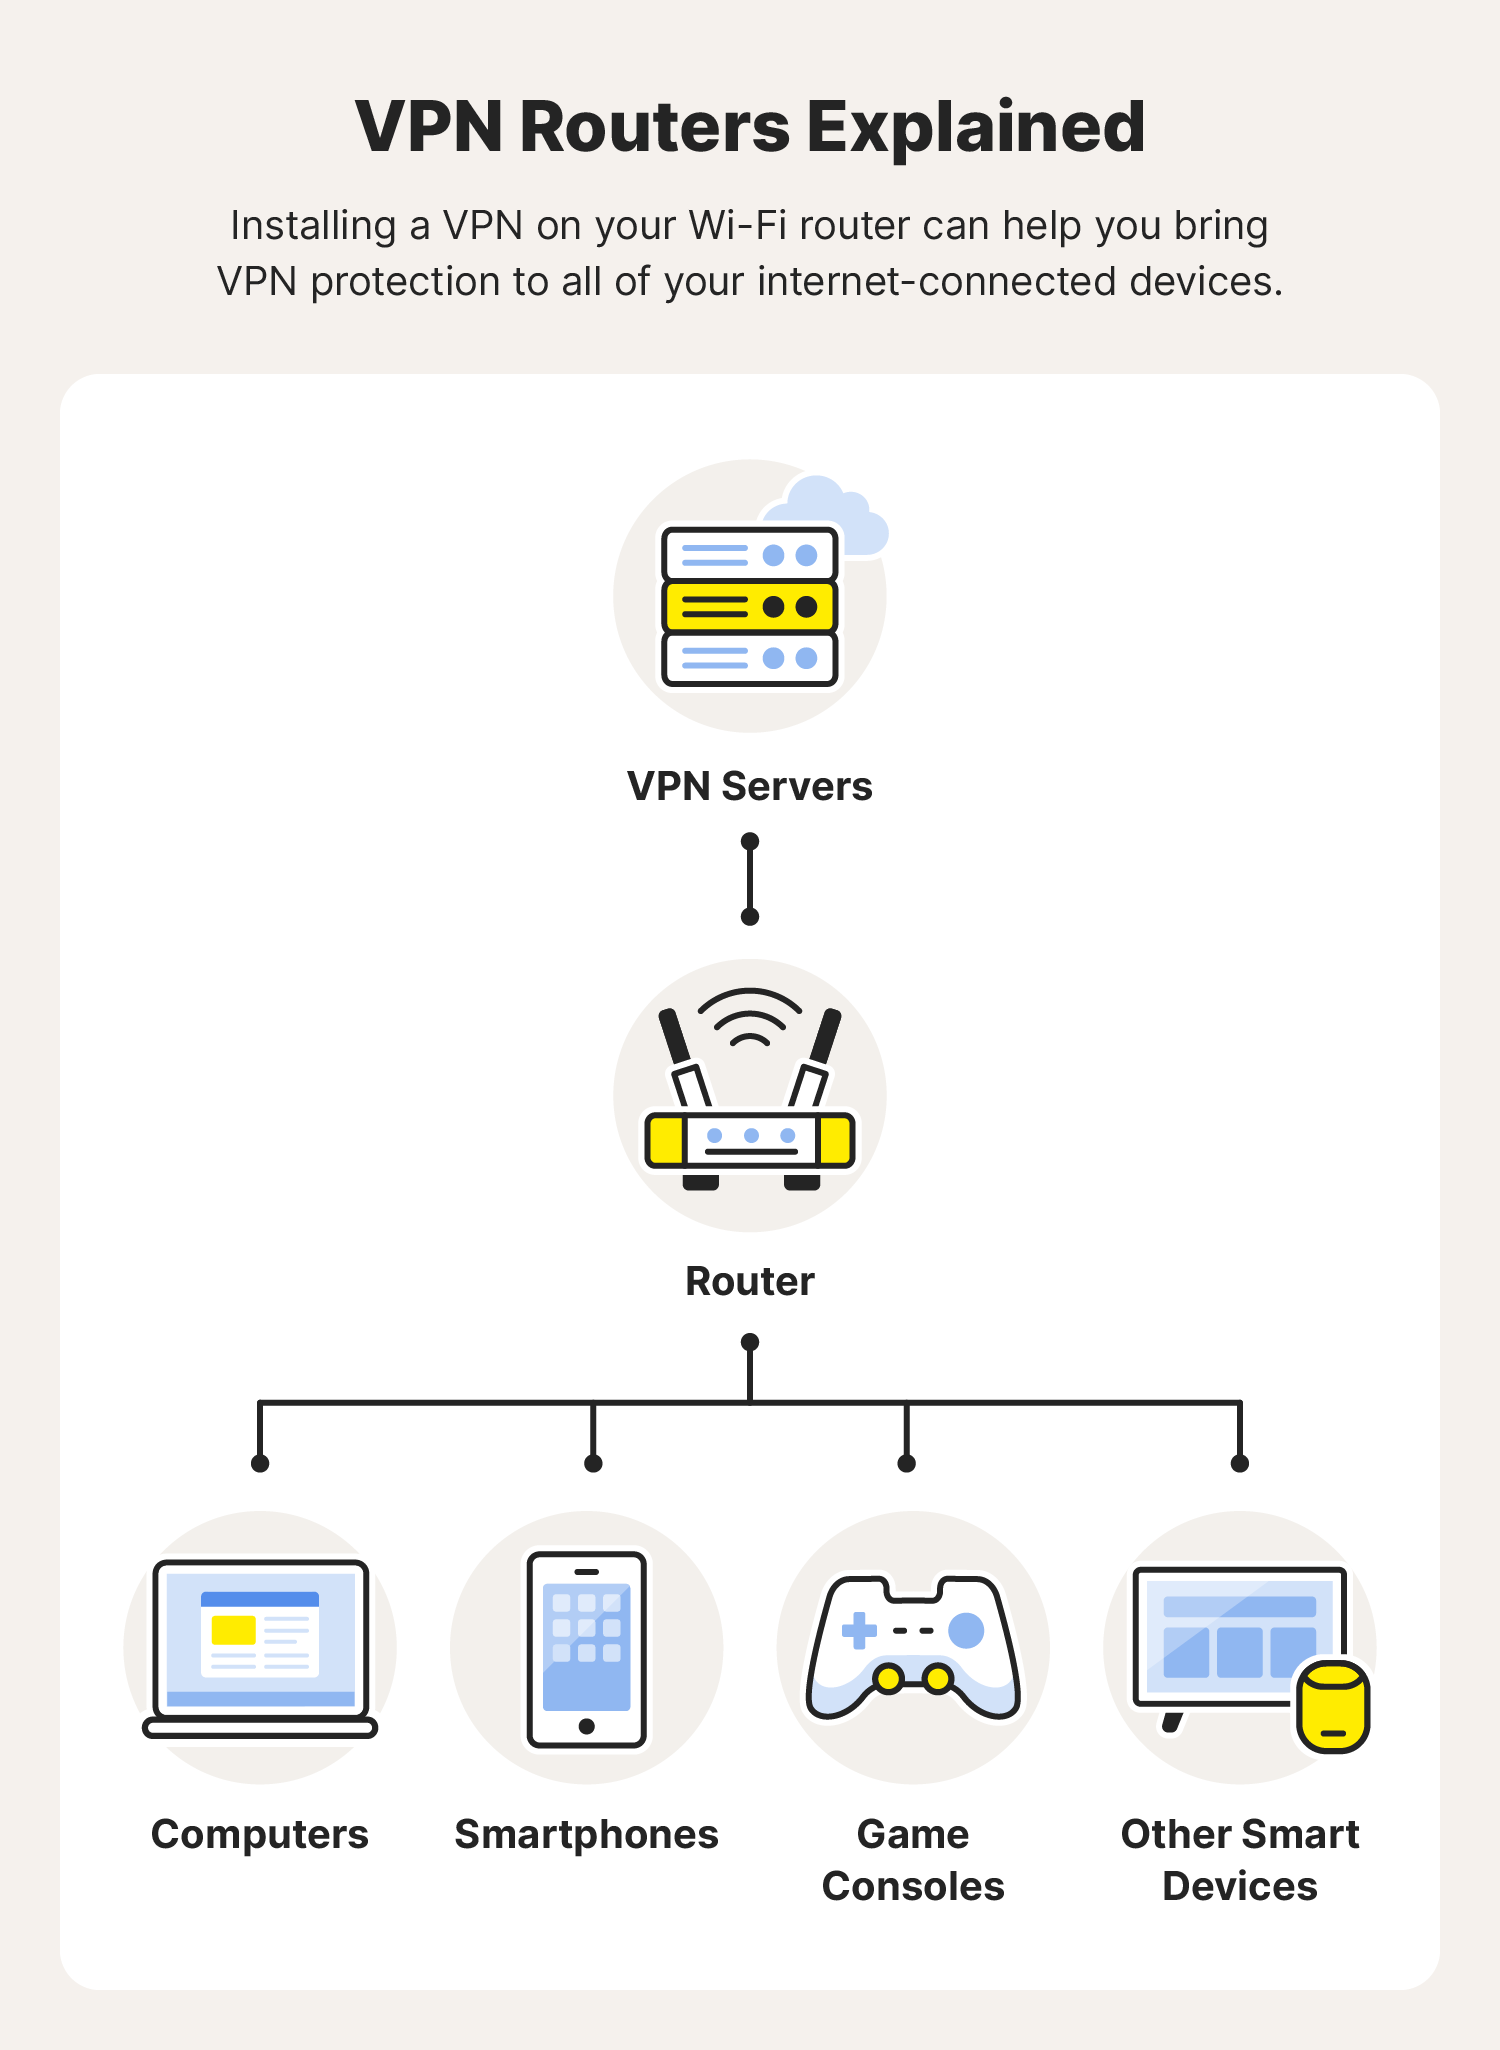
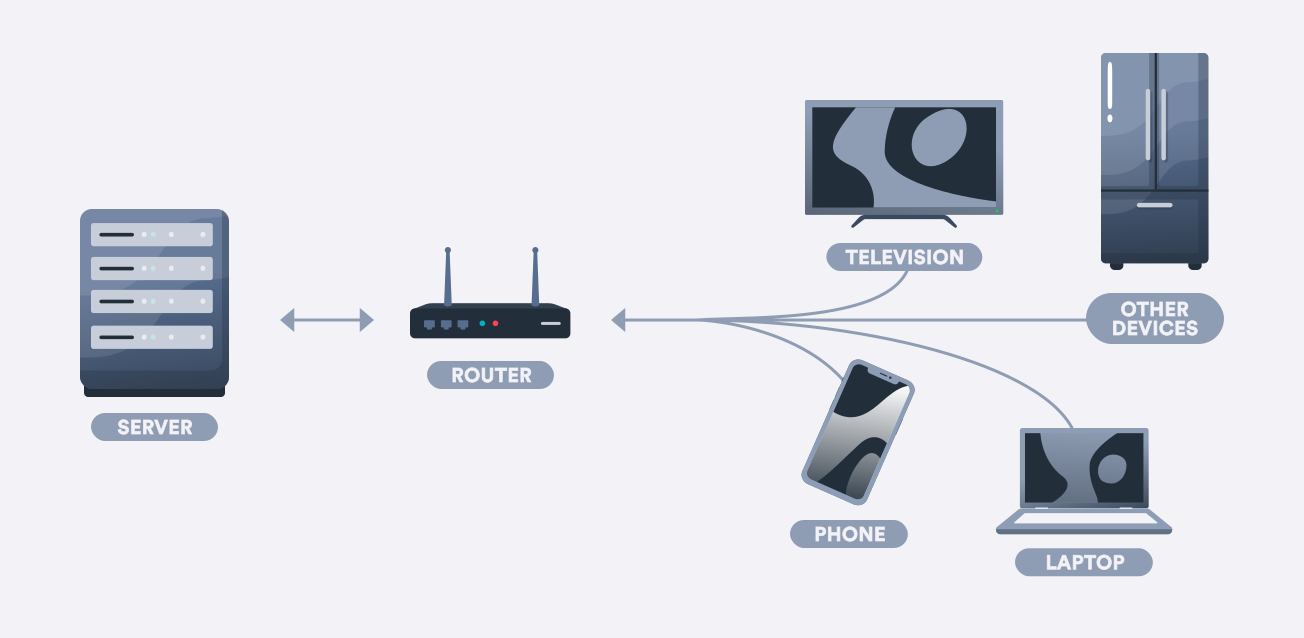
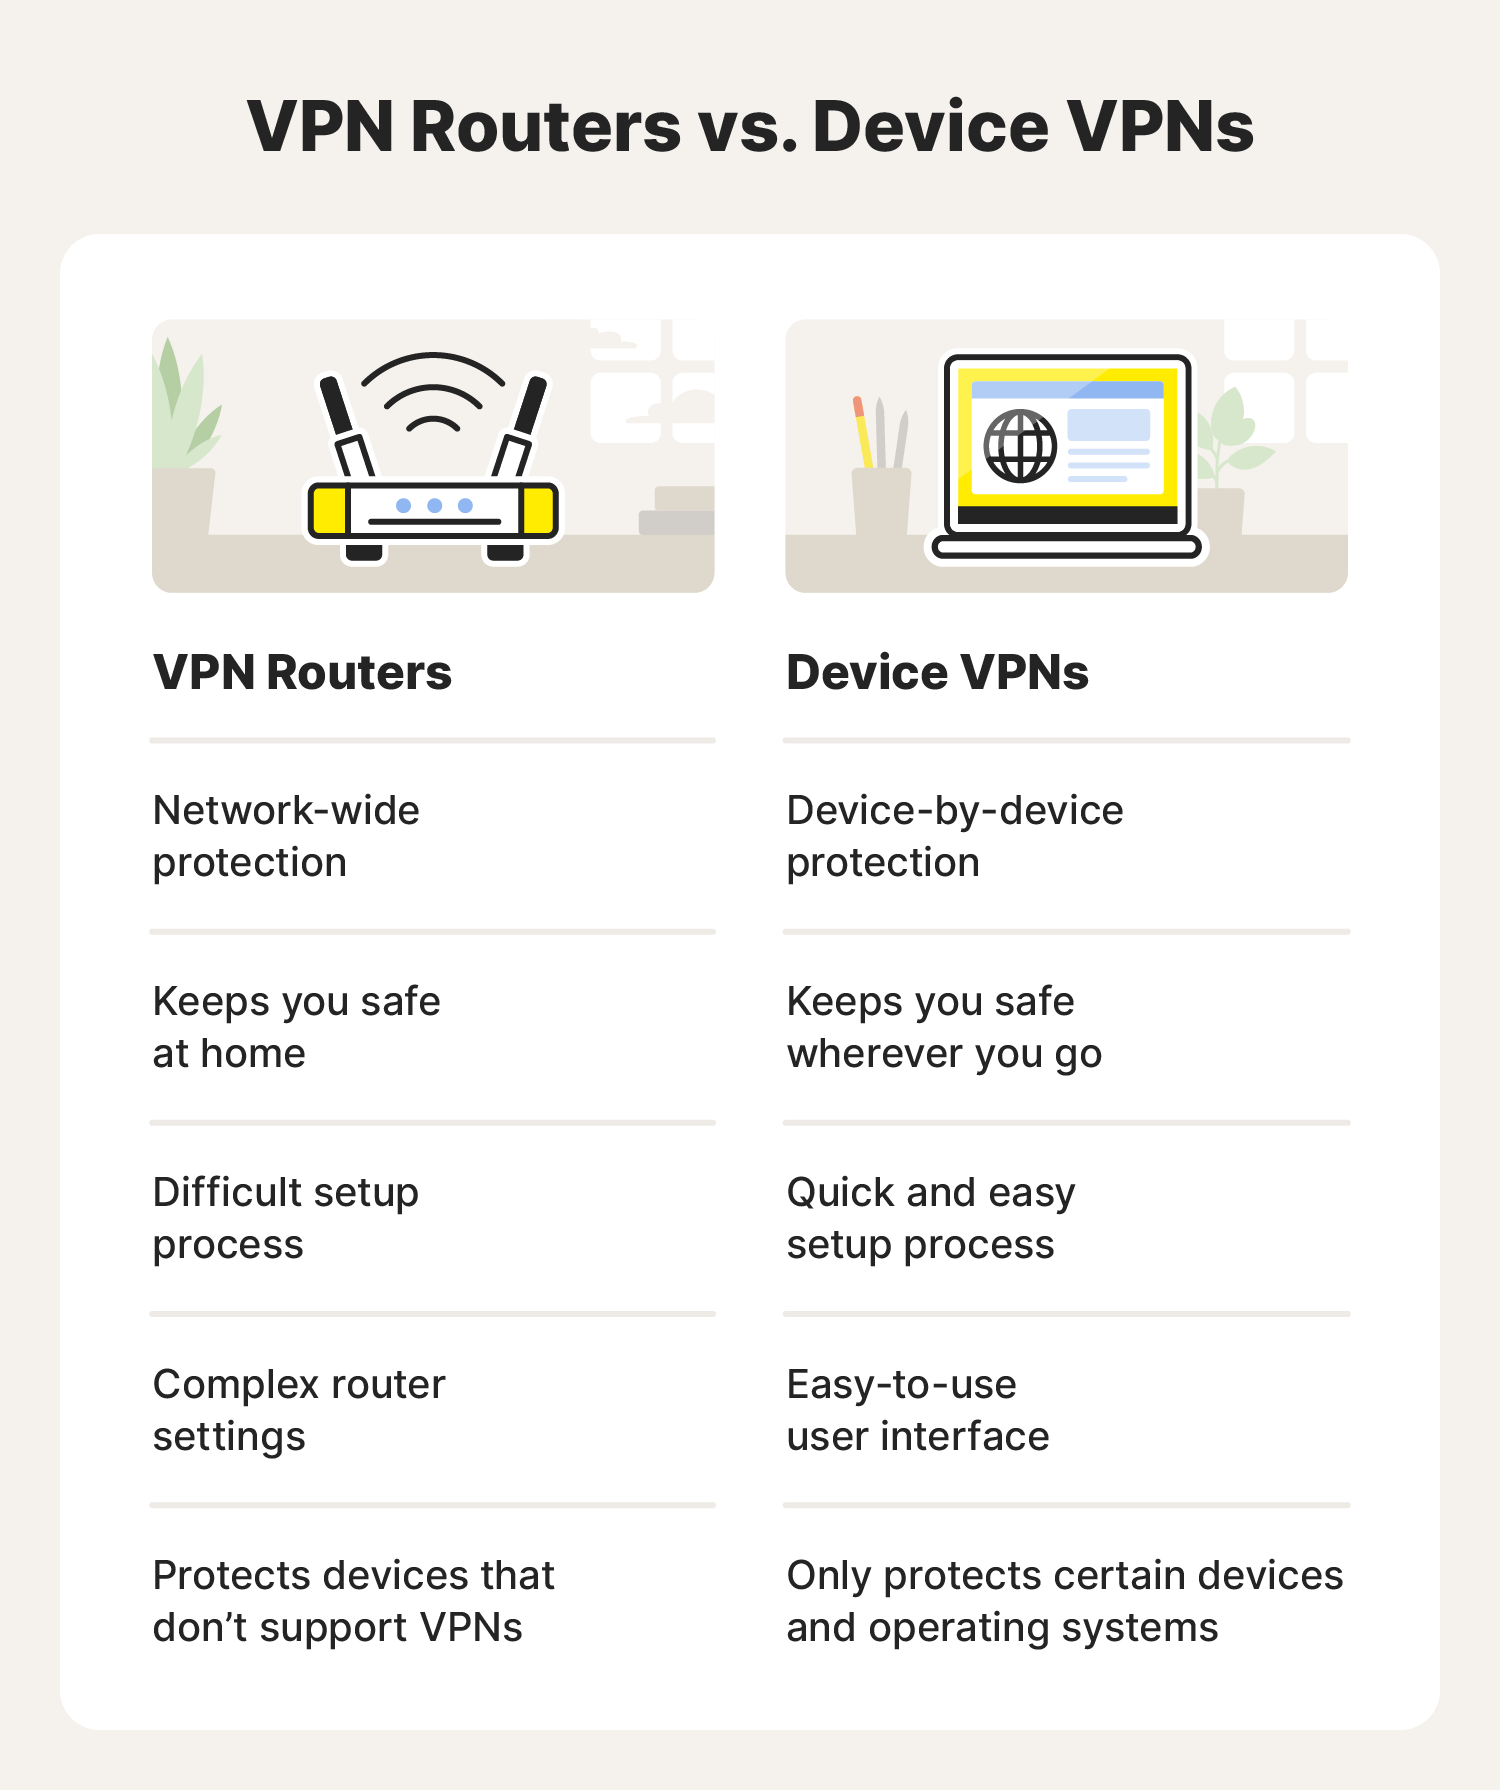
While installing a VPN app on each device (laptop, phone, tablet) offers protection, it can be cumbersome. Each device requires its own client, and some devices, like smart TVs, gaming consoles, or smart home gadgets, often lack native VPN support. This is where a router-level VPN shines. By configuring your VPN directly on your router, every device connected to that network — be it wired or wireless — automatically benefits from the VPN’s protection without needing individual software installations. This creates a blanket of security for your entire digital ecosystem, simplifying management and ensuring no device is left vulnerable.
For professionals engaged in remote work or online income generation, this ubiquitous protection is invaluable. It ensures that sensitive business communications, financial transactions, and client data remain secure across all devices, a critical aspect of maintaining brand integrity and protecting your financial well-being in the digital sphere.
Key Benefits: Enhanced Security, Privacy, and Accessibility
The advantages of a router-based VPN extend far beyond simple convenience:
- Universal Protection: Every device connected to your Wi-Fi network is automatically protected. This includes devices that can’t run VPN software, such as smart TVs, gaming consoles, IoT devices (smart bulbs, thermostats), and even guest devices. This comprehensive coverage drastically reduces your attack surface and enhances overall digital security.
- Always-On Security: Once configured, your router VPN is always active. There’s no need to remember to turn it on or worry about accidental disconnections from individual apps. This ensures continuous protection, crucial for sensitive activities like online banking or accessing work resources.
- Simplified Device Management: Instead of managing multiple VPN subscriptions or installations, you manage just one: the router. This streamlines your digital security setup, saving time and reducing potential configuration errors. For households or small businesses with numerous connected gadgets, this is a significant productivity booster.
- Bypass Geo-Restrictions on All Devices: Access region-locked content (streaming services, websites) on any connected device, irrespective of whether it natively supports VPN software. Enjoy global content on your smart TV or gaming console without extra hassle.
- Enhanced Privacy: By encrypting all network traffic at the source, your router VPN prevents your ISP and other third parties from monitoring your online activities. This is a foundational element of personal finance security and protecting your digital footprint.
- Cost-Effective Security: While some VPN services offer multiple simultaneous connections, a router VPN effectively turns one connection into unlimited connections for all devices on your network, making it a highly cost-effective solution for comprehensive household or office security.
Preparing for Installation: Essential Prerequisites
Successfully installing a VPN on your router requires some preparatory steps. This isn’t a one-size-fits-all process, as router hardware and software (firmware) vary widely. Understanding these prerequisites will save you time and potential headaches down the line.
Is Your Router Compatible?
The most critical factor is your router’s compatibility. Not all routers can run a VPN client natively. There are generally three categories of routers when it comes to VPN support:
- Routers with Native VPN Client Support: Some high-end routers, particularly those from brands like Asus (running AsusWRT), Netgear, or Linksys, come with a built-in VPN client feature in their stock firmware. This is the easiest scenario, as it requires no firmware modifications. You simply configure the VPN settings through the router’s web interface.
- Routers Compatible with Custom Firmware (DD-WRT, OpenWRT, Tomato): A vast number of routers, especially older models or specific newer ones, can have their stock firmware replaced with open-source alternatives like DD-WRT, OpenWRT, or Tomato. These custom firmwares are powerful and almost always include robust VPN client support. This method offers great flexibility but requires technical proficiency and carries a slight risk of “bricking” your router if done incorrectly.
- Incompatible Routers: Many entry-level or ISP-provided routers do not support custom firmware and lack a native VPN client. In these cases, your options are to purchase a new, compatible router or use a pre-flashed VPN router.
How to Check Compatibility:
- Consult your router’s manual or manufacturer’s website: Look for “VPN client” support.
- Check custom firmware databases: Websites for DD-WRT, OpenWRT, and Tomato have extensive lists of supported routers. Search for your specific model number.
Choosing the Right VPN Provider
The effectiveness of your router VPN hinges on the quality of your VPN provider. Not all VPN services are equal, especially when it comes to router compatibility and performance. When making your choice, consider these features:
- Router Support: Your chosen VPN provider must offer configuration files and guides specifically for routers (OpenVPN being the most common protocol for this). Check if they support the firmware you intend to use (e.g., DD-WRT, OpenWRT, AsusWRT).
- Security Protocols: Look for providers supporting OpenVPN, IKEv2, or WireGuard. OpenVPN is generally preferred for routers due to its open-source nature and robust security.
- Server Network and Speed: A large network of servers across many countries offers more options for bypassing geo-restrictions and finding faster connections. Prioritize providers known for high speeds to minimize performance degradation, critical for streaming and online gaming.
- No-Logs Policy: A strict no-logs policy is fundamental for privacy. Ensure the provider doesn’t log your online activities.
- Customer Support: Responsive and knowledgeable customer support is invaluable, especially if you encounter installation issues. Look for 24/7 support via live chat.
- Pricing and Money-Back Guarantee: Compare pricing plans and check for a money-back guarantee, allowing you to test the service risk-free.
- Advanced Features: Some providers offer features like split tunneling (allowing some traffic to bypass the VPN), kill switch (though less critical on a router), and dedicated IP addresses, which can be useful depending on your needs.
Reputable VPN brands like ExpressVPN, NordVPN, Surfshark, and ProtonVPN are often recommended for their router compatibility and strong security features, fitting well within our recommendations for digital security tools.
Gathering Necessary Information and Tools
Once you have a compatible router and a chosen VPN provider, gather the following:
- Router Login Credentials: The username and password for your router’s administration panel (usually
admin/adminor printed on a sticker on the router). - VPN Account Credentials: Your username and password for your VPN service.
- VPN Configuration Files: Your VPN provider will supply
.ovpn(OpenVPN configuration) files, certificates, and keys. Download these from your provider’s website. - Ethernet Cable: For direct connection to your router during configuration, especially when flashing custom firmware.
- Browser: A modern web browser (Chrome, Firefox, Edge) to access your router’s interface.
- Firmware File (if flashing): The specific custom firmware file (e.g., DD-WRT .bin file) for your exact router model.
Step-by-Step Installation Guides for Common Router Setups
The installation process varies significantly based on your router’s capabilities. We’ll cover the most common methods.
Method 1: Flashing Custom Firmware (e.g., DD-WRT/OpenWRT)
This method is for routers that don’t have native VPN client support but are compatible with open-source firmware. Proceed with caution, as incorrect flashing can damage your router.
-
Check Compatibility & Download Firmware:
- Visit the DD-WRT or OpenWRT website and search for your specific router model.
- Download the correct firmware file for your router. Ensure it’s the right version (e.g., “factory-to-ddwrt.bin” for first-time flashing, or “router-name-ddwrt.bin” for upgrades).
- Crucial: Read the installation instructions provided on the firmware website for your specific router model, as steps can differ.
-
Backup Your Router’s Current Configuration:
- Log into your router’s stock firmware (usually by typing its IP address, e.g.,
192.168.1.1or192.168.0.1, into a browser). - Navigate to the “Administration” or “System” section and find an option to “Backup Settings” or “Save Configuration.” This allows you to revert if needed.
- Log into your router’s stock firmware (usually by typing its IP address, e.g.,
-
Reset Your Router to Factory Defaults:
- Perform a 30/30/30 hard reset:
- With the router powered on, press and hold the reset button for 30 seconds.
- While holding the reset button, unplug the power for 30 seconds.
- While still holding the reset button, plug the power back in and hold for another 30 seconds.
- Release the button and wait for the router to fully boot up. This clears out old settings that might conflict with the new firmware.
- Perform a 30/30/30 hard reset:
-
Flash the Custom Firmware:
- Connect your computer directly to the router’s LAN port using an Ethernet cable. Avoid Wi-Fi during flashing.
- Log into your router’s stock firmware interface (likely
192.168.1.1). - Go to the “Administration” or “Firmware Upgrade” section.
- Browse and select the downloaded DD-WRT/OpenWRT firmware file.
- Click “Upgrade” or “Apply.”
- DO NOT interrupt the process. Wait for the router to reboot (it might take several minutes).
-
Configure DD-WRT/OpenWRT:
- After reboot, you should be able to access the new firmware interface (often
192.168.1.1). You might be prompted to set a new username and password. - Navigate to Services > VPN.
- Under the “OpenVPN Client” tab, enable “Start OpenVPN Client.”
- Copy and paste the configuration details from your VPN provider’s
.ovpnfile into the respective fields (OpenVPN Config, CA Cert, Public Client Cert, Private Client Key). - Enter your VPN username and password.
- Save and apply settings.
- After reboot, you should be able to access the new firmware interface (often
-
Test the VPN Connection:
- Go to Status > OpenVPN to check the connection status. It should show “Client: CONNECTED.”
- Open a browser on a device connected to your router and visit an IP address checker website (e.g.,
whatismyipaddress.com). Your displayed IP address should be that of your VPN server.
Method 2: Configuring a Router with a Built-in VPN Client (e.g., AsusWRT)
This is the simpler method, as it leverages your router’s existing capabilities.
-
Access Your Router’s Web Interface:
- Connect your computer to the router via Ethernet or Wi-Fi.
- Open a web browser and type your router’s IP address (e.g.,
192.168.1.1orrouter.asus.com). - Log in with your router’s username and password.
-
Locate the VPN Client Section:
- In the router’s administration panel, look for “VPN” or “VPN Client” under the “Advanced Settings” or “Network” section.
- Click on the “VPN Client” tab (if applicable).
-
Add a New VPN Profile:
- Click “Add profile” or “Add new connection.”
- Select the VPN type, usually “OpenVPN.”
- Provide a description for the connection (e.g., “My VPN”).
-
Import/Configure VPN Settings:
- Most modern routers allow you to simply “Import .ovpn file.” Upload the configuration file provided by your VPN service.
- If manual configuration is required, you’ll need to copy and paste details such as:
- Description: Name for your connection.
- VPN Server: The server address (e.g.,
us-nyc.vpnserver.com). - Username and Password: Your VPN service credentials.
- Port: (e.g., 1194 or 443).
- Protocol: (e.g., UDP or TCP).
- CA Certificate: Paste the contents of your VPN provider’s CA certificate file.
- Client Certificate/Key: Paste contents if your provider uses these (less common for consumer VPNs).
- Ensure “DHCP Query” is set to “Strict” if available, to prevent DNS leaks.
-
Connect to the VPN:
- Save the settings.
- On the VPN client list, select your newly created profile and click “Activate” or “Connect.”
- Wait a few moments for the connection to establish.
-
Test the VPN Connection:
- On the VPN client status page, verify that the connection status is “Connected.”
- Open a browser on any device connected to your network and visit an IP address checker website (e.g.,
whatismyipaddress.com). Confirm your IP address has changed to that of your VPN server.
Method 3: Using a Pre-Flashed VPN Router
For those who prefer a plug-and-play solution, many reputable VPN providers and third-party vendors offer routers that come pre-flashed with VPN-compatible firmware (like DD-WRT or OpenWRT) and often pre-configured for their service. While more expensive upfront, this option eliminates the technical complexities of flashing and configuration, making it ideal for users prioritizing ease of use and immediate security benefits.
Verifying Your VPN Connection and Troubleshooting
After going through the installation steps, it’s crucial to verify that your VPN is working as intended. If not, don’t worry – there are common issues and solutions.
How to Confirm Your VPN is Working
-
Check IP Address:
- On any device connected to your router’s Wi-Fi or Ethernet, open a web browser.
- Go to a website that displays your public IP address, such as
whatismyipaddress.comoriplocation.net. - The displayed IP address and location should match your chosen VPN server’s location, not your actual physical location. If it shows your actual location, the VPN is not active.
-
DNS Leak Test:
- While on an IP address checker site, also look for a “DNS leak test” feature, or use a dedicated site like
dnsleaktest.com. - Run the extended test. The DNS servers listed should belong to your VPN provider, not your ISP. If you see your ISP’s DNS servers, you have a DNS leak, which compromises your privacy.
- While on an IP address checker site, also look for a “DNS leak test” feature, or use a dedicated site like
-
Check VPN Status in Router Interface:
- Log back into your router’s administration panel (DD-WRT: Status > OpenVPN, AsusWRT: VPN Client tab).
- Confirm that the VPN client shows a “Connected” status. Look for logs that indicate a successful connection.
Common Issues and Their Solutions
-
VPN Not Connecting/Frequent Disconnections:
- Incorrect Credentials: Double-check your VPN username and password in the router settings.
- Incorrect Configuration: Review the
.ovpnfile content you pasted. Even a single missing character or extra space can cause issues. Ensure all certificates and keys are correctly entered. - Firewall Interference: Your router’s firewall or ISP’s firewall might be blocking VPN traffic. Try changing the VPN protocol (e.g., from UDP to TCP) or port (e.g., from 1194 to 443) in your router and VPN settings.
- Server Overload: Try connecting to a different server location from your VPN provider.
- Outdated Firmware: Ensure your custom firmware (DD-WRT, OpenWRT) is up to date, as newer versions often fix bugs.
- ISP Blocking: Some ISPs might try to block VPN traffic. Using obfuscated servers or specific ports (like 443 TCP, which mimics HTTPS traffic) can sometimes circumvent this.
-
Slow VPN Speeds:
- Server Distance: Connecting to a server far away will inherently be slower. Choose a server closer to your physical location.
- Server Load: High-traffic VPN servers can be slow. Switch to a less congested server.
- Encryption Overhead: VPN encryption adds overhead. While unavoidable, some protocols are faster than others (e.g., WireGuard is generally faster than OpenVPN).
- Router CPU: Older or less powerful routers might struggle with the encryption demands of a VPN, leading to slower speeds. Consider upgrading your router if this is a persistent issue.
- ISP Throttling: Some ISPs might throttle VPN traffic. Trying different ports or protocols can help.
-
DNS Leaks:
- Ensure your router is configured to use your VPN provider’s DNS servers or generic secure DNS (like Cloudflare 1.1.1.1 or Google 8.8.8.8) and not your ISP’s DNS.
- In DD-WRT, under Setup > Basic Setup, ensure “Use DNSMasq for DHCP” and “Use DNSMasq for DNS” are enabled. Also, under Services > Services, ensure “Strict Order for DNS Resolution” is enabled.
- Your VPN provider’s guide will often have specific instructions to prevent DNS leaks on routers.
-
Accessing Local Network Devices (e.g., printer, NAS):
- With a full router VPN, all traffic goes through the VPN. This might prevent direct access to local devices.
- If your router firmware supports it, consider configuring Split Tunneling. This allows you to specify which devices or IP addresses bypass the VPN, enabling local network access while securing internet traffic.
Maximizing Your Router VPN Experience
Installing a VPN on your router is a significant step, but you can further optimize your setup for performance, flexibility, and security.
Advanced Configurations and Split Tunneling
- Split Tunneling: This feature (if supported by your router’s firmware or VPN provider) allows you to selectively route certain traffic or devices around the VPN. For example, you could route your streaming devices through the VPN to access geo-restricted content, while your work laptop connects directly to your local ISP for maximum speed, or your printer remains accessible on the local network. This offers granular control and maximizes both security and performance.
- Multiple VPN Connections: Some advanced firmwares (like OpenWRT) allow you to configure multiple VPN client profiles. You could then set up policies to route different devices or users through different VPN servers or even different VPN providers, offering unparalleled flexibility.
- VPN Kill Switch (Software-based): While less common as a router feature, some custom firmwares might offer a robust “kill switch” functionality at the router level. This ensures that if the VPN connection drops, all internet traffic from the router is blocked, preventing accidental data leaks. For most router VPNs, if the VPN drops, traffic reverts to your ISP.
Considerations for Performance and Maintenance
- Router Hardware: The performance of your router VPN is heavily dependent on your router’s processor. Encrypting and decrypting all network traffic is CPU-intensive. If you experience significant speed drops, especially on a slower router, consider upgrading to a more powerful model with a high-performance CPU designed for VPN processing.
- Firmware Updates: Regularly check for updates for your custom firmware (DD-WRT, OpenWRT) or your router’s stock firmware. Updates often bring security patches, bug fixes, and performance improvements.
- VPN Server Selection: Periodically experiment with different VPN server locations provided by your service. Server load changes, and a server that was fast last week might be slow today.
- Monitoring: Keep an eye on your router’s CPU and memory usage (if your firmware provides this). High utilization might indicate a bottleneck affecting performance.
Conclusion
Installing a VPN on your router is arguably the most effective way to secure your entire digital environment. It moves beyond individual device protection to create a unified, always-on shield for every gadget connected to your home or office network. From safeguarding personal data and financial transactions to ensuring seamless access to global content and maintaining a productive, secure remote work setup, a router-level VPN is a critical component of modern digital security.
While the process can seem daunting, especially with custom firmware flashing, the benefits far outweigh the initial effort. By following this guide, choosing a reputable VPN provider, and exercising patience, you’ll establish a robust defense against online threats, ensuring your digital life remains private, secure, and unrestricted. Embrace this powerful tech solution and take control of your online security today!
aViewFromTheCave is a participant in the Amazon Services LLC Associates Program, an affiliate advertising program designed to provide a means for sites to earn advertising fees by advertising and linking to Amazon.com. Amazon, the Amazon logo, AmazonSupply, and the AmazonSupply logo are trademarks of Amazon.com, Inc. or its affiliates. As an Amazon Associate we earn affiliate commissions from qualifying purchases.