
In the ever-evolving landscape of personal computing, storage capacity and speed are paramount. Whether you’re a content creator battling massive video files, a gamer seeking lightning-fast load times, or simply someone who enjoys a snappier operating system, upgrading your storage is one of the most impactful and accessible enhancements you can make. Among the most popular and effective upgrades is installing a second Solid State Drive (SSD). This guide will walk you through the entire process, from understanding the benefits and choosing the right SSD to the physical installation and initial setup.
Why Install a Second SSD?
Before diving into the “how,” let’s briefly touch upon the “why.” The benefits of adding a second SSD are multifaceted and directly align with the core tenets of enhancing your technological setup.
Performance Boost
SSDs, by their very nature, offer a dramatic improvement in read and write speeds compared to traditional Hard Disk Drives (HDDs). Installing a second SSD can provide several advantages:
- Faster Boot Times: Your operating system, installed on an SSD, will load in mere seconds.
- Quicker Application Loading: Programs, especially large and resource-intensive ones like video editors, CAD software, or AAA games, will launch significantly faster.
- Improved File Transfer Speeds: Moving large files between drives becomes a breeze, saving you valuable time.
- Enhanced Multitasking: With faster access to data, your system can handle multiple demanding applications simultaneously with greater fluidity.
Increased Storage Capacity
While modern SSDs are becoming more affordable, they still often command a higher price per gigabyte than HDDs. However, by adding a second drive, you can exponentially increase your total storage space without needing to replace your primary, potentially larger, or more expensive SSD. This is particularly useful for:
- Game Libraries: Modern games are notoriously large. A dedicated SSD for your game library ensures quick installation and optimal performance.
- Media Collections: Storing your vast collections of photos, videos, and music on a separate drive keeps your primary drive lean and your media readily accessible.
- Project Files: For professionals, storing active project files on a fast SSD can streamline workflows and prevent bottlenecks.
Dedicated Storage for Specific Tasks
A second SSD can serve a specific purpose, further optimizing your system’s performance and organization:
- Operating System and Applications Drive: Many users opt to install their OS and frequently used applications on their primary SSD for maximum speed.
- Game Drive: As mentioned, a dedicated drive for games significantly reduces loading times.
- Scratch Disk for Creative Software: Applications like Adobe Photoshop, Premiere Pro, or After Effects often use a “scratch disk” for temporary data. An SSD designated as a scratch disk can drastically improve performance in these demanding applications.
- Storage for Large Files: If you frequently work with large files, such as raw video footage or massive datasets, a second SSD can provide ample, fast storage.
Choosing the Right SSD
With the decision made, the next crucial step is selecting the correct SSD for your needs. The market offers a variety of types and interfaces, each with its own advantages.
Types of SSDs
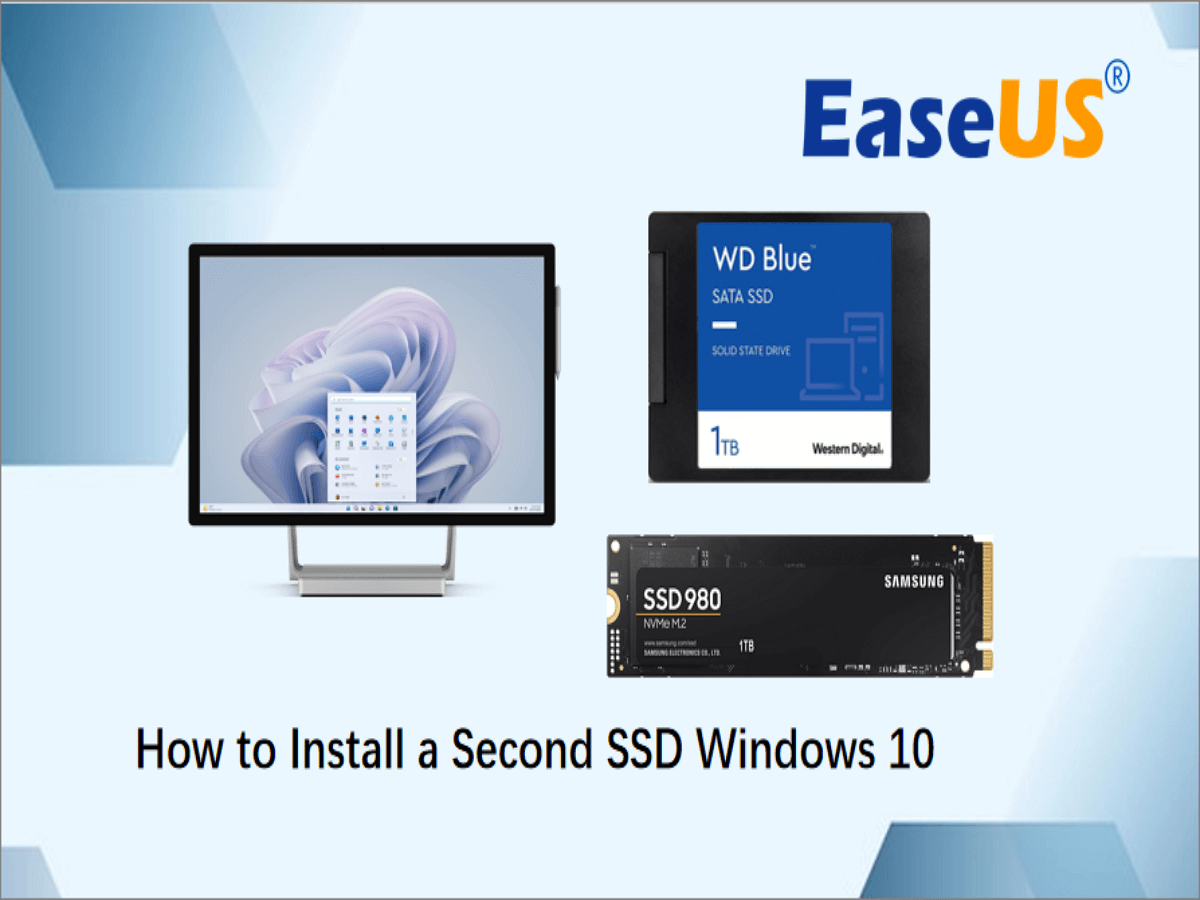
- SATA SSDs: These are the most common type of SSD and connect to your motherboard via a SATA cable. They offer a significant speed upgrade over HDDs and are generally the most budget-friendly option. If your motherboard doesn’t have an M.2 slot or you’re looking for a simple and cost-effective upgrade, a SATA SSD is an excellent choice.
- NVMe SSDs: These are the current kings of SSD performance. NVMe (Non-Volatile Memory Express) SSDs connect directly to your motherboard via an M.2 slot using PCIe lanes. This direct connection allows for significantly faster read and write speeds compared to SATA SSDs, making them ideal for demanding workloads. NVMe SSDs are often more expensive than SATA SSDs.
Key Factors to Consider
- Capacity: How much storage do you need? Common capacities range from 250GB to 4TB and beyond. Consider your current storage needs and future growth.
- Performance (Read/Write Speeds): For SATA SSDs, speeds are generally around 550MB/s. NVMe SSDs can reach speeds of several thousand MB/s, depending on the generation of PCIe they utilize (e.g., PCIe 3.0, 4.0, 5.0).
- Form Factor:
- 2.5-inch: This is the standard form factor for SATA SSDs, designed to fit into the same bays as 2.5-inch HDDs.
- M.2: This is a small, gumstick-shaped form factor that plugs directly into an M.2 slot on your motherboard. M.2 SSDs can be either SATA or NVMe. Ensure your motherboard has an available M.2 slot and that it supports the type of M.2 SSD you choose (SATA or NVMe).
- Brand and Reliability: Stick to reputable brands known for their quality and reliability (e.g., Samsung, Crucial, Western Digital, Kingston, SK Hynix). Check reviews and warranty information.
- Price: SSD prices have come down significantly, but NVMe drives still command a premium. Balance your budget with your performance needs.
The Installation Process: A Step-by-Step Guide
With your new SSD in hand, it’s time to get your hands dirty. This process requires a bit of caution and attention to detail.
Preparation is Key
Before you open your computer, ensure you have the following:
- Your New SSD: The star of the show!
- Screwdriver Set: You’ll likely need a Phillips head screwdriver, and possibly a smaller one for M.2 drives.
- Anti-Static Wrist Strap: Essential for preventing electrostatic discharge (ESD), which can damage sensitive computer components.
- Your Computer’s Manual: This can be helpful for identifying specific ports and mounting locations.
- A Well-Lit Workspace: You need to see what you’re doing.
- Patience: Take your time and don’t rush.
Physical Installation
The physical installation process will vary slightly depending on whether you’re installing a 2.5-inch SATA SSD or an M.2 NVMe SSD.
Installing a 2.5-inch SATA SSD
- Power Down Your Computer: Crucially, shut down your computer completely and unplug the power cord from the wall.
- Ground Yourself: Put on your anti-static wrist strap and connect it to a grounded metal object (like the unpainted metal frame of your computer case).
- Open Your Computer Case: Consult your computer’s manual if you’re unsure how to open it. Most cases have side panels that can be removed by unscrewing or releasing latches.
- Locate a Drive Bay: Find an available 2.5-inch drive bay. Some cases have dedicated SSD mounting points, while others may require an adapter to fit a 2.5-inch drive into a 3.5-inch bay.
- Mount the SSD: Secure the SSD into the drive bay using screws. Some cases have tool-less mounting systems.
- Connect the Data Cable: Connect one end of a SATA data cable to the SSD and the other end to an available SATA port on your motherboard. Note the SATA port number; it can be useful later.
- Connect the Power Cable: Connect a SATA power cable from your power supply unit (PSU) to the SSD.
- Close the Case: Reassemble your computer case.
- Reconnect Peripherals and Power: Plug in your monitor, keyboard, mouse, and the power cord.
Installing an M.2 NVMe SSD
- Power Down Your Computer: Shut down your computer completely and unplug the power cord from the wall.
- Ground Yourself: Put on your anti-static wrist strap and connect it to a grounded metal object.
- Open Your Computer Case: Consult your computer’s manual.
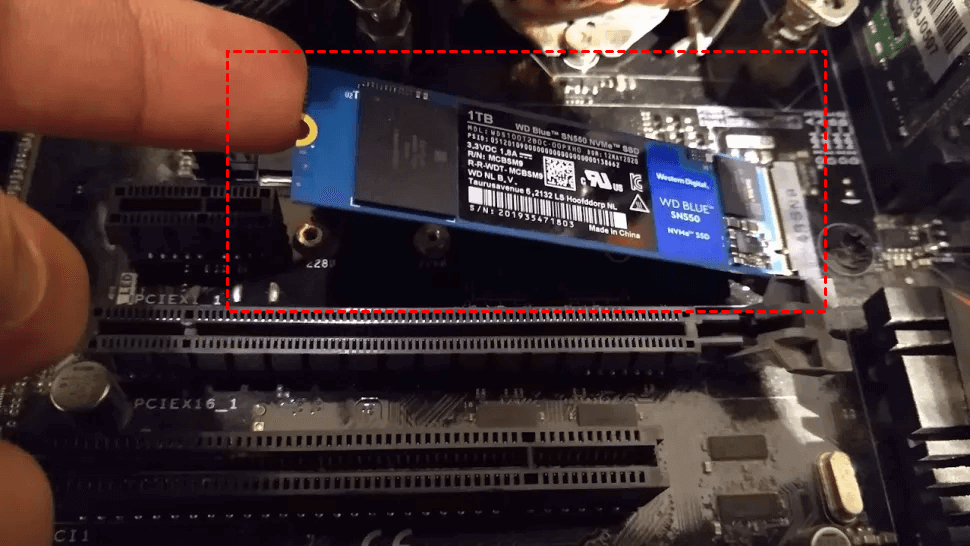
- Locate the M.2 Slot: Identify the M.2 slot on your motherboard. It’s usually a small, horizontal slot with a retaining screw at the end. Refer to your motherboard manual to confirm its location and type (e.g., PCIe Gen3, Gen4).
- Remove the Retaining Screw: Unscrew the small screw at the end of the M.2 slot. You might need a smaller screwdriver for this.
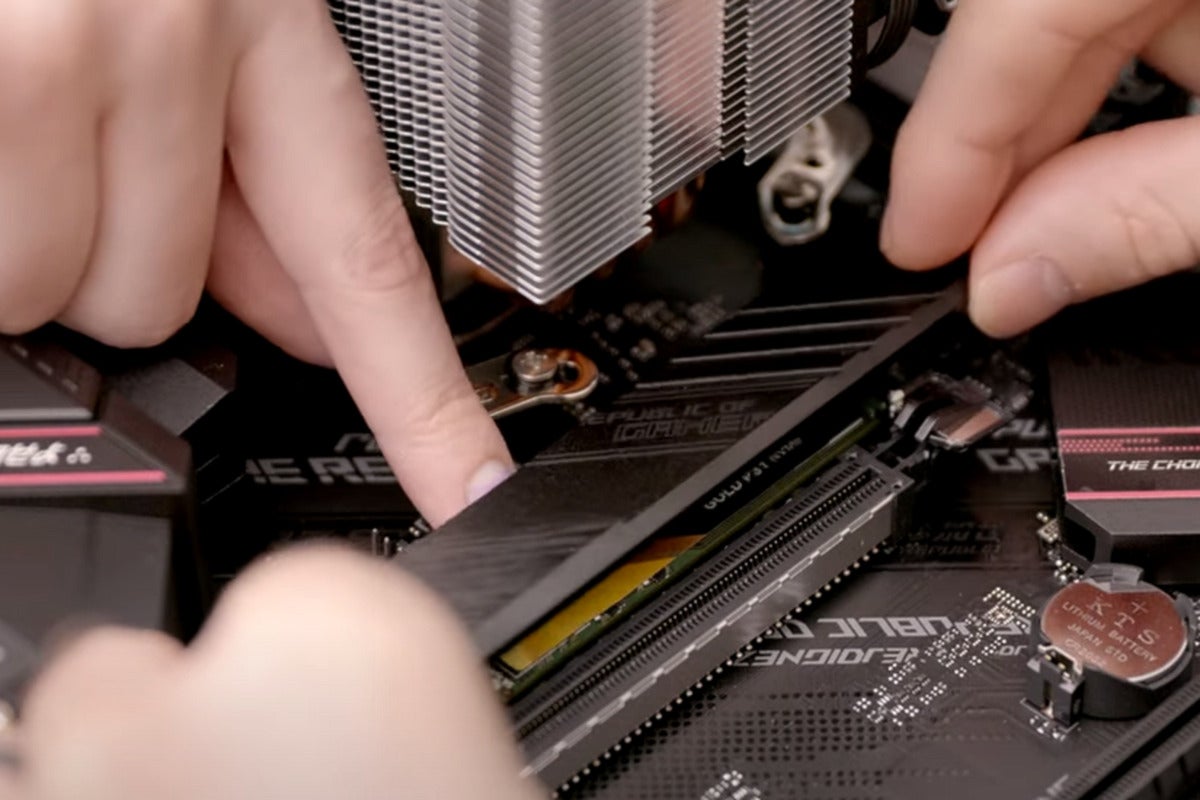
- Insert the M.2 SSD: Carefully align the notch on the M.2 SSD with the notch in the M.2 slot and gently push the SSD into the slot at an angle (approximately 30 degrees).
- Secure the SSD: Once the SSD is fully seated, gently push it down until it lies flat against the motherboard and secure it with the retaining screw you removed earlier. Do not overtighten.
- Close the Case: Reassemble your computer case.
- Reconnect Peripherals and Power: Plug in your monitor, keyboard, mouse, and the power cord.
Initial Setup and Configuration
Once the hardware is installed, your computer needs to recognize and utilize the new drive.
- Boot into BIOS/UEFI: Turn on your computer and immediately press the key to enter your BIOS/UEFI settings (commonly Del, F2, F10, or F12, depending on your motherboard manufacturer).
- Verify Detection: Navigate through the BIOS/UEFI menus to find the storage or boot device information. Your new SSD should be listed here. If it’s not detected, double-check your physical connections or consult your motherboard manual.
- Initialize and Format the Drive:
- Windows: After booting into Windows, right-click the Start button and select “Disk Management.” You should see your new SSD listed as “Unallocated” space.
- Right-click on the unallocated space and select “New Simple Volume.”
- Follow the on-screen wizard to assign a drive letter (e.g., D:, E:), choose NTFS as the file system, and perform a quick format.
- macOS: For macOS, open “Disk Utility” (Applications > Utilities). Select your new SSD from the left sidebar and click “Erase.” Choose a format (APFS is recommended for modern macOS versions) and a scheme (GUID Partition Map).
- Linux: The process varies by distribution, but typically involves using tools like
fdisk,parted, or graphical utilities like GParted.
Once initialized and formatted, your new SSD will appear in File Explorer (Windows) or Finder (macOS) as a usable drive. You can now begin transferring files or installing new applications onto it.
Optimizing Your New SSD
To ensure you’re getting the most out of your new storage solution, a few post-installation optimizations can be beneficial.
Driver Updates
For NVMe SSDs, ensuring you have the latest drivers can sometimes offer performance improvements. Visit the manufacturer’s website for your SSD and download any available driver or firmware updates.
TRIM Command (Windows)
Windows typically enables the TRIM command automatically for SSDs. TRIM allows the operating system to tell the SSD which data blocks are no longer in use and can be cleared. This helps maintain write performance over time. You can check its status by opening Command Prompt as an administrator and typing: fsutil behavior query DisableDeleteNotify. A value of 0 indicates TRIM is enabled.
Disk Defragmentation (Not for SSDs!)
It’s crucial to understand that you should never defragment an SSD. Defragmentation is a process for HDDs that physically rearranges data for faster access. SSDs use different mechanisms for data access, and defragmentation can actually reduce their lifespan and offer no performance benefits. Windows will automatically recognize SSDs and apply appropriate optimizations, such as TRIM.
Partitioning and Data Management
Decide on the best use for your new SSD. If it’s a secondary drive for games, you’ll install your games there. If it’s for large project files, organize your work accordingly. Consider creating partitions if you have specific organizational needs, although for most users, a single partition for the entire drive is sufficient.
Conclusion
Installing a second SSD is a rewarding upgrade that significantly enhances your computing experience. By following these steps, you can confidently add more storage, boost your system’s speed, and optimize your digital workflow. Whether you’re a creative professional pushing the boundaries of what’s possible or a gamer demanding the fastest load times, a second SSD is a smart investment in your technology. Remember to always prioritize safety by grounding yourself and taking your time throughout the installation process. Happy computing!
aViewFromTheCave is a participant in the Amazon Services LLC Associates Program, an affiliate advertising program designed to provide a means for sites to earn advertising fees by advertising and linking to Amazon.com. Amazon, the Amazon logo, AmazonSupply, and the AmazonSupply logo are trademarks of Amazon.com, Inc. or its affiliates. As an Amazon Associate we earn affiliate commissions from qualifying purchases.