
In an increasingly data-driven world, the quest for more storage space is a constant for virtually every tech enthusiast and everyday user alike. From high-resolution photos and 4K videos to extensive app libraries and crucial work documents, our digital lives are constantly expanding, pushing the limits of our device’s internal memory. This is where the humble yet powerful micro SD card steps in, offering an elegant and often cost-effective solution to the perennial storage crunch. Installing a micro SD card isn’t just about adding gigabytes; it’s about unlocking new levels of productivity, enhancing your device’s capabilities, and safeguarding your precious digital assets.

This comprehensive guide will walk you through everything you need to know about micro SD cards, from understanding their technology and choosing the right one, to a step-by-step installation process across various devices, and crucial post-installation best practices. Whether you’re a smartphone owner looking to store more memories, a drone pilot needing extra flight footage capacity, or a tablet user keen on expanding your app library, mastering micro SD card installation is a fundamental skill in today’s digital landscape. By integrating insights from technology trends, brand considerations, and even the financial implications of smart storage solutions, we aim to provide a holistic perspective that goes beyond mere hardware installation.
Understanding Micro SD Cards and Their Value
Before diving into the mechanics of installation, it’s essential to grasp what a micro SD card is and why it’s such a valuable asset in our modern tech ecosystem. Understanding its purpose and the benefits it offers will underscore the importance of proper selection and installation.
What is a Micro SD Card?
A micro SD card is a tiny, fingernail-sized flash memory card designed to store data. It’s the smallest variant in the Secure Digital (SD) card family, making it ideal for compact portable devices where internal space is at a premium. Despite its diminutive size, these cards can pack a formidable amount of storage, ranging from a few gigabytes to several terabytes. Their ubiquity stems from their versatility and the standardized interface that allows them to be used across a vast array of devices.
At its core, a micro SD card functions as an external hard drive for your portable gadgets. It uses non-volatile flash memory, meaning it retains stored information even without power. This makes it a reliable medium for everything from operating system files in embedded systems to personal photos and videos on your smartphone. The technological advancements in manufacturing have not only increased capacities but also significantly boosted their read and write speeds, transforming them from mere storage extenders into vital components for high-performance applications like 4K video recording and rapid-fire photography. The underlying technology, constantly evolving, is a testament to ongoing innovation in solid-state storage, reflecting broader Technology Trends in miniaturization and efficiency.
Why Expand Your Device’s Storage?
The primary motivation for installing a micro SD card is, of course, to gain additional storage. However, the benefits extend far beyond simply having more room.
Firstly, an expanded storage capacity means you can keep more of what matters to you on your device. For smartphone users, this translates to thousands more photos, hours of video, and a larger library of music or podcasts without constantly worrying about “storage full” notifications. For photographers and videographers using cameras or drones, it means longer shooting sessions and the ability to capture more high-resolution content without needing to offload data midway through a project. This directly impacts Productivity, allowing users to work or create without interruption.
Secondly, a micro SD card can significantly enhance the Performance of certain devices. For instance, some Android devices allow users to install apps directly onto the SD card, freeing up valuable internal memory which can improve the overall responsiveness of the operating system. While not always as fast as internal storage, modern high-speed micro SD cards can often keep up with less demanding apps and files.
Thirdly, micro SD cards play a crucial role in Data Management and Digital Security. They offer a convenient way to back up important files, providing a physical safeguard against data loss should your primary device fail or be lost. You can easily transfer files between devices or use the card as a portable archive, making it an invaluable tool for both personal and professional data handling. In the context of Digital Security, having external backups mitigates risks associated with device damage or cyber incidents, offering peace of mind that your critical information is preserved.
Finally, considering the Money aspect, expanding storage with a micro SD card is often far more economical than purchasing a new device with higher internal memory. For a fraction of the cost, you can effectively double or even quadruple your device’s capacity, extending its lifespan and maximizing your investment. This makes micro SD cards a smart financial decision for consumers looking to get more value out of their existing technology.
Choosing the Right Micro SD Card for Your Needs
Selecting the appropriate micro SD card is as critical as the installation process itself. An ill-suited card can lead to performance issues, compatibility problems, or even data corruption. This section focuses on the key specifications and considerations to ensure you make an informed decision, touching upon Brand considerations and the Financial implications of your choice.
Capacity, Speed Class, and Compatibility Explained
The market for micro SD cards is vast, with various specifications that cater to different use cases. Understanding these is paramount:
-
Capacity (GB/TB): This refers to how much data the card can store. Common capacities range from 32GB to 1TB, with newer cards pushing towards 2TB.
- SDHC (Secure Digital High Capacity): Supports up to 32GB.
- SDXC (Secure Digital eXtended Capacity): Supports from 32GB up to 2TB.
- SDUC (Secure Digital Ultra Capacity): Supports up to 128TB (though cards of this size are not yet widely available).
It’s vital to check your device’s maximum supported capacity. Most modern devices support SDXC cards, but older gadgets might be limited to SDHC. Exceeding your device’s limit means the card won’t be fully recognized or used.
-
Speed Class: This indicates the minimum sequential write speed of the card, crucial for recording high-resolution videos without dropped frames or for transferring large files quickly.
- Speed Class (C2, C4, C6, C10): Indicates a minimum write speed of 2MB/s, 4MB/s, 6MB/s, or 10MB/s respectively. C10 (10MB/s) is common for most general uses.
- UHS Speed Class (U1, U3): UHS (Ultra High Speed) cards are designed for devices that support the UHS bus interface, offering faster speeds. U1 guarantees a minimum write speed of 10MB/s, while U3 guarantees 30MB/s. U3 is recommended for 4K video recording.
- Video Speed Class (V6, V10, V30, V60, V90): The newest standard, specifically designed for video recording. V30 guarantees 30MB/s, V60 guarantees 60MB/s, and V90 guarantees 90MB/s. For professional-grade 4K and 8K video, V60 or V90 cards are often necessary.
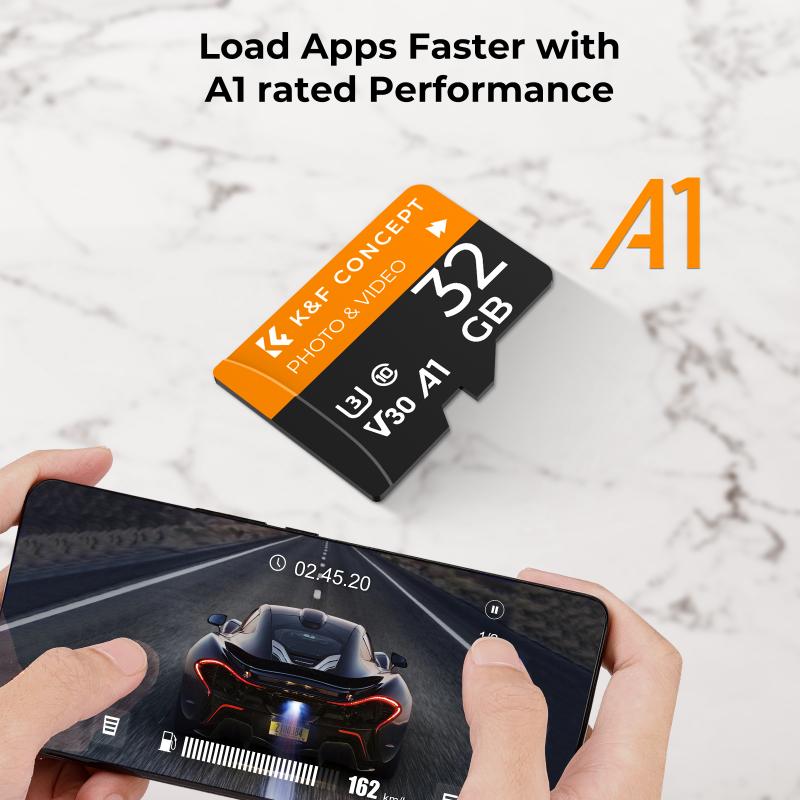
- Application Performance Class (A1, A2): Introduced for devices that run Android apps directly from the SD card. A1 and A2 cards offer better random read/write performance, leading to a smoother app experience. A2 is faster than A1.
Matching the card’s speed class to your usage is crucial. A slow card in a 4K camera will result in dropped frames or inability to record at the desired quality. A faster card might cost more, but it prevents bottlenecks and enhances the overall user experience, directly impacting Productivity and the quality of your digital output.
-
Physical Compatibility: All micro SD cards have the same physical dimensions (15mm x 11mm x 1mm). However, some devices require full-size SD adapters, which micro SD cards often come with, to fit into larger SD card slots found in digital cameras or laptops.
Top Brands and Where to Buy
The market is saturated with micro SD cards, but choosing a reputable Brand is paramount for reliability, performance, and data integrity. Well-known brands typically invest heavily in R&D, quality control, and offer robust warranties.
- Leading Brands: Samsung, SanDisk, Kingston, Lexar, PNY, and Integral are consistently rated highly for their micro SD cards. These brands offer a range of products catering to different needs and budgets, from everyday storage to high-end professional use. Their branding often highlights key features like speed classes and capacities, making it easier for consumers to identify the right product.
- Where to Buy: Always purchase micro SD cards from authorized retailers, reputable online stores (like Amazon, Best Buy, Newegg, or the manufacturer’s official website), or physical electronics stores. The market is unfortunately rife with counterfeit cards, which often claim high capacities or speeds but deliver poor performance and are prone to failure. Purchasing from trusted sources helps ensure you get a genuine product with the advertised specifications and warranty.
- Cost-Effectiveness and Investment: While choosing a card, consider the balance between cost and performance. A cheap, no-name card might seem like a bargain, but the potential for data loss or frustratingly slow performance can negate any initial Financial savings. Investing in a slightly more expensive, but reliable, card from a reputable brand protects your data and ensures a smooth user experience, ultimately being a wiser long-term investment. Think of it as an insurance policy for your digital life.
Step-by-Step Guide to Micro SD Card Installation
Once you’ve chosen the perfect micro SD card, the next step is the installation. While the general principle is the same, the exact method can vary slightly depending on the type of device. This section provides a detailed walkthrough for common devices, ensuring a smooth and successful installation.
Preparing for Installation
Before you begin, a few preparatory steps can prevent potential issues and ensure data safety:
- Back Up Your Device (Optional but Recommended): While installing an SD card shouldn’t affect your device’s internal data, it’s always good practice to back up critical information before making any hardware changes. This is a fundamental principle of Digital Security and Data Management.
- Power Down Your Device: Crucially, turn off your device completely before attempting to install the micro SD card. Inserting or removing an SD card while the device is on can lead to data corruption on the card or even damage to the device’s card reader. This simple step is vital for hardware integrity and preventing data loss.
- Gather Your Tools: For some devices, you might need a SIM ejector tool (often included with smartphones) or a small paperclip to open the card tray. Ensure you have a clean, well-lit workspace.
Locating and Accessing the SD Card Slot
The location of the micro SD card slot varies significantly across different devices:
- Smartphones and Tablets:
- SIM/SD Card Tray: Most modern smartphones and some tablets feature a combined SIM and micro SD card tray located on the side of the device. You’ll typically need a SIM ejector tool or a straightened paperclip to push into a small hole next to the tray, causing it to pop out.
- Under the Battery Cover: Older smartphone models or some ruggedized devices may have the micro SD slot located under a removable back cover, often adjacent to the battery compartment. You might need to remove the battery itself to access the slot.
- Digital Cameras and Drones:
- Often, the micro SD card slot (or full-size SD slot, requiring an adapter for micro SD) is located behind a small, hinged door on the side or bottom of the device. This door usually latches shut to protect the card from the elements.
- Laptops:
- Many laptops, especially ultra-thin models, include a dedicated micro SD card slot, usually on the side. Some larger laptops may have a full-size SD card slot, for which you’d use a micro SD card adapter.
- Gaming Consoles (e.g., Nintendo Switch):
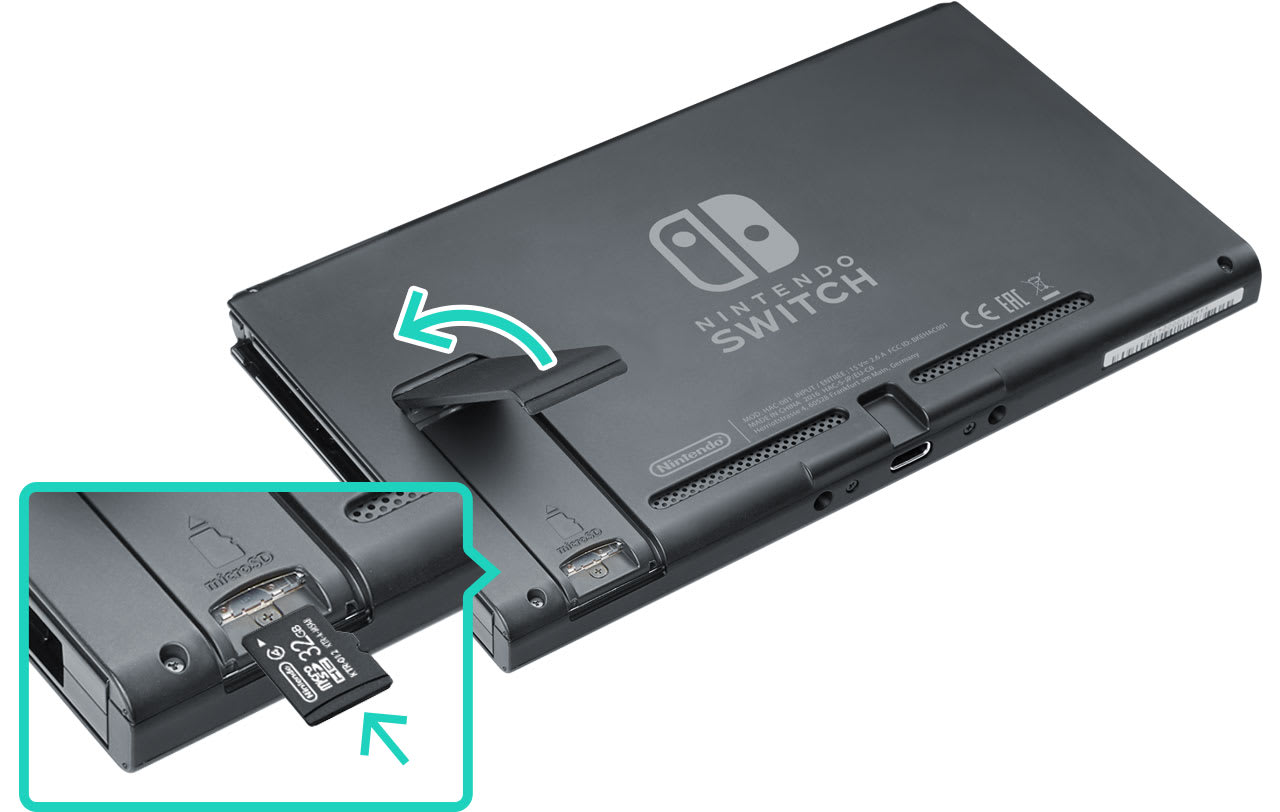
- The Nintendo Switch, for instance, has its micro SD card slot conveniently located under the kickstand on the back of the console.
Carefully examine your device or consult its user manual to pinpoint the exact location of the micro SD card slot. For many Tech gadgets, manufacturers streamline access to such components, but slight variations are common across different brands and models.
Inserting the Micro SD Card Correctly
Once you’ve located and accessed the slot, inserting the card is straightforward but requires precision:
- Identify the Correct Orientation: Micro SD cards are not symmetrical and must be inserted in a specific orientation. Look for a small diagram etched near the slot or on the card tray itself that shows the correct way to insert the card (usually with the gold contacts facing down or towards the back of the device, and the notched corner aligning with the slot). Do not force the card.
- Gently Slide/Press the Card:
- For Tray-Based Slots: Place the micro SD card into the designated cutout on the tray. It should sit snugly without falling out. Then, carefully slide the tray back into the device until it’s flush.
- For Push-to-Insert Slots: Gently push the micro SD card into the slot until you feel a slight click. This mechanism locks the card in place. If it doesn’t click, it’s either not fully inserted or the orientation is incorrect.
Securing and Powering On Your Device
After inserting the card:
- Secure the Slot: If you removed a back cover or opened a door, replace it or close it securely. For tray-based slots, ensure the tray is fully pushed in.
- Power On Your Device: Now you can safely power on your smartphone, tablet, camera, or laptop. The device should boot up as normal.
Post-Installation: Optimizing and Managing Your New Storage
Installing the micro SD card is only the first step. To fully leverage its potential, you’ll need to verify its detection, potentially format it, and understand how to manage your data effectively. This section delves into optimizing your new storage, emphasizing Data Management and Longevity.
Verifying Detection and Initial Setup
Upon powering on your device, the operating system should automatically detect the new micro SD card.
- Check Device Settings:
- Android: Go to
Settings > StorageorSettings > Device Care > Storage. You should see an entry for “SD Card” or “External Storage,” indicating its total capacity and available space. - Windows/macOS (for laptops with SD slots): The card should appear as a new drive under “This PC” (Windows) or in Finder (macOS).
- Cameras/Drones: The device’s display should show that an SD card is present and ready for use, often indicating remaining photo/video capacity.
- Android: Go to
- Formatting the SD Card:
- Why Format? Formatting prepares the card for use with your specific device and cleans it of any pre-existing data or file systems that might be incompatible. If you’re using a brand-new card or moving a card from one device to another, formatting is highly recommended. It also resolves many minor card errors.
- How to Format: Most devices offer an option to format the SD card directly from their settings menu.
- Android: Within the
Storagesettings, tap on the “SD Card” entry, and you’ll usually find an option to “Format” or “Erase and Format.” Some Android versions also offer “Adoptable Storage,” which formats the SD card to act as an extension of the internal storage, allowing apps to be fully installed on it. Be aware that adoptable storage encrypts the card and makes it exclusive to that device. - Cameras/Drones: Look for a “Format Card” or “Erase Card” option in the camera’s system settings or menu.
- Computers: Right-click the drive in “This PC” (Windows) and select “Format,” or use Disk Utility (macOS).
- Android: Within the
- Warning: Formatting will erase ALL data on the micro SD card. Ensure you have backed up any important files before proceeding. This step is crucial for maintaining Digital Security and preventing accidental data loss.
Moving Files, Apps, and Setting Default Storage
Once formatted and detected, you can start utilizing your expanded storage:
- Moving Existing Files:
- Android: Use a file manager app (either built-in or third-party) to navigate to your device’s internal storage. Select photos, videos, or documents, and then choose to “Move” or “Copy” them to your SD card. This is an effective way to free up internal space.
- Computers: Simply drag and drop files between your computer’s storage and the SD card’s drive.
- Installing Apps to SD Card (Android specific):
- While Android’s ability to move apps to an SD card has changed over versions, some devices still support it. Go to
Settings > Apps & notifications > App info, select an app, and if the option is available, choose “Storage” and then “Change” to move it to the SD card. - Remember, using a high-speed A1 or A2 rated card is crucial for acceptable app performance if running apps from the SD card.
- While Android’s ability to move apps to an SD card has changed over versions, some devices still support it. Go to
- Setting Default Storage Location:
- Many cameras, voice recorders, and some Android phones allow you to designate the SD card as the default storage location for new photos, videos, or downloads. Look for this option in the device’s camera settings, download manager settings, or general storage settings. This streamlines future Productivity, ensuring new media automatically goes to the larger storage.
Best Practices for Data Management and Longevity
To maximize the life of your micro SD card and protect your data, follow these best practices:
- Safe Removal: Always “eject” or “unmount” the micro SD card through your device’s software settings before physically removing it. Pulling it out abruptly can corrupt data on the card or damage the card itself.
- Regular Backups: Treat your micro SD card as a temporary storage or an extension, not the sole repository of irreplaceable data. Regularly back up its contents to a computer, cloud storage, or another external drive. This is a cornerstone of robust Digital Security and Data Management.
- Monitor Card Health: If you notice slower performance, read/write errors, or files becoming corrupt, it might be an indication that the card is failing. Back up your data immediately and consider replacing the card.
- Avoid Extreme Conditions: Micro SD cards are durable, but extreme temperatures, moisture, or strong magnetic fields can damage them. Store spare cards in protective cases.
- Understand Write Cycles: Flash memory has a finite number of write cycles. While this is usually very high for modern cards, constantly rewriting small files can reduce its lifespan. Using a card for applications that involve continuous small writes (like security camera footage) might require more frequent replacement than one used for storing photos.
Troubleshooting Common Micro SD Card Issues
Despite careful installation and management, you might occasionally encounter issues with your micro SD card. Knowing how to troubleshoot these common problems can save you time and potential frustration.
Card Not Detected or Read Errors
This is one of the most frequent problems.
- Re-insert the Card: The simplest fix is often to power down the device, remove the SD card, inspect it for any visible damage or dirt on the contacts, gently clean the contacts with a soft, dry cloth (or an alcohol swab if necessary), and re-insert it firmly and correctly.
- Restart Your Device: Sometimes a simple reboot can help the device re-scan and detect the card.
- Test on Another Device: If the card isn’t detected in your primary device, try inserting it into another compatible device (e.g., another phone, a camera, or a computer’s SD card reader). If it works elsewhere, the problem might be with your original device’s card reader. If it’s not detected anywhere, the card itself might be faulty.
- Check for Software Updates: Ensure your device’s operating system is up to date. Software bugs can sometimes affect SD card recognition.
- Driver Issues (for computers): On a computer, ensure your SD card reader drivers are installed and up to date.
- Format the Card (as a last resort): If the card is detected but showing errors or won’t mount, formatting it might resolve the issue, but remember this will erase all data. Only do this if you have no crucial data or have successfully backed it up.
Performance Problems and Data Corruption
Slow read/write speeds, apps crashing when on the SD card, or files becoming unreadable are signs of performance issues or corruption.
- Check Speed Class: As discussed earlier, using a card with an insufficient speed class for your activities (e.g., a C4 card for 4K video) will lead to poor performance. Upgrade to a faster card if necessary.
- Bad Sectors or Corruption: Flash memory can develop bad sectors over time, leading to data corruption.
- Error Checking Tools: Windows has a built-in error-checking tool (right-click drive > Properties > Tools > Check) that can scan for and sometimes fix bad sectors. macOS has Disk Utility.
- Third-Party Tools: Several third-party data recovery or disk repair tools are available, but proceed with caution as they can sometimes worsen the problem if not used correctly.
- Overheating: Prolonged heavy use, especially in hot environments, can cause SD cards to overheat and throttle performance or even become unstable. Ensure good airflow around your device.
- Counterfeit Cards: If you purchased a card from an unreliable source, it might be counterfeit. Counterfeit cards often claim high capacities/speeds but deliver much less, leading to performance issues and early failure. This reiterates the importance of buying from reputable Brands and vendors, aligning with smart Financial decisions to avoid wasted money and data loss.
- Device Limitations: Sometimes, the device itself has limitations. Older devices might not fully utilize the speeds of newer, faster SD cards, or their internal bus might simply be slower.
In conclusion, installing a micro SD card is a relatively simple process that unlocks significant benefits for your digital life. By understanding the technology, making informed choices about capacity and speed, following proper installation procedures, and implementing smart data management practices, you can effectively expand your device’s capabilities. This not only enhances your Productivity and Digital Security but also represents a smart Financial decision, allowing you to maximize the value and longevity of your existing technology. Don’t let storage limitations hold you back—embrace the power of the micro SD card and expand your digital horizon today.
aViewFromTheCave is a participant in the Amazon Services LLC Associates Program, an affiliate advertising program designed to provide a means for sites to earn advertising fees by advertising and linking to Amazon.com. Amazon, the Amazon logo, AmazonSupply, and the AmazonSupply logo are trademarks of Amazon.com, Inc. or its affiliates. As an Amazon Associate we earn affiliate commissions from qualifying purchases.