Upgrading your PC with a new graphics card (or GPU) is one of the most impactful ways to boost its performance, especially for gaming, video editing, or any graphically intensive task. While the prospect might seem daunting to some, the process is surprisingly straightforward, even for those with limited technical experience. This comprehensive guide will walk you through everything you need to know, from choosing the right card to ensuring a smooth installation.
Understanding Your Needs and Choosing the Right Graphics Card
Before you even think about opening your PC case, it’s crucial to determine what kind of graphics card will best suit your needs and budget. This involves a bit of research and understanding of your current system’s limitations.
Gaming Performance: Frame Rates and Resolutions
If your primary motivation for upgrading is gaming, then performance metrics like frame rates (FPS – Frames Per Second) and resolution will be your key considerations. Higher FPS means smoother gameplay, while higher resolutions (like 1080p, 1440p, or 4K) offer sharper, more detailed visuals.
- Target Resolution: Are you playing at 1080p, or are you aiming for the immersive experience of 1440p or 4K? The higher the resolution, the more powerful a GPU you’ll need. A budget card might suffice for 1080p gaming, but for higher resolutions, you’ll be looking at mid-range to high-end options.
- Desired Frame Rate: For casual gaming, 60 FPS is often considered the standard. Competitive gamers, however, might aim for 120 FPS or even 240 FPS for the smoothest possible response times.
- Game Settings: Will you be playing games on the highest graphical settings, or are you content with medium or high? Pushing games to their absolute visual limits requires a more potent GPU.
Beyond Gaming: Workstations and Creative Tasks
While gaming is a common reason for GPU upgrades, professionals in fields like 3D modeling, video editing, animation, and AI development also rely heavily on powerful graphics cards. For these applications, specific features and VRAM (Video Random Access Memory) become paramount.
- VRAM Capacity: Video editing software, rendering engines, and large datasets in AI training can consume significant amounts of VRAM. For professional workloads, 8GB of VRAM is often a minimum, with 12GB, 16GB, or even more being beneficial for complex projects.
- CUDA Cores (NVIDIA) / Stream Processors (AMD): These are the processing units within a GPU that handle parallel computations. More cores generally translate to faster rendering and processing times in compatible software.
- Software Optimization: Certain professional applications are optimized for specific GPU architectures. For example, NVIDIA’s CUDA platform is widely supported in many professional rendering and AI applications. Research which GPU brands and models are best supported by the software you intend to use.
Budget Considerations and Entry-Level vs. High-End
Graphics cards span a wide price spectrum, from budget-friendly options to high-end powerhouses. It’s essential to set a realistic budget and understand what you can expect for your money.
- Entry-Level: These cards are suitable for basic gaming at 1080p with medium settings, or for general productivity and multimedia tasks.
- Mid-Range: These offer a significant performance leap, capable of handling 1080p gaming at high settings, 1440p gaming at medium to high settings, and light to moderate creative work.
- High-End: These are for enthusiasts who demand the best. They excel at 1440p and 4K gaming at ultra settings, high refresh rates, and demanding professional workloads.
- Used Market: The used graphics card market can offer excellent value, but it comes with risks. Ensure you buy from a reputable seller and, if possible, test the card before purchasing.
Compatibility Checks: Ensuring a Perfect Fit
Before purchasing, it’s vital to ensure the new graphics card is compatible with your existing PC components.
Power Supply Unit (PSU) Wattage and Connectors
Your PC’s power supply unit (PSU) needs to be capable of providing enough wattage for the new graphics card, especially under load.
- Recommended Wattage: Each graphics card will have a recommended PSU wattage specified by the manufacturer. It’s generally a good idea to have a PSU that exceeds this recommendation by at least 100-150W to ensure stability and headroom for other components. You can find this information on the GPU’s product page or packaging.
- PCIe Power Connectors: Modern graphics cards often require dedicated power connectors directly from the PSU, typically 6-pin or 8-pin PCIe power connectors. Check how many connectors your current PSU has and ensure it matches the requirements of the new GPU. If your PSU lacks the necessary connectors, you’ll need to upgrade your PSU as well. Many PSUs come with multiple connectors, so this is rarely an insurmountable hurdle.
Motherboard Slot and Physical Dimensions
Your motherboard needs to have a compatible slot, and the physical size of the card must fit within your PC case.
- PCIe Slot: All modern graphics cards utilize the PCI Express (PCIe) interface. Your motherboard will have at least one PCIe x16 slot, which is the standard for graphics cards. Even if your motherboard has a newer generation PCIe slot (e.g., PCIe 4.0 or 5.0), a newer card will still work, albeit at the maximum speed supported by the older slot. Conversely, a newer card in an older slot will work but might be bottlenecked.
- Physical Size: Graphics cards come in various lengths, heights (often occupying two or three expansion slots), and depths. Measure the available space inside your PC case, paying attention to the length of the card, the area around the drive bays, and the number of expansion slots it will occupy. Compare these measurements to the specifications of the graphics card you’re considering.
Preparing Your PC for the Graphics Card Installation
Once you’ve chosen your new GPU, it’s time to get your PC ready for the installation. This involves both physical preparation and software adjustments.
Safety First: Grounding Yourself and Powering Down
Static electricity can be a PC component’s worst enemy. Taking a few precautions can prevent accidental damage.
- Disconnect Power: Before opening your PC case, always unplug the power cable from the wall outlet. Press the power button a few times afterward to discharge any residual electricity in the system.
- Anti-Static Precautions: Touch a grounded metal object (like the unpainted metal part of your PC case once the power is unplugged) before handling any internal components. Wearing an anti-static wrist strap is highly recommended for maximum protection.
- Work Area: Choose a well-lit, clean, and spacious area to work. Avoid carpeting, as it generates more static electricity.
Uninstalling Old Drivers: A Crucial Step for a Clean Slate
If you’re replacing an existing graphics card, uninstalling its drivers is a critical step to prevent software conflicts.
- Driver Uninstaller Software: The most thorough way to remove old drivers is by using a dedicated uninstaller tool. Display Driver Uninstaller (DDU) is a popular and highly effective free utility that removes all traces of graphics drivers from your system.
- Safe Mode: For the most effective driver removal with DDU, it’s recommended to run it in Windows Safe Mode. Boot your PC into Safe Mode, then run DDU to remove the old drivers. Select the correct GPU vendor (NVIDIA, AMD, or Intel) and choose the option to “Clean and restart.”
Opening Your PC Case and Locating Components
Now it’s time to get hands-on with your hardware.
- Accessing the Interior: Most PC cases have side panels that are secured by screws or a latching mechanism. Consult your case’s manual if you’re unsure how to open it.
- Identifying the PCIe Slot: Once inside, locate the PCIe x16 slot on your motherboard. This is typically the longest PCIe slot and is often a different color than other slots. It’s usually positioned closer to the CPU.
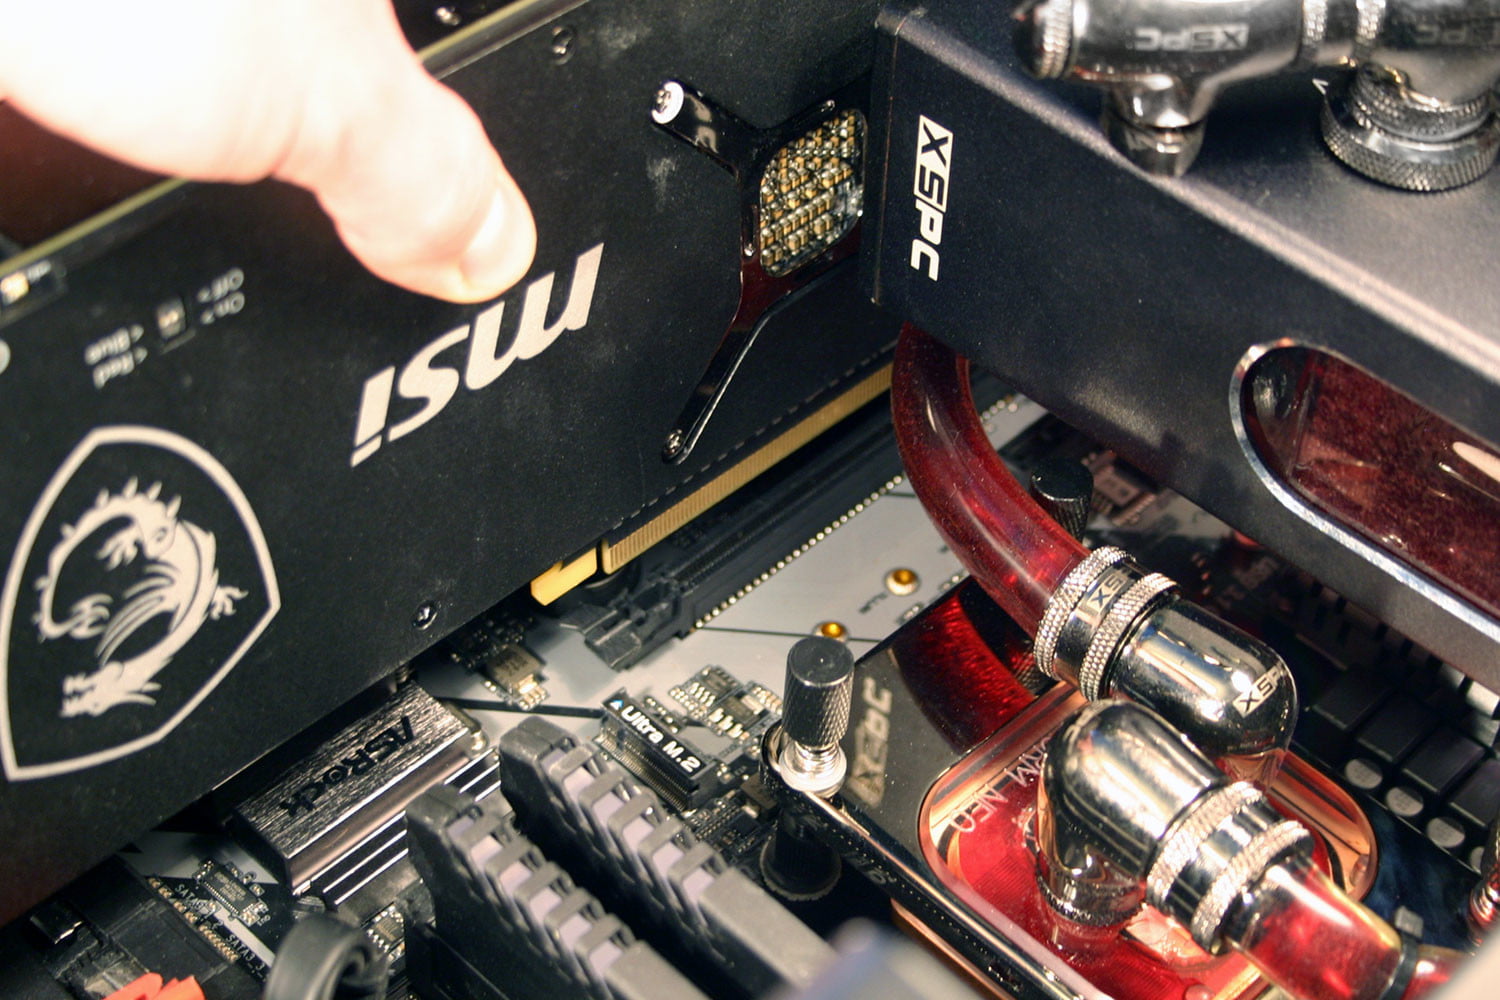
- Removing the Old Graphics Card (If Applicable):
- Disconnect Power Cables: If your old GPU has PCIe power connectors, carefully unplug them.
- Release the Retention Clip: At the end of the PCIe slot, there’s usually a small plastic retention clip that holds the graphics card in place. Gently press this clip down or to the side to release the card.
- Unscrew from Case: The graphics card is usually secured to the back of the PC case with one or two screws. Remove these screws.
- Gently Pull Out: With the screws removed and the retention clip released, you should be able to gently pull the graphics card straight out of the PCIe slot. Avoid wiggling it excessively.
Installing the New Graphics Card: A Step-by-Step Process
With the old hardware out of the way (if applicable) and your PC prepped, you’re ready for the main event.
Inserting the New GPU into the PCIe Slot
This is the core of the installation process.
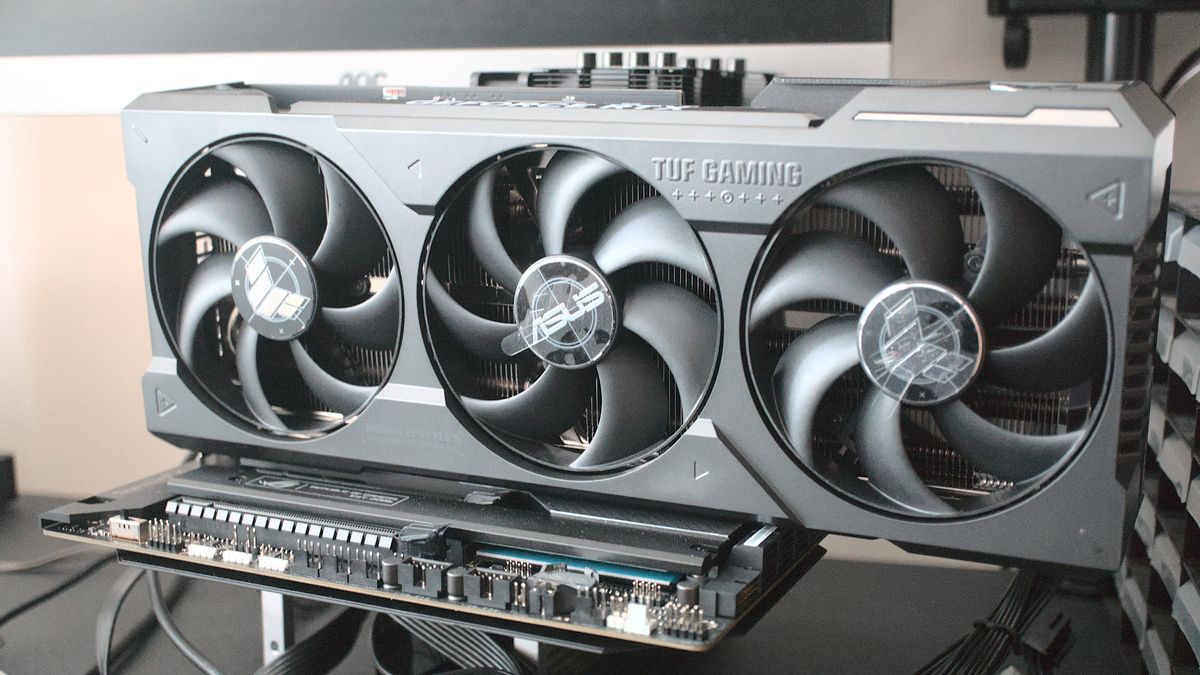
- Align the Card: Carefully align the new graphics card’s connector with the PCIe x16 slot on your motherboard. Ensure it’s oriented correctly.
- Gentle but Firm Pressure: Apply even, gentle pressure downwards onto the top edge of the graphics card. You should feel it seat firmly into the slot. You might hear or feel a click as the retention clip engages, securing the card.
- Secure to the Case: Reinstall the screws that hold the graphics card’s bracket to the rear of the PC case. Ensure the card is flush and stable.
Connecting Power Cables: Fueling Your New GPU
This is a critical step to ensure your new graphics card receives the necessary power.
- Identify Power Connectors: Locate the required PCIe power connectors on your new graphics card. These are usually on the top or rear edge of the card.
- Connect PSU Cables: Connect the appropriate PCIe power cables from your PSU to the graphics card. Ensure they click securely into place.
- Double-Check Connections: It’s always a good idea to double-check that all power cables are firmly seated.
Final Checks and Closing Up
Before powering on your PC, a quick review ensures everything is in order.
- Component Seating: Briefly check that the graphics card is firmly seated in the PCIe slot and secured to the case.
- Cable Management: Tidy up any loose cables within the case to ensure good airflow and prevent them from interfering with fans.
- Close the Case: Reattach your PC case’s side panel, ensuring all screws or latches are properly secured.
Post-Installation: Drivers and Testing
You’ve physically installed the card, but the process isn’t quite complete. Software is the next frontier.
Installing the Latest Graphics Drivers
This is arguably the most important step after physically installing the card.
- Download Drivers: Visit the official website of your graphics card manufacturer (NVIDIA or AMD). Navigate to their support or download section and find the latest drivers for your specific GPU model and operating system.
- Run the Installer: Execute the downloaded driver installer. Follow the on-screen prompts. It’s generally recommended to choose the “Express Installation” option for a straightforward setup.
- Restart Your PC: After the driver installation is complete, restart your computer. This ensures the new drivers are properly loaded and integrated into your system.

Testing Your New Graphics Card: Benchmarking and Real-World Performance
Now it’s time to see your new GPU in action.
- Display Output: Connect your monitor to the new graphics card’s output ports (HDMI, DisplayPort), not to the motherboard’s integrated graphics ports.
- Resolution and Refresh Rate: Once Windows loads, check your display settings to ensure your monitor is running at its native resolution and desired refresh rate.
- Benchmarking Tools: For a quantitative assessment of your GPU’s performance, consider using benchmarking software. Popular options include:
- 3DMark: A comprehensive suite for testing various aspects of GPU performance.
- Unigine Heaven/Superposition: Visually stunning benchmarks that push GPUs to their limits.
- FurMark: A stress-testing utility that can help monitor GPU temperatures under heavy load.
- In-Game Testing: The best test is often real-world usage. Launch your favorite games or demanding applications and monitor their performance. Check your frame rates using in-game counters or overlay software like MSI Afterburner or GeForce Experience. Observe for any graphical anomalies, artifacts, or crashes.
- Temperature Monitoring: During testing, it’s crucial to monitor your graphics card’s temperature. Use tools like MSI Afterburner, HWMonitor, or the manufacturer’s own software to keep an eye on temperatures. If your GPU consistently runs too hot (generally above 80-85°C under load), it might indicate an issue with airflow in your case, insufficient cooling on the GPU itself, or potentially a faulty card.
By following these steps, you can successfully install a new graphics card in your PC and unlock a significant boost in performance, whether for immersive gaming experiences or demanding creative workflows. Enjoy the enhanced visual power!
aViewFromTheCave is a participant in the Amazon Services LLC Associates Program, an affiliate advertising program designed to provide a means for sites to earn advertising fees by advertising and linking to Amazon.com. Amazon, the Amazon logo, AmazonSupply, and the AmazonSupply logo are trademarks of Amazon.com, Inc. or its affiliates. As an Amazon Associate we earn affiliate commissions from qualifying purchases.