In today’s visually driven world, the right font can transform a document from mundane to memorable, a presentation from forgettable to impactful, and a design project from amateurish to professional. Whether you’re a graphic designer crafting a new logo, a writer seeking to imbue your manuscript with a specific tone, a student preparing a report, or simply someone who wants to personalize their digital experience, understanding how to install new fonts on your Windows 10 operating system is an essential skill. This guide will walk you through the process, ensuring you can effortlessly expand your typographic toolkit and unlock new creative possibilities.
The ability to customize fonts goes beyond mere aesthetics. For businesses and individuals focused on branding, consistent and distinctive typography is a cornerstone of identity. A well-chosen font can evoke specific emotions, communicate a brand’s personality, and ensure recognition across all communication channels. For those venturing into personal branding or marketing, exploring a diverse font library allows for greater expressiveness and the ability to stand out in a crowded digital landscape. Moreover, for productivity, having quick access to your preferred fonts can streamline your workflow, reducing the time spent searching for or recreating desired text styles.
This article will delve into the practical steps of font installation on Windows 10, exploring different methods and offering insights relevant to various aspects of technology, brand building, and even personal finance considerations when acquiring font licenses.
Understanding Font Files and Where to Find Them
Before we dive into the installation process, it’s crucial to understand what font files are and where you can procure them. Fonts, in the digital realm, are essentially small software programs that dictate how characters are rendered on your screen and in print. They come in various formats, with the most common and widely supported on Windows being:
- TrueType Fonts (.ttf): This is one of the oldest and most widely used font formats. TrueType fonts are scalable, meaning they can be resized without losing quality, and they are supported by almost all operating systems and applications.
- OpenType Fonts (.otf): Developed by Adobe and Microsoft, OpenType is a more advanced format that builds upon TrueType. It offers enhanced features like ligatures (custom combinations of characters), stylistic alternates, and support for a wider range of characters and languages. OpenType fonts are generally preferred for professional design work due to their expanded capabilities.
You’ll encounter font files in various locations online. Many websites offer free fonts, often released under licenses that allow for personal and sometimes commercial use. It’s crucial to always check the license agreement associated with any free font to ensure you’re complying with its terms. For professional projects and a wider selection of high-quality, often commercially licensed fonts, you can explore:
- Stock Photo and Design Resource Sites: Many platforms that offer stock images and design elements also provide font libraries.
- Font Foundries and Designers: Dedicated font foundries and independent font designers often sell their creations directly, offering exclusive and meticulously crafted typefaces.
- Subscription Services: Some services offer a monthly or annual subscription that grants access to a vast library of fonts, often with flexible licensing options suitable for various professional needs.
When downloading fonts, especially from less reputable sources, be cautious of potential malware. Always ensure your antivirus software is up-to-date and consider downloading from well-known and trusted websites. The investment in high-quality, licensed fonts can be significant, but for businesses and serious creatives, it’s an investment in brand integrity and professional output.
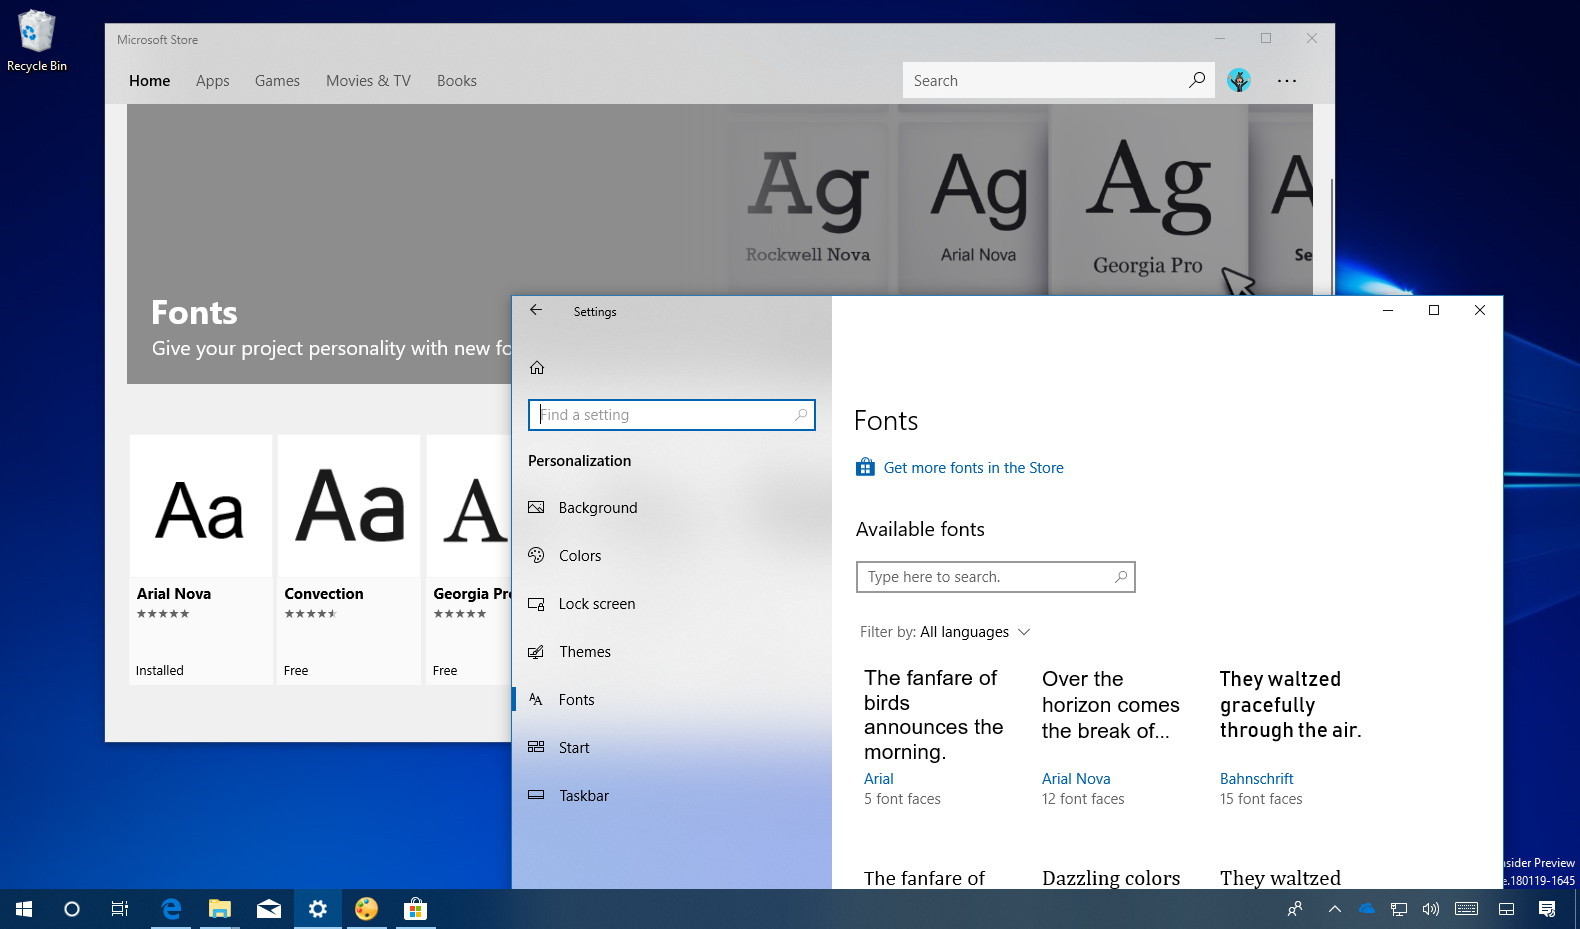
Where to Find Fonts
- Free Font Repositories:
- Google Fonts: A vast, free library of open-source fonts for everyone.
- DaFont: A popular source for free fonts, categorized for easy browsing.
- Font Squirrel: Offers free, commercially licensed fonts, meticulously curated.
- Paid Font Marketplaces and Foundries:
- Adobe Fonts: Included with Creative Cloud subscriptions, offering a premium selection.
- MyFonts: A comprehensive marketplace for commercial fonts from various foundries.
- Fontspring: Another excellent source for commercially licensed fonts.
- Linotype: A historic and reputable source for high-quality typefaces.
Checking Font Licenses
Before installing and using any font, particularly for commercial purposes, it is imperative to understand its licensing terms.
- Personal Use: Fonts licensed for personal use can be installed and used on your computer for non-commercial projects, such as personal documents, emails, or social media posts.
- Commercial Use: Fonts licensed for commercial use can be incorporated into projects intended for sale, promotion, or any business-related activity. This can include websites, marketing materials, product packaging, and more.
- Desktop License: This is the most common type of license, allowing you to install and use the font on a specified number of desktop computers.
- Webfont License: If you intend to use a font on a website, you’ll typically need a webfont license, which allows the font to be displayed across different browsers for website visitors.
- App License: For embedding fonts within software applications or mobile apps, a specific app license is usually required.
Always read the End User License Agreement (EULA) associated with any font download. Ignoring these terms can lead to legal issues and brand damage. For businesses, investing in appropriate licenses is a crucial aspect of brand protection and ethical marketing.
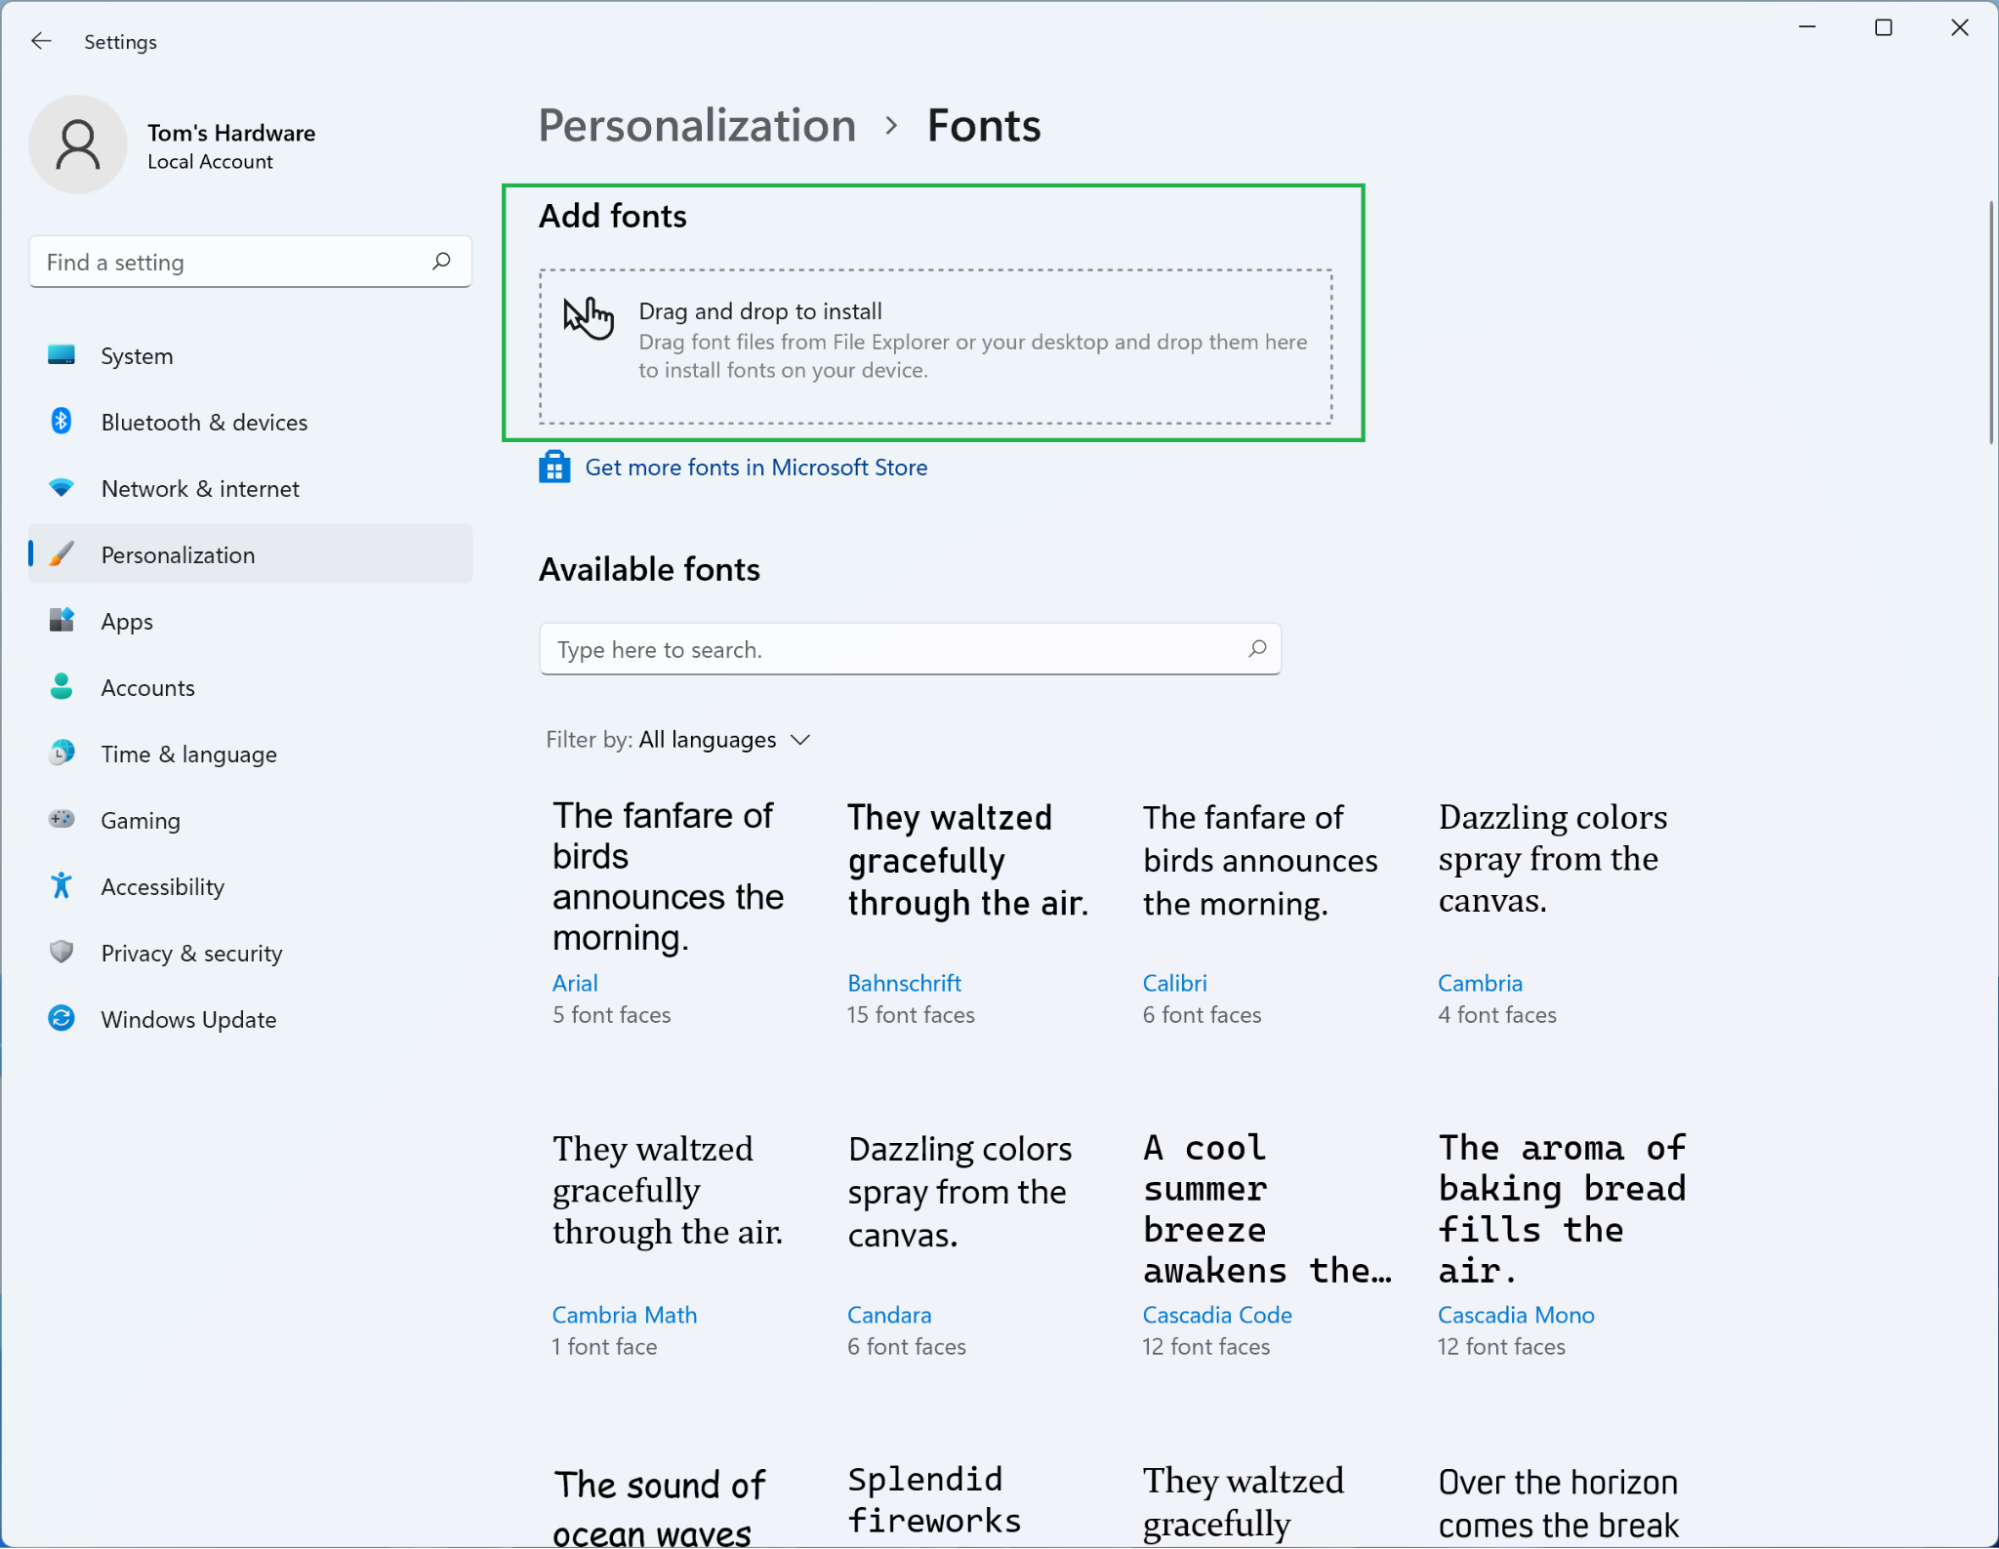
Method 1: Installing Fonts via the Windows Settings App
The most straightforward and recommended method for installing fonts on Windows 10 is through the built-in Settings app. This approach is user-friendly and integrates seamlessly with your operating system.
Step-by-Step Installation
-
Locate Your Font File: First, ensure you have downloaded the font file(s) and know their location on your computer. Font files are typically compressed in a .zip archive. If so, you’ll need to extract them. Right-click on the .zip file and select “Extract All…” or use a third-party unzipping tool. You should end up with one or more .ttf or .otf files.
-
Open Windows Settings: Click on the Start button (the Windows icon in the bottom-left corner of your screen) and then click on the gear icon to open the Settings app. Alternatively, you can press the Windows key + I on your keyboard.
-
Navigate to Personalization: In the Settings window, click on Personalization.
-
Select Fonts: In the Personalization sidebar, click on Fonts.
-
Drag and Drop or Browse: You will see a section labeled “Add fonts” with a drag-and-drop area. You have two options here:
- Drag and Drop: Open the folder where your extracted font files are located. Click and drag the .ttf or .otf font file(s) directly into the drag-and-drop area in the Fonts settings.
- Browse: Click on the “Browse” button. This will open a File Explorer window. Navigate to the location of your font file(s), select them, and click “Open.”
-
Installation Confirmation: Windows will automatically begin installing the font. You will see a brief “Installing…” message. Once complete, the font will appear in the list of available fonts under the “Manage your fonts” section.
Verifying the Installation
To confirm that your font has been installed correctly, you can open any application that uses fonts, such as Microsoft Word, Notepad, or even the Paint application.
- Open an Application: Launch your preferred application (e.g., Microsoft Word).
- Access the Font Menu: Locate the font selection dropdown menu. This is usually found in the “Home” tab of most word processing applications.
- Find Your Font: Scroll through the list of available fonts. Your newly installed font should be present. You can also start typing the name of the font in the font selection box to find it more quickly.

If your font appears and can be applied to text, the installation was successful.
Method 2: Installing Fonts via File Explorer
Another quick and convenient way to install fonts is by directly interacting with the font files themselves through File Explorer. This method is particularly useful when you have a single font file or a small batch to install.
Using the “Install” Context Menu Option
-
Locate Your Font File: As with the previous method, ensure you have the font file(s) extracted from any compressed archive and ready to go.
-
Open File Explorer: Navigate to the folder containing your font file(s).
-
Right-Click and Install:
- Single Font File: Right-click on the .ttf or .otf font file. A context menu will appear. Select Install.
- Multiple Font Files: You can select multiple font files by holding down the Ctrl key while clicking on each file, or by clicking and dragging a selection box around them. Once selected, right-click on any of the selected files and choose Install.
-
User Account Control (UAC) Prompt: You may be prompted by User Account Control to confirm that you want to allow the application to make changes to your device. Click Yes to proceed.
-
Installation: Windows will quickly install the font. You won’t see an explicit confirmation message within File Explorer, but the font will be added to your system.
Previewing and Installing via Font Preview
Each font file also has a built-in preview feature that allows you to see what the font looks like before committing to installation.
-
Locate Font File: Find your .ttf or .otf font file in File Explorer.
-
Double-Click the Font File: Double-clicking a font file will open a dedicated font preview window provided by Windows.
-
View Font Details: This window will display the font’s name, the font designer (if available), and examples of characters.
-
Click the “Install” Button: At the top of this preview window, you will see an Install button. Click this button to install the font onto your system.
-
UAC Prompt: Again, you might encounter a User Account Control prompt; click Yes to authorize the installation.
This preview method is excellent for quickly assessing a font and installing it if you like what you see, all within a few clicks.
Method 3: Installing Fonts to a Specific User Profile (Advanced)
While the previous methods install fonts for all users on the computer, you might sometimes want to install a font only for your specific user account. This is less common for general use but can be useful in shared computer environments or for specific application configurations.
Accessing the Fonts Folder for Your User Profile
-
Open the Run Dialog: Press Windows key + R on your keyboard to open the Run dialog box.
-
Type the Command: In the “Open” field, type
shell:fontsand press Enter or click OK. This command will open the main Fonts folder for your current user profile. -
Drag and Drop or Copy/Paste:
- Drag and Drop: Open a File Explorer window showing your downloaded font files. Drag and drop the .ttf or .otf files directly into the
C:WindowsFontsfolder that opened. - Copy and Paste: Select your font files in File Explorer, right-click and choose “Copy.” Then, navigate to the
C:WindowsFontsfolder, right-click in an empty space within the folder, and select “Paste.”
- Drag and Drop: Open a File Explorer window showing your downloaded font files. Drag and drop the .ttf or .otf files directly into the
-
UAC Prompt: You will likely be prompted by User Account Control to grant permission for the installation. Click Yes.
-
Automatic Installation: Windows will automatically install the fonts. You will see the progress indicated within the Fonts folder.
Important Considerations for Font Management
- Uninstalling Fonts: To uninstall a font, open the Settings app > Personalization > Fonts. Find the font you wish to remove, click on it, and then click the Uninstall button. You can also uninstall fonts by right-clicking them in the
C:WindowsFontsfolder and selecting “Delete.” - Font Overload: While it’s tempting to install every font you find appealing, a massive font library can slow down your system and make it harder to find the fonts you need. It’s good practice to periodically review and uninstall fonts you no longer use.
- Font Consistency for Branding: For businesses, maintaining brand consistency is paramount. Ensure that you are using approved fonts across all your marketing materials, website, and internal documents. This often involves managing font licenses carefully to avoid legal repercussions.
- Backup Your Fonts: If you have invested in premium fonts or collected a curated library, consider backing them up to an external drive or cloud storage. This protects your investment in case of hard drive failure or other data loss scenarios.
By mastering these font installation methods, you equip yourself with a valuable skill that enhances both your creative output and your professional presentation. Whether you’re aiming to build a strong personal brand, optimize your business’s visual identity, or simply enjoy a more personalized computing experience, understanding how to effectively manage your font library on Windows 10 is a small but significant step towards achieving those goals.
aViewFromTheCave is a participant in the Amazon Services LLC Associates Program, an affiliate advertising program designed to provide a means for sites to earn advertising fees by advertising and linking to Amazon.com. Amazon, the Amazon logo, AmazonSupply, and the AmazonSupply logo are trademarks of Amazon.com, Inc. or its affiliates. As an Amazon Associate we earn affiliate commissions from qualifying purchases.