In the intricate world of computing, where sophisticated hardware components and complex software interfaces constantly interact, there exists a crucial intermediary: the driver. Often overlooked until something goes wrong, drivers are the unsung heroes that enable your operating system to communicate effectively with your computer’s various hardware components, from your graphics card to your printer. Without the correct drivers, even the most cutting-edge hardware is nothing more than inert circuitry.
This comprehensive guide will demystify the process of driver installation, equipping you with the knowledge and steps necessary to ensure your system runs smoothly and efficiently. Whether you’re setting up new hardware, troubleshooting an issue, or simply aiming for optimal performance, understanding how to properly install and manage drivers is a fundamental skill for any computer user.
Understanding Drivers: The Digital Bridge
Before diving into the “how-to,” it’s essential to grasp the fundamental role drivers play in your computer’s ecosystem. Think of drivers as translators or instruction manuals that allow the software (your operating system, applications) to speak the same language as the hardware (graphics card, sound card, network adapter).
What Exactly is a Driver?
At its core, a device driver is a specific type of software program that operates or controls a particular type of device that is attached to a computer or automation system. Every piece of hardware connected to your computer, be it internal (like your CPU, RAM, or motherboard chipset) or external (like a mouse, keyboard, printer, or external hard drive), requires a driver to function correctly. Without the appropriate driver, your operating system wouldn’t know how to send data to your printer, display graphics on your monitor, or connect to the internet via your Wi-Fi adapter. The driver acts as a low-level interface, abstracting the complexities of hardware operation away from the operating system and applications. This abstraction allows developers to write software without needing to know the minute details of every possible piece of hardware.
Why Driver Installation is Crucial
The importance of properly installed drivers extends far beyond mere functionality. They are critical for:
- Optimal Performance: Up-to-date and correctly installed drivers ensure that your hardware can perform at its peak. For instance, an outdated graphics driver might lead to poor frame rates in games or sluggish video editing, while an updated one can unlock significant performance gains.
- System Stability: Incorrect, corrupted, or incompatible drivers are a leading cause of system crashes, “blue screens of death” (BSODs), and general system instability. Stable drivers contribute to a reliable and smooth computing experience.
- Security: Like any other software, drivers can have vulnerabilities. Manufacturers frequently release updated drivers that patch security flaws, protecting your system from potential exploits. Neglecting driver updates can leave your system open to attack.
- Feature Access: New hardware features or improvements often require a corresponding driver update to be accessible. Without the latest driver, you might miss out on performance enhancements, new display technologies, or improved power efficiency.
Common Scenarios for Driver Installation
You’ll typically find yourself needing to install or update drivers in several common situations:
- New Hardware Installation: Whenever you add a new component (e.g., a new graphics card, Wi-Fi adapter, or printer), it will almost certainly require specific drivers.
- Operating System Reinstallation or Upgrade: A fresh installation of Windows or macOS means all drivers need to be reinstalled. Similarly, upgrading your OS might necessitate new drivers compatible with the latest version.
- Troubleshooting Hardware Issues: If a device isn’t working correctly, or if you’re experiencing system crashes, outdated or corrupted drivers are often the first suspect. Reinstalling or updating them can resolve many problems.
- Performance Optimization: Gamers, content creators, and power users frequently update drivers (especially for graphics cards) to squeeze every bit of performance out of their hardware.
- Manufacturer Updates: Hardware manufacturers periodically release updated drivers to improve performance, fix bugs, enhance compatibility, or introduce new features.
Preparing for Driver Installation: Best Practices Before You Begin
While installing a driver might seem straightforward, a little preparation can save you a lot of headaches. Taking a few precautionary steps ensures a smoother process and provides a safety net if anything goes awry.
Identifying Your Hardware and Operating System
The most critical first step is accurately identifying the hardware device you need a driver for and knowing your operating system’s exact version (e.g., Windows 10 Home 64-bit, Windows 11 Pro 32-bit, macOS Sonoma). Drivers are highly specific to both the hardware model and the operating system architecture (32-bit vs. 64-bit).
- For Windows Users:
- Device Manager: Press
Windows key + Xand select “Device Manager.” Here, you can see a list of all your hardware. Right-click on a device, select “Properties,” and then the “Details” tab to find hardware IDs, which can help in identification. - System Information: Type
msinfo32in the Run dialog (Windows key + R) to get detailed system information, including your OS version and system type. - DirectX Diagnostic Tool: Type
dxdiagin the Run dialog for detailed information, especially about display, sound, and input devices.
- Device Manager: Press
- For macOS Users:
- About This Mac: Click the Apple menu in the top-left corner and select “About This Mac” to find details about your macOS version and hardware.
Locating Reliable Driver Sources
Downloading drivers from untrustworthy sources is a common pitfall that can introduce malware or incompatible software. Always prioritize official channels:
- Manufacturer’s Official Website: This is the gold standard. For a graphics card, go to NVIDIA, AMD, or Intel’s website. For a printer, visit HP, Canon, Epson, etc. Navigate to their “Support” or “Downloads” section and search using your device’s exact model number.
- Windows Update (for Windows): Microsoft often distributes certified drivers through Windows Update, especially for essential system components and peripherals. This is a very safe and convenient option.
- Hardware Bundles: New hardware often comes with a CD/DVD containing drivers. While convenient, these drivers are often outdated, so checking the manufacturer’s website for newer versions is still recommended.
Avoid: Generic driver download sites, non-official forums, or websites that promise “universal drivers” without proper verification. These can be risky.
Backup Current Drivers and Create a System Restore Point
Before installing any new driver, especially for critical components, it’s prudent to create a safety net:
- System Restore Point (Windows): This is your most important backup. It creates a snapshot of your system files, installed applications, Windows Registry, and system settings. If the new driver causes issues, you can revert your system to a previous working state. Search for “Create a restore point” in Windows search.
- Backup Specific Drivers: While less common for the average user, advanced users might export specific drivers using tools like
DISMcommands or third-party utilities. For most, a system restore point is sufficient.
Uninstalling Old/Conflicting Drivers (When Necessary)
In certain situations, particularly when upgrading a graphics card or troubleshooting persistent issues, it’s advisable to completely uninstall previous drivers before installing new ones. This prevents conflicts that can arise from remnants of older driver files.
- Graphics Drivers: Tools like Display Driver Uninstaller (DDU) are highly recommended for a clean uninstall of graphics drivers.
- Device Manager: For other devices, you can right-click the device in Device Manager, select “Uninstall device,” and check the box to “Delete the driver software for this device” if available.
Step-by-Step Driver Installation Methods
With preparations complete, let’s explore the various methods for installing drivers. The approach you take will depend on the device, your operating system, and the nature of the driver update.

Method 1: Automatic Installation via Windows Update (Windows)
This is often the easiest and safest method for many devices, especially for integrated components and common peripherals.
- Access Windows Update: Go to
Settings > Update & Security (Windows 10) / Windows Update (Windows 11). - Check for Updates: Click “Check for updates.” Windows will scan for available updates, including recommended drivers.
- Review Optional Updates (Windows 10/11): Sometimes, specific hardware drivers are listed under “View optional updates.” Click on this section and select the drivers you wish to install.
- Install and Restart: Allow Windows to download and install the drivers. A restart is often required to finalize the installation.
Pros: Convenient, reliable, drivers are Microsoft-certified, often updates core system components.
Cons: May not always provide the absolute latest drivers from the manufacturer, especially for graphics cards.
Method 2: Manual Installation from Manufacturer’s Website
This is the preferred method for getting the very latest drivers, particularly for high-performance components like graphics cards, or for new peripherals not yet fully supported by Windows Update.
- Download the Driver: Visit the official website of your hardware manufacturer. Navigate to the “Support” or “Downloads” section.
- Locate Your Device: Use the search function or browse categories to find your specific device model. Ensure you select the correct operating system (e.g., Windows 11 64-bit) and sometimes even the region.
- Download the Installer: Download the latest driver package. It will usually be an executable file (.exe) or a compressed archive (.zip, .rar).
- Run the Installer:
- If it’s an
.exefile, simply double-click it. Follow the on-screen prompts, which typically involve accepting a license agreement, choosing installation options (e.g., “Express” or “Custom” for graphics drivers), and specifying an installation location. - If it’s a compressed file, extract its contents to a folder on your desktop. You will then likely find an
setup.exeorinstall.exefile to run, or you may need to use Device Manager (see Method 3).
- If it’s an
- Restart Your System: After installation, a restart is almost always necessary to load the new drivers into the operating system.
Pros: Access to the absolute latest drivers, manufacturer-specific features, often provides better performance than generic drivers.
Cons: Requires careful identification of hardware, manual effort, risk of downloading incorrect drivers if not careful.
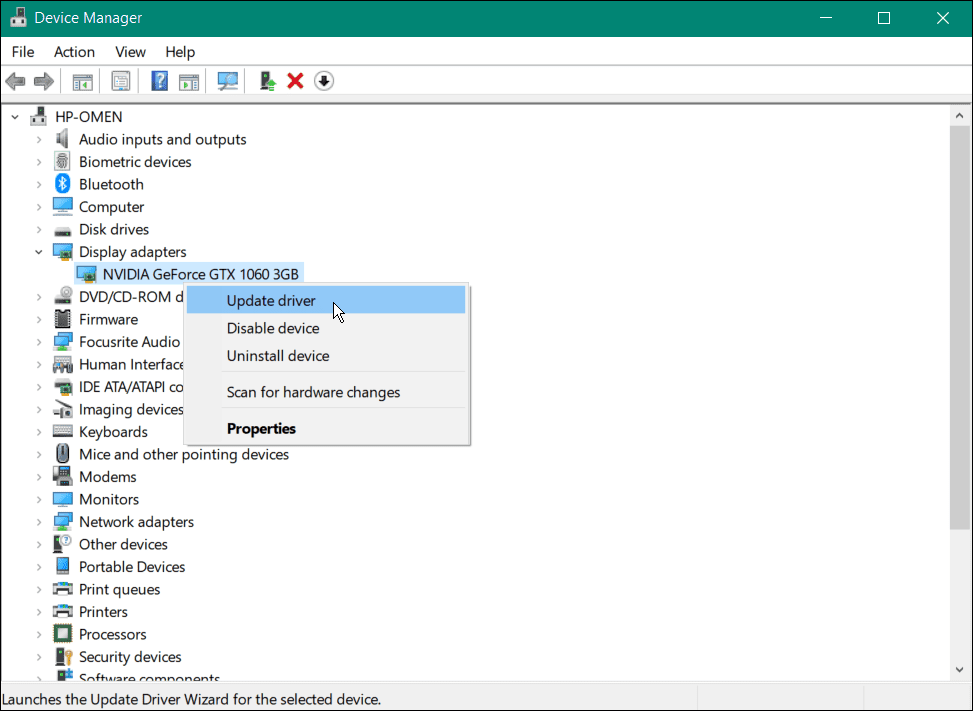
Method 3: Using Device Manager for Manual Updates (Windows)
This method is useful when you have downloaded driver files manually (e.g., an extracted .zip archive) but there isn’t a standalone installer, or when you want to force Windows to use a specific driver.
- Open Device Manager: Press
Windows key + Xand select “Device Manager.” - Locate the Device: Expand the categories to find the hardware component you want to update. It might appear with a yellow exclamation mark if it’s not working, or simply as a generic device.
- Update Driver Software: Right-click on the device and select “Update driver.”
- Choose How to Search:
- “Search automatically for updated driver software”: Windows will try to find a driver on your computer and online. This is similar to Windows Update but focused on a single device.
- “Browse my computer for driver software”: This is what you’ll use if you’ve downloaded the driver files manually. Click this option.
- Specify Location: Click “Browse” and navigate to the folder where you extracted or saved your driver files. Ensure “Include subfolders” is checked.
- Install: Click “Next.” Windows will attempt to install the driver from the specified location.
- Restart: If prompted, restart your computer.
Pros: Granular control over driver installation, useful for specific troubleshooting or when a direct installer isn’t available.
Cons: Can be more complex if you don’t know the exact folder for the driver files.
Method 4: Third-Party Driver Update Utilities (Use with Caution)
Several third-party programs claim to automatically scan your system, identify outdated drivers, and install updates. While some reputable tools exist, many are dubious and can cause more harm than good, installing incorrect drivers, bloatware, or even malware.
Recommendation: For the vast majority of users, sticking to Methods 1, 2, and 3 is safer and more reliable. If you choose to use a third-party utility, ensure it is from an extremely reputable source, read reviews, and always create a system restore point beforehand. Free versions often come with limitations or bundled software.
Post-Installation and Troubleshooting
Installing a driver isn’t always the final step; verifying its success and knowing how to troubleshoot potential issues are equally important.
Verifying Driver Installation
After installing a driver and restarting your system, it’s good practice to confirm it was successful:
- Device Manager: Open Device Manager. Look for your device. If it’s installed correctly, it should appear without any yellow exclamation marks or red “X” symbols. Right-click on the device, select “Properties,” and then the “Driver” tab to see the driver provider, date, and version. Confirm these details match the driver you intended to install.
- Functionality Test: Test the device. If it’s a printer, try printing a test page. If it’s a graphics card, try a demanding application or game.
Common Installation Issues and Solutions
Even with careful planning, driver installation can sometimes run into snags.
- “This device cannot start (Code 10)”: A very common error in Device Manager indicating that the driver failed to initialize the hardware. Often solved by reinstalling the driver, trying an older version, or checking for hardware conflicts.
- Driver Not Found/Incompatible: Ensure you downloaded the correct driver for your exact hardware model and OS architecture (32-bit vs. 64-bit).
- System Instability/BSODs: If your system crashes after a driver installation, it’s a strong indicator of an incompatible or faulty driver.
- Installation Failure/Error Messages: Take note of any error messages. They often provide clues. Try running the installer as an administrator. Temporarily disable antivirus software if it interferes (but re-enable immediately after).
- Device Not Recognized: Ensure the hardware is properly connected and seated. Try a different port or slot if applicable.
Driver Rollback and System Restore
If a new driver causes problems, these are your primary recovery tools:
- Driver Rollback (Windows): In Device Manager, right-click the problematic device, go to “Properties,” then the “Driver” tab, and click “Roll Back Driver.” This will revert to the previously installed driver. This option is only available if a previous driver was present.
- System Restore (Windows): If a driver rollback doesn’t fix the issue, or if the problem is more widespread, use the System Restore Point you created before installation. Search for “Create a restore point” and then click “System Restore” in the window that opens. Follow the prompts to select a restore point from before the problematic installation.

Keeping Drivers Up-to-Date
Maintaining updated drivers is an ongoing process.
- Regular Checks: Periodically check the manufacturer’s websites for major components (graphics card, motherboard chipset).
- Windows Update: Allow Windows Update to run regularly to catch essential system drivers.
- Manufacturer Utilities: Many manufacturers (NVIDIA GeForce Experience, AMD Adrenalin, Intel Driver & Support Assistant) offer their own software that automatically checks for and installs driver updates for their specific hardware.
In conclusion, understanding how to install and manage drivers is a foundational skill for maintaining a healthy, high-performing computer. By following these professional and insightful steps, you can confidently bridge the gap between your hardware and software, ensuring a seamless and productive computing experience. Always remember to prioritize official sources, prepare adequately, and know your recovery options to navigate the world of drivers with ease.
aViewFromTheCave is a participant in the Amazon Services LLC Associates Program, an affiliate advertising program designed to provide a means for sites to earn advertising fees by advertising and linking to Amazon.com. Amazon, the Amazon logo, AmazonSupply, and the AmazonSupply logo are trademarks of Amazon.com, Inc. or its affiliates. As an Amazon Associate we earn affiliate commissions from qualifying purchases.