For millions of Mac users worldwide, the .dmg file is a familiar sight – the digital gateway to installing new software, from productivity suites and creative tools to essential utilities and entertainment. While the process often appears as simple as a drag-and-drop, understanding the nuances of DMG files and adhering to best practices is crucial for maintaining your Mac’s security, efficiency, and overall performance. In an era dominated by rapid technological advancements, staying on top of how you manage your digital tools is fundamental to both your personal productivity and digital security.
This comprehensive guide will demystify the .dmg file, walk you through the installation process step-by-step, troubleshoot common issues, and equip you with the knowledge to manage your Mac applications like a seasoned pro. Whether you’re a new Mac user or a long-time enthusiast looking to refine your digital habits, mastering DMG installations is a cornerstone of effective macOS use, aligning perfectly with the modern emphasis on smarter tech utilization.
Understanding DMG Files: The Digital Container for Mac Apps
Before diving into the installation process, it’s essential to grasp what a DMG file is and why it’s the preferred method for software distribution on macOS. DMGs are more than just simple installers; they are sophisticated digital packages designed for reliability and ease of use.
What Exactly is a DMG? Dissecting the Mac Disk Image
A DMG, which stands for “Disk Image,” is essentially a virtual disk drive. When you open a DMG file, your macOS treats it as if you’ve plugged in an external drive or inserted a CD/DVD containing the application. This virtual drive is often carefully crafted by developers to present a user-friendly interface, guiding you through the installation.
Think of it this way: instead of scattering application components across various folders during download, a developer bundles everything neatly into a single, self-contained DMG file. This includes the application itself, sometimes a shortcut to the Applications folder, license agreements, readme files, and even custom backgrounds or icons to brand the installation experience. This self-contained nature provides integrity, ensuring that all necessary files are present and haven’t been tampered with since the developer packaged them.
Historically, DMGs evolved from earlier disk image formats like IMG and SIT archives. Their modern iteration leverages Apple’s file system capabilities, offering features like compression, encryption, and the ability to verify checksums to ensure file integrity. This makes them incredibly versatile for developers and robust for users, providing a consistent and secure method for delivering software. For those keen on digital security, knowing that a DMG can be verified for integrity offers a layer of confidence that an application hasn’t been corrupted or maliciously altered during download.
Why Developers Choose DMG for Software Distribution
Developers opt for DMG files for several compelling reasons, which directly benefit end-users and contribute to a streamlined software ecosystem.
Firstly, ease of use is paramount. The drag-and-drop method commonly found within DMGs is incredibly intuitive, requiring minimal technical expertise from the user. This simplicity reduces support queries and makes new software accessible to a broader audience. For software brands, this user-friendly approach enhances the initial brand experience, making a positive first impression.
Secondly, integrity and security are built-in. As mentioned, DMGs can be cryptographically signed by developers. When you download a signed DMG, macOS Gatekeeper can verify its authenticity, confirming that the application comes from an identified developer and hasn’t been modified. This acts as a crucial first line of defense against malware and unauthorized software. Developers value this because it protects their intellectual property and brand reputation, ensuring users receive the genuine article.
Thirdly, customization and branding allow developers to control the installation experience. A DMG can present a visually appealing background, specific instructions, and a clear path for installation (e.g., an arrow pointing to the Applications folder). This attention to detail reinforces brand identity and professionalism, creating a memorable and positive interaction even before the application is fully launched. This is a subtle yet powerful aspect of digital marketing and brand strategy for software companies.
Finally, efficiency and compression are practical benefits. DMG files can significantly compress the application’s size, making downloads faster and conserving bandwidth – a small but important factor for users with limited internet access or data caps. This efficiency contributes to a better user experience from the very first click of the download button.
Step-by-Step Guide: Seamless DMG Installation
Now that we understand the ‘what’ and ‘why,’ let’s walk through the practical steps of installing a DMG file on your Mac. This process is generally straightforward but paying attention to each detail ensures a smooth and secure installation.
Downloading the DMG File: Prioritizing Security
The journey begins with downloading the DMG file. This initial step is perhaps the most critical for your digital security.
Always download software from reputable sources. This means going directly to the software developer’s official website or a trusted marketplace. Avoid third-party download sites or suspicious links, which are often vectors for distributing malware, adware, or modified applications. Before clicking “Download,” take a moment to verify the URL in your browser’s address bar. Look for https:// (indicating a secure connection) and confirm that the domain name matches the official developer or vendor.
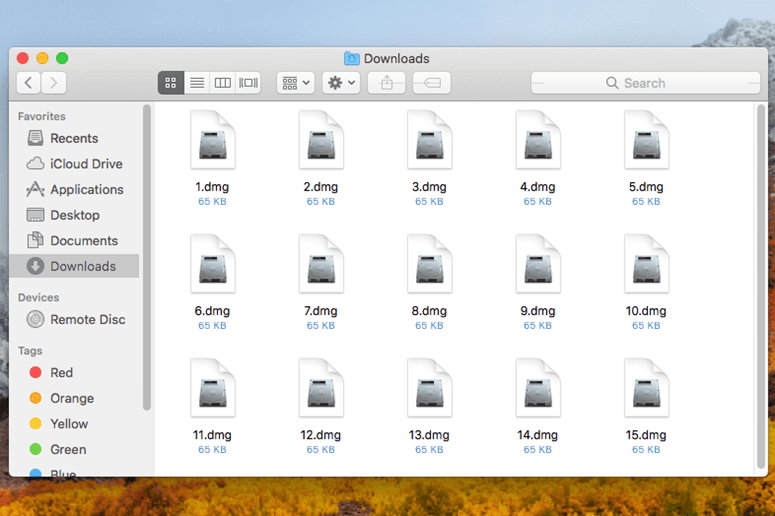
Once downloaded, the DMG file will typically appear in your Downloads folder, unless you’ve configured your browser to save files elsewhere. It will usually have an icon resembling a white package box or a disk drive. At this point, it’s also good practice to check the file size. If it seems unusually small or large compared to what you expect for the software, it might be a corrupt or fake download. A quick search for the expected file size can offer reassurance. This simple verification step can save you considerable time and potential headaches down the line, safeguarding your tech infrastructure.
Mounting the Disk Image: Accessing the Virtual Drive
With the DMG file safely downloaded, the next step is to “mount” it.
To do this, simply double-click the DMG file.
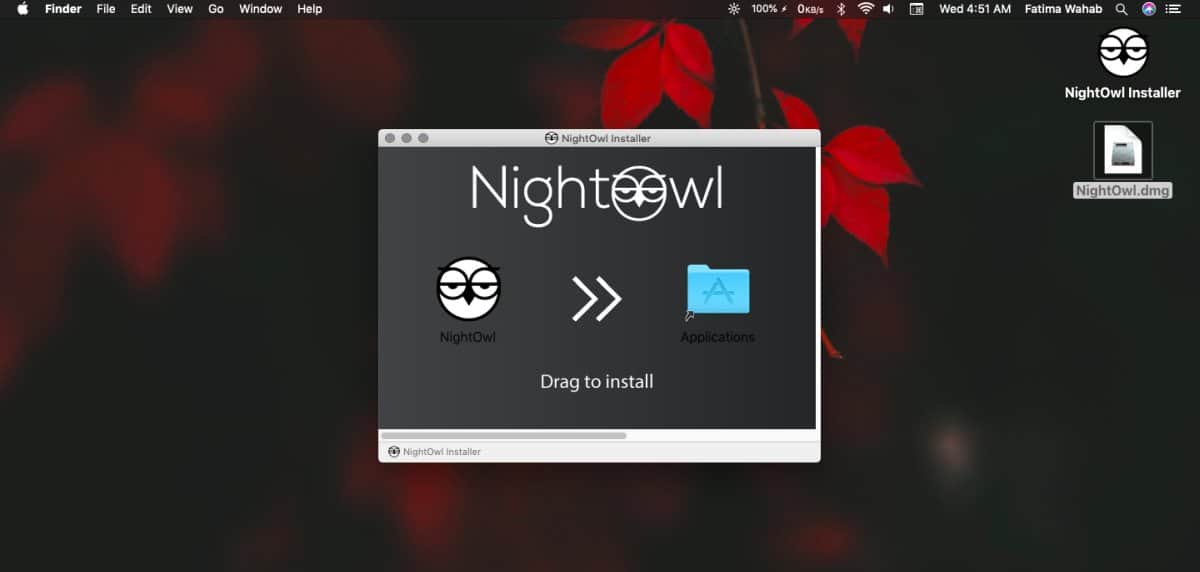
macOS will then perform a quick verification check (especially if the file is from the internet) and, upon successful verification, mount the disk image. This process makes the contents of the DMG accessible, much like plugging in a USB drive. A new window will typically pop open, displaying the contents of the virtual disk. You’ll usually see the application icon and often an alias (a shortcut) to your Mac’s Applications folder, sometimes accompanied by a stylized background and instructions.
You’ll also notice a new “drive” icon appearing on your desktop (if you have desktop icons enabled for external drives) and in the Finder sidebar under “Locations.” This signifies that the virtual disk image is now active and its contents are ready for interaction. This visual cue is important, as it confirms that the DMG has been properly mounted and is ready for the next step. If nothing happens after double-clicking, or you receive an error message, it could indicate a corrupt download or an issue with your system.
The Drag-and-Drop Installation: Placing Your New App
This is the core of DMG installation and where the Mac’s intuitive design truly shines.
In the window that opened after mounting the DMG, you will almost always see the application icon (e.g., Chrome.app, Slack.app) and often a shortcut to your Mac’s Applications folder.
To install the application, click and drag the application icon directly into the Applications folder shortcut.
macOS will then copy the application file from the mounted disk image to your Mac’s Applications directory. This process might take a few moments, depending on the size of the application. Once the copying is complete, the application is installed and ready to be used.
Why the Applications folder? This directory is the standard location for all user-installed applications on macOS. Placing your apps here ensures that they are discoverable by Spotlight search, launchpads, and other system utilities. It also maintains a tidy and organized system, which is key for productivity. Avoid dragging apps to your desktop or other random folders, as this can lead to issues with updates, permissions, and system functionality later on. Sometimes, a DMG might include an Install.app or Installer.pkg file instead of a direct application. In such cases, double-click that installer and follow its on-screen instructions, which might involve agreeing to terms and conditions, selecting installation locations, and entering your administrator password.
Ejecting the DMG and Post-Installation Cleanup
Once the application has been successfully copied to your Applications folder, the mounted DMG disk image is no longer needed.
It is crucial to “eject” the disk image. You can do this in a few ways:
- Drag the DMG icon from your desktop (if visible) to the Trash icon in the Dock (which will transform into an Eject symbol).
- Right-click (or Control-click) the DMG icon on your desktop or in the Finder sidebar and select “Eject [Disk Image Name].”
- Click the Eject icon next to the disk image name in the Finder sidebar.
Ejecting the DMG is important because it safely unmounts the virtual drive, preventing potential file corruption if your Mac were to suddenly shut down or experience an error while the DMG was still active. Once ejected, the virtual disk image disappears from your desktop and Finder sidebar.
Finally, you can delete the original DMG file that you downloaded to your Downloads folder. Drag it to the Trash and empty the Trash. The DMG file is merely the installer; the application itself now resides permanently in your Applications folder. Keeping old DMG files can unnecessarily clutter your hard drive and consume valuable storage space, impacting your Mac’s overall performance and productivity. Discarding them helps maintain a clean and efficient system, a principle of effective digital asset management.
Troubleshooting Common DMG Installation Issues
While DMG installation is generally smooth, you might occasionally encounter hiccups. Knowing how to troubleshoot these common issues can save you time and frustration.
“Unidentified Developer” Warnings: Navigating Gatekeeper
One of the most frequent messages Mac users encounter is the “Unidentified Developer” warning. This appears when you try to open an application from a developer not registered with Apple, or if the developer hasn’t digitally signed their application with an Apple Developer ID. This is macOS Gatekeeper doing its job – protecting your system from potentially malicious or untrusted software.
By default, macOS is set to allow apps only from the App Store and identified developers. If you trust the source of the application and are confident it’s legitimate (having downloaded it from the official developer’s site), you can bypass this warning.
To open an app from an unidentified developer:
- Right-click (or Control-click) the application icon in your
Applicationsfolder. - Select Open from the contextual menu.
- A dialog box will appear, asking if you are sure you want to open the app. Click Open.
Alternatively, you can go to System Settings (or System Preferences) > Privacy & Security. Scroll down to the “Security” section. If you’ve just attempted to open a blocked app, you’ll see a message ““[App Name]” was blocked from opening because it is not from an identified developer.” Click Open Anyway.
A word of caution: Only bypass this warning if you are absolutely certain about the legitimacy and safety of the software. Blindly opening applications from unknown sources is a significant security risk and can expose your Mac to malware. This relates directly to digital security within the “Tech” realm and protecting your digital assets.
“Disk Image Could Not Be Opened” Errors: Corrupt Files and Permissions
If you double-click a DMG and receive an error message like “Disk Image Could Not Be Opened” or “The following disk images failed to open,” several issues could be at play:
- Corrupt Download: The most common cause is a partially or completely corrupt download. Internet interruptions, network issues, or server problems during the download can result in a damaged file. Solution: Delete the problematic DMG file and try downloading it again, ensuring a stable internet connection.
- Insufficient Permissions: Less common, but sometimes the DMG file itself might have incorrect permissions, preventing your system from accessing it. Solution: Right-click the DMG file, select
Get Info, and check the “Sharing & Permissions” section to ensure your user account has read/write access. - Disk Image Utility Issues: Rarely, the Disk Image Utility (the background process that handles DMGs) might encounter a glitch. Solution: Restart your Mac. A fresh system boot often resolves these temporary software conflicts.
- Outdated macOS: In very rare cases, an extremely old macOS version might struggle with newer DMG formats. Solution: Ensure your macOS is up to date via System Settings > General > Software Update.
These issues highlight the importance of careful file handling and maintaining a healthy operating system for optimal tech performance.
Installation Stuck or Slow: Patience and Resources
Sometimes, the drag-and-drop copying process can appear to hang or take an unusually long time.
- Large Application Size: Modern applications can be several gigabytes in size. Copying such large files takes time, especially on older Macs or those with slower hard drives (traditional HDDs instead of SSDs). Solution: Be patient. Check the progress bar, if available, or observe the activity indicator.
- System Resource Contention: If your Mac is running many demanding applications simultaneously, system resources (CPU, RAM, disk I/O) might be stretched thin, slowing down the copying process. Solution: Close unnecessary applications before starting the installation. You can monitor your system’s resource usage using Activity Monitor (found in
Applications>Utilities). - Disk Health: A struggling hard drive or SSD can also contribute to slow file operations. Solution: While not an immediate fix, regularly checking your disk health and ensuring sufficient free space can prevent future slowdowns.
Patience is key here, but also recognizing when a legitimate delay turns into a genuine freeze. If an installation is truly stuck for an unreasonable amount of time (e.g., hours for a moderately sized app), you might need to force-quit Finder (press Command + Option + Esc, select Finder, and click Relaunch) and restart the process.
Beyond DMGs: Other Ways to Install Software on Your Mac
While DMGs are ubiquitous, they are not the only method for installing software on macOS. Understanding the alternatives provides a fuller picture of application management and can inform your choices based on security, convenience, and specific software needs.
The App Store: Simplicity and Security
The Mac App Store is Apple’s curated marketplace for macOS applications. Installing apps from the App Store is arguably the simplest and most secure method available.
Pros:
- Unrivaled Security: Every app in the App Store undergoes a rigorous review process by Apple, ensuring it meets strict guidelines for security, privacy, and functionality. Apps are “sandboxed,” meaning they have limited access to your system, further enhancing security.
- Automatic Updates: Apps purchased or downloaded from the App Store are automatically updated in the background, ensuring you always have the latest features and security patches.
- Easy Management: All your App Store purchases are tied to your Apple ID, making it easy to reinstall apps on new Macs or after a system wipe.
- Streamlined Experience: Installation is a single click, with no drag-and-drop or manual cleanup required.
Cons:
- Limited Selection: Not all software is available on the App Store. Developers might choose to distribute independently to avoid Apple’s revenue share or adhere to specific guidelines that conflict with their app’s functionality.
- Sandbox Restrictions: While a security benefit, sandboxing can limit some apps from performing certain system-level tasks, which might affect their full functionality.
For general users seeking maximum convenience and security, the Mac App Store is often the first place to look for software. This aligns with modern “Tech” trends focusing on user-friendly and secure ecosystems.
Package Installers (.pkg files): For More Complex Setups
Some applications, especially larger, more complex software suites or those requiring system-level integrations (like drivers or extensive libraries), are distributed as .pkg (package) files. These are similar to .exe installers on Windows.
When you double-click a .pkg file, it launches an installer wizard that guides you through a multi-step process. This typically involves:
- Introduction: A welcome screen.
- License Agreement: Requiring you to agree to terms and conditions.
- Destination Select: Choosing where the software will be installed (often non-negotiable for system-level components).
- Installation Type: Sometimes offering custom installation options.
- Authentication: Requiring your administrator password to proceed with system-level changes.
- Summary: Confirming the installation.
PKG installers are common for professional software (e.g., Adobe Creative Suite, Microsoft Office, specialized development tools) and for components that need to integrate deeply with macOS or require specific pre-installation checks. While more involved than a DMG drag-and-drop, they provide developers with more control over the installation process for intricate software.
Command-Line Tools (Homebrew): The Developer’s Choice
For developers, power users, and those comfortable with the command line, tools like Homebrew offer an incredibly efficient way to install and manage software. Homebrew is a “package manager” for macOS.
How it works: Instead of manually downloading DMGs or running PKG installers, you type a simple command in Terminal (e.g., brew install firefox), and Homebrew automatically downloads, installs, and configures the software for you. It also handles dependencies, updates, and uninstallation seamlessly.
Pros:
- Automation & Efficiency: Installs software quickly and reliably.
- Vast Library: Access to a huge range of open-source tools, utilities, and developer software not always found in the App Store or as traditional installers.
- Dependency Management: Automatically installs any prerequisite software.
Cons:
- Command-Line Interface: Requires comfort with Terminal, which can be daunting for casual users.
- Less Visual: No graphical installer.
Homebrew is a prime example of a “Tech” tool that significantly boosts “Productivity” for a specific user segment, streamlining the management of numerous developer tools and utilities.
Best Practices for Secure and Efficient Software Management
Beyond the mechanics of installation, adopting smart habits for software management is paramount for maintaining a secure, efficient, and enjoyable Mac experience. These practices extend the life of your device and protect your digital assets.
Always Download from Reputable Sources: Your First Line of Defense
Reiterating this point is crucial because it’s the single most effective way to prevent malware and security breaches. As discussed, always use official developer websites or trusted app stores. Be wary of software “cracks,” torrent sites, or unsolicited download links. These are notorious sources of malicious software that can compromise your data, steal personal information, or hold your system for ransom. A proactive approach to verifying download sources directly impacts your digital security and can save you significant “Money” by avoiding costly repairs or data recovery services. Trusting reputable sources builds a secure digital environment, aligning with robust “Digital Security” principles.
Keep Your macOS Updated: Security and Compatibility
Apple regularly releases macOS updates that include critical security patches, bug fixes, and performance enhancements. Running an outdated operating system leaves your Mac vulnerable to known exploits.
Solution: Regularly check for updates via System Settings > General > Software Update and install them promptly. While it might seem like a minor inconvenience, keeping your OS current is a fundamental aspect of digital hygiene and ensures compatibility with the latest applications and security protocols, crucial for robust “Tech” operations.
Regularly Review and Uninstall Unused Apps: Declutter and Optimize
Over time, you might accumulate applications you no longer use. These unused apps consume valuable disk space, can run background processes that slow down your Mac, and sometimes even pose security risks if they’re outdated and unmaintained.
Solution: Periodically go through your Applications folder. For apps installed via DMG (drag-and-drop), simply drag the application icon to the Trash. For App Store apps, you can delete them directly from Launchpad by holding down the Option key until icons jiggle, then clicking the ‘X’. For complex apps or those with .pkg installers, consider using the developer’s uninstaller (if provided) or a third-party uninstallation utility like CleanMyMac X or AppCleaner to ensure all associated files (preferences, caches, support files) are removed. This decluttering process significantly improves your Mac’s performance and enhances your “Productivity” by freeing up resources and reducing digital distraction.
Backup Your Mac: The Ultimate Safety Net
Regardless of how diligent you are with security and software management, unforeseen events can occur – hardware failure, accidental deletion, or even a successful malware attack. Having a recent backup is your ultimate safety net.
Solution: Utilize Apple’s built-in Time Machine to automatically back up your entire system to an external drive. Additionally, consider cloud backup services for critical documents. A robust backup strategy ensures that your valuable data, creative projects, and financial records are safe, providing peace of mind and protecting your “Money” by safeguarding against data loss.

Conclusion: Mastering Your Mac’s Digital Landscape
The humble DMG file, a cornerstone of macOS software distribution, is more than just an installer; it’s a testament to Apple’s commitment to user-friendly design and robust digital security. By understanding what DMGs are, following the straightforward installation steps, knowing how to troubleshoot common issues, and adopting best practices for software management, you empower yourself to navigate your Mac’s digital landscape with confidence and efficiency.
In a world where technology constantly evolves, mastering these fundamental skills is not just about installing an app; it’s about safeguarding your digital life, maximizing your productivity, and ensuring your Mac remains a powerful and reliable tool for all your endeavors. Embrace these insights, and take full control of your Mac, transforming it into an even more effective instrument for both your tech ventures and personal achievements.
aViewFromTheCave is a participant in the Amazon Services LLC Associates Program, an affiliate advertising program designed to provide a means for sites to earn advertising fees by advertising and linking to Amazon.com. Amazon, the Amazon logo, AmazonSupply, and the AmazonSupply logo are trademarks of Amazon.com, Inc. or its affiliates. As an Amazon Associate we earn affiliate commissions from qualifying purchases.