In the rapidly evolving world of technology, a personal computer is more than just a tool; it’s a gateway to entertainment, productivity, and digital creation. At the heart of a PC’s visual prowess lies the video card, also known as the Graphics Processing Unit (GPU). Whether you’re a hardcore gamer seeking the highest frame rates, a creative professional rendering intricate 3D models, or simply looking to enhance your multi-monitor setup for better productivity, understanding how to install and upgrade your video card is an essential skill. This guide will walk you through every step of the process, ensuring a smooth transition to superior visual performance while touching upon the broader implications for your tech experience, brand choices, and financial investments.

Why Upgrade Your Video Card? Understanding the Tech & Your Needs
The decision to upgrade your video card is often driven by a desire for improved performance and a more immersive computing experience. A video card is arguably the most impactful component when it comes to visual fidelity and responsiveness, making it a cornerstone of modern computing.
The Core of Visual Performance: What a Video Card Does
A video card is a specialized electronic circuit designed to rapidly manipulate and alter memory to accelerate the creation of images in a frame buffer intended for output to a display device. In simpler terms, it’s what takes the data from your CPU and translates it into the pixels you see on your screen. High-performance video cards are equipped with dedicated processors and memory (VRAM) that allow them to handle complex graphical computations far more efficiently than your system’s main CPU or integrated graphics. This dedicated horsepower is crucial for rendering detailed 3D environments, processing high-resolution video, and accelerating certain artificial intelligence (AI) and machine learning (ML) tasks, which are becoming increasingly prevalent in various applications.
Identifying Your Upgrade Motivation: Tailoring Your Tech Investment
Before embarking on the installation process, it’s beneficial to understand why you’re upgrading. Your motivation will often dictate the type of card you choose and the expected benefits.
- Gaming: This is perhaps the most common reason for a GPU upgrade. Newer games demand more powerful hardware to run at higher resolutions (1080p, 1440p, 4K), frame rates (60fps, 144fps, 240fps), and graphical settings (ultra, high). An upgraded video card can unlock a smoother, more detailed, and ultimately more enjoyable gaming experience.
- Professional Work: For content creators, designers, architects, and engineers, a powerful GPU can dramatically cut down render times in software like Adobe Premiere Pro, Blender, AutoCAD, or SolidWorks. It accelerates tasks like video editing, 3D rendering, scientific simulations, and machine learning model training, directly impacting productivity and workflow efficiency. This is where your tech choices directly translate into professional output and potentially, your personal or corporate brand’s efficiency.
- Multi-Monitor Setups & High-Resolution Displays: If you’re running multiple monitors or a single high-resolution display (e.g., a 4K ultrawide), a dedicated video card is essential to drive these pixels without performance hiccups. Integrated graphics often struggle with such demands.
- Future-Proofing & VR: While “future-proofing” is a challenging concept in tech, a new GPU can extend the lifespan of your current PC build, allowing you to run upcoming applications and games for longer. It’s also a prerequisite for experiencing virtual reality (VR) at its best.
Compatibility Check: The First Crucial Step in Your Tech Journey
Before you even unbox your new GPU, a thorough compatibility check is paramount. Overlooking these details can lead to frustration, wasted time, and even potential damage.
- PCIe Slot Type: Modern video cards utilize PCI Express (PCIe) slots. Most current GPUs require a PCIe x16 slot. Ensure your motherboard has an available PCIe x16 slot (usually the longest slot on your motherboard, typically colored differently or reinforced). While newer GPUs use PCIe 4.0 or even 5.0, they are generally backward compatible with PCIe 3.0 slots, though you might experience a minor performance reduction with older standards.
- Power Supply Unit (PSU) Requirements: This is a critical factor. Your new video card will have specific power requirements, usually stated in watts, and require certain PCIe power connectors (e.g., 6-pin, 8-pin, or 12-pin). Check the manufacturer’s specifications for your chosen GPU and compare them against your PSU’s total wattage output and available connectors. An underpowered PSU can lead to instability, crashes, or simply prevent your system from booting. Investing in a high-quality, reputable brand PSU is crucial for system stability and longevity, aligning with smart financial choices in tech.
- Case Size: Video cards, especially high-performance models, can be surprisingly long and thick. Measure the available space in your PC case and compare it with the dimensions of your new GPU. Pay attention to both length and height, especially if you have an air cooler on your CPU or want to ensure proper airflow.
- CPU Bottlenecking Considerations: While a powerful GPU is excellent, it can be bottlenecked by an older or less powerful CPU. If your CPU isn’t fast enough to feed data to the GPU at its full potential, you won’t get the maximum performance out of your new video card. Research common pairings and benchmarks to ensure a balanced system.
- Monitor Compatibility: Ensure your new GPU has the necessary display output ports (HDMI, DisplayPort, DVI) to connect to your monitor(s). Adapters are available but direct connections are generally preferred for optimal performance.
Preparing for Installation: A Smooth Transition to Enhanced Graphics
Preparation is key to any successful upgrade. Taking the time to properly prepare your workspace and PC will prevent headaches and ensure a safe, efficient installation.
Gathering Your Tools: The Essentials for a Tech Task
Having the right tools at hand will make the process much smoother:
- Phillips Head Screwdriver: The most common tool you’ll need for opening your case and securing the GPU.
- Anti-Static Wrist Strap (Optional but Recommended): This prevents static electricity discharge from damaging sensitive components. If you don’t have one, frequently touch a grounded metal object (like your PC’s unpainted metal frame) to discharge any static buildup. This is a small investment for peace of mind, protecting your more significant financial outlay on hardware.
- Zip Ties or Velcro Straps: Useful for cable management after installation, improving airflow and aesthetics.
- Compressed Air or Cleaning Brush: An excellent opportunity to clean out any dust buildup inside your PC.
- Flashlight: To illuminate dark corners inside your case.
Backing Up and Powering Down: Safety First
Before you touch any internal components, prioritize safety and data integrity:
- Backup Important Data: While a GPU installation typically doesn’t affect data, it’s always good practice to back up critical files before performing any major hardware changes. This is a fundamental digital security and productivity habit.
- Power Down Completely: Shut down your computer through the operating system. Once it’s off, unplug the power cable from the wall outlet or surge protector. Also, unplug any other peripherals (monitor, keyboard, mouse, etc.) to give yourself plenty of room to work.
- Hold Power Button (Optional but Recommended): After unplugging, press and hold your PC’s power button for 5-10 seconds. This helps drain any residual power from the system’s capacitors, reducing the risk of accidental shock or component damage.
Discharging Static Electricity: Protecting Your Investment
Static electricity is an invisible threat to electronic components. A sudden discharge can “fry” sensitive circuits, turning your expensive new GPU into a paperweight.
- Anti-Static Wrist Strap: If you have one, attach it to your wrist and clip the other end to an unpainted metal part of your PC case.
- Ground Yourself Regularly: If you don’t have a strap, frequently touch the unpainted metal frame of your PC case. This ensures you’re at the same electrical potential as the PC, preventing static buildup. Avoid working on carpeted floors, and consider wearing cotton clothing rather than synthetic materials.
Removing Your Old Graphics Card (if applicable): Making Space for the New
If you’re upgrading an existing GPU, you’ll need to remove the old one first:
- Open Your PC Case: Remove the side panel(s) of your PC case to gain full access to the interior.
- Unplug Power Cables: Locate any PCIe power cables connected to your old graphics card. Gently but firmly disconnect them. These usually have clips that need to be squeezed or pressed.
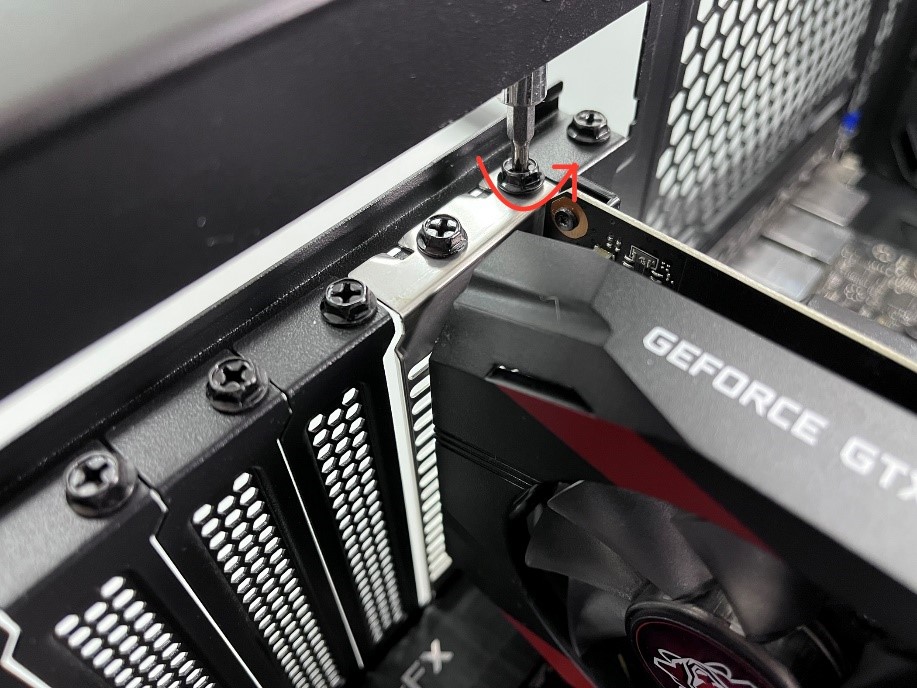
- Unscrew the Bracket: Your graphics card will be secured to the PC case’s rear panel by one or two screws (or a tool-less retention clip). Unscrew these to free the card from its bracket.
- Release the PCIe Retention Clip: At the end of the PCIe x16 slot on the motherboard, there’s usually a small plastic clip that holds the graphics card in place. Gently push or pull this clip (depending on its design) to release the card. It might be stiff, so be careful not to force it.
- Careful Removal and Storage: With the power cables disconnected, the bracket unscrewed, and the clip released, you can now gently pull the old graphics card straight out of the PCIe slot. Avoid wiggling it excessively. Place it in an anti-static bag (if you have one, often comes with new hardware) for safe storage or potential resale – a smart financial move if the card still has value.
The Installation Process: Your Step-by-Step Guide to GPU Integration
With preparations complete, you’re ready for the main event: installing your new video card. This is where your tech journey culminates in tangible performance gains.
Opening the PC Case: Ensuring Clear Access
If you haven’t already, ensure your PC case is fully open and you have unobstructed access to the motherboard and PCIe slots. Clear any cables that might be in the way.
Identifying the PCIe Slot: The New Home for Your GPU
Locate the primary PCIe x16 slot on your motherboard. This is typically the top-most long slot, nearest to your CPU. It’s usually reinforced with metal for heavier cards. If you have multiple x16 slots, using the top one is generally recommended as it’s often directly connected to the CPU for maximum bandwidth.
Inserting the New Graphics Card: A Precise Fit
- Remove Slot Covers: If there are metal slot covers on the back of your PC case corresponding to where your GPU will sit, remove them. You’ll typically need to remove two covers for a standard dual-slot GPU.
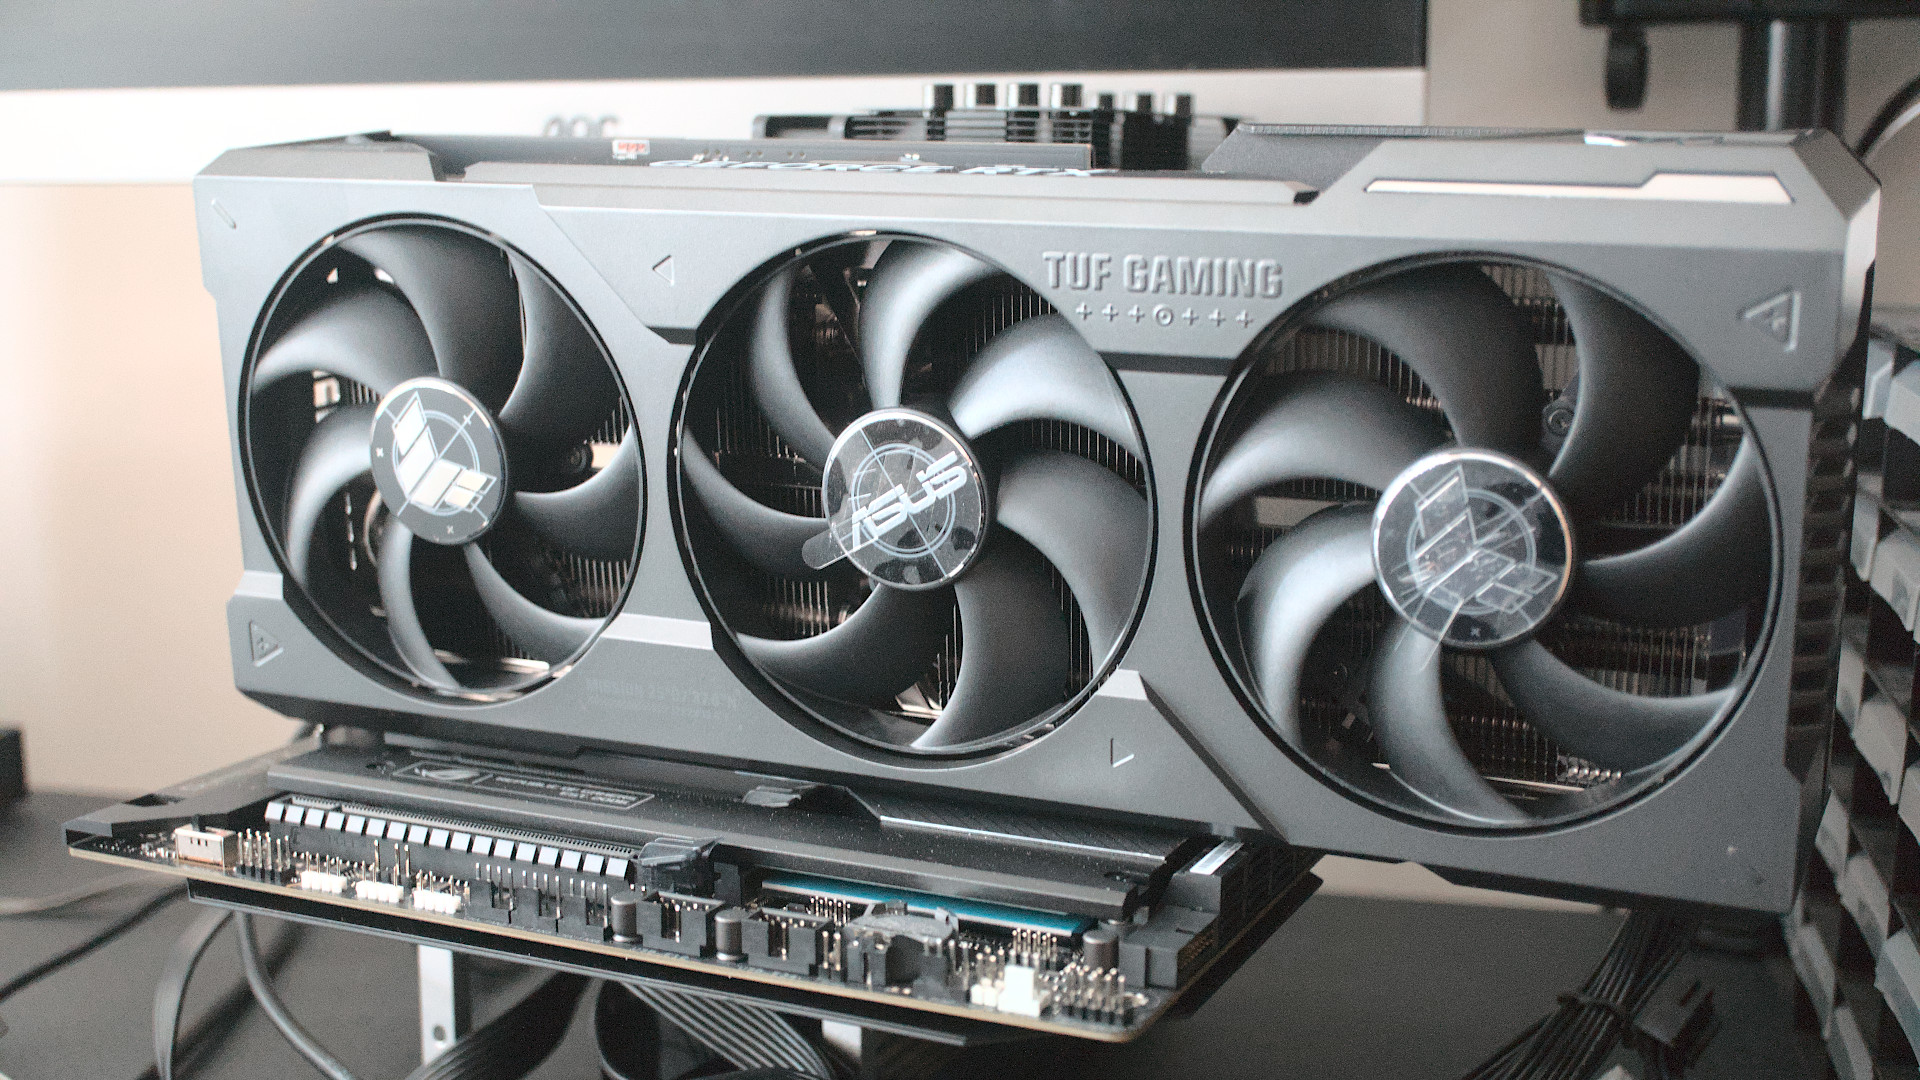
- Align and Insert: Carefully align your new graphics card with the chosen PCIe x16 slot. Ensure the gold contacts on the card are directly above the slot.
- Press Firmly and Evenly: With both hands, gently but firmly press the graphics card straight down into the PCIe slot until it’s fully seated. You should hear a satisfying “click” as the retention clip at the end of the slot engages and locks the card into place. Do not force it; if it doesn’t go in smoothly, re-check alignment.
- Secure the Card: Once the card is fully seated and the clip is engaged, use the screws you removed earlier (or new ones provided with your case/GPU) to secure the card’s bracket to the PC case. This prevents the card from sagging and helps with stability.
Connecting Power Cables: Fueling the Performance Beast
This step is critical for your GPU to function correctly.
- Identify Required Connectors: Check your new GPU’s specifications or look at the card itself to see what PCIe power connectors it requires (e.g., one 8-pin, two 6+2-pin, a 12-pin, etc.).
- Plug Them In: Locate the corresponding PCIe power cables from your PSU. These cables are typically labeled “PCIe” or “VGA” and usually have 6+2 pin configurations, allowing flexibility for 6-pin or 8-pin connections. Connect all required cables securely to the GPU. Ensure the clips on the connectors click into place. Do not leave any required power connectors unplugged.
Cable Management (Optional but Recommended): Aesthetics and Airflow
While not strictly necessary for functionality, taking a few minutes to manage your cables can pay dividends:
- Improve Airflow: Tidy cables allow air to flow more freely through your case, improving cooling efficiency for all components, including your new GPU.
- Aesthetics: A clean build looks professional and is easier to work with if you need to perform future maintenance or upgrades. This contributes to the overall “brand” of your PC setup.
- Use Zip Ties/Velcro: Route cables behind the motherboard tray or along the edges of the case, securing them with zip ties or Velcro straps.
Closing the PC Case: Sealing the Deal
Once everything is securely connected and tidy, carefully reattach the side panel(s) of your PC case. Ensure all screws are tightened.
Post-Installation Setup and Optimization
Installing the hardware is only half the battle. To unlock your new GPU’s full potential and ensure a stable system, follow these post-installation steps.
First Boot and Display Connection: The Moment of Truth
- Connect Your Monitor: Plug your monitor’s display cable (HDMI, DisplayPort, DVI) directly into one of the output ports on your new graphics card. Do not connect it to the motherboard’s integrated graphics ports.
- Plug In and Power On: Reconnect all peripherals and the power cable to your PC. Press the power button.
- Initial Boot: Your PC should boot up normally, though the screen might display a lower resolution initially, or even briefly flicker, as it loads generic display drivers. If you don’t see anything, review the troubleshooting section below.
Installing the Latest Drivers: Unleashing Raw Power
This is perhaps the most crucial software step. Outdated or incorrect drivers can severely limit performance or cause instability.
- Clean Driver Installation:
- Recommended: For the cleanest installation, especially if you’re switching between NVIDIA and AMD cards, it’s highly recommended to use Display Driver Uninstaller (DDU). Download DDU, boot into Safe Mode (Windows), run DDU to completely remove all previous graphics drivers, then reboot into normal Windows.
- Without DDU (less ideal): You can often uninstall previous drivers through Windows’ “Add or Remove Programs” or by using the manufacturer’s driver utility.
- Download Latest Drivers: Visit the official website of your graphics card manufacturer (NVIDIA for GeForce cards, AMD for Radeon cards). Navigate to their driver download section, select your specific GPU model and operating system, and download the latest stable drivers. Avoid downloading drivers from third-party sites to ensure digital security.
- Install Drivers: Run the downloaded driver installer and follow the on-screen prompts. Typically, a “Custom” or “Express” installation is offered. Express is usually fine for most users, but a custom install allows you to deselect optional software you might not need. Your screen may flicker or go black multiple times during installation – this is normal. Restart your PC if prompted.
Testing and Benchmarking: Confirming Your Upgrade
After drivers are installed, it’s time to verify your new card is working as expected.
- System Information: Open Task Manager (Ctrl+Shift+Esc), go to the “Performance” tab, and select “GPU.” You should see your new graphics card listed with active usage.
- Run a Game/Application: Load up a demanding game or professional application you frequently use. Check the in-game settings to ensure your new resolution, refresh rate, and graphical options are available and performing well.
- Benchmarking Software: Tools like 3DMark, Unigine Heaven/Superposition, or FurMark can push your GPU to its limits and provide comparative scores, allowing you to see how your new card stacks up against others and confirm its performance.
Monitoring Performance and Temperatures: Keeping Your Tech Healthy
Even after installation, ongoing monitoring is good practice for the longevity of your hardware.
- Monitoring Tools: Use software like MSI Afterburner, HWMonitor, or the manufacturer’s utility (e.g., NVIDIA GeForce Experience, AMD Adrenalin Software) to monitor GPU temperatures, clock speeds, fan speeds, and VRAM usage while under load.
- Temperature Ranges: Keep an eye on temperatures. Under heavy load, GPUs typically operate in the 60-80°C range. Consistently exceeding 85-90°C might indicate inadequate cooling or poor airflow within your case, potentially shortening the card’s lifespan.
Troubleshooting Common Issues: Addressing Roadblocks
Even with careful preparation, issues can arise. Here are a few common problems and their solutions:
- No Display/Black Screen:
- Check power cables: Ensure all PCIe power cables are securely plugged into the GPU and the PSU.
- Reseat the GPU: Power off, unplug, open the case, and reseat the graphics card firmly in the PCIe slot.
- Check monitor cable: Ensure the display cable is plugged into the new GPU’s output, not the motherboard. Try a different port on the GPU or a different cable.
- BIOS/UEFI Settings: Some motherboards may require you to explicitly set the primary display output to “PCIe” rather than “Integrated Graphics” in the BIOS/UEFI.
- Driver Installation Failure/Crashes:
- Ensure a clean driver uninstallation using DDU before reinstalling.
- Download drivers directly from the manufacturer’s website.
- If the PC crashes during driver installation, boot into Safe Mode and try installing an older, known-stable driver version.
- Low Performance/Stuttering:
- Ensure drivers are correctly installed and up to date.
- Check for CPU bottlenecking (monitor CPU usage during demanding tasks).
- Verify the GPU is running at the correct PCIe speed (x16).
- Check for adequate cooling; thermal throttling can severely reduce performance.
The Brand and Money Perspective: Making Smart Choices
Beyond the technical steps, upgrading your video card has significant implications from a brand and financial perspective, aligning with our broader website themes.
Choosing the Right Brand: Reputation and Ecosystem
When selecting a GPU, you’re primarily choosing between two major chip manufacturers: NVIDIA (GeForce) and AMD (Radeon). Each has its ecosystem and reputation:
- NVIDIA: Often perceived as the market leader in high-end performance, known for technologies like DLSS (Deep Learning Super Sampling) and ray tracing capabilities. Their “brand” is often associated with cutting-edge features and a robust driver ecosystem.
- AMD: Offers competitive performance, particularly in the mid-range, with features like FSR (FidelityFX Super Resolution) and a strong value proposition. Their “brand” often emphasizes open standards and a competitive price-to-performance ratio.
Beyond the chip, you also choose a board partner (e.g., ASUS, MSI, Gigabyte, EVGA, Sapphire). These partners design and manufacture the actual cards using NVIDIA or AMD chips, offering variations in cooling solutions, factory overclocks, and aesthetics. Researching brand reputation for reliability, customer support, and specific model reviews is crucial for a wise investment.
Investment and ROI: Balancing Performance with Budget
A video card upgrade is a significant financial investment, ranging from a few hundred to over a thousand dollars. Consider the return on investment (ROI):
- Performance vs. Price: Balance the performance you need with your budget. The highest-end cards often offer diminishing returns for their price premium.
- Future-Proofing (within reason): While no tech is truly future-proof, investing in a slightly more powerful card than your immediate needs might save you from another upgrade sooner, potentially offering better long-term value.
- Resale Value: Keep the packaging and documentation for your old and new GPUs. If your old card is still functional, selling it can recoup some of your upgrade costs, making the overall investment more manageable. This is a practical aspect of personal finance in the tech world.
Digital Security and Maintenance: Protecting Your Performance and Investment
Your new GPU, like any other piece of technology, requires ongoing maintenance and attention to digital security.
- Driver Updates: Regularly update your drivers. Beyond performance enhancements, driver updates often include critical security patches that protect your system from vulnerabilities.
- Physical Cleaning: Periodically clean your GPU and PC case to remove dust buildup. Dust acts as an insulator, reducing cooling efficiency and potentially shortening component life. A clean PC runs cooler, quieter, and more efficiently, extending the life of your valuable hardware.
Installing a video card is a rewarding process that significantly impacts your PC’s capabilities. By following these detailed steps and considering the broader tech, brand, and money implications, you can confidently upgrade your system, unlock new levels of performance, and enhance your overall computing experience. Embrace the power of the GPU and transform your digital world.
aViewFromTheCave is a participant in the Amazon Services LLC Associates Program, an affiliate advertising program designed to provide a means for sites to earn advertising fees by advertising and linking to Amazon.com. Amazon, the Amazon logo, AmazonSupply, and the AmazonSupply logo are trademarks of Amazon.com, Inc. or its affiliates. As an Amazon Associate we earn affiliate commissions from qualifying purchases.