Chromebooks have revolutionized personal computing with their affordability, simplicity, and cloud-centric approach. However, for users who crave more power, flexibility, and access to a wider ecosystem of software, the built-in Chrome OS can feel limiting. Fortunately, there’s a way to bridge this gap and unlock the true potential of your Chromebook: installing Linux. This process transforms your device from a streamlined web browser into a versatile desktop computer capable of running powerful applications, engaging in software development, and much more.
This comprehensive guide will walk you through the process of installing Linux on your Chromebook, demystifying the steps and equipping you with the knowledge to embark on this exciting upgrade. Whether you’re a student looking to expand your academic tools, a developer seeking a robust coding environment, or simply a curious tech enthusiast, this tutorial is for you.
Understanding the Linux on Chromebook Landscape
Before diving into the installation process, it’s crucial to understand what “installing Linux on a Chromebook” actually entails. Unlike traditional laptops where you’d replace your operating system entirely, most Chromebooks utilize a feature called Linux (Beta), now often referred to as Crostini. This integration allows you to run a Linux environment within Chrome OS, creating a dual-booting experience without sacrificing the core functionality of your Chromebook.
This approach offers several advantages:
- Seamless Integration: Linux applications run alongside your Chrome OS apps, allowing you to easily switch between them.
- Security: The Linux environment is containerized, meaning it’s isolated from your main Chrome OS system, providing an added layer of security.
- Non-Destructive: You don’t need to erase your existing Chrome OS installation, ensuring you can revert to your familiar environment at any time.
- Accessibility: For most modern Chromebooks, enabling Linux is a straightforward process requiring just a few clicks.
However, it’s important to note that not all Chromebooks are created equal. While the vast majority of devices released in the last few years support Linux (Beta), older or very low-end models might have limitations or may not be compatible at all. Always check your specific Chromebook model’s compatibility before proceeding.
Why Install Linux on Your Chromebook?
The reasons for installing Linux on your Chromebook are as diverse as the Linux ecosystem itself. Here are some of the most compelling motivations:
Expanding Your Software Arsenal
The Chrome Web Store, while growing, is not as extensive as the vast repositories of Linux software. Installing Linux opens up a world of powerful applications that are either unavailable on Chrome OS or offer a more robust feature set. This includes:
- Development Tools: Compilers, code editors (like VS Code, Sublime Text), IDEs, version control systems (Git), and Docker are essential for software development.
- Creative Software: Powerful image editors (GIMP), video editors, 3D modeling software, and music production tools become accessible.
- Productivity Suites: While Google Workspace is excellent, some users prefer or require alternative office suites or specialized productivity apps.
- System Utilities: Advanced file management, system monitoring, and network analysis tools can be invaluable for tech-savvy users.
- Gaming: While not the primary focus for most Chromebook users, Linux offers a gateway to a wider selection of games, including many open-source titles and some commercial games through platforms like Steam (with some performance considerations).
Enhancing Your Learning and Skill Development
For students and aspiring professionals, a Linux environment on a Chromebook can be an invaluable learning tool.
- Computer Science Education: Learning to navigate the command line, understanding file systems, and working with programming languages are fundamental skills in computer science. Linux provides a hands-on environment to develop these competencies.
- Software Engineering Practice: Setting up development environments, experimenting with different programming languages, and working with server-side technologies are all readily achievable.
- Digital Security Exploration: For those interested in cybersecurity, Linux offers a platform to experiment with security tools and understand operating system internals.
Boosting Productivity and Customization
Linux is renowned for its flexibility and customizability. While Crostini offers a controlled environment, it still allows for significant personalization.
- Tailored Workflows: You can set up your Linux environment precisely to your needs, installing only the applications you use and configuring them for optimal efficiency.
- Command-Line Power: Mastering the Linux command line can dramatically speed up many tasks, from file manipulation to script automation.
- Deeper System Understanding: Interacting with a Linux terminal provides a deeper understanding of how operating systems function, which can be beneficial for troubleshooting and advanced use.
Preparing Your Chromebook for Linux Installation
Before you can begin the exciting journey of installing Linux, a few preparatory steps are necessary to ensure a smooth and successful installation. These steps are designed to optimize your Chromebook and prepare it for the new environment.
Checking Your Chromebook’s Compatibility and Requirements
As mentioned earlier, not all Chromebooks will seamlessly support Linux (Beta). While Google has made this feature widely available, it’s always best to confirm.
- Check Your Chromebook Model: Most Chromebooks released after 2019 should have robust Linux support. You can typically find your Chromebook’s model name by going to
Settings > About Chrome OS > Additional details > Diagnostics. - Ensure Chrome OS is Up to Date: The Linux (Beta) feature is an integral part of Chrome OS. To ensure you have the latest capabilities and security updates, make sure your operating system is current. Navigate to
Settings > About Chrome OS > Check for updates. - Sufficient Storage Space: While Linux (Beta) is designed to be efficient, running multiple Linux applications will consume storage space. It’s recommended to have at least 10-15 GB of free internal storage for a comfortable experience. If you’re low on space, consider deleting unused files, uninstalling unused Android apps, or moving data to cloud storage.
- Device Resources: While most modern Chromebooks are capable, very low-spec devices might experience slower performance when running Linux applications. Ensure your Chromebook has at least 4GB of RAM for a smoother experience.
Enabling the Linux (Beta) Feature in Chrome OS Settings
This is the core step that unlocks the Linux environment on your Chromebook. The process is remarkably simple and user-friendly.
- Open Settings: Click on the time in the bottom-right corner of your screen and then click on the gear icon to open the Settings menu.
- Navigate to Advanced Settings: In the left-hand sidebar, scroll down and click on “Advanced.”
- Locate “Developers”: Under the “Advanced” section, you should see an option labeled “Developers.” Click on it.
- Turn on Linux (Beta): You will find a toggle switch for “Linux development environment.” Click on the “Turn on” button next to it.
- Follow the On-Screen Prompts: A setup wizard will appear. Click “Next” to proceed.
- Username and Disk Size: The wizard will prompt you to set a username for your Linux environment. This username will be used for your Linux terminal. You’ll also be asked to allocate disk space for your Linux container. You can accept the default allocation or adjust it based on your needs. Remember, you can always resize this later if necessary.
- Installation: Click “Install.” Your Chromebook will now download and set up the Linux environment. This process can take several minutes, depending on your internet speed and device performance.
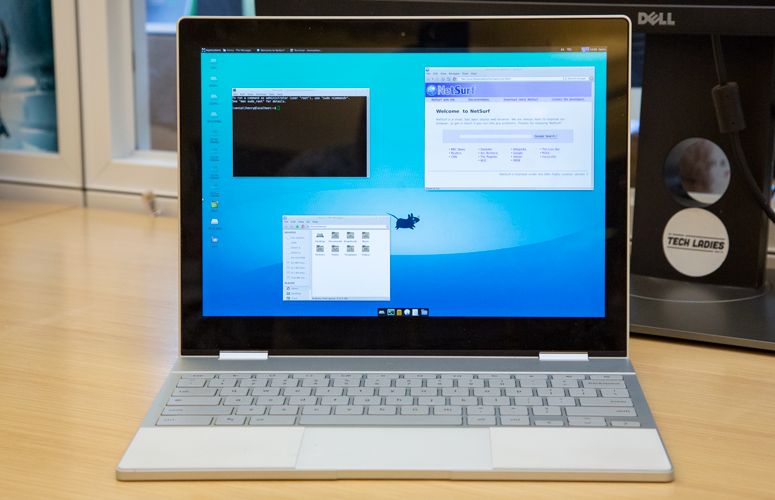
- Terminal Window: Once the installation is complete, a Linux terminal window will automatically open. Congratulations, you’ve successfully enabled Linux on your Chromebook!
Installing and Managing Linux Applications
With the Linux environment set up, the next exciting phase is populating it with the applications you need. This is where the true power of Linux shines, offering a vast array of software for diverse purposes.

Using the Linux Terminal to Install Software
The Linux terminal is your gateway to installing and managing applications using the command line. The most common package manager for Debian-based Linux distributions (which is what Chrome OS typically uses) is apt.
Understanding Basic apt Commands
-
Updating Package Lists: Before installing any new software, it’s always a good practice to update your package lists. This ensures you’re aware of the latest available versions of software.
sudo apt updateThe
sudocommand grants administrator privileges, which are often required for system-level operations. You’ll be prompted to enter your Linux user password. -
Upgrading Installed Packages: Once your package lists are updated, you can upgrade any installed packages to their latest versions.
sudo apt upgrade -
Installing a Package: To install a specific application, you’ll use the
installcommand followed by the package name. For example, to install the popular text editornano:sudo apt install nanoYou will be asked to confirm the installation by typing ‘Y’ and pressing Enter.
-
Searching for Packages: If you’re unsure of the exact package name, you can search for it. For instance, to search for packages related to “python”:
apt search python -
Removing a Package: To uninstall an application:
bash

sudo apt remove <package_name>
Common Linux Applications to Install
Here are some popular and useful Linux applications that many Chromebook users find beneficial:
-
Text Editors:
nano: A simple and user-friendly command-line text editor.vim: A highly configurable and powerful modal text editor.emacs: Another extremely powerful and extensible text editor.
-
Code Editors and IDEs:
- VS Code: While often installed via a
.debpackage (see below), it’s a top choice for developers. - Geany: A lightweight IDE with syntax highlighting and other useful features.
- VS Code: While often installed via a
-
Programming Languages and Tools:
python3: The Python 3 interpreter.nodejs: For JavaScript development.git: Essential for version control.
-
File Managers:
nautilus: The default GNOME file manager, offering a graphical interface.
-
Productivity and Utilities:
htop: An interactive process viewer that provides more detail than the standardtopcommand.gimp: The GNU Image Manipulation Program, a powerful free alternative to Photoshop.
Installing Applications via .deb Files
Some applications, particularly those with graphical interfaces or proprietary software, might be distributed as .deb files. These are Debian package files.
- Download the
.debfile: Navigate to the application’s official website and download the.debfile to your Chromebook’s “Linux files” folder (which is accessible from your Chromebook’s file manager). - Open the Terminal: Open your Linux terminal.
- Navigate to the Download Directory: Use the
cdcommand to go to the directory where you downloaded the file. For example, if it’s in your “Downloads” folder within “Linux files”:
bash

cd ~/Downloads
(Note: “Linux files” is often mapped to~/Downloadswithin the Linux container). - Install the
.debfile: Usedpkgto install the package.
bash

sudo dpkg -i <package_name>.deb
Replace<package_name>.debwith the actual name of the downloaded file. - Fix Broken Dependencies (if any): If the installation fails due to missing dependencies, you can often resolve this with the following command:
bash

sudo apt --fix-broken install
Accessing Linux Applications from Chrome OS
Once installed, Linux applications can be launched directly from your Chromebook’s app launcher. They will appear in a dedicated “Linux apps” folder. Clicking on a Linux app icon will open it in its own window, just like any other Chrome OS or Android app. You can move, resize, and pin these windows for a seamless multitasking experience.
Advanced Tips and Troubleshooting
As you become more comfortable with your Linux environment, you might encounter situations that require a deeper understanding or specific troubleshooting steps. This section covers some advanced topics and common solutions.
Managing Storage and Performance
- Resizing the Linux Container: If you initially allocated too little disk space, you can resize your Linux container.
- Go to
Settings > Advanced > Developers. - Under “Linux development environment,” click on “Disk size.”
- You’ll have the option to adjust the slider to increase or decrease the allocated space. Important: While you can decrease the size, it’s generally safer and more practical to increase it if needed. If you decrease it significantly, you might lose data within the container, so back up important files beforehand.
- Go to
- Cleaning Up Unused Packages: Over time, installing and uninstalling applications can leave behind unnecessary dependencies. You can remove these to free up space:
bash

sudo apt autoremove
- Monitoring System Resources: If your Chromebook feels sluggish, use
htop(install it withsudo apt install htop) to monitor CPU and memory usage of your Linux applications. This can help identify resource-hungry processes. - External Storage: For large projects or datasets, consider utilizing external USB drives. You can typically mount these drives within your Linux environment, providing ample storage without consuming your Chromebook’s internal disk.
Interacting with the Chrome OS File System
Your Linux environment has access to a special folder within Chrome OS called “Linux files.” This is the primary bridge between your Chrome OS and Linux file systems.
- Accessing Chrome OS Files: Any files you save within the “Linux files” folder in your Chromebook’s main file manager will be accessible from within your Linux terminal.
- Accessing Linux Files from Chrome OS: Conversely, files and directories created within your Linux environment are generally stored within the Linux container and are not directly visible in the main Chrome OS file manager unless you explicitly share them. The “Linux files” folder is the primary way to interact.
When Things Go Wrong: Common Troubleshooting Steps
- Linux VM Not Starting:
- Restart your Chromebook: A simple reboot can often resolve temporary glitches.
- Check for Chrome OS Updates: Ensure your Chrome OS is fully updated.
- Disable and Re-enable Linux: Go to
Settings > Advanced > Developers, click on “Linux development environment,” and select “Remove.” Be aware that this will erase all data within your Linux container. After removing, follow the setup process again.
- Application Crashes or Errors:
- Check for Updates: Ensure both your Chrome OS and your Linux applications are up to date.
- Consult Online Forums: Search for the specific error message online. The Linux and Chromebook communities are vast and helpful.
- Reinstall the Application: If a specific app is problematic, try uninstalling and reinstalling it.
- Network Issues:
- Ensure Wi-Fi is Connected: Linux relies on Chrome OS for network connectivity. Make sure your Chromebook is connected to the internet.
- Firewall Settings: While less common with Crostini, ensure no overly aggressive firewall settings are blocking traffic.
By following these steps and embracing the spirit of exploration, you can transform your Chromebook into a powerful and versatile computing device, capable of tackling a wide range of tasks beyond its original scope. The journey into the Linux ecosystem is rewarding, and with this guide, you’re well on your way to unlocking its full potential.
aViewFromTheCave is a participant in the Amazon Services LLC Associates Program, an affiliate advertising program designed to provide a means for sites to earn advertising fees by advertising and linking to Amazon.com. Amazon, the Amazon logo, AmazonSupply, and the AmazonSupply logo are trademarks of Amazon.com, Inc. or its affiliates. As an Amazon Associate we earn affiliate commissions from qualifying purchases.