
In the intricate world of PC gaming, professional content creation, and even general computing, the graphics card stands as a pivotal component. For users of NVIDIA GPUs, the true potential of their hardware isn’t unlocked merely by installing the physical card; it’s harnessed through a dedicated software interface: the NVIDIA Control Panel. This unassuming utility is the nerve center for managing display settings, optimizing game performance, configuring multi-monitor setups, and ensuring your graphics card operates at its peak. Yet, for many users, particularly after system updates, driver installations, or fresh Windows setups, the NVIDIA Control Panel can mysteriously vanish, leaving users unable to fine-tune their visual experience. This comprehensive guide will demystify the process of reacquiring, installing, and effectively utilizing the NVIDIA Control Panel, ensuring you regain full command over your graphics hardware.
The Indispensable Hub for NVIDIA Users
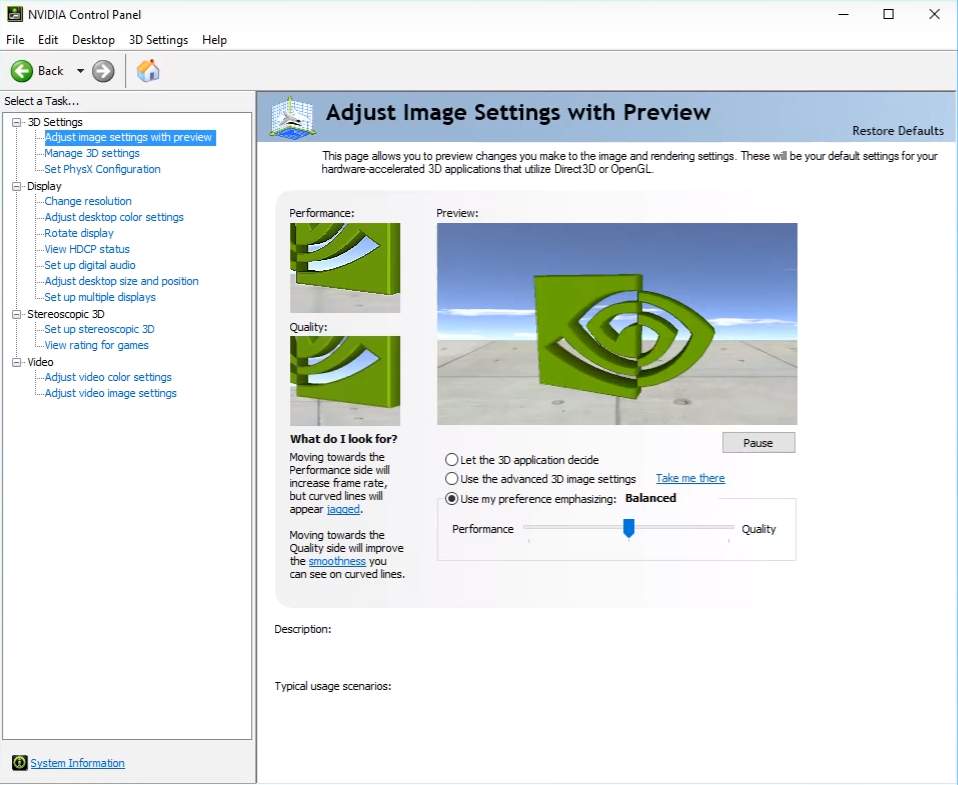
The NVIDIA Control Panel is far more than just a settings menu; it’s a sophisticated management utility that grants users granular control over their NVIDIA graphics processing unit (GPU). Its absence can lead to frustrating limitations, from sub-optimal gaming performance to an inability to correctly configure display resolutions or color profiles. Understanding its core functionality and why it’s so critical is the first step in appreciating its value.
Understanding the NVIDIA Control Panel’s Core Functionality
At its heart, the NVIDIA Control Panel serves as a centralized dashboard for all NVIDIA-related display and graphics settings. It categorizes settings into several key areas, allowing users to delve deep into specific aspects of their GPU’s operation:
- 3D Settings: This section is perhaps the most critical for gamers and professional users. It allows for global or program-specific adjustments to graphical parameters such as Anti-aliasing, Anisotropic filtering, V-Sync, Texture filtering quality, and Power management mode. These settings directly impact visual fidelity and frame rates, enabling users to strike the perfect balance between performance and image quality for individual applications or games.
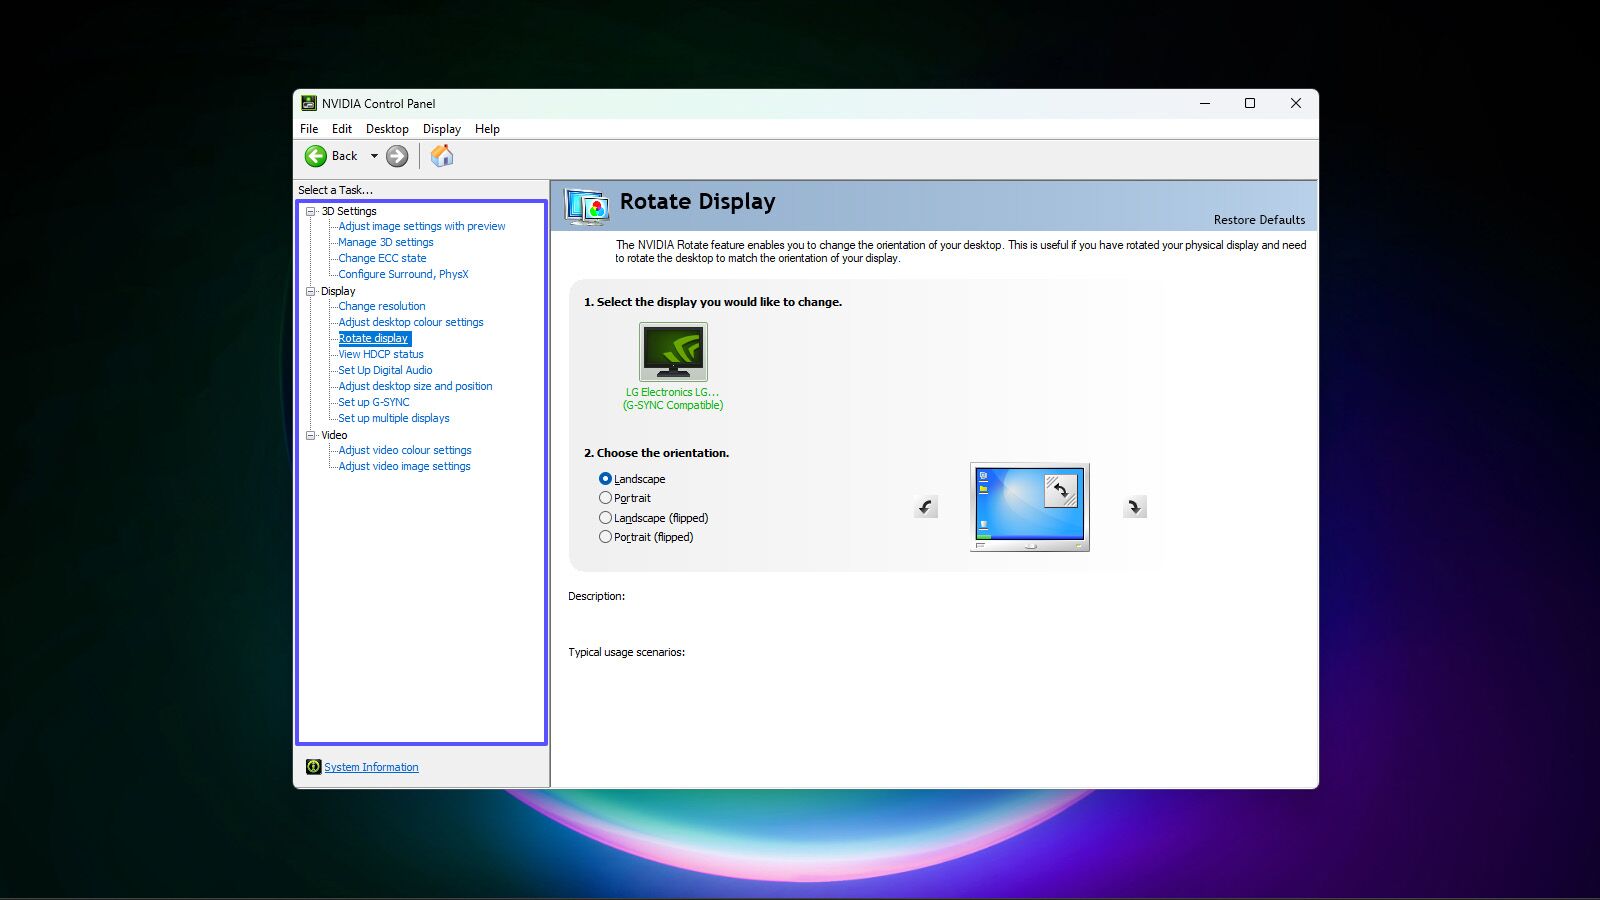
- Display Settings: Here, users can manage resolution, refresh rate, color depth, and monitor rotation. It’s essential for setting up multiple displays, configuring G-Sync monitors for tear-free gaming, and ensuring your display outputs the correct color profile.
- Video Settings: For those working with video playback or streaming, this section offers controls over color, contrast, and image enhancement features, ensuring optimal visual quality for multimedia content.
- Stereoscopic 3D Settings: Though less common today, for users with compatible hardware, this section allows for the configuration of NVIDIA’s Stereoscopic 3D technology.
Each of these categories provides an unprecedented level of control, allowing users to tailor their graphics experience precisely to their needs, whether that’s maximizing frames per second in an competitive esports title or ensuring color accuracy for professional photo and video editing.
Why the Control Panel is Critical for Optimal Performance
Without the NVIDIA Control Panel, users are largely at the mercy of default Windows settings and the limited in-game or application-specific graphical options. While modern games offer a decent array of settings, they rarely provide the low-level, global control that the NVIDIA Control Panel does. For instance:
- Performance Tuning: The ability to force specific anti-aliasing modes or texture filtering quality globally can significantly improve the visual quality of older games or applications that lack robust internal settings. Conversely, dialing back certain features can reclaim valuable frames per second in demanding titles.
- Display Synchronization (G-Sync/FreeSync Compatibility): For users with G-Sync compatible monitors, the Control Panel is indispensable for enabling and configuring this adaptive sync technology, which eliminates screen tearing and minimizes stuttering for a buttery-smooth gaming experience.
- Multi-Monitor Management: Setting up multiple displays, arranging their layout, and configuring features like Surround Vision (for panoramic gaming) is often cumbersome or impossible without the dedicated tools within the Control Panel.
- Driver Feature Access: Many advanced driver features, such as image sharpening, low latency mode, and custom resolution settings, are exclusively accessible through the Control Panel. These features can provide a significant competitive edge or quality-of-life improvement.
In essence, the NVIDIA Control Panel is the bridge between your powerful NVIDIA hardware and your desired computing experience. Its absence is not merely an inconvenience; it’s a barrier to achieving the full potential of your system.
Common Scenarios for a Missing Control Panel
The disappearance of the NVIDIA Control Panel is a surprisingly common issue, often leading to confusion and frustration among users. Understanding the typical reasons behind its absence is crucial for effectively troubleshooting and reacquiring it.
Driver Installation Anomalies and Their Impact
The most frequent culprit for a missing Control Panel is an incomplete or improperly executed driver installation. When you install new NVIDIA drivers, the Control Panel is typically bundled within the driver package. However, several factors can disrupt this:
- Incomplete Downloads: A corrupted or interrupted driver download can lead to missing components, including the Control Panel.
- Quick vs. Custom Install: Sometimes, during a “quick” or express installation, not all components are correctly registered with the system, or previous conflicting files are not properly removed.
- Existing Driver Conflicts: If old driver files are not thoroughly removed before a new installation, conflicts can arise, preventing the new Control Panel from integrating correctly.
- Windows Update Overwrites: Windows Update occasionally installs its own generic display drivers, which can sometimes overwrite or interfere with official NVIDIA drivers, leading to the Control Panel disappearing.
The Evolving Landscape: Microsoft Store vs. Traditional Drivers
A significant shift in how the NVIDIA Control Panel is delivered has contributed to recent confusion. Historically, it was always part of the main graphics driver package. However, with Windows 10 and 11, NVIDIA introduced two types of drivers:
- Standard Drivers (DCH): These are “Driver, Component, Hardware Support App.” With DCH drivers, the core driver package is smaller, and the NVIDIA Control Panel is distributed as a separate application through the Microsoft Store. This modular approach allows for easier updates to the Control Panel app independent of the core driver.
- Legacy/Standard Drivers: For older systems or specific configurations, NVIDIA still offers “Standard” drivers where the Control Panel is bundled directly within the driver installer.
If you installed a DCH driver but didn’t subsequently download the Control Panel from the Microsoft Store, it will appear missing. Conversely, if you installed a legacy driver and expect to find it in the Microsoft Store, you’ll be looking in the wrong place. Identifying your driver type is a key step in troubleshooting.
Other Potential Culprits: System Updates and Conflicts
Beyond driver-specific issues, other system-level events can cause the Control Panel to disappear or become inaccessible:
- Major Windows Updates: Feature updates in Windows 10/11 can sometimes reset display configurations or interfere with installed software, occasionally impacting the Control Panel’s visibility or functionality.
- System File Corruption: Damaged or corrupted Windows system files can prevent applications from launching correctly or appearing in expected locations.
- Antivirus/Security Software Interference: Aggressive security software might, in rare cases, mistakenly block components of the NVIDIA driver or Control Panel during installation or startup.
- User Account Control (UAC) Issues: Incorrect UAC settings or permissions can sometimes prevent applications from launching, though this is less common for the Control Panel itself.
By being aware of these potential issues, users can approach the reacquisition process with a clearer understanding of the underlying problem, leading to more targeted and effective solutions.
Comprehensive Methods to Reacquire and Install
Once you’ve identified a missing NVIDIA Control Panel, there are several reliable methods to bring it back. The approach you take will largely depend on whether your system uses DCH drivers or if the issue is merely a matter of access.
Method 1: The Official NVIDIA Driver Installation (Clean Install Recommended)
This is often the most robust solution, especially if you suspect driver corruption or conflicts. A clean installation ensures all old driver components are removed, paving the way for a fresh, error-free setup.
- Download the Latest Drivers: Visit the official NVIDIA driver download page (nvidia.com/drivers). Use the dropdown menus to select your specific GPU series, product, and operating system. Ensure you choose the “Recommended/Certified” driver type.
- Determine Driver Type (Optional but Recommended): On the download page, NVIDIA usually indicates whether the driver is “Standard” or “DCH.” This will inform whether you need to download the Control Panel separately from the Microsoft Store.
- Use Display Driver Uninstaller (DDU): Before installing new drivers, it’s highly recommended to use DDU to thoroughly remove all traces of previous NVIDIA drivers.
- Download DDU from a reputable source (e.g., Wagnardsoft’s Guru3D page).
- Boot your PC into Safe Mode (Search “System Configuration” > “Boot” tab > “Safe boot” checkbox).
- Run DDU, select “GPU” and “NVIDIA,” then choose “Clean and restart.”
- Install the New Drivers: Once your PC restarts normally after DDU, run the NVIDIA driver installer you downloaded.
- Choose “Custom (Advanced)” installation.
- Check the “Perform a clean installation” box. This option clears all previous settings and ensures a fresh start.
- Follow the on-screen prompts to complete the installation.
- Check for Control Panel: After the installation and a final restart (if prompted), check for the Control Panel.

Method 2: Leveraging GeForce Experience (For Gamers and Creators)
If you use NVIDIA GeForce Experience for game optimization and driver updates, it often acts as a convenient gateway for installing or updating the Control Panel.
- Update GeForce Experience: Ensure GeForce Experience itself is updated to the latest version.
- Check for Driver Updates: Open GeForce Experience, navigate to the “Drivers” tab, and check for any available driver updates.
- Perform Express/Custom Install: Download and install the latest driver package through GeForce Experience. It typically bundles the Control Panel. Even if it’s a DCH driver, GeForce Experience will often prompt you or guide you to download the Control Panel from the Microsoft Store.
- Launch Control Panel: After installation, the Control Panel should be accessible.
Method 3: Acquiring from the Microsoft Store (Modern Windows Approach)
This method is specifically for users running DCH drivers on Windows 10 or 11. If you’ve performed a clean driver install (Method 1) with a DCH driver and the Control Panel is still missing, this is your next step.
- Open Microsoft Store: Search for “Microsoft Store” in your Windows search bar and open the application.
- Search for NVIDIA Control Panel: In the search bar within the Microsoft Store, type “NVIDIA Control Panel” and press Enter.
- Install the Application: Locate the official “NVIDIA Control Panel” app (published by NVIDIA Corporation) and click “Get” or “Install.”
- Launch: Once installed, the Control Panel should appear in your Start Menu and be accessible via other standard methods.
Method 4: Manual Driver Updates through Device Manager
While less comprehensive than Method 1, this can sometimes resolve minor driver inconsistencies.
- Open Device Manager: Right-click the Start button and select “Device Manager.”
- Update Display Adapter: Expand “Display adapters,” right-click on your NVIDIA graphics card, and select “Update driver.”
- Search Automatically: Choose “Search automatically for updated driver software.” Windows will attempt to find and install the latest compatible driver. This method is generally less effective for re-adding a missing Control Panel compared to a full driver reinstallation, but it’s a quick check.
- Reinstall Driver: If “Update driver” doesn’t work, you can try “Uninstall device” (check “Delete the driver software for this device” if available), then restart your PC. Windows will attempt to reinstall a basic driver, after which you can proceed with a full NVIDIA driver install.
Navigating and Accessing Your NVIDIA Control Panel
Once successfully installed, accessing the NVIDIA Control Panel is straightforward through several common pathways. Knowing these ensures you can quickly get to your settings whenever needed.
Standard Access Points: Desktop Right-Click and System Tray
- Desktop Right-Click: The most common and convenient method. Simply right-click anywhere on your desktop background, and “NVIDIA Control Panel” should appear as an option in the context menu. Clicking this will launch the application.
- System Tray Icon: After installation, a small NVIDIA icon (often green or black) usually appears in your Windows system tray (the area near the clock on the taskbar). Right-clicking this icon will often present options to open the Control Panel or access specific settings quickly. If it’s not visible, it might be hidden in the “show hidden icons” area (up arrow).
Utilizing Windows Search and Control Panel Direct Access
- Windows Search: Type “NVIDIA Control Panel” into the Windows search bar (or press the Windows key and start typing). The application should appear in the search results, allowing you to launch it directly.
- Traditional Control Panel: For those accustomed to older Windows interfaces, you can also access it through the traditional Windows Control Panel. Search for “Control Panel” and open it. Depending on your “View by” setting (Category, Large icons, or Small icons), you should see “NVIDIA Control Panel” as an item.
Pinning for Quick Future Access
For frequent users, pinning the NVIDIA Control Panel to the Start Menu or Taskbar can save time:
- Pin to Start: Search for “NVIDIA Control Panel,” right-click on the result, and select “Pin to Start.”
- Pin to Taskbar: Search for “NVIDIA Control Panel,” right-click on the result, select “More,” and then “Pin to Taskbar.”
These access methods ensure that regardless of your preferred workflow, the NVIDIA Control Panel is always just a few clicks away, ready for you to fine-tune your graphics experience.
Advanced Troubleshooting and Persistence
Even after attempting the primary installation methods, some users might still encounter issues with the NVIDIA Control Panel. In such cases, a more advanced troubleshooting approach is necessary.
Verifying Driver Integrity and Services Status
Sometimes, the Control Panel might be installed but fails to launch due to underlying driver or service issues.
- Check NVIDIA Services:
- Press
Win + R, typeservices.msc, and hit Enter. - Scroll down and look for services starting with “NVIDIA.”
- Ensure that services like “NVIDIA Display Container LS,” “NVIDIA LocalSystem Container,” and “NVIDIA NetworkService Container” are running and set to “Automatic” startup type. If any are stopped, try starting them manually.
- Press
- Event Viewer Check:
- Search for “Event Viewer” in Windows.
- Navigate to “Windows Logs” -> “Application” and “System.”
- Look for any critical errors or warnings related to NVIDIA components or the Control Panel around the time you tried to launch it. This can often point to specific dll errors or conflicts.
- System File Checker (SFC):
- Open Command Prompt as administrator.
- Type
sfc /scannowand press Enter. This tool scans for and repairs corrupted Windows system files that might be preventing applications from working correctly.
Addressing Software Conflicts and System Glitches
Other software or system quirks can sometimes interfere with the NVIDIA Control Panel.
- Clean Boot: Perform a clean boot to identify if a third-party application is conflicting with the NVIDIA Control Panel.
- Press
Win + R, typemsconfig, and go to the “Services” tab. - Check “Hide all Microsoft services,” then click “Disable all.”
- Go to the “Startup” tab, click “Open Task Manager,” and disable all startup items.
- Restart your PC. If the Control Panel appears, re-enable services and startup items gradually to find the culprit.
- Press
- Antivirus/Firewall Exclusion: Temporarily disable your antivirus or firewall to see if it’s blocking the Control Panel. If it works, add exclusions for the NVIDIA driver and Control Panel executable files.
- User Profile Corruption: In very rare cases, a corrupted Windows user profile can cause issues. Try creating a new local administrator account and see if the Control Panel functions correctly there.
When All Else Fails: Seeking NVIDIA Support
If, after exhausting all troubleshooting steps, you’re still unable to access the NVIDIA Control Panel, it’s time to reach out to NVIDIA’s official support. They can provide more specific guidance, potentially diagnose unique hardware or software configurations, and offer advanced solutions. Be prepared to provide details of your system specifications, driver versions, and all troubleshooting steps you’ve already taken.
Conclusion
The NVIDIA Control Panel is an essential utility for anyone looking to maximize the performance and visual fidelity of their NVIDIA-powered PC. While its disappearance can be perplexing, understanding the common causes—from driver installation nuances to the DCH driver model and the Microsoft Store distribution—empowers users to effectively troubleshoot and resolve the issue. By following the comprehensive steps outlined in this guide, including clean driver installations, leveraging GeForce Experience, and utilizing the Microsoft Store, you can swiftly regain control over your graphics settings. With the Control Panel back in its rightful place, you’ll unlock the full potential of your NVIDIA hardware, ensuring an optimized and highly personalized computing experience for gaming, content creation, and everyday use. Remember, a well-maintained graphics driver and an accessible Control Panel are cornerstones of a high-performance system.
aViewFromTheCave is a participant in the Amazon Services LLC Associates Program, an affiliate advertising program designed to provide a means for sites to earn advertising fees by advertising and linking to Amazon.com. Amazon, the Amazon logo, AmazonSupply, and the AmazonSupply logo are trademarks of Amazon.com, Inc. or its affiliates. As an Amazon Associate we earn affiliate commissions from qualifying purchases.