
YouTube TV has revolutionized the way many households consume live television and on-demand content, offering a comprehensive streaming package that blends the familiarity of cable with the flexibility of modern streaming platforms. A cornerstone of its appeal, and often a deciding factor for subscribers, is its robust Digital Video Recorder (DVR) capability. Unlike traditional DVRs that rely on physical hardware and limited storage, YouTube TV leverages a cloud-based system, providing unparalleled convenience and capacity. Understanding and effectively utilizing this feature is key to maximizing your subscription and ensuring you never miss a moment of your favorite shows, movies, or live events.
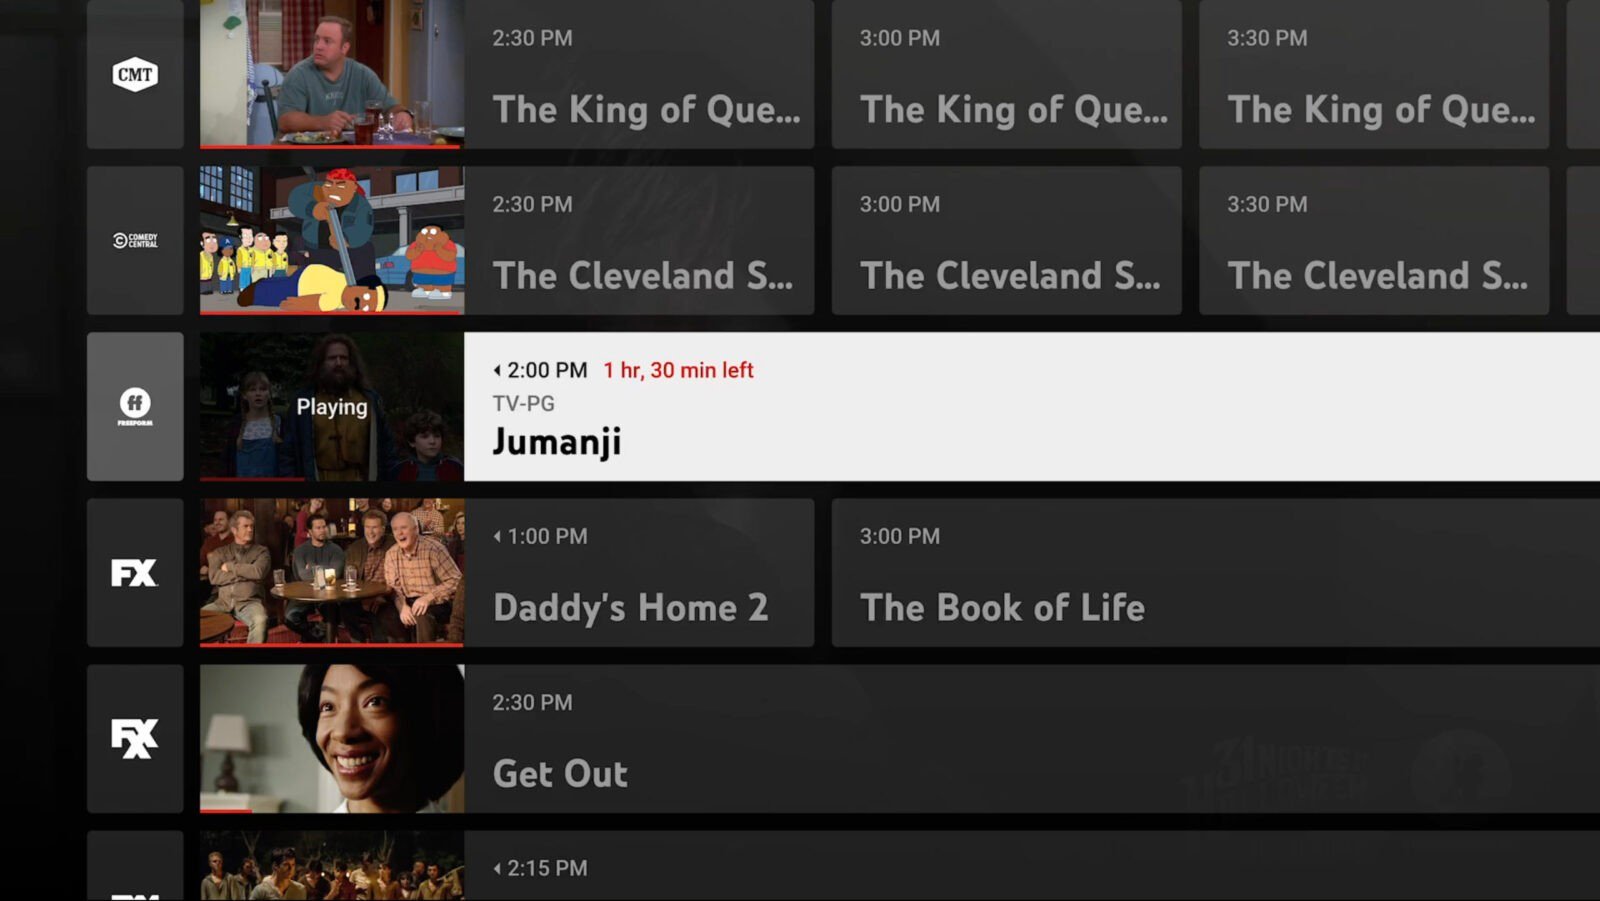
Understanding YouTube TV’s DVR Functionality
At its core, YouTube TV’s DVR system is designed for simplicity and efficiency. It eschews the complexities of setting specific recording times or worrying about storage space, opting instead for a user-friendly “add to library” model. This approach streamlines the process, allowing users to focus on content rather than technicalities. The service’s cloud infrastructure means that all your recordings are stored remotely, accessible from any device where you log into your YouTube TV account, be it a smart TV, smartphone, tablet, or web browser.
The Cloud DVR Advantage
The primary benefit of YouTube TV’s DVR is its cloud-based nature. This means there’s no physical box to install, no hard drive to fill up, and no intricate wiring diagrams to decipher. All recordings are handled on Google’s powerful servers, making them instantly available across all your connected devices. Whether you start watching a recorded program on your living room television and want to finish it on your commute, the cloud DVR ensures a seamless transition. This cross-device compatibility is a significant upgrade from conventional DVR systems, offering a truly mobile and flexible viewing experience. Furthermore, multi-user households benefit immensely, as each user within a family group can maintain their own personalized library of recordings without impacting others’ storage or selections.
Unlimited Storage and Retention
One of YouTube TV’s most compelling DVR features is its “unlimited” storage capacity. This isn’t just a marketing slogan; it fundamentally changes the user experience. You don’t have to worry about deleting old recordings to make space for new ones. Every show, movie, or sporting event you add to your library will be stored without a cap on volume. The only significant limitation is the retention period: most recordings are kept for nine months. For ongoing series, this typically means you’ll have access to recent episodes for an extended period, ensuring you can catch up at your leisure. For one-off events or movies, the nine-month window provides ample time for multiple viewings. After nine months, older recordings are automatically removed, making way for new content if the series is still airing.
Recording vs. On-Demand
It’s crucial to distinguish between DVR recordings and on-demand content within YouTube TV. While both offer flexibility, they serve different purposes and come with different characteristics. DVR recordings are essentially your personalized copies of broadcasts, allowing you to watch them as they aired, with the ability to fast-forward through commercials (more on this later). On-demand content, conversely, is provided directly by the networks and often includes unskippable advertisements, depending on the network’s policy. When you “add to library” a show, YouTube TV typically prioritizes playing your DVR recording first. However, if a recording isn’t available (e.g., if you added a show after an episode aired but before it was recorded), it may offer the on-demand version. Understanding this distinction helps in managing expectations regarding ad-skipping capabilities.
Step-by-Step Guide to Recording on YouTube TV
The process for utilizing YouTube TV’s DVR is remarkably straightforward, emphasizing ease of use over complex scheduling. Rather than setting a specific time and channel for each recording, you simply indicate your interest in a show, movie, or team, and YouTube TV does the rest.
Adding Shows or Movies to Your Library
The primary method for “recording” content on YouTube TV is by adding it to your Library. This signals to the system that you wish to record all future airings of that particular program.
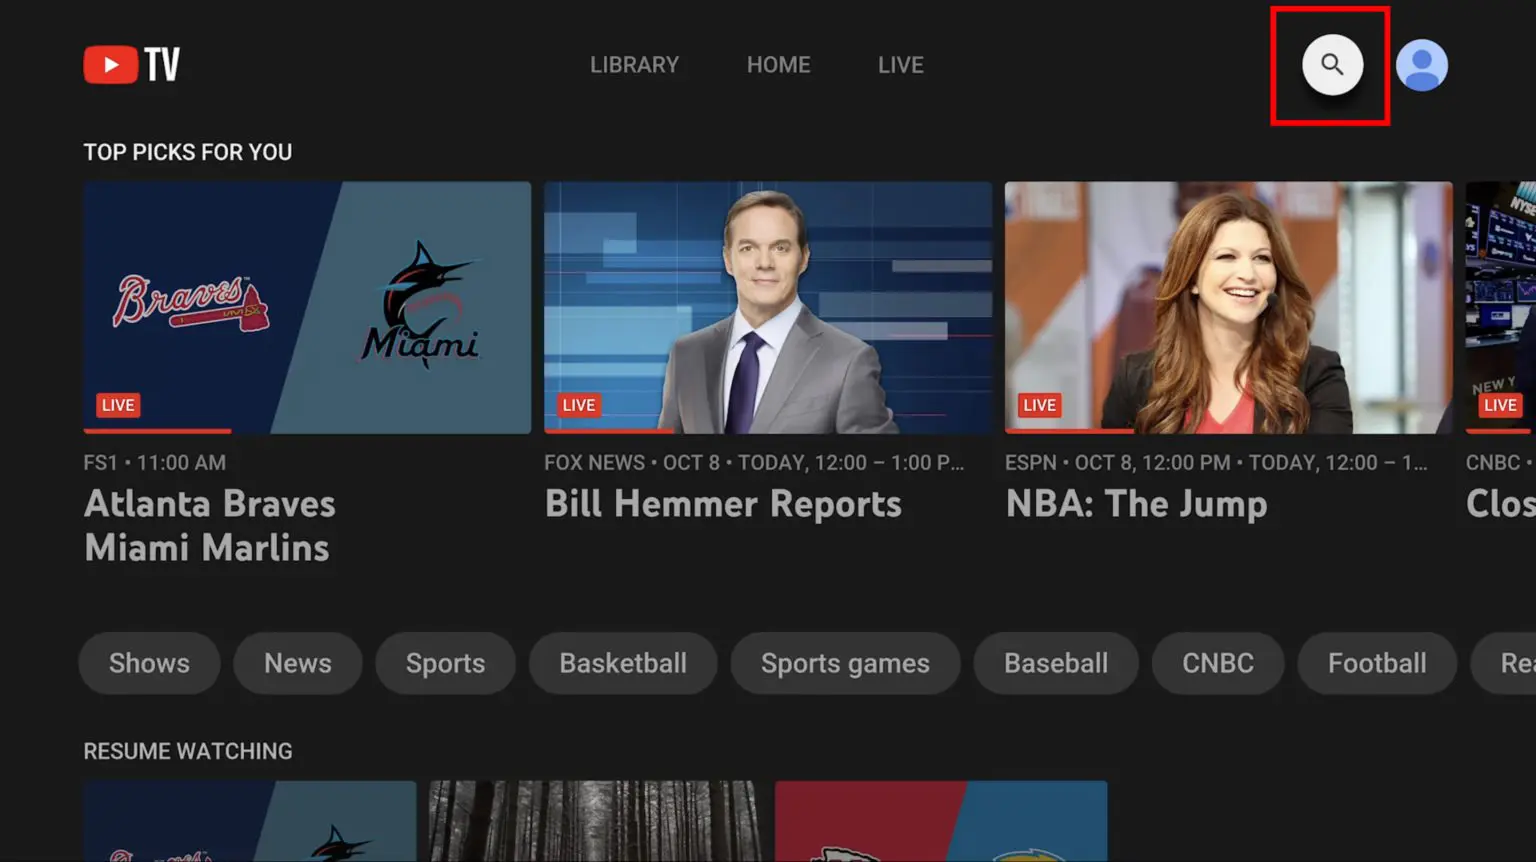
- Search or Browse: Navigate through the YouTube TV interface, either by browsing channels, exploring the “Live” guide, or using the search function to find the desired show, movie, or sports team.
- Locate the Plus Icon: Once you’ve found your content, you’ll typically see a “+” (plus) icon or a button labeled “Add to Library” or simply “Record.” This icon is usually next to the program title or within its details page.
- Confirm Addition: Click or select the “+” icon. A confirmation message might appear, indicating that the program has been added to your library. For ongoing series, YouTube TV will automatically record all new episodes (and often re-runs) that air on any channel included in your subscription. For movies, it will record all future airings.
Once added, the content will appear in your “Library” tab, organized by genre, show, or sports team, making it easy to find and watch later.
Recording Live Broadcasts
While adding a series to your library ensures all future episodes are recorded, you might occasionally want to record a specific live broadcast, such as a breaking news event or a one-off special. The process remains essentially the same:
- Access the Live Guide: Go to the “Live” tab within YouTube TV.
- Find the Live Program: Browse the channels to find the live program you want to record.
- Add to Library: Select the program. You’ll see the same “+” icon or “Add to Library” option. Clicking this will add that specific broadcast (and subsequent airings if it’s a series) to your library. If the program is already in progress, selecting “Add to Library” will start recording from that point onward, and you can still watch it from the beginning once the recording is complete.
The beauty of the cloud DVR is that even if you start watching a live program late, adding it to your library means you can often rewind to the beginning of the broadcast if it’s still airing, or watch the full recorded version once it finishes.
Managing Your Library and Recordings
Keeping your library organized ensures a smooth viewing experience. YouTube TV provides intuitive tools for managing your recorded content:
- Accessing Your Library: Simply click or select the “Library” tab from the main navigation menu.
- Browsing Categories: Your library will be organized into categories such as “New in your library,” “Shows,” “Movies,” “Sports,” and “Events.” This makes it easy to quickly locate specific types of content.
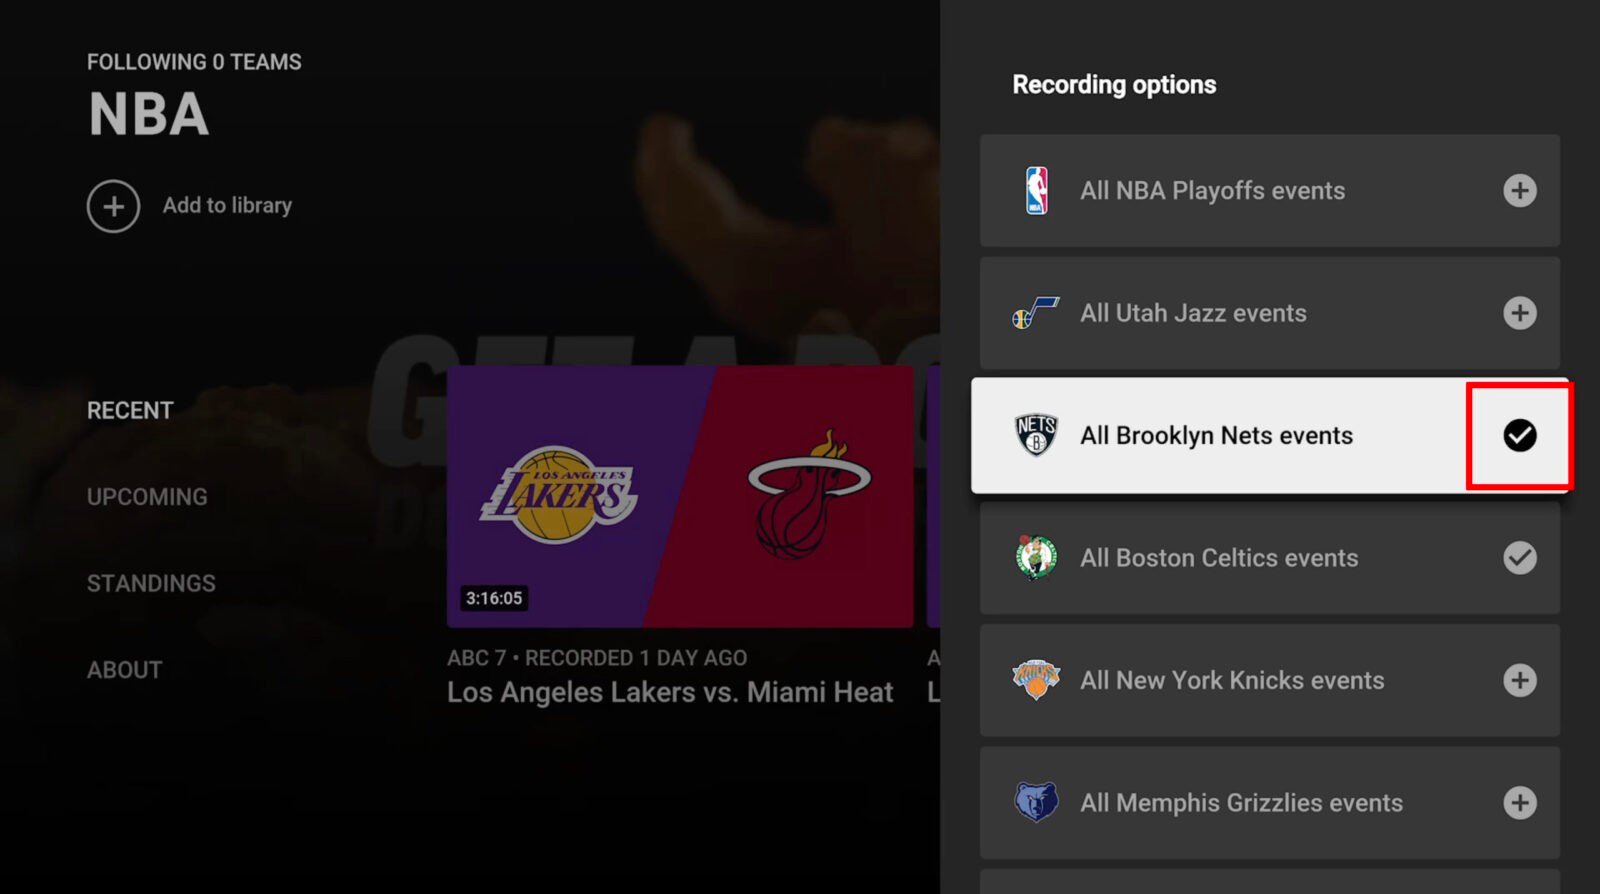
- Removing Content: If you no longer wish to record a particular series or movie, navigate to its entry in your library or search for it. On the program’s details page, you’ll see a checkmark next to “Added to Library.” Clicking this checkmark (or selecting the option to remove from library) will stop future recordings and remove the program from your library. Note that this action will also delete any existing recordings of that content from your library.
Optimizing Your DVR Experience
Beyond the basic recording functions, there are several ways to enhance your DVR usage on YouTube TV, making your viewing experience even more enjoyable and efficient.
Navigating Your Library
YouTube TV’s interface is designed for quick access to your content. Within the “Library” tab:
- “New in your library”: This section highlights recently recorded episodes or newly available content from shows you’ve added. It’s an excellent starting point for catching up.
- Alphabetical/Chronological Sorting: Shows are typically sorted alphabetically, and within each show, episodes are usually presented in chronological order, from newest to oldest.
- Continue Watching: Just like other streaming services, YouTube TV offers a “Continue Watching” rail, allowing you to pick up where you left off on any recorded or on-demand content.
Familiarizing yourself with these navigation aids will significantly cut down the time spent searching for something to watch.
Fast-Forwarding Through Ads (Where Applicable)
One of the most cherished features of any DVR is the ability to skip commercials. YouTube TV’s cloud DVR generally allows you to fast-forward through ads on content you’ve recorded. When playing a recording, you’ll typically see a scrubber bar at the bottom of the screen. You can use the remote’s fast-forward button or your device’s touch controls to quickly advance through commercial breaks.
However, there’s a nuance: some on-demand versions of shows might have unskippable ads imposed by the network, even if you’ve added the show to your library. YouTube TV usually prioritizes your DVR recording, which allows ad-skipping. If you encounter ads you can’t skip, it’s likely you are watching the on-demand version. To ensure you’re watching the DVR version, check the play options available when you select the program from your library.
Troubleshooting Common DVR Issues
While YouTube TV’s DVR is generally reliable, you might occasionally encounter minor issues.
- “Why didn’t my show record?”:
- Check your library: Ensure the show was indeed added to your library (look for the checkmark).
- Channel availability: Confirm the channel that aired the show is part of your YouTube TV subscription.
- Network schedule changes: Live TV schedules can change unexpectedly. YouTube TV relies on program guides, and last-minute alterations might sometimes cause a missed recording.
- Expiration: Remember the nine-month retention period. Older recordings are automatically removed.
- “I can’t fast-forward through ads.”:
- As mentioned, you might be watching the on-demand version. Try to locate the DVR recording in your library.
- Some specific programs or networks might have different rules, though this is less common for actual DVR recordings.
- Playback issues: If a recording isn’t playing smoothly, try clearing the cache of your YouTube TV app or checking your internet connection.
Advanced Tips and Tricks for YouTube TV Users
Beyond the basics, leveraging some advanced techniques can further refine your YouTube TV DVR experience.
Recording Sports and Live Events Effectively
Sports fans particularly benefit from YouTube TV’s DVR. To effectively record games and live events:
- Add teams to your library: Instead of just individual games, search for and add your favorite sports teams (e.g., “Los Angeles Lakers,” “New York Yankees”). YouTube TV will automatically record all their games that air on channels within your subscription.
- Handle overlaps: If multiple games are airing simultaneously, YouTube TV’s cloud DVR can record them all without conflict, a significant advantage over single-tuner physical DVRs.
- Watch from the start while recording: If you arrive late to a live game, simply select it from the “Live” tab, and you’ll typically be given the option to “Watch from Beginning” even as it continues to record. This allows you to catch up without spoiling the live action.
Discovering New Content with Recordings
Your DVR library isn’t just for shows you already know. Use it as a discovery tool:
- Explore related shows: When you’re on a show’s details page, YouTube TV often suggests related content. Add these to your library to broaden your viewing horizons.
- Browse genre categories: Within your library, explore categories like “Drama,” “Comedy,” or “Documentary.” You might find shows you added long ago but forgot about, or re-runs of classics you want to revisit.
Device Compatibility and Multi-User Access
YouTube TV’s DVR is universally accessible across supported devices, which include:
- Smart TVs (Samsung, LG, Vizio, etc.)
- Streaming devices (Roku, Apple TV, Amazon Fire TV, Chromecast with Google TV)
- Mobile devices (iOS and Android smartphones and tablets)
- Web browsers (Chrome, Firefox, Safari, Edge)
Crucially, each member of a YouTube TV family group (up to six accounts) gets their own distinct library. This means your recordings and viewing habits don’t interfere with anyone else’s, providing a personalized DVR experience for everyone in the household. This multi-user functionality, combined with the unlimited cloud storage, solidifies YouTube TV’s position as a powerful and flexible streaming solution, particularly for those who value the traditional DVR experience updated for the digital age. By mastering these features, users can fully harness the potential of their YouTube TV subscription.
aViewFromTheCave is a participant in the Amazon Services LLC Associates Program, an affiliate advertising program designed to provide a means for sites to earn advertising fees by advertising and linking to Amazon.com. Amazon, the Amazon logo, AmazonSupply, and the AmazonSupply logo are trademarks of Amazon.com, Inc. or its affiliates. As an Amazon Associate we earn affiliate commissions from qualifying purchases.