
In the fast-evolving world of technology, keeping your operating system running smoothly and securely is paramount. While upgrading from an older version of Windows or simply resetting your current installation might seem sufficient, there’s a gold standard for optimizing performance and tackling stubborn issues: a clean install. For Windows 11 users, this process means wiping the slate clean, removing all previous data and software, and installing a fresh, pristine copy of the operating system. It’s akin to giving your computer a complete overhaul, often resulting in a noticeably snappier and more reliable experience.
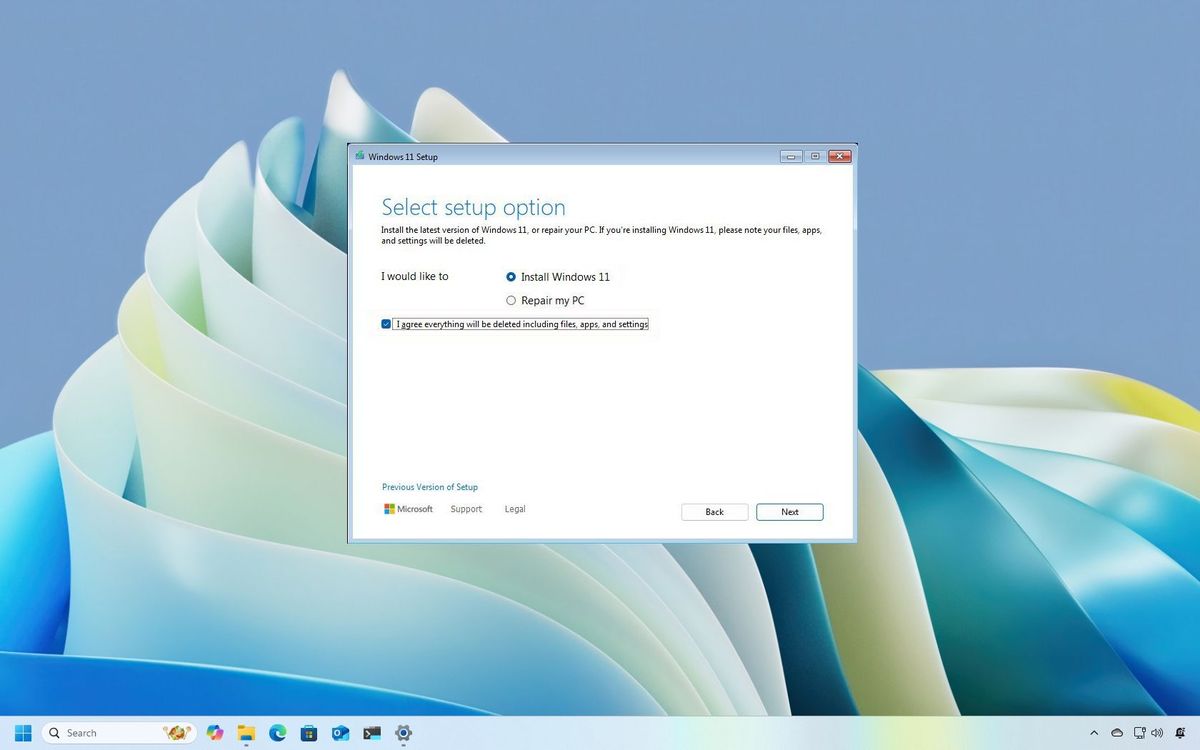
A clean install of Windows 11 is not just for troubleshooting; it’s a powerful tool for maintaining digital security, enhancing productivity, and ensuring your system operates at its peak. This comprehensive tutorial will guide you through every essential step, from crucial pre-installation preparations to the nuanced post-installation optimizations. Whether you’re grappling with persistent software glitches, looking to sell your PC, or simply craving the speed and responsiveness of a brand-new machine, understanding how to perform a clean install is an invaluable skill for any modern tech enthusiast. Let’s delve into the process that promises to rejuvenate your Windows 11 experience.
The Undeniable Advantages of a Windows 11 Clean Install
Deciding to undertake a clean install of Windows 11 is more than just a technical procedure; it’s an investment in your system’s longevity, performance, and security. While it might seem daunting, the benefits far outweigh the initial effort, making it a highly recommended practice for many scenarios.
Reclaiming Performance and Stability
Over time, any operating system can accumulate digital clutter. This includes remnants of uninstalled programs, outdated drivers, corrupted system files, and the insidious “bloatware” that often comes pre-installed on new machines. All these factors contribute to a gradual degradation of performance, leading to slower boot times, unresponsive applications, and frequent crashes. A clean install meticulously sweeps away all this baggage, providing a fresh canvas for Windows 11. By eliminating these inefficiencies, your system can restore its original responsiveness, run applications more smoothly, and significantly reduce the likelihood of system instability. It’s the most effective way to achieve that “brand new computer” feel without actually buying new hardware. This focus on performance directly ties into the broader theme of productivity, as a faster, more stable system allows users to accomplish tasks more efficiently.
Enhanced Security and Digital Hygiene
In an era of increasing cyber threats, digital security is non-negotiable. While antivirus software and regular updates are crucial, they aren’t always infallible. Persistent malware, rootkits, or deeply embedded adware can sometimes survive system resets or even full antivirus scans. A clean install acts as the ultimate digital disinfectant. By completely erasing the old operating system and all its data, you eliminate any hidden malicious software that might have been lurking undetected. This process ensures that your fresh Windows 11 installation starts from a secure, untainted foundation, significantly bolstering your defense against future attacks. It’s a proactive step in maintaining robust digital security and practicing excellent digital hygiene, giving you peace of mind that your sensitive data is resting on a clean and trustworthy system.
A True Fresh Start Experience
Beyond performance and security, a clean install offers an unparalleled sense of renewal. It’s an opportunity to truly start fresh, free from years of accumulated files, programs you no longer use, and settings you’ve long forgotten. This fresh start is particularly beneficial if you’re experiencing chronic software conflicts that seem impossible to resolve, or if you’re preparing to sell or donate your computer. For a new owner, a clean install guarantees that no personal data from the previous user remains, ensuring their privacy and providing them with a pristine experience. For individual users, it’s a chance to thoughtfully reconsider which software and apps they truly need, leading to a more organized and personalized computing environment from the ground up, tailored specifically to their current needs and workflow.
Essential Pre-Installation Steps: Preparing for Success
Before you embark on the journey of a clean Windows 11 installation, meticulous preparation is key. Rushing into the process without adequate safeguards can lead to data loss or significant frustrations. These preparatory steps are not just recommendations; they are critical foundations for a smooth and successful transition.
Critical Data Backup Strategies
This is arguably the most crucial step in the entire process. A clean install will erase everything on the drive where Windows is installed. Therefore, backing up all your personal data is non-negotiable. Think about documents, photos, videos, music, browser bookmarks, email archives, and any critical work-related files. You might also want to note down software license keys or account details for applications you’ll reinstall.
There are several reliable backup methods:
- External Hard Drive/SSD: A physical drive offers fast and local storage for large amounts of data.
- Cloud Storage Services: Services like OneDrive, Google Drive, Dropbox, or iCloud provide convenient, off-site storage that’s accessible from anywhere. Many even offer synchronization features, making future backups easier.
- Network Attached Storage (NAS): For those with a home network, a NAS device offers centralized, redundant storage.
Choose a method that suits your volume of data and comfort level, and double-check that your most important files have successfully been copied before proceeding. This emphasizes the importance of digital security for your personal assets.
Gathering Your Installation Toolkit
Having the right tools ready beforehand will streamline the installation process.
- USB Flash Drive (8GB or larger): This will be used to create your bootable Windows 11 installation media. Ensure it’s empty or that you’ve backed up any data on it, as it will be formatted.
- Windows 11 Media Creation Tool or ISO File: Microsoft provides a free Media Creation Tool that automates the process of downloading the Windows 11 ISO and creating a bootable USB. Alternatively, advanced users can download the ISO directly and use a tool like Rufus to create the bootable drive.
- Windows 11 Product Key: While often linked to your Microsoft account or embedded in your system’s firmware (especially for OEM PCs), having it handy is always a good idea. You can usually skip entering it during installation if it’s digitally licensed, and Windows will activate automatically later.
- Essential Device Drivers: Crucially, download network (Ethernet and Wi-Fi), chipset, and graphics drivers for your specific computer model or motherboard before you start. Save them to a separate USB drive or an external hard drive. After a clean install, your internet might not work immediately, leaving you unable to download these vital drivers. Having them ready ensures you can connect and install the rest. This falls under the tutorials aspect, ensuring users are prepared for post-install connectivity.
- Power Supply: Ensure your laptop is plugged in, or your desktop is connected to a reliable power source to prevent unexpected shutdowns during the installation.
Verifying System Compatibility and Requirements
Windows 11 has stricter system requirements than its predecessors, notably regarding TPM 2.0 and Secure Boot. Before a clean install, verify your system meets these specifications:
- Processor: 1 gigahertz (GHz) or faster with 2 or more cores on a compatible 64-bit processor or System on a Chip (SoC).
- RAM: 4 gigabytes (GB).
- Storage: 64 GB or larger storage device.
- System Firmware: UEFI, Secure Boot capable.
- TPM: Trusted Platform Module (TPM) version 2.0.
- Graphics Card: Compatible with DirectX 12 or later with WDDM 2.0 driver.
- Display: High definition (720p) display that is greater than 9” diagonally, 8 bits per color channel.
Microsoft’s PC Health Check app can quickly assess your system’s compatibility. You may also need to enter your computer’s BIOS/UEFI settings (usually by pressing F2, F10, F12, or Delete during startup) to ensure TPM 2.0 and Secure Boot are enabled.
Disabling BitLocker Encryption (If Activated)
If your current Windows installation is protected by BitLocker encryption, it’s crucial to suspend it before attempting a clean install. Failure to do so can complicate the process, as the installer might not be able to access or format the encrypted drive. You can typically suspend BitLocker from the Control Panel under “BitLocker Drive Encryption.” This ensures a smooth drive wiping process without encountering security-related roadblocks.
The Step-by-Step Clean Install Process
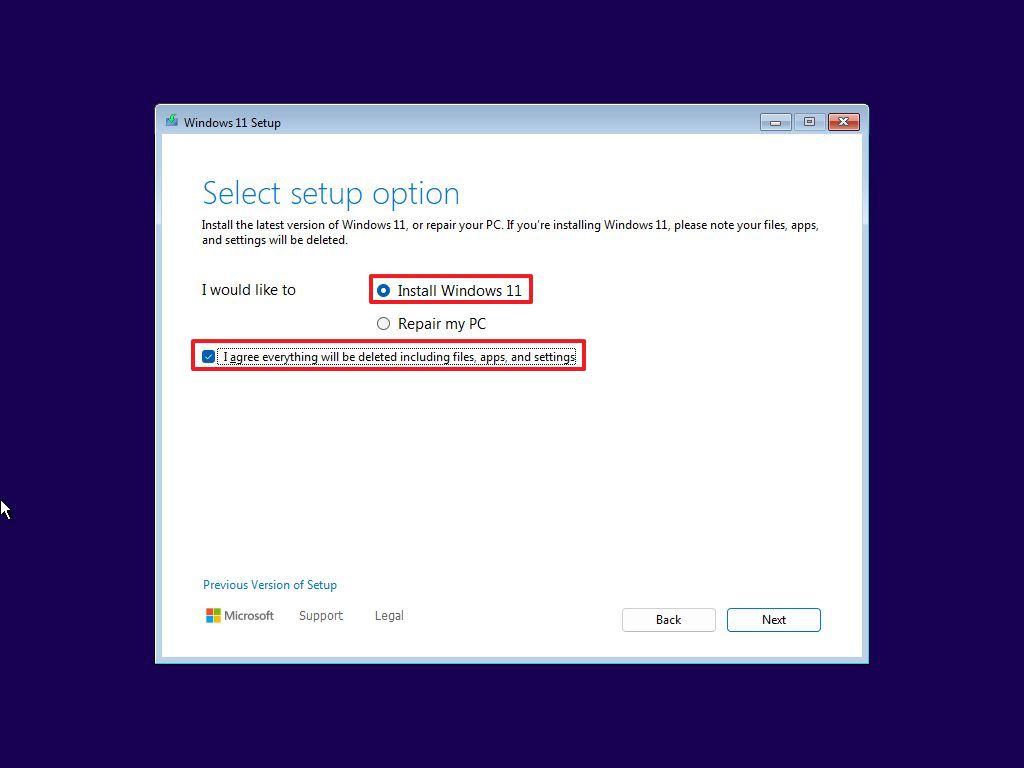
With all your preparations complete, you’re ready to dive into the core of the clean installation. This section details the sequence of actions, ensuring you navigate the Windows Setup environment confidently. This segment serves as the core tutorial for the entire process.
Creating Bootable Windows 11 Media
The first practical step is to create the installation media that your computer will boot from.
- Download the Media Creation Tool: Visit the official Microsoft Windows 11 download page and locate the “Create Windows 11 Installation Media” section. Download the tool.
- Run the Tool: Execute the downloaded
MediaCreationToolW11.exe. Accept the license terms. - Select Language and Edition: Confirm your desired language and Windows 11 edition (usually automatically detected).
- Choose Media Type: Select “USB flash drive” and then choose your connected USB drive from the list.
- Create Media: The tool will download Windows 11 and write it to your USB drive, making it bootable. This process can take a significant amount of time depending on your internet speed.
Configuring Your PC to Boot from USB
Once your bootable USB is ready, you need to instruct your computer to start from it rather than your hard drive.
- Insert USB: Plug the bootable USB drive into an available port on your computer.
- Restart PC: Restart your computer. As it powers on, you’ll need to press a specific key repeatedly to enter the BIOS/UEFI firmware settings or a boot menu. Common keys include F2, F10, F12, or Delete. The exact key varies by motherboard manufacturer (e.g., Dell, HP, ASUS, Lenovo, MSI).
- Change Boot Order: Once in the BIOS/UEFI, navigate to the “Boot Options” or “Boot Priority” section. Change the boot order to prioritize your USB drive (it might be listed as “USB-HDD,” “Removable Device,” or by the brand of your USB drive) above your primary hard drive.
- Save and Exit: Save your changes and exit the BIOS/UEFI. Your computer should now restart and boot directly from the USB drive.
Initiating the Windows 11 Setup
When your computer successfully boots from the USB, you’ll see the Windows 11 setup screen.
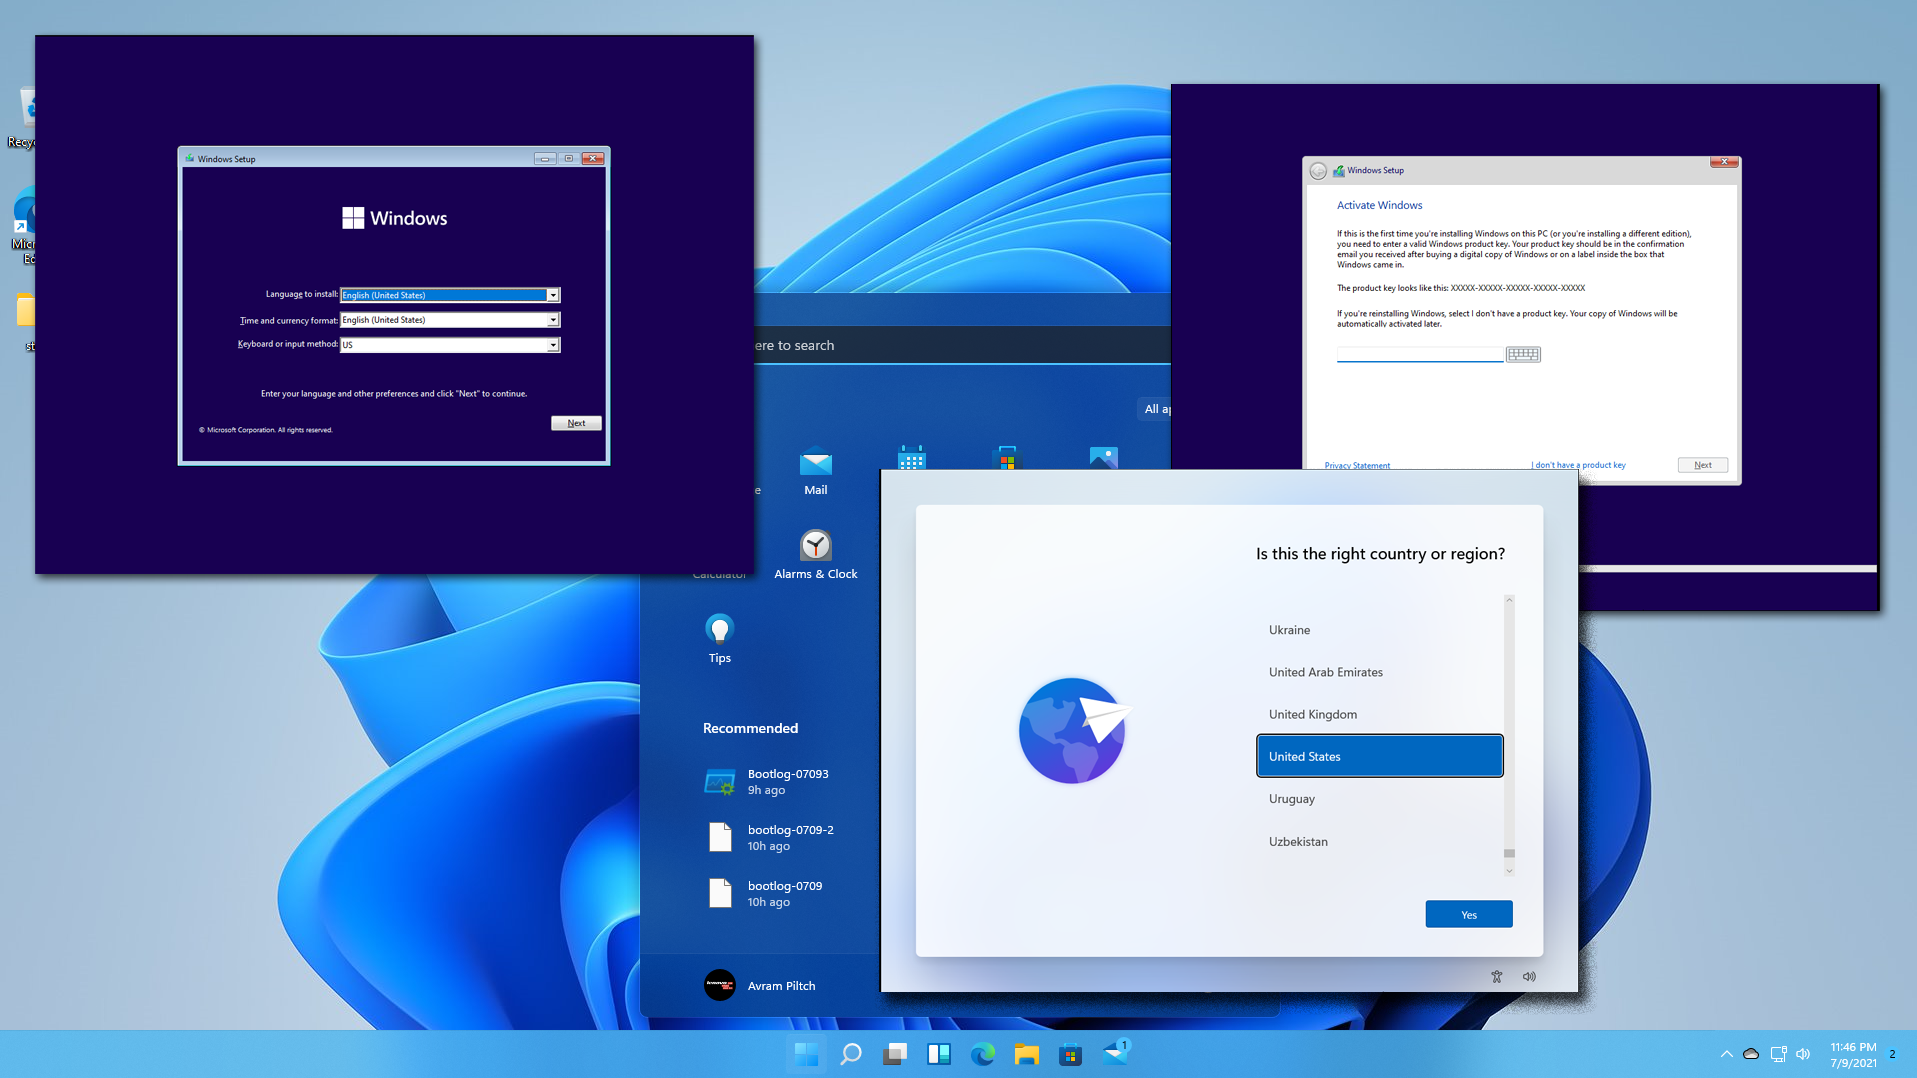
- Language and Region: Select your language, time and currency format, and keyboard layout. Click “Next.”
- Install Now: Click the “Install now” button.
- Product Key: If prompted, enter your Windows 11 product key. If you have a digital license associated with your Microsoft account, or if Windows was pre-installed, you can usually click “I don’t have a product key” and it will activate automatically after installation and internet connection.
- Select Edition: Choose the edition of Windows 11 you wish to install (e.g., Windows 11 Home, Windows 11 Pro). Ensure it matches your product key if you entered one.
- License Terms: Accept the Microsoft Software License Terms and click “Next.”
Custom Installation and Drive Partitioning
This is the most critical stage, where you’ll define how Windows 11 uses your storage. This is where you truly perform the “clean” aspect of the install.
- Choose Installation Type: Select “Custom: Install Windows only (advanced).” This option allows you to manage disk partitions.
- Delete Existing Partitions: You will see a list of partitions on your drive (e.g., “Drive 0 Partition 1,” “Drive 0 Partition 2”). To perform a clean install, you need to delete all partitions related to your previous Windows installation. Select each partition one by one and click “Delete.” Be absolutely certain you are deleting partitions on the correct drive if you have multiple drives installed.
- Create New Partition: Once all old partitions are gone, you’ll see “Drive 0 Unallocated Space.” You can either select this unallocated space and click “Next” (Windows will automatically create necessary partitions for you), or you can click “New” to manually create a primary partition of a specific size. For most users, letting Windows manage it is simplest.
- Select Installation Drive: Make sure the newly created (or unallocated) space on your primary drive is selected, then click “Next.” Windows will now begin copying files and installing.
First Boot and Initial Configuration
Windows will install, restart multiple times, and then present you with the initial setup screens.
- Region and Keyboard Layout: Confirm your country/region and keyboard layout.
- Network Connection: Connect to your Wi-Fi or plug in an Ethernet cable. An internet connection is often required for the remaining setup steps, especially if using a Microsoft account.
- Name Your Device: You can name your PC now or skip it.
- Microsoft Account: Sign in with your Microsoft account. If you prefer a local account, sometimes there are options to create an “offline account,” though Windows 11 often tries to steer you towards an online profile.
- Restore from Backup (Optional): You might be offered to restore settings from a previous backup on your Microsoft account. You can usually skip this for a truly clean slate.
- Privacy Settings: Review the various privacy settings (location, diagnostics, advertising ID, etc.) and adjust them to your preference.
- Create PIN: Set up a PIN for faster sign-in.
- Customize Your Experience: Windows 11 might ask about your intended use (gaming, creativity, work, etc.) to tailor initial suggestions.
- Welcome Screen: After a few more moments, you’ll arrive at the Windows 11 desktop.
Post-Installation: Optimizing Your Fresh Windows 11 System
Congratulations, you’ve successfully performed a clean install! However, the journey isn’t quite over. A few crucial steps remain to fully optimize your new system, ensure all hardware is recognized, and restore your personalized environment. This final phase integrates aspects of digital security, productivity, and software management.
Installing Essential Device Drivers
Immediately after a clean install, some of your hardware might not be fully functional. This is because Windows 11 ships with generic drivers, which may not be optimal or even compatible with all components.
- Start with Network Drivers: If your internet isn’t working, install the network (Ethernet and Wi-Fi) drivers you downloaded earlier. Once online, Windows Update can often find many missing drivers, but manufacturer-specific drivers are usually better.
- Visit Manufacturer Websites: Go to the support section of your motherboard, graphics card, and other peripheral manufacturers (e.g., NVIDIA, AMD, Intel, Logitech). Download and install the latest chipset, graphics, audio, and any other crucial drivers specific to your hardware model. Outdated drivers can lead to performance issues or even system instability. This ensures your gadgets are working optimally.
- Device Manager: You can check for any remaining missing drivers by opening Device Manager (search for it in the Start menu). Any devices with a yellow exclamation mark indicate a missing or problematic driver.
Running Windows Updates
Even though you’ve just installed the latest version of Windows 11, Microsoft constantly releases cumulative updates, security patches, and optional feature updates.
- Check for Updates: Go to
Settings > Windows Updateand click “Check for updates.” - Install All Updates: Install all available updates, including any optional driver updates that Windows Update might offer. You might need to restart your computer several times to apply all updates. Keeping your system up-to-date is fundamental for digital security and stability.
Restoring Your Personal Data and Applications
Now is the time to bring back your files and essential software.
- Copy Back Data: Connect your backup drive (external HDD/SSD, access cloud storage) and copy your personal documents, photos, videos, and other files back to their desired locations on your new Windows 11 drive.
- Install Essential Software: Begin installing the applications you use daily. This typically includes:
- Your preferred web browser (Chrome, Firefox, Edge, etc.).
- An office suite (Microsoft Office, LibreOffice, Google Docs desktop app).
- Antivirus/Security software (if you prefer a third-party solution over Windows Defender).
- Communication apps (Discord, Zoom, Slack).
- Media players, photo editors, and any other productivity or entertainment tools.
Take this opportunity to only install what you truly need, avoiding unnecessary bloat.
Customizing and Securing Your System
Finally, tailor Windows 11 to your preferences and enhance its security.
- Review Privacy Settings: Revisit
Settings > Privacy & securityand fine-tune all privacy options, including app permissions, diagnostic data, and activity history, to ensure your data is handled as you prefer. - Configure Security: Ensure Windows Defender is active and up-to-date, or verify your third-party antivirus is fully operational. Consider setting up a File History backup or creating a system restore point, which can be lifesavers for future issues.
- Personalization: Customize your desktop background, themes, taskbar, Start menu layout, and other visual elements to make your Windows 11 environment truly yours.
- Performance Tweaks: Explore settings like Storage Sense to automatically clean up temporary files, or adjust power plans for optimal performance or battery life, further boosting your productivity.
Conclusion
Performing a clean install of Windows 11 is a powerful way to revitalize your computer, ensuring it runs with optimal speed, stability, and security. While it requires careful planning and execution, the end result is a pristine operating system free from the accumulated digital baggage that can bog down performance over time. By following this comprehensive tutorial, you’ve not only mastered a crucial technical skill but also empowered yourself to maintain a healthier, more efficient, and more secure computing environment.
From reclaiming lost performance to bolstering your digital security and enjoying a truly fresh start, the benefits of a clean install are profound. Remember to always back up your data, gather your tools, and follow each step diligently. With your newly installed Windows 11, you’re now poised for enhanced productivity and a smoother digital experience, ready to tackle any task with renewed confidence. Keep your system updated, install only the software you need, and enjoy the robust performance of your revitalized PC.
aViewFromTheCave is a participant in the Amazon Services LLC Associates Program, an affiliate advertising program designed to provide a means for sites to earn advertising fees by advertising and linking to Amazon.com. Amazon, the Amazon logo, AmazonSupply, and the AmazonSupply logo are trademarks of Amazon.com, Inc. or its affiliates. As an Amazon Associate we earn affiliate commissions from qualifying purchases.