
Embarking on a clean installation of Windows 11 is more than just a technical procedure; it’s a strategic move to revitalize your computing experience, akin to a digital spring cleaning. Whether you’re looking to banish lingering performance issues, ensure optimal system stability, or simply start fresh with a pristine operating system, a clean install is the most effective method. This process meticulously wipes your drive clean, removing all existing data and applications, and then installs a fresh copy of Windows 11. This ensures you’re building from the ground up, free from accumulated digital clutter and potential software conflicts that can plague a system over time.
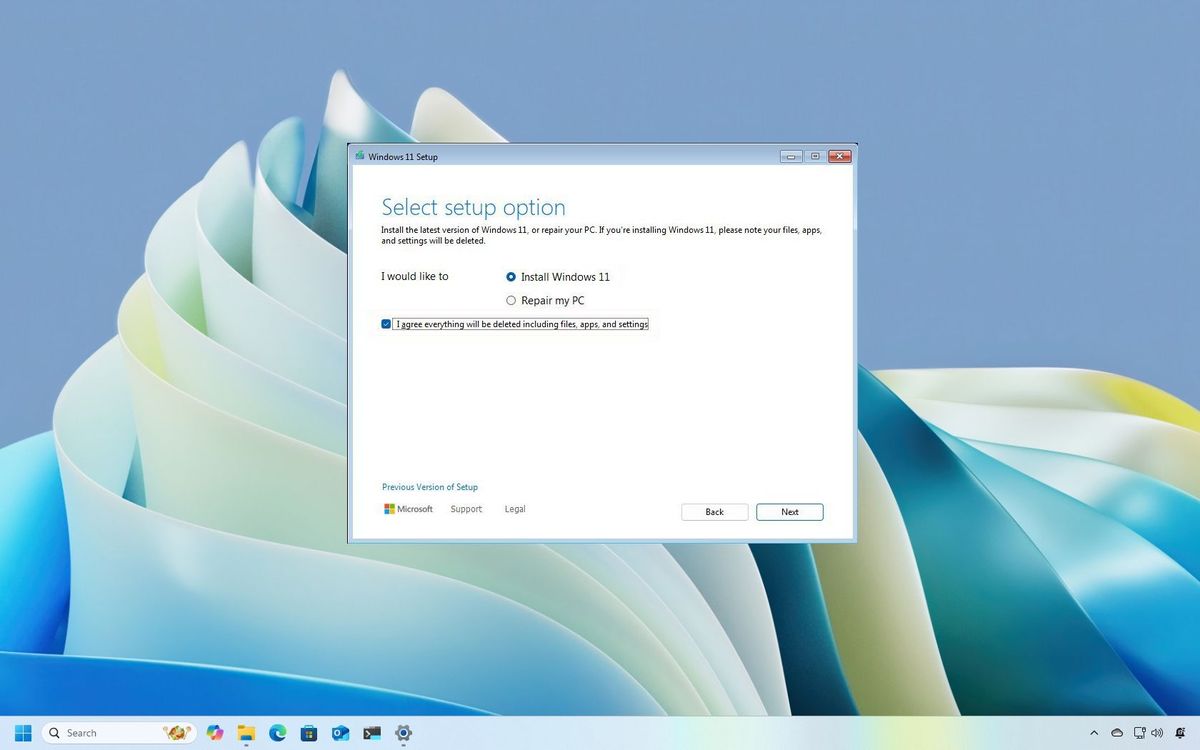
This guide is designed for anyone looking to achieve a truly optimized Windows 11 environment. We’ll navigate the essential steps, from preparation to post-installation tweaks, ensuring a smooth and successful transition. Think of this as your roadmap to a faster, more responsive, and more secure computing future, directly impacting your productivity and overall digital well-being.
Understanding the Benefits of a Clean Installation
Before diving into the technicalities, it’s crucial to understand why a clean installation of Windows 11 is often the superior choice for many users. This isn’t just about vanity; it’s about efficiency, security, and long-term system health.
Revitalizing System Performance
Over months and years of use, your Windows installation can become bogged down. Temporary files accumulate, registry entries become fragmented, and background processes multiply, all of which can contribute to sluggish performance. Applications may take longer to launch, file transfers can slow to a crawl, and the overall responsiveness of your system diminishes. A clean install effectively resets this clock. By removing everything and starting anew, you eliminate all the accumulated digital detritus that was slowing you down. This results in a noticeably faster boot-up, quicker application loading times, and a more fluid user experience. For professionals who rely on their machines for demanding tasks, this performance boost can translate directly into increased productivity and less time spent waiting for your computer.
Eliminating Software Conflicts and Bugs
Sometimes, the issues plaguing your system aren’t due to simple clutter but rather to deeper-seated software conflicts or residual bugs from previous installations or updates. Uninstalling programs doesn’t always remove every trace of their presence, and corrupted system files can persist, leading to unexpected crashes, errors, or malfunctioning features. A clean installation guarantees that you’re starting with a completely unblemished operating system. This eliminates the possibility of these persistent software conflicts or corrupted files affecting your new Windows 11 environment. It’s like moving into a brand-new house rather than just tidying up an old one – you’re guaranteed a fresh start free from inherited problems.
Enhancing Digital Security
While Windows 11 has robust built-in security features, a clean installation offers an additional layer of security. Any malware or persistent viruses that may have infiltrated your system and proven difficult to remove through traditional means will be completely eradicated during the wiping process. Furthermore, starting with a fresh OS means you’ll be installing the latest security patches and updates from Microsoft from the outset, ensuring your system is protected against the most current threats. For individuals and businesses alike, this is a significant advantage in maintaining a secure digital footprint and protecting sensitive data.
A Foundation for Optimal Productivity
For those whose work hinges on a stable and efficient computing environment, a clean install is often a proactive maintenance step. It ensures that your operating system is running on a clean slate, free from the potential for unforeseen issues that could disrupt workflow. This reliability is paramount for professionals in fields like software development, graphic design, video editing, or financial analysis, where system stability directly impacts output and deadlines. A clean Windows 11 installation provides a robust and predictable foundation upon which you can build your digital productivity.
Preparing for Your Windows 11 Clean Installation
A successful clean installation hinges on thorough preparation. Rushing this phase can lead to lost data or a frustrating setup process. Think of this as the architectural blueprint for your new digital home.
Backing Up Your Essential Data: The Golden Rule
This is, without a doubt, the most critical step. A clean installation will completely erase all data on the drive where Windows is installed. Therefore, backing up your personal files, documents, photos, videos, and any other important data is paramount.
Identifying What to Back Up
- Personal Documents: This includes files in your “Documents,” “Pictures,” “Videos,” and “Music” folders. Don’t forget any custom folders you’ve created elsewhere on your drives.
- Application Data: While applications themselves will be reinstalled, some programs store important configuration files, profiles, or saved game data. Research specific applications you use frequently to see if their data needs to be backed up separately. For instance, browser bookmarks, email client data, and certain creative software settings might require attention.
- Desktop and Downloads: These folders often contain important files that can be easily overlooked.
- Cloud Sync Folders: If you use services like OneDrive, Google Drive, or Dropbox, ensure that all your important files are fully synced to the cloud before you begin the clean install. You may also consider downloading a local copy of critical data if you’re particularly cautious.
Methods for Data Backup
- External Hard Drive or SSD: This is the most common and reliable method. Copy all your identified data to an external drive. Ensure the drive has sufficient capacity.
- Cloud Storage Services: Utilize services like OneDrive, Google Drive, or Dropbox. Upload your important files to these services. Again, verify that all files are fully synced.
- Network Attached Storage (NAS): If you have a NAS device on your home or office network, this can be an excellent centralized backup solution.
- USB Flash Drives: Suitable for smaller amounts of data, but less ideal for a full system backup.
Crucially, after backing up, double-check that your backups are complete and accessible. Don’t proceed with the clean install until you are confident that your data is safe.
Gathering Your Software and Licenses
After the clean installation, you’ll need to reinstall all your desired applications. Having your software installation media or download links readily available will save you considerable time and effort.
- Application Installers: Download the latest versions of your essential software (web browsers, office suites, creative tools, communication apps, etc.).
- Product Keys and Licenses: Locate all your software product keys, serial numbers, and license information. This is particularly important for paid software like Microsoft Office, Adobe Creative Suite, or games. Many applications are now tied to online accounts (e.g., Adobe Creative Cloud, Microsoft 365), so ensure you have access to those account credentials.
- Drivers: While Windows 11 usually installs most necessary drivers automatically, it’s good practice to have the latest drivers for your motherboard, graphics card, and other peripherals downloaded from the manufacturer’s website. This ensures optimal performance and hardware compatibility.
Creating Bootable Windows 11 Installation Media
To perform a clean installation, you’ll need bootable installation media. This can be a USB flash drive or a DVD. The USB method is generally preferred due to its speed and widespread compatibility.
Using the Media Creation Tool
Microsoft provides a free tool called the Media Creation Tool, which simplifies the process of creating bootable USB drives for Windows 11.
- Download the Media Creation Tool: Visit the official Microsoft website and download the Windows 11 Media Creation Tool.
- Run the Tool: Execute the downloaded file. Accept the license terms.
- Select “Create installation media (USB flash drive, DVD, or ISO file) for another PC.”
- Choose Language, Edition, and Architecture: The tool will typically default to recommended options for your current PC. You can uncheck “Use the recommended options for this PC” if you need to select a different language, edition (e.g., Home, Pro), or architecture (64-bit). Windows 11 is only available in 64-bit.
- Select “USB flash drive.”
- Choose Your USB Drive: Select the USB flash drive you want to use. Ensure it’s at least 8GB in size and that you’ve backed up any data on it, as it will be formatted.
- Download and Create: The tool will download the Windows 11 files and create the bootable USB drive. This process can take some time depending on your internet speed.
Alternative: Downloading an ISO File
If you prefer to create the USB drive manually or burn a DVD, you can download the Windows 11 ISO file directly from Microsoft’s website. You can then use third-party tools like Rufus to create a bootable USB from the ISO.
Performing the Clean Installation of Windows 11
With your preparation complete, it’s time to execute the clean installation. This involves booting from your installation media and following the on-screen prompts.
Booting from the Installation Media
The first step is to configure your computer to boot from the USB drive or DVD you created.
- Insert the Bootable Media: Plug in your Windows 11 USB drive or insert the DVD into your computer.
- Restart Your Computer: Reboot your PC.
- Access BIOS/UEFI Settings: As your computer starts to boot, you’ll need to press a specific key to enter the BIOS or UEFI settings. This key varies by manufacturer but is commonly one of the following:
F2,F10,F12,DEL, orESC. The correct key is usually displayed briefly on the screen during startup. - Change Boot Order: Within the BIOS/UEFI settings, navigate to the “Boot” or “Boot Order” section. Change the boot priority so that your USB drive or DVD drive is listed before your hard drive.
- Save and Exit: Save the changes you’ve made in the BIOS/UEFI and exit. Your computer will restart.
- “Press any key to boot from…” Prompt: If you’ve set the boot order correctly, you should see a message like “Press any key to boot from CD or DVD…” or similar for USB. Quickly press any key on your keyboard to initiate the boot process from your installation media.
The Windows Setup Process
Once your computer boots from the installation media, the Windows Setup wizard will launch.
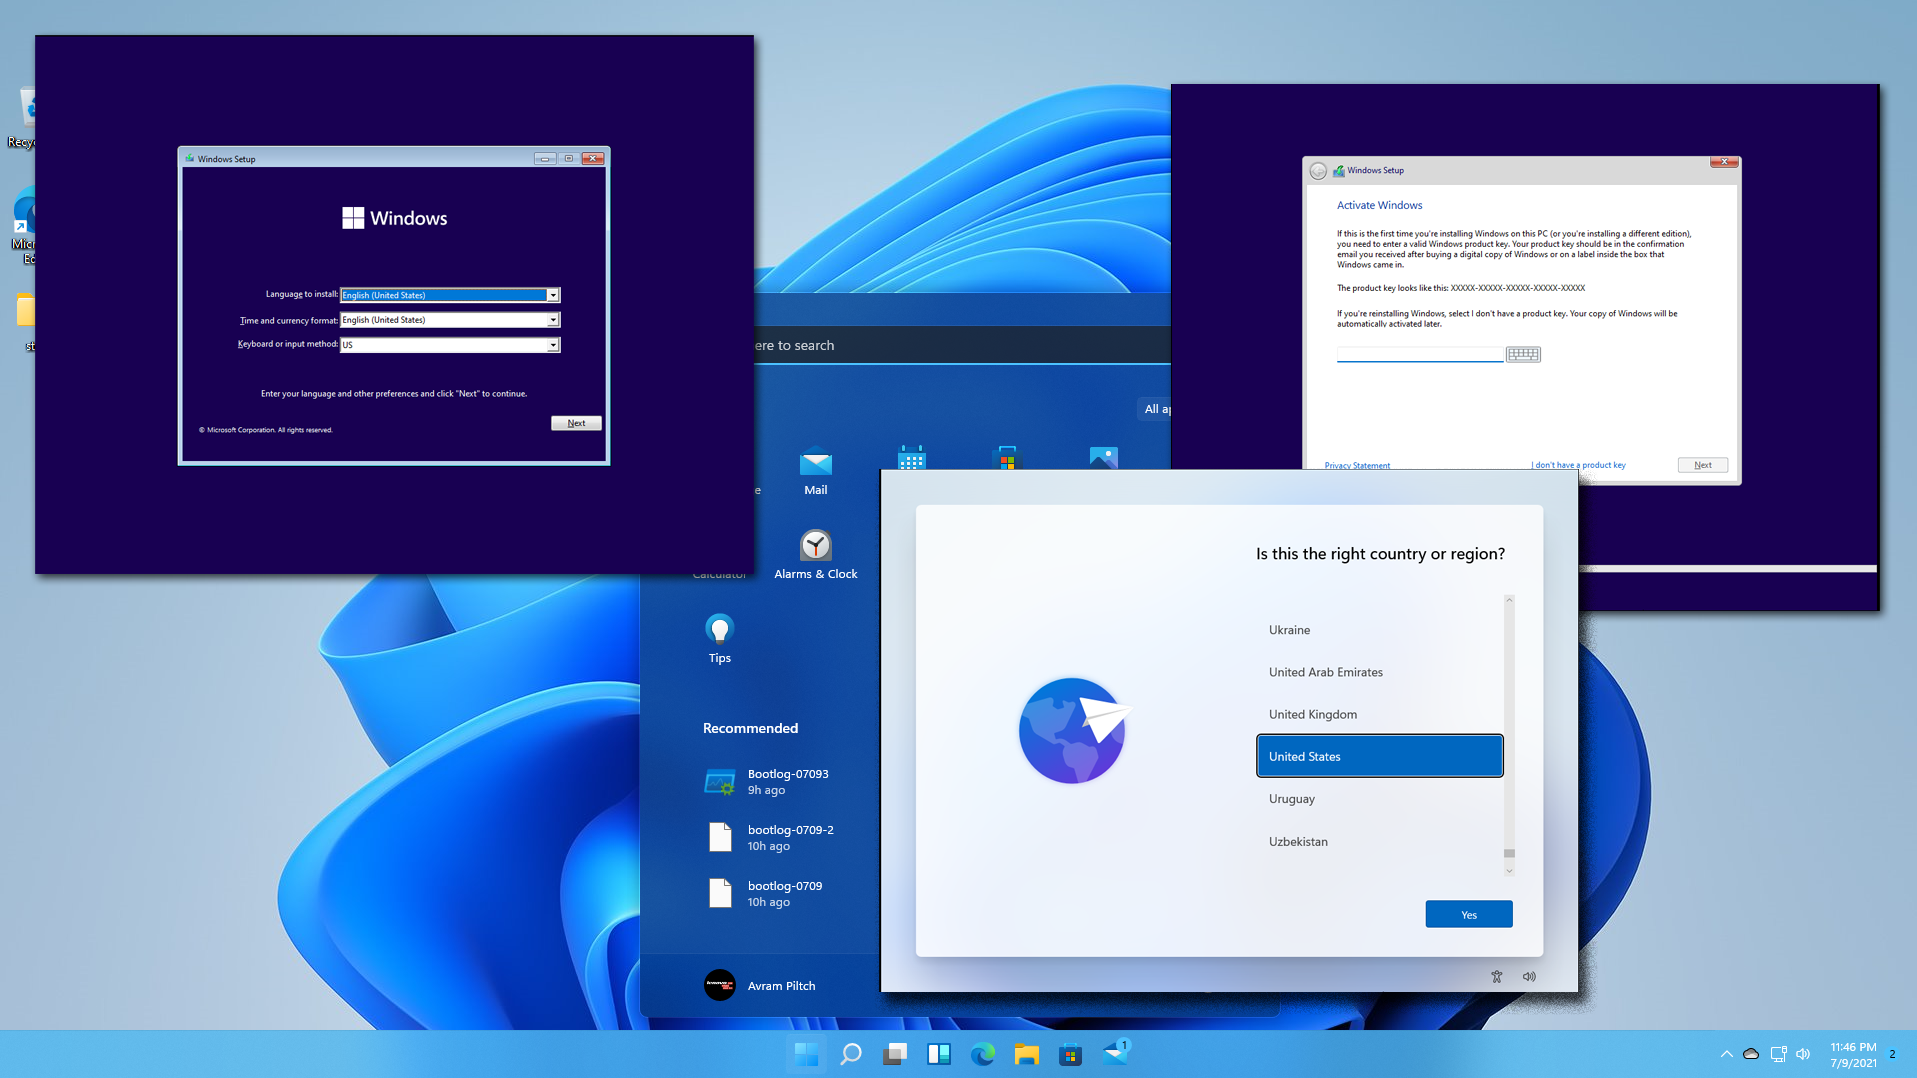
- Language, Time, and Keyboard: The first screen will ask you to select your preferred language, time and currency format, and keyboard or input method. Click “Next.”
- Install Now: Click the “Install now” button.
- Product Key: You’ll be prompted to enter your Windows product key.
- If you are reinstalling Windows on a device that was previously activated, you can often skip this step by clicking “I don’t have a product key.” Windows will automatically activate online once it detects your hardware.
- If you have a new license or are installing a different edition, enter your product key.
- Select Operating System: If you entered a generic product key or skipped, you might need to choose the edition of Windows 11 you want to install (e.g., Windows 11 Home, Windows 11 Pro). Make sure this matches your license.
- Accept License Terms: Read the Microsoft license terms and check the box to accept them. Click “Next.”
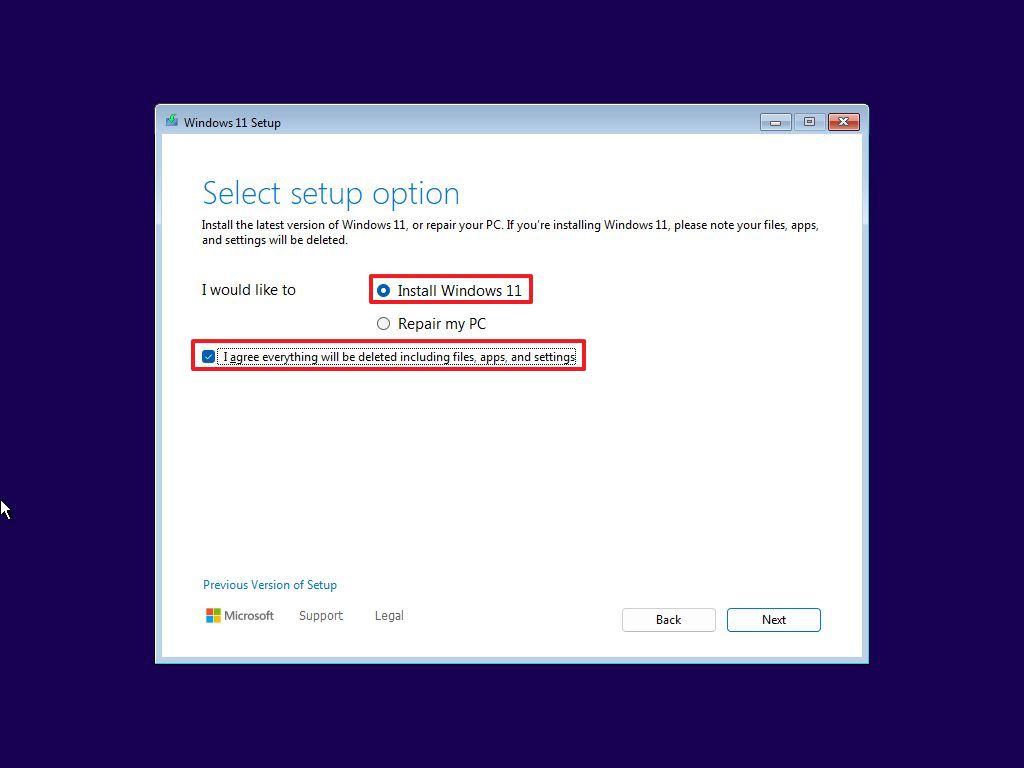
- Choose Installation Type: Custom: This is where you select the “Custom: Install Windows only (advanced)” option. This is the crucial step for a clean installation.
- Drive Selection and Formatting: You will see a list of all the drives and partitions on your computer.
- Identify your main drive: This is usually labeled “Drive 0” or similar, and it’s where your current Windows installation resides.
- Delete existing partitions: For a truly clean install, select each partition associated with your old Windows installation (typically the primary partition where Windows is installed, the system reserved partition, and any recovery partitions) and click “Delete.” Be extremely careful here, as this action is irreversible and will erase data. If you have multiple drives, ensure you are only deleting partitions from the drive where you intend to install Windows 11.
- Create New Partition (Optional but Recommended): Once you’ve deleted the old partitions, you’ll have “Unallocated Space.” You can either select this unallocated space and click “Next” to let Windows create the necessary partitions automatically, or you can click “New” to manually create a partition of a specific size. It’s generally safe to let Windows handle it.
- Select the partition where you want to install Windows 11 and click “Next.”
- Windows Installation: The installation process will begin. Files will be copied, features will be installed, and updates will be applied. Your computer will restart several times during this phase. Remember to remove the USB drive or DVD after the first restart to avoid booting from it again.
Initial Windows 11 Setup (Out-of-Box Experience – OOBE)
After the main installation is complete and your computer restarts, you’ll be greeted with the Windows 11 Out-of-Box Experience (OOBE). This is where you personalize your settings.
- Region and Keyboard Layout: Select your country or region and confirm your keyboard layout.
- Network Connection: Connect to your Wi-Fi network or plug in an Ethernet cable. This is often required for the setup process.
- Account Setup:
- Microsoft Account: You’ll be prompted to sign in with your Microsoft account. This is recommended for syncing settings, accessing the Microsoft Store, and utilizing cloud features. If you wish to use a local account (which is becoming less straightforward in Windows 11), you might need to disconnect from the internet temporarily or look for specific workarounds.
- Windows 11 Pro: If you have Windows 11 Pro, you may have a clearer option to create a local account during setup if you’re not connected to the internet or use specific commands.
- PIN Creation: Create a PIN for quick and secure access to your account.
- Privacy Settings: Review and configure your privacy settings (location, diagnostics data, tailored experiences, etc.). It’s advisable to uncheck options you’re not comfortable with.
- Personalization: You might be asked about how you plan to use your PC (gaming, school, business, etc.) to tailor recommendations.
- OneDrive Setup: You’ll have the option to set up OneDrive for file backup and synchronization.
- Finalizing Setup: Windows will apply your settings and prepare your desktop. This can take a few minutes.
Post-Installation Essentials and Optimization
Once you’ve successfully booted into your fresh Windows 11 desktop, your work isn’t entirely done. A few crucial steps will ensure your system is running optimally and securely.
Installing Drivers and Updates
While Windows 11 is excellent at automatically detecting and installing hardware drivers, it’s essential to ensure everything is up-to-date.
- Windows Update: The first thing you should do is run Windows Update. Go to
Settings > Windows Updateand click “Check for updates.” Install all available updates, including optional ones, which often contain driver updates. Reboot your computer after the updates are installed. - Manufacturer Websites: For critical components like your graphics card (NVIDIA, AMD, Intel), motherboard, and network adapter, visit the manufacturer’s official website to download the latest drivers. Sometimes, these drivers are more current or offer better performance than those provided through Windows Update.
- Device Manager: You can check Device Manager (
Right-click Start button > Device Manager) for any devices with a yellow exclamation mark, indicating a driver issue.
Reinstalling Your Applications and Restoring Data
Now it’s time to populate your pristine system with your essential software and bring back your personal files.
- Install Essential Applications: Reinstall your web browsers, office suite, media players, communication tools, and any other software you use regularly. Prioritize applications that are critical for your daily tasks.
- Restore Your Data: Connect your external hard drive or log into your cloud storage service and copy your backed-up personal files back to their appropriate locations on your new Windows 11 installation.
- Configure Application Settings: Reconfigure the settings for your applications. This might involve signing back into accounts, importing bookmarks, or re-establishing preferences.
System Optimization and Security Enhancements
To truly maximize the benefits of your clean install, consider these additional steps:
- Disk Cleanup and Optimization: Once all your data is restored and applications are installed, run Disk Cleanup (
Search for "Disk Cleanup") to remove any temporary files created during the installation and setup process. For SSDs, ensure TRIM is enabled (which it usually is by default). - Review Startup Programs: Go to
Settings > Apps > Startupand disable any unnecessary applications that launch automatically when Windows starts. This can significantly speed up boot times. - Antivirus and Security: Ensure your preferred antivirus software is installed and updated, or rely on Windows Security, which is robust and integrated. Configure your firewall and review other security settings.
- System Restore Point: After you’ve got everything set up to your satisfaction, it’s a good idea to create a new system restore point. This allows you to revert your system to its current stable state if any future issues arise.
By following these comprehensive steps, you’ll have successfully performed a clean installation of Windows 11, resulting in a faster, more stable, and more secure computing experience. This proactive approach to system maintenance is an investment in your digital productivity and overall satisfaction with your PC.
aViewFromTheCave is a participant in the Amazon Services LLC Associates Program, an affiliate advertising program designed to provide a means for sites to earn advertising fees by advertising and linking to Amazon.com. Amazon, the Amazon logo, AmazonSupply, and the AmazonSupply logo are trademarks of Amazon.com, Inc. or its affiliates. As an Amazon Associate we earn affiliate commissions from qualifying purchases.