
In the rapidly evolving landscape of digital assets, understanding the intricacies of managing your cryptocurrency is paramount. For many, Coinbase serves as the initial gateway, offering a user-friendly platform for buying, selling, and holding various digital currencies. However, as users delve deeper into the decentralized world, the need for greater control and access to advanced functionalities often arises. This is where the Coinbase Wallet enters the picture – a self-custodial wallet designed to unlock the full potential of Web3, including decentralized finance (DeFi), non-fungible tokens (NFTs), and decentralized applications (dApps).
Connecting your Coinbase exchange account to your Coinbase Wallet is not merely about transferring funds; it’s about establishing a bridge between a centralized exchange and your personal, decentralized digital asset fortress. This integration empowers users with enhanced autonomy over their holdings, facilitates direct interaction with blockchain networks, and opens up a spectrum of decentralized opportunities. This guide will meticulously walk you through the technical process, ensuring you can seamlessly link these two powerful platforms, understand their distinct roles, and confidently navigate the decentralized web.

Understanding the Ecosystem: Coinbase Exchange vs. Coinbase Wallet
Before diving into the connection process, it’s crucial to distinguish between the two platforms and appreciate the unique value each offers within the broader cryptocurrency ecosystem. While both bear the Coinbase name, their underlying architectures and primary functionalities are fundamentally different, serving distinct purposes for digital asset management.
Coinbase: The Centralized Exchange Hub
Coinbase, in its primary form, functions as a centralized cryptocurrency exchange. This means it operates as a third-party custodian, holding your private keys and managing your digital assets on your behalf. When you purchase cryptocurrency on Coinbase, you effectively own an IOU, with Coinbase responsible for the security and integrity of your holdings. Its appeal lies in its simplicity, regulatory compliance, and robust security measures, making it an ideal entry point for newcomers.
Key characteristics of the Coinbase exchange include:
- Custodial Control: Coinbase holds your private keys.
- Ease of Use: Simplified buying, selling, and trading interface.
- Fiat On/Off-Ramps: Direct connections to traditional banking systems for seamless fiat currency conversion.
- Regulatory Compliance: Adherence to various financial regulations, offering a degree of consumer protection.
- Limited Decentralized Access: Primarily focused on exchange functionalities, with restricted direct access to DeFi protocols or dApps.
Coinbase Wallet: Your Gateway to Decentralization and Self-Custody
In stark contrast, Coinbase Wallet is a non-custodial, or self-custodial, software wallet. This critical distinction means you hold the private keys and, by extension, full control over your digital assets. It operates independently of the Coinbase exchange and functions as your personal portal to the decentralized web. Think of it less as a bank account and more as your digital passport and vault for interacting directly with various blockchain networks.
Key characteristics of the Coinbase Wallet include:
- Self-Custody: You control your private keys (represented by a seed phrase).
- Decentralized Access: Direct interaction with DeFi protocols, dApps, and NFTs across multiple blockchains (Ethereum, Polygon, Solana, etc.).
- Browser Extension & Mobile App: Available across devices for flexible access.
- Native dApp Browser: Facilitates seamless exploration and interaction with decentralized applications.
- No Fiat On/Off-Ramps: While it can send/receive crypto, it doesn’t directly convert fiat currency.
The Synergistic Relationship and Why Connect Them
Connecting your Coinbase exchange account to your Coinbase Wallet creates a powerful synergy, bridging the best of both worlds. The primary motivations for this technical integration are rooted in enhanced control, broadened access, and optimized asset management:
- Achieving Self-Custody: The most compelling reason is to move assets from Coinbase’s custodial control to your self-custodial wallet. This grants you true ownership and eliminates reliance on a third party for security.
- Accessing Decentralized Finance (DeFi): Coinbase Wallet is your primary tool for engaging with DeFi protocols like lending platforms, decentralized exchanges (DEXs), and yield farming opportunities, which are inaccessible directly from the Coinbase exchange.
- Exploring NFTs and Web3: Interact with NFT marketplaces, metaverses, and a vast array of dApps that require a non-custodial wallet for authentication and transaction signing.
- Enhanced Security Posture: While Coinbase exchange is secure, having assets spread across both a centralized exchange and a self-custodial wallet can mitigate risks associated with a single point of failure (e.g., exchange hacks). It also provides a private, encrypted environment for your most sensitive assets.
- Streamlined Asset Transfers: Once connected, transferring assets between your Coinbase exchange portfolio and your Coinbase Wallet becomes a more intuitive and integrated process, often leveraging internal mechanisms for faster and potentially cheaper transactions compared to external network transfers.
This integration is not about merging two accounts into one, but rather about creating a secure, efficient conduit for your digital assets to flow between a managed, centralized environment and a completely user-controlled, decentralized one.
The Step-by-Step Technical Integration Process
Connecting Coinbase to Coinbase Wallet is a straightforward technical procedure, designed to be user-friendly while maintaining robust security protocols. This section details the precise steps required to establish this link.
Initial Setup and Account Verification
Before initiating the connection, ensure both your Coinbase exchange account and Coinbase Wallet are fully set up and accessible.
- Coinbase Exchange: Log into your Coinbase account and ensure any required identity verification (KYC) is complete. This is crucial for transaction limits and full platform access.
- Coinbase Wallet: Download the Coinbase Wallet app (available for iOS and Android) or install the browser extension. If you’re a new user, follow the prompts to create a new wallet. This involves generating and securely backing up your 12-word seed phrase (recovery phrase). This phrase is your ultimate key; never share it and store it offline. If you already have a wallet, ensure you can access it.
Initiating the Connection from Coinbase Wallet
The connection process is typically initiated from within the Coinbase Wallet application or browser extension.
- Open Coinbase Wallet: Launch your Coinbase Wallet app or extension.
- Navigate to Settings/Connect: Look for a “Settings” or “Connect” option. In many versions, there’s a specific “Connect to Coinbase” or “Link Coinbase Account” option.
- Select Coinbase Exchange: Tap or click on the option to connect to your Coinbase exchange account. The wallet will often provide a brief explanation of what the connection entails.
- Security Prompt: The wallet will likely open a secure browser window or redirect you to the Coinbase exchange login page to authorize the connection.
Authorizing the Connection on Coinbase Exchange
This is the critical step where you grant permission for your Coinbase Wallet to interact with your exchange account.
- Log into Coinbase Exchange: When prompted, securely log into your Coinbase exchange account using your credentials.
- Review Permissions: Coinbase will display a permissions screen, detailing what access you are granting to your Coinbase Wallet. Typically, this includes permission to view your balances, send/receive assets, and potentially manage addresses. Carefully review these permissions. Ensure you are comfortable with the level of access being requested. It’s usually limited to what’s necessary for basic interaction and transfers.
- Authorize Connection: After reviewing, click or tap “Authorize,” “Connect,” or “Allow.” This action cryptographically links the two accounts.
- Two-Factor Authentication (2FA): If you have 2FA enabled on your Coinbase account (which is highly recommended), you will likely be prompted to enter a 2FA code to finalize the authorization.
Verifying a Successful Link
Once authorized, you should see confirmation in both applications.
- Coinbase Wallet Confirmation: Your Coinbase Wallet app or extension should display a confirmation message indicating a successful connection. You might see your Coinbase exchange balance or a simplified transfer interface within the wallet.
- Coinbase Exchange Confirmation (Optional): Some users might find a notification or a linked devices section within their Coinbase exchange account settings confirming the connection.
- Test Transaction (Recommended): To fully verify the connection, initiate a small test transfer from your Coinbase exchange to your Coinbase Wallet. Start with a minimal amount of a low-fee cryptocurrency (e.g., XLM, LTC, or a small amount of ETH if gas fees are low). Monitor the transaction status in both applications. This confirms the technical pipeline is fully functional.

Securely Managing and Transferring Digital Assets
Once connected, the ability to move assets between your Coinbase exchange and Coinbase Wallet becomes a core functionality. This process, while seemingly simple, involves understanding network dynamics, security best practices, and potential cost implications.
Navigating Asset Transfers: From Exchange to Wallet
Transferring assets typically follows a clear protocol:
- Initiate Transfer: From your Coinbase exchange account, select the cryptocurrency you wish to send. Choose “Send” or “Withdraw.”
- Select Destination: Since you’re connected to Coinbase Wallet, the exchange will often provide an option to directly send to your linked Coinbase Wallet, or you can manually input your Coinbase Wallet’s receiving address for the specific cryptocurrency. Using the direct link (if available) can sometimes be faster and more user-friendly.
- Specify Amount: Enter the amount of crypto you wish to transfer.
- Review and Confirm: Double-check all details: the asset, amount, and destination address. Confirm the transaction. You’ll likely need to use your 2FA for this step.
- Monitor Transaction: The transaction will be processed on the blockchain. You can monitor its status on Coinbase exchange and, once confirmed on the network, it will appear in your Coinbase Wallet.
Understanding Transaction Fees and Network Congestion
Transfers between Coinbase exchange and Coinbase Wallet are essentially blockchain transactions. As such, they are subject to network fees and confirmation times:
- Network Fees (Gas Fees): These are paid to the miners or validators of the blockchain network to process your transaction. Fees vary significantly based on the blockchain (e.g., Ethereum’s gas fees are notoriously volatile) and network congestion. Coinbase typically allows you to preview the fee before confirming.
- Internal Transfers: In some cases, if both platforms internally recognize the linked account, certain transfers (especially for specific assets) might be processed ‘off-chain’ by Coinbase, potentially reducing or eliminating network fees and speeding up the process. However, this is not always the case, and users should always check fees and processing times.
- Confirmation Times: The time it takes for a transaction to be confirmed depends on the blockchain network’s current load and the fee paid. High congestion (many pending transactions) means longer wait times unless a higher fee is paid.
Best Practices for Transaction Security and Confirmation
Maintaining security during transfers is paramount:
- Always Double-Check Addresses: Before confirming any transaction, meticulously verify the destination address in your Coinbase Wallet. Copy-pasting is generally safer than manual entry, but always visually confirm the first few and last few characters. Malware can sometimes alter copied addresses.
- Start Small: For your first few transfers, especially with new assets or large amounts, send a small test amount first to confirm everything works as expected.
- Understand Network Delays: Be patient. Blockchain transactions are not instantaneous. Unnecessary re-sends or panicking can lead to errors. Use block explorers to track your transaction with its transaction ID (TxID).
- Enable 2FA: Always have 2FA enabled on both your Coinbase exchange account and, if available, your Coinbase Wallet for an extra layer of security.
- Secure Your Seed Phrase: Your Coinbase Wallet’s seed phrase is the ultimate key. Keep it offline, in a secure location, and never digitally store or share it. Loss of this phrase means permanent loss of your assets if your device is compromised.
Advanced Features and Decentralized Applications (dApps)
With your Coinbase Wallet securely connected, you’ve unlocked the true potential of decentralized technology. This goes far beyond simple storage and includes engaging with a vibrant ecosystem of dApps, DeFi protocols, and digital collectibles.
Exploring DeFi, NFTs, and Web3 with Coinbase Wallet
Coinbase Wallet acts as your universal remote for Web3:
- DeFi (Decentralized Finance): Access platforms like Uniswap for decentralized trading, Aave or Compound for lending/borrowing, and various yield farming protocols. Your wallet connects directly to these smart contracts, allowing you to participate without intermediaries.
- NFTs (Non-Fungible Tokens): Browse and manage your NFT collections on marketplaces like OpenSea directly through your wallet. You can view your digital art, trade items, and participate in drops.
- Web3 Gaming & Metaverse: Interact with blockchain-based games and virtual worlds, where your wallet holds your in-game assets and identity.
- DAO (Decentralized Autonomous Organizations) Governance: Participate in the governance of various projects by holding their tokens and voting on proposals directly from your wallet.
Integrating with dApps and Smart Contracts
The technical process of interacting with a dApp through your Coinbase Wallet is straightforward:
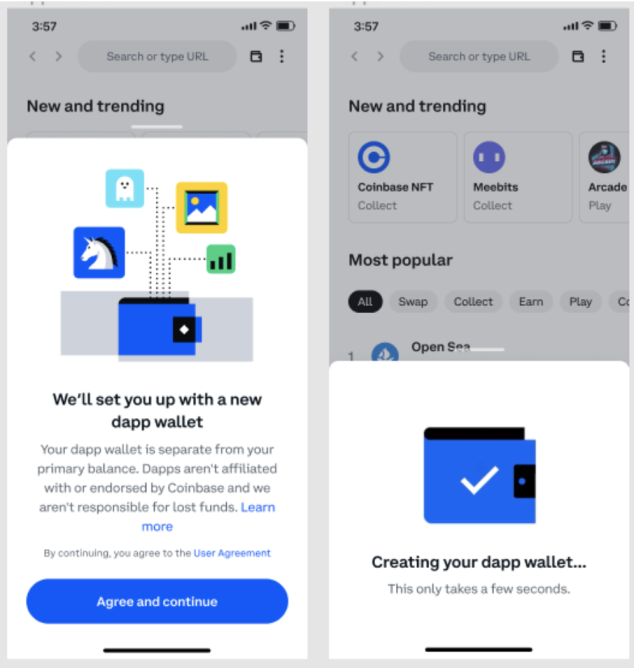
- Navigate to dApp: Use the built-in dApp browser within Coinbase Wallet or navigate to the dApp’s website using a standard browser (like Chrome), then select the Coinbase Wallet browser extension to connect.
- Connect Wallet: On the dApp’s interface, look for a “Connect Wallet” button. Click it and select “Coinbase Wallet” (or “WalletConnect” if Coinbase Wallet is an option there).
- Authorize Connection: Your Coinbase Wallet will pop up, asking for your permission to connect to the dApp. Review the permissions carefully – typically, this is just to view your address and balance.
- Sign Transactions: When you perform an action on the dApp (e.g., swapping tokens, buying an NFT, lending assets), your Coinbase Wallet will prompt you to “Sign” the transaction. This is where you cryptographically authorize the smart contract interaction. Each signature will typically involve a network fee.
Key Management and Seed Phrase Security: A Technical Deep Dive
The security of your Coinbase Wallet hinges entirely on your seed phrase. This 12- or 24-word sequence is a human-readable representation of your private key, which itself is a long, cryptographic string of characters.
- Cryptographic Foundation: The seed phrase is derived from a master private key using a standard like BIP39. From this master private key, all your individual account private keys (for different cryptocurrencies on different networks) are deterministically generated.
- Offline Storage: The most secure method for storing your seed phrase is offline – etched onto metal, written on paper, or stored in a secure physical vault. Any digital copy (even encrypted) introduces a vector for compromise.
- Never Share: Sharing your seed phrase is equivalent to giving someone direct, unfettered access to all your digital assets. No legitimate service, including Coinbase, will ever ask for your seed phrase.
- Backup Protocol: It’s advisable to create multiple physical backups and store them in geographically separate, secure locations to protect against fire, flood, or theft.
Understanding this technical underpinning of key management reinforces why the seed phrase is the single most critical piece of information for any self-custodial wallet user. Its compromise means irreversible loss of assets.
Troubleshooting Common Connection and Transaction Issues
Even with a robust understanding, users may occasionally encounter technical glitches when connecting or transacting between Coinbase and Coinbase Wallet. Knowing how to diagnose and resolve these common issues is crucial for a smooth user experience.
Addressing Synchronization Problems and Connection Errors
Sometimes the connection might appear broken or fail to establish correctly.
- Refresh Connection: Often, simply disconnecting and reconnecting the wallet can resolve minor synchronization issues. In your Coinbase Wallet settings, look for an option to “Disconnect Coinbase Account,” then re-initiate the connection process.
- Clear Cache/Data: For mobile apps, try clearing the app’s cache and data (Android) or reinstalling the app (iOS). For browser extensions, try disabling and re-enabling the extension, or clearing your browser’s cache.
- Update Software: Ensure both your Coinbase Wallet app/extension and your web browser are updated to their latest versions. Outdated software can lead to compatibility issues.
- Check Network Status: Occasionally, Coinbase or the underlying blockchain network might be experiencing technical difficulties. Check Coinbase’s status page (status.coinbase.com) and relevant blockchain explorer statuses for any known outages.
- Firewall/VPN Interference: If you’re using a VPN or strict firewall settings, they might be interfering with the connection. Temporarily disabling them to test if the connection works can help diagnose the issue.
Resolving Failed Transactions and Network Delays
Transactions can fail or get stuck for several reasons, primarily related to network conditions or insufficient funds.
- Insufficient Funds (Including Gas): Ensure you have enough of the native cryptocurrency (e.g., Ether for Ethereum network transactions) in your wallet to cover both the transaction amount and the network (gas) fee. A common mistake is attempting to send almost the entire balance without leaving enough for gas.
- High Network Congestion: During periods of high network activity, transactions with lower gas fees might get stuck or fail. You might need to wait for congestion to subside or attempt to “speed up” the transaction by submitting it again with a higher gas fee (if your wallet supports this feature).
- Incorrect Address/Network: Double-check that you’re sending to the correct address and, crucially, on the correct network. Sending tokens designed for Ethereum to a Solana address, for example, will result in permanent loss.
- Token Approvals: For some dApp interactions, you first need to approve the dApp to spend a certain token amount from your wallet. This is a separate transaction with its own gas fee. If you skip or fail this approval, subsequent transactions might fail.
- Nonce Issues: In advanced scenarios, particularly if you’ve submitted multiple transactions rapidly, a “nonce” conflict can occur. Resetting your wallet’s transaction history or re-syncing can sometimes help, though this is less common for typical users.
Security Audits and Account Recovery Protocols
While troubleshooting, always prioritize security:
- Regular Security Audits: Periodically review the permissions you’ve granted to dApps within your Coinbase Wallet. Disconnect from any dApps you no longer use or trust.
- Phishing Awareness: Be extremely wary of unsolicited messages, emails, or websites claiming to be Coinbase or a dApp. Always verify URLs directly. Never enter your seed phrase or private keys into any website or application unless you are absolutely certain of its legitimacy.
- Recovery Protocol Familiarity: Understand the process for recovering your Coinbase Wallet using your seed phrase. Practice this mentally or with a small amount of test funds to ensure you know how to access your assets in case of device loss or damage. Coinbase cannot recover your wallet without your seed phrase.
- Reporting Suspicious Activity: If you suspect your Coinbase exchange account has been compromised, contact Coinbase support immediately. For Coinbase Wallet, if your seed phrase is compromised, move all funds to a new, secure wallet as quickly as possible, as recovery is solely your responsibility.
By understanding these technical nuances and adhering to best practices, users can confidently navigate the connection between Coinbase and Coinbase Wallet, unlocking a world of decentralized possibilities while maintaining the highest levels of security and control over their digital assets.
aViewFromTheCave is a participant in the Amazon Services LLC Associates Program, an affiliate advertising program designed to provide a means for sites to earn advertising fees by advertising and linking to Amazon.com. Amazon, the Amazon logo, AmazonSupply, and the AmazonSupply logo are trademarks of Amazon.com, Inc. or its affiliates. As an Amazon Associate we earn affiliate commissions from qualifying purchases.