
In the dynamic world of gaming, capturing those epic moments – a clutch play, a hilarious glitch, or a breathtaking environmental vista – has become an integral part of the experience. Whether you’re a seasoned streamer, an aspiring content creator, or simply someone who loves to relive and share their best gaming memories, knowing how to effectively record and “clip” your gameplay is essential. For PC gamers powered by NVIDIA graphics cards, the answer often lies within GeForce Experience, a powerful companion application that offers a suite of tools designed to enhance your gaming, including seamless clipping capabilities.
This guide will delve deep into how to leverage GeForce Experience’s features, particularly its “Instant Replay” functionality, to ensure you never miss a beat. We’ll explore everything from initial setup and optimal settings to advanced tips and troubleshooting, transforming you into a master of digital game capture.
Understanding GeForce Experience and Instant Replay
Before diving into the mechanics, it’s crucial to understand what GeForce Experience is and how its core clipping feature, Instant Replay, functions. This foundational knowledge will empower you to use the tool more effectively and appreciate its unique advantages.
What is GeForce Experience?
GeForce Experience is a free application from NVIDIA that acts as a central hub for various utilities designed to optimize your gaming PC. It automatically scans your system for compatible games, then suggests optimal graphics settings based on your hardware, keeps your NVIDIA drivers updated, and offers performance monitoring. Crucially for this discussion, it integrates Share (formerly ShadowPlay), a powerful overlay that enables recording, broadcasting, and screenshot capture without significantly impacting game performance. This integration makes it a go-to solution for millions of gamers.
The Power of Instant Replay: Never Miss a Moment
At the heart of GeForce Experience’s clipping prowess is its Instant Replay feature. Unlike traditional recording software that requires you to actively start and stop recording, Instant Replay continuously records your gameplay in the background to a temporary buffer. This buffer typically stores the last 30 seconds to 20 minutes of gameplay (configurable by the user). When something noteworthy happens – a multi-kill, a difficult boss takedown, or a funny interaction – you simply press a hotkey, and GeForce Experience saves the preceding moments as a high-quality video clip.
This “retroactive recording” mechanism is incredibly powerful because it eliminates the need to constantly think about hitting the record button. You can focus entirely on your game, knowing that if something awesome occurs, you have a window of opportunity to capture it. It’s perfect for those spontaneous, unscripted moments that make gaming so memorable.
Key Benefits for Gamers and Content Creators
The ability to clip with GeForce Experience offers a multitude of benefits:
- Spontaneity: Capture unexpected moments without prior planning.
- Performance Impact: Designed to run efficiently, it has a minimal impact on your in-game frame rates, especially compared to some other recording solutions.
- Ease of Use: Simple hotkeys make saving clips quick and intuitive.
- Quality: Records high-quality video (up to 4K resolution and 60 FPS) directly from your GPU.
- Integration: Seamlessly integrates with your NVIDIA hardware and drivers.
- Sharing: Easy local storage of clips, ready for editing or direct upload to social media platforms.
For content creators, this means less time spent sifting through hours of footage and more time focusing on specific highlights. For casual gamers, it’s a simple way to preserve and share bragging rights with friends.
Setting Up GeForce Experience for Optimal Clipping
To unlock the full potential of GeForce Experience for clipping, a proper initial setup is essential. This involves installation, activating the in-game overlay, and configuring key settings for performance and convenience.
Installation and Initial Setup
If you have an NVIDIA graphics card, GeForce Experience is often bundled with the driver installation. If not, you can download it directly from the NVIDIA website. Once installed:
- Launch GeForce Experience: You’ll likely need to log in with an NVIDIA account (or create one).
- Scan for Games: The application will automatically scan your system for installed games.
- Update Drivers: Ensure your graphics drivers are up to date for optimal performance and compatibility.
Configuring In-Game Overlay
The in-game overlay is the interface through which you control all the capture features.
- Enable Overlay: Go to Settings (the cog icon) in GeForce Experience. Under the “GENERAL” section, ensure “IN-GAME OVERLAY” is toggled ON.
- Open Overlay: The default hotkey to open the overlay while in a game is
Alt + Z. It’s a good idea to remember this, as it provides access to all your capture options.
Essential Settings: Performance, Storage, and Hotkeys
Within the in-game overlay (Alt + Z), click the “Settings” icon (another cog) to access crucial configurations for clipping.
- Recordings:
- Videos: Set your temporary file location (where Instant Replay stores its buffer) and your output file location (where saved clips go). Ensure you have ample space on a fast drive (SSD is highly recommended) to prevent performance hitches.
- Screenshots: Define the folder where screenshots will be saved.
- Keyboard Shortcuts:
- This is critical! Memorize or customize the hotkeys for “Save last X minutes” (Instant Replay) and “Toggle manual record.” The default is typically
Alt + F10for Instant Replay andAlt + F9for manual recording. Choose combinations that are easy to reach but won’t interfere with your in-game controls.
- This is critical! Memorize or customize the hotkeys for “Save last X minutes” (Instant Replay) and “Toggle manual record.” The default is typically
- Video Capture:
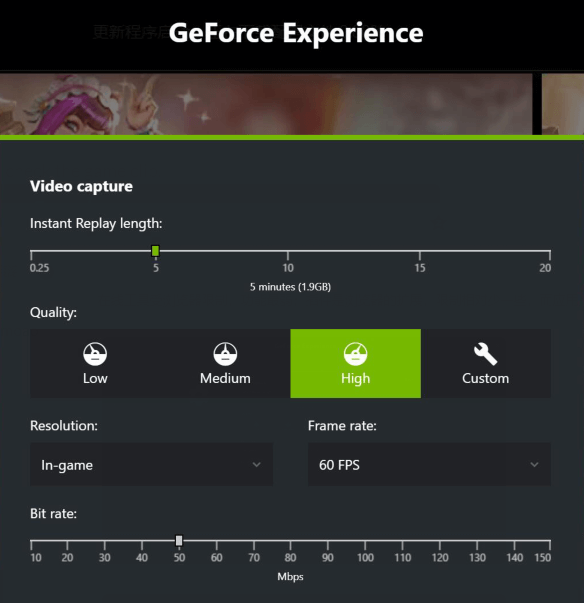
- Quality: Here you can adjust the resolution, frame rate, and bitrate of your recordings.
- Resolution: Match your game’s resolution for native quality (e.g., 1080p, 1440p, 4K).
- Frame Rate: 60 FPS is recommended for smooth gameplay footage.
- Bitrate: Higher bitrates result in better visual quality but larger file sizes. Start with a medium setting (e.g., 50-70 Mbps for 1080p@60FPS) and adjust based on your storage and upload speed constraints.
- Shadow & Manual Recording Time: For Instant Replay, this is where you define how long the buffer keeps footage (e.g., 5, 10, 20 minutes). For clipping, a 1-5 minute buffer is usually sufficient.
- Quality: Here you can adjust the resolution, frame rate, and bitrate of your recordings.
Mastering Instant Replay: Your Go-To Clipping Tool
With your settings configured, you’re ready to start capturing those incredible gaming moments using Instant Replay.
Activating and Adjusting Instant Replay Buffer
- Activate: While in a game, open the overlay (
Alt + Z) and locate the “Instant Replay” tile. Click it and select “Turn On.” A small indicator (often a green circle or icon) will appear on your screen, indicating that Instant Replay is active and buffering gameplay. - Adjust Buffer Length: Within the “Instant Replay” section of the overlay (or via “Video Capture” settings), you can fine-tune the duration of the buffer. If you frequently capture short, impactful clips, a 1-2 minute buffer is ideal. For longer sequences, extend it to 5-10 minutes. Remember, a longer buffer uses more temporary storage space and potentially more system resources.
Saving Your Clips: The Quick Save Feature
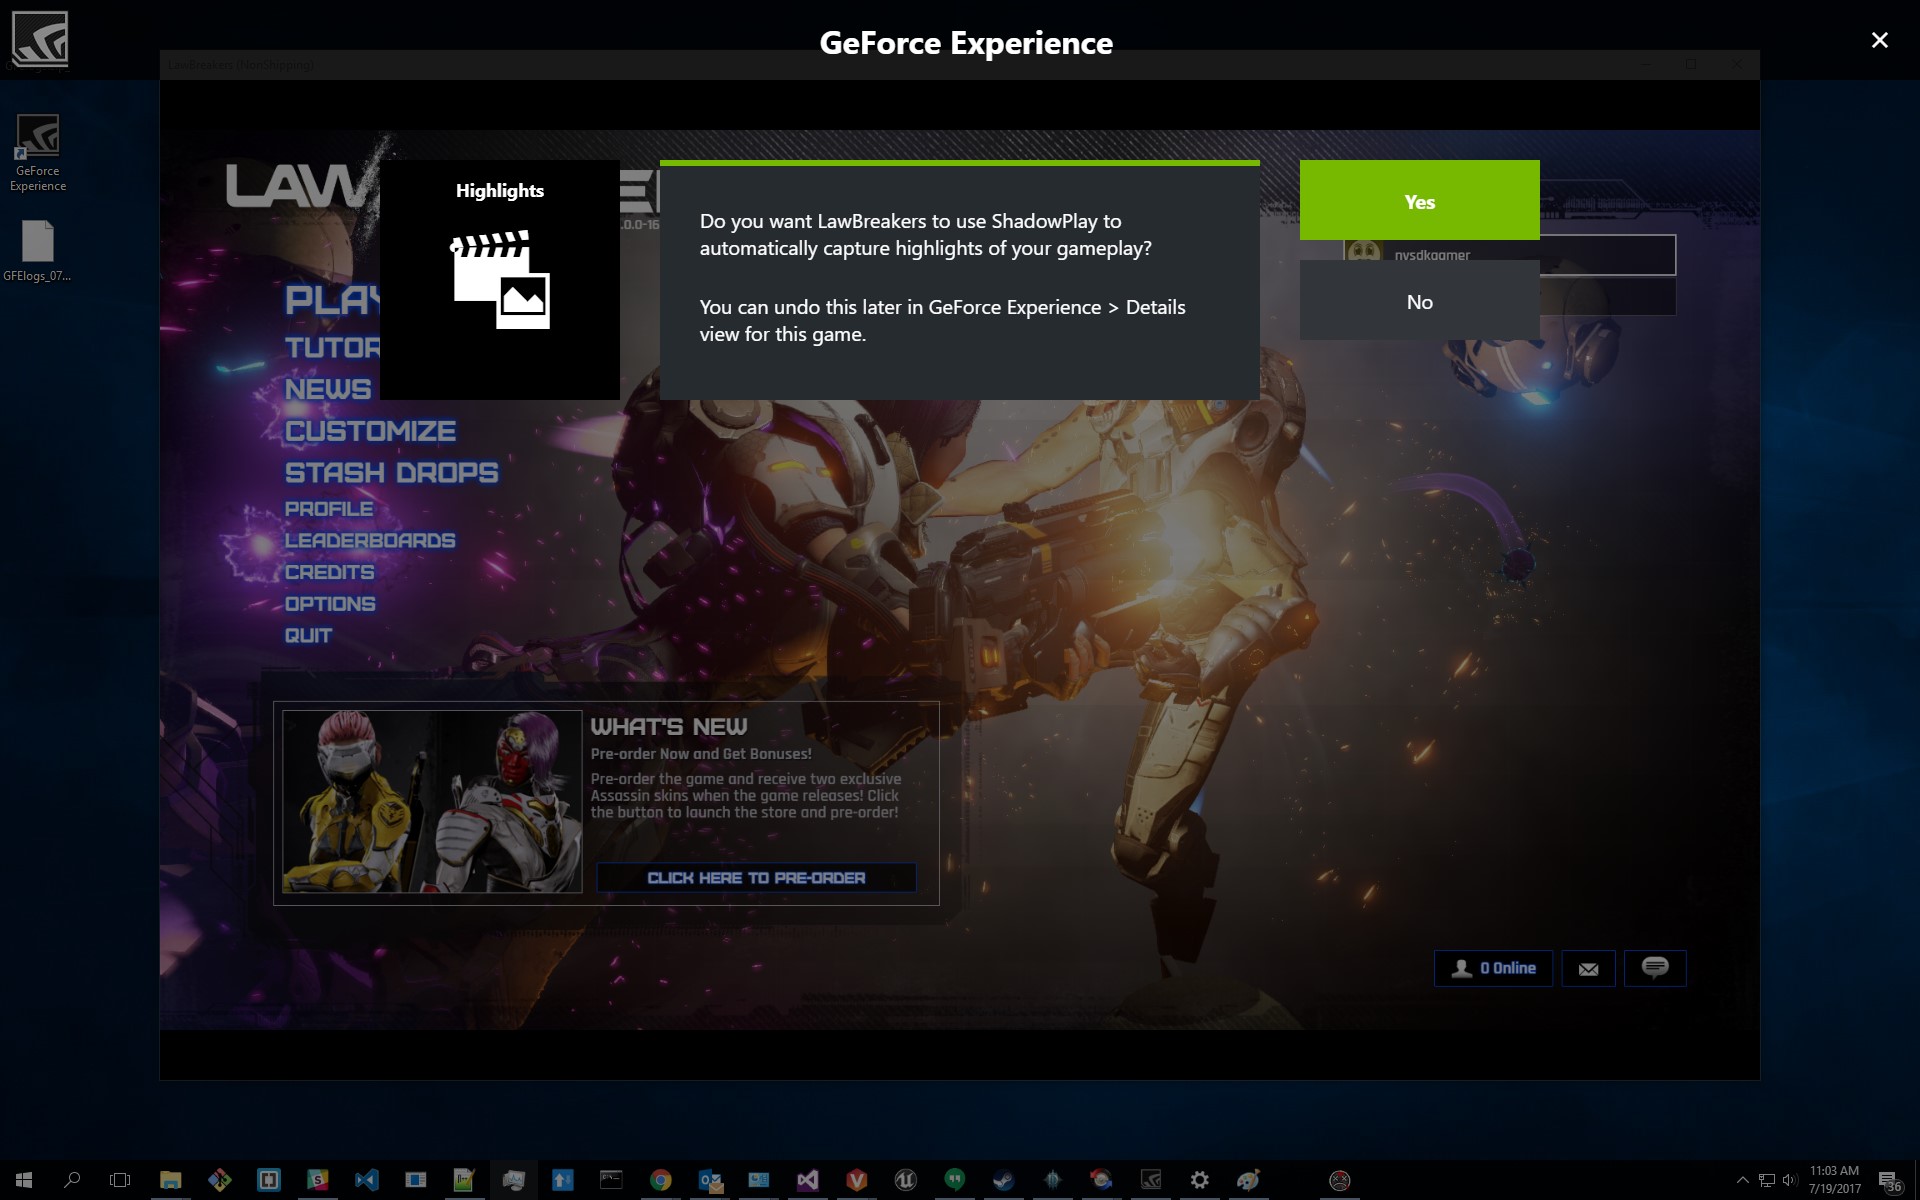
This is the moment of truth! When you perform an amazing feat or witness something memorable:
- Press the Hotkey: Immediately press your designated “Save last X minutes” hotkey (default
Alt + F10). - Confirmation: You’ll see a brief notification on screen (e.g., “Recording saved”) confirming that the clip has been written to your output folder.
That’s it! GeForce Experience automatically retrieves the footage from the temporary buffer corresponding to the length you set (e.g., the last 3 minutes) and saves it as a video file.
Understanding Clip Quality and File Size
The settings you choose under “Video Capture” directly impact both the visual fidelity and the file size of your clips.
- Higher Resolution (e.g., 4K) + Higher Frame Rate (60 FPS) + Higher Bitrate: Results in stunning, professional-grade footage but generates very large files that require significant storage space and more powerful hardware to process and upload.
- Lower Resolution (e.g., 1080p) + Standard Frame Rate (30 FPS) + Lower Bitrate: Produces perfectly acceptable quality for casual sharing, with much smaller file sizes and less demand on your system.
Experiment with these settings to find a balance that suits your needs, your hardware capabilities, and your target audience (if any). For most gamers, 1080p at 60 FPS with a moderate bitrate offers an excellent balance of quality and manageability.
Beyond Instant Replay: Manual Recording and Broadcast Features
While Instant Replay is perfect for spontaneous clips, GeForce Experience offers additional functionalities for capturing longer sessions or sharing your gameplay live.
Full Session Recording for Longer Content
If you plan to record an entire gaming session, a speedrun, or a full match, manual recording is the way to go.
- Activate Manual Recording: Press your “Toggle manual record” hotkey (default
Alt + F9). - Monitor: A recording indicator will typically appear on screen.
- Stop Recording: Press the same hotkey (
Alt + F9) to stop the recording. The full session will be saved to your output folder.
This is ideal for creating long-form content, such as walkthroughs, Let’s Plays, or analysis videos, where you need to capture everything from start to finish.
Broadcasting Your Gameplay Live
GeForce Experience also integrates directly with popular streaming platforms like Twitch, YouTube, and Facebook Live.
- Access Broadcast Settings: Within the in-game overlay (
Alt + Z), click the “Broadcast” tile. - Connect Accounts: You’ll be prompted to log in and connect your streaming accounts.
- Configure Quality: Similar to recording, you can set resolution, frame rate, and bitrate for your live stream. Ensure your internet upload speed can handle the chosen quality.
- Start/Stop Broadcast: Use the overlay to start and stop your live stream, or assign a dedicated hotkey.
This feature simplifies the streaming setup for many NVIDIA users, allowing them to go live with just a few clicks.
Capturing Screenshots with GeForce Experience
Sometimes a static image captures a moment better than video. GeForce Experience makes this easy too.
- Take Screenshot: Press the “Save screenshot” hotkey (default
Alt + F1). - Save to Gallery: Screenshots are saved to your designated folder and also appear in the GeForce Experience “Gallery” for easy access.
- HDR Screenshots: For compatible games and HDR displays, you can capture stunning HDR screenshots for unparalleled visual fidelity.
Advanced Tips and Troubleshooting
To truly master clipping with GeForce Experience, consider these advanced tips and be prepared for common issues.
Optimizing Performance While Recording
Even though GeForce Experience is optimized, recording can still impact performance on less powerful systems.
- Lower Recording Settings: If you experience frame drops, reduce the resolution, frame rate, or bitrate of your recordings.
- Dedicated Drive: Store temporary and final clips on a separate, fast drive (e.g., an SSD that isn’t your primary OS drive) to minimize disk I/O bottlenecks.
- Close Background Apps: Ensure no other demanding applications are running in the background.
- Keep Drivers Updated: Always run the latest NVIDIA drivers for performance improvements and bug fixes.
Common Issues and Solutions
- Overlay Not Appearing:
- Ensure “In-Game Overlay” is enabled in GeForce Experience settings.
- Restart GeForce Experience and/or your game.
- Check for conflicting overlays from other applications (e.g., Discord, Steam, MSI Afterburner).
- Recording Not Saving:
- Check your designated output folder.
- Ensure you have sufficient disk space.
- Verify your hotkeys are correctly assigned and not conflicting with in-game controls.
- Run GeForce Experience as administrator.
- Poor Recording Quality/Performance:
- Adjust video capture settings (resolution, frame rate, bitrate) to lower values.
- Check your system’s resources (CPU, GPU, RAM, disk usage) during recording. Upgrade hardware if consistently struggling.
- Ensure your game is running smoothly before recording.
- “Something went wrong” Error:
- Reinstall GeForce Experience clean (using DDU to remove old drivers and software can help).
- Ensure Windows is fully updated.
Integrating with Video Editing Software
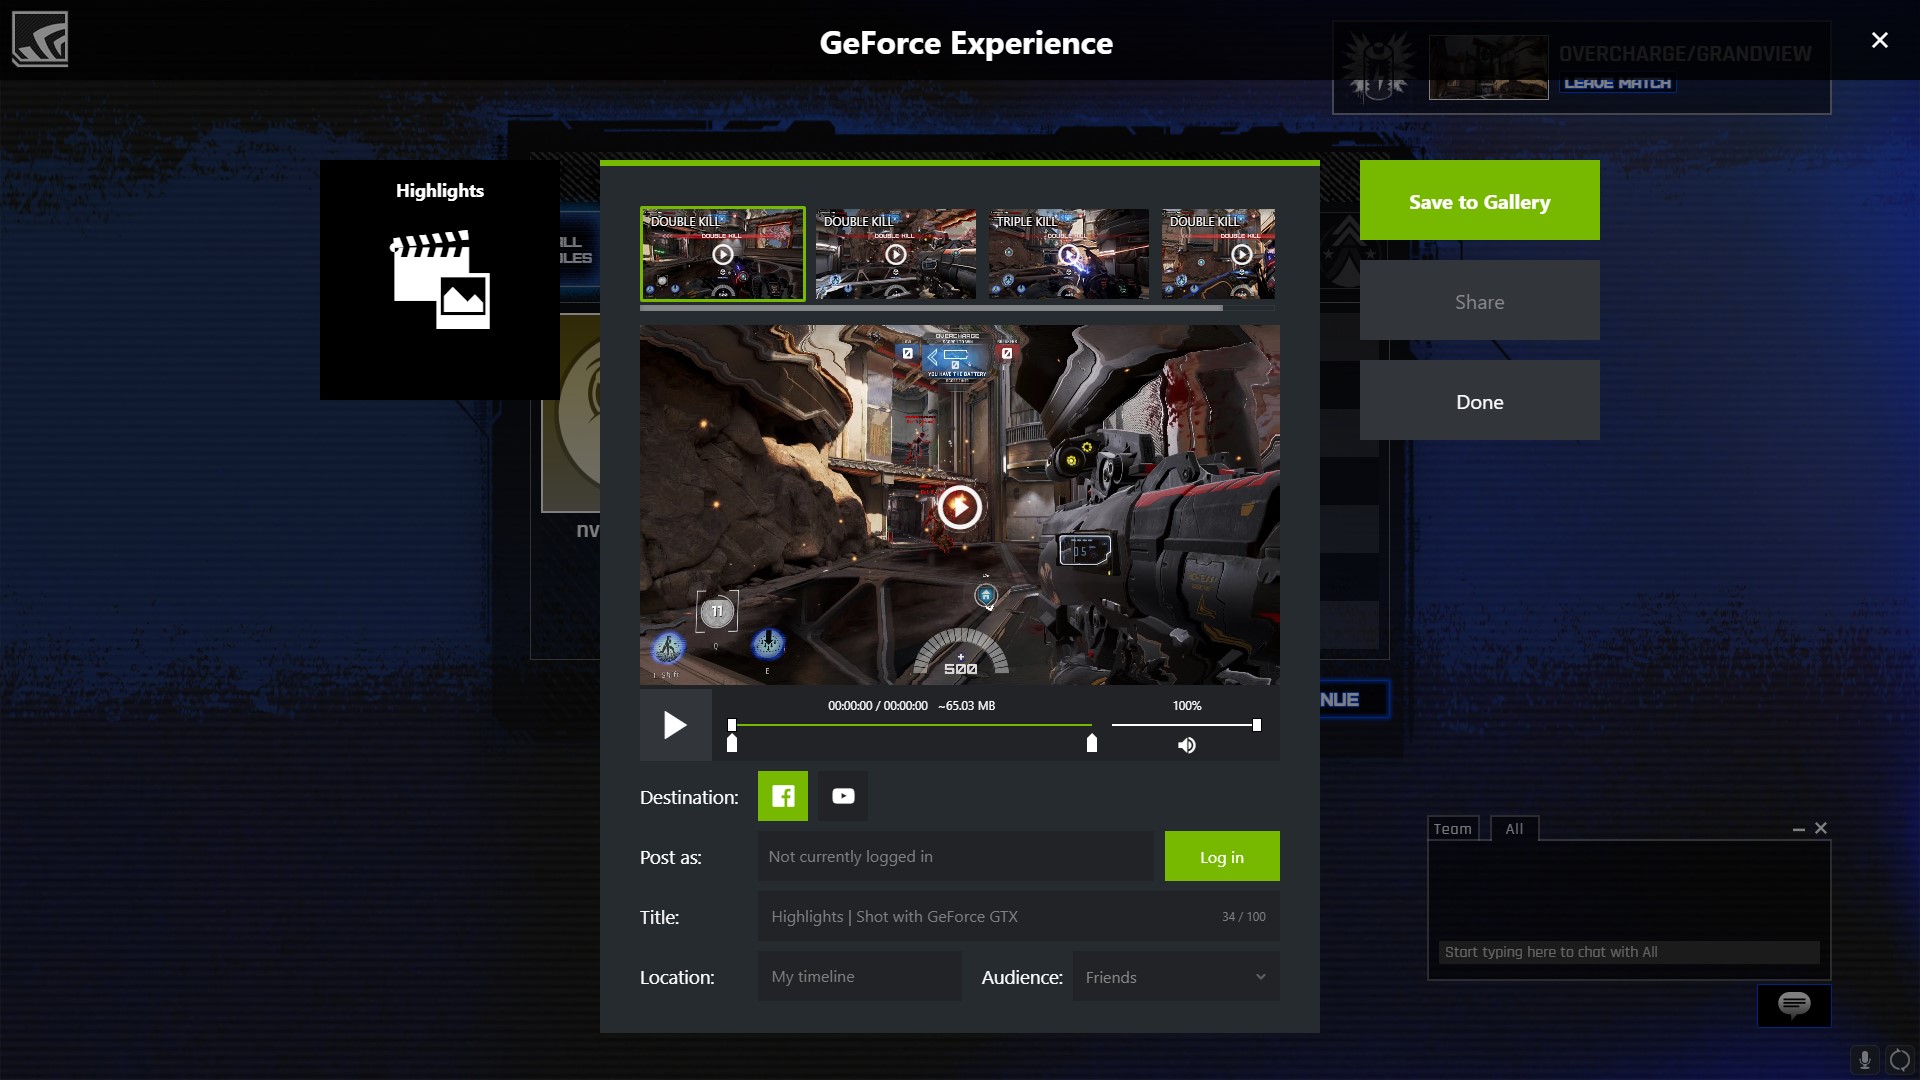
Once you’ve captured your clips, you’ll likely want to edit them. GeForce Experience outputs standard MP4 files, which are compatible with virtually all video editing software, from free options like DaVinci Resolve (free version) and Shotcut to paid professional suites like Adobe Premiere Pro and Sony Vegas. Simply import your saved clips into your chosen editor, trim, add effects, transitions, and music, then export your polished video.
Conclusion
Capturing your gameplay with GeForce Experience is a straightforward yet incredibly powerful process. By understanding the core functionalities like Instant Replay, configuring your settings appropriately, and practicing its use, you can effortlessly immortalize your most thrilling, amusing, and impressive gaming moments. Whether you’re sharing a quick highlight with friends or building a library of content for an audience, GeForce Experience provides the robust, performance-friendly tools you need to clip with confidence and precision, ensuring no epic moment ever slips through your fingers again. So, fire up your game, keep your finger near that hotkey, and start building your legendary gaming archive.
aViewFromTheCave is a participant in the Amazon Services LLC Associates Program, an affiliate advertising program designed to provide a means for sites to earn advertising fees by advertising and linking to Amazon.com. Amazon, the Amazon logo, AmazonSupply, and the AmazonSupply logo are trademarks of Amazon.com, Inc. or its affiliates. As an Amazon Associate we earn affiliate commissions from qualifying purchases.