In the digital age, our computers are the epicenters of our productivity, creativity, and connectivity. Over time, however, even the most robust Windows 10 system can accumulate digital clutter, unwanted software, corrupted files, and performance-sapping issues. This degradation often manifests as slower boot times, frequent crashes, inexplicable errors, and a general feeling of sluggishness. While many users resort to quick fixes or system refreshes, the most potent solution for revitalizing your PC is a “clean install” of Windows 10.
A clean install is akin to giving your computer a complete overhaul, wiping the slate entirely clean and reinstalling the operating system from scratch. This process isn’t just about restoring factory settings; it’s about building a fresh, optimized foundation for your digital life, free from the accumulated baggage of old installations, bloatware, and potential malware remnants. For anyone looking to breathe new life into an aging machine, resolve persistent software glitches, or simply ensure their system is running at peak efficiency and security, a clean install is an indispensable skill and an invaluable investment of time.

This comprehensive guide will walk you through every step of the Windows 10 clean installation process, from crucial pre-installation preparations to post-installation optimization. We’ll delve into why this process is so beneficial, what you need to do before you start, how to create your installation media, and finally, how to get your freshly installed Windows 10 up and running optimally. Embracing this tutorial means empowering yourself with the knowledge to maintain a high-performing, secure, and stable computing environment, aligning perfectly with the core tenets of technology tutorials and digital security.
Why a Clean Install of Windows 10 is Your Best Bet
Before diving into the technicalities, it’s essential to understand the profound benefits a clean installation offers. It’s more than just a troubleshooting step; it’s a proactive measure that enhances virtually every aspect of your computing experience.
Reclaiming Performance and Speed
One of the most immediate and noticeable benefits of a clean install is the dramatic improvement in system performance and speed. Over months or years of use, Windows accumulates an astonishing amount of data: temporary files, registry entries from uninstalled programs, remnants of malware, and an ever-growing list of background processes. This digital clutter acts like a drag chain, slowing down boot times, application launches, and overall system responsiveness.
A clean install eradicates all this unnecessary baggage. It installs only the essential Windows components, allowing your system to run leaner and faster. Imagine your PC’s hard drive as a closet; a clean install is like emptying it completely and only putting back what you truly need, organized perfectly. This leads to quicker boot-ups, smoother multitasking, and a more responsive user interface, making your daily digital tasks significantly more efficient.
Enhanced Stability and Reliability
Beyond speed, a clean Windows 10 installation significantly boosts system stability and reliability. Many persistent computer issues – random crashes, frozen applications, Blue Screens of Death (BSODs), and inexplicable errors – are often rooted in corrupted system files, conflicting software installations, or driver conflicts that have accumulated over time. These issues can be incredibly frustrating, leading to lost work and significant downtime.
By starting fresh, you eliminate the underlying causes of these instabilities. The operating system is installed with a pristine set of files, free from corruption or third-party interference. This provides a robust and dependable foundation, drastically reducing the likelihood of unexpected errors and crashes. For professionals and students alike, a stable system means uninterrupted work, higher productivity, and fewer moments of digital despair.
Bolstering Digital Security
In an era defined by cyber threats, digital security is paramount. While antivirus software and firewalls are crucial, a clean install offers a deeper layer of security. Over time, even with robust protection, a system can harbor remnants of past malware infections, rootkits, or hidden vulnerabilities. These lingering threats can compromise your data, privacy, and system integrity.
A clean install acts as a comprehensive digital cleanse. By formatting the drive and reinstalling the OS, you effectively purge any hidden malware, viruses, or spyware that might have evaded previous detection. You start with a fresh, secure environment, giving you peace of mind that your data and online activities are protected from a clean slate. This is a critical step for anyone concerned about maintaining a strong digital security posture.
A Fresh Start for Productivity
Finally, a clean install offers an unparalleled opportunity for a fresh start, not just for your computer, but for your productivity workflow. With a blank canvas, you can be intentional about what software you install, avoiding unnecessary applications and bloatware. This allows you to set up your system exactly as you need it, optimizing your workspace for maximum efficiency.
You can streamline your startup programs, customize privacy settings, and organize your files from day one, creating an environment that supports focus and reduces digital distractions. For those who value a clean, uncluttered digital workspace, a clean install is the ultimate tool for achieving peak personal and professional productivity.
Essential Preparations Before You Begin
A clean install is a powerful process, but it requires careful preparation. Skipping these crucial preliminary steps can lead to data loss or significant frustration. Think of it as preparing your workspace before undertaking a complex project – proper groundwork ensures a smooth and successful outcome.
Back Up Your Critical Data
This is, without a doubt, the single most important step. A clean install involves formatting your primary drive, which will permanently delete all data on it. This includes documents, photos, videos, music, applications, and settings.
How to back up:
- External Hard Drive: The simplest and often fastest method. Connect an external drive and manually copy all your important files and folders.
- Cloud Storage: Services like Google Drive, OneDrive, Dropbox, or iCloud offer convenient ways to synchronize and store your data online. Ensure all your critical files are synced before proceeding.
- System Imaging (Advanced): Tools like Macrium Reflect or the built-in Windows System Image Backup (though less reliable in Windows 10) can create an exact copy of your entire drive. This is useful if you want a complete fallback, but for a true clean install, you’ll still need to selectively restore your personal files.
What to back up: Don’t forget browser bookmarks, email archives (PST files for Outlook), game saves, and any specialized software configurations. Prioritize personal and irreplaceable data.
Locate Your Windows 10 Product Key
While many modern Windows 10 licenses are digital and tied to your Microsoft account or hardware, it’s always good practice to have your product key handy.
- Digital License: If your Windows 10 was an upgrade from Windows 7/8/8.1, or came pre-installed and activated, you likely have a digital license. When you reinstall, Windows will usually activate automatically once you connect to the internet and sign in with your Microsoft account.
- Product Key Sticker: If you purchased a retail copy or a PC with a physical license, the key might be on a sticker on your computer’s chassis (often on the bottom for laptops or side for desktops).
- Software Tools: Tools like ProduKey can often retrieve the product key from your currently installed system, which can be useful as a backup.
Gather Necessary Hardware
You’ll need a few physical items to proceed with the installation:
- USB Flash Drive (8GB or larger): This will be your installation media. Ensure it’s empty or contains data you’ve already backed up, as it will be formatted during the process.
- Stable Internet Connection: Crucial for downloading the Media Creation Tool and for subsequent Windows updates and driver downloads.
- Second PC (Optional but Recommended): Having access to another computer can be a lifesaver if you encounter issues during the installation, especially if your primary PC’s network drivers aren’t immediately recognized.
Download the Windows 10 Media Creation Tool
This official tool from Microsoft is your gateway to creating bootable Windows 10 installation media.
- Open your web browser and go to the official Microsoft Windows 10 download page.
- Locate and click the “Download tool now” button under the “Create Windows 10 installation media” section.
- Save the
MediaCreationTool.exefile to your computer.
Check System Compatibility and Drivers
While Windows 10 is generally good at recognizing hardware, it’s wise to proactively check for critical drivers, especially network drivers. Without them, your freshly installed system might not be able to connect to the internet, making it difficult to download other necessary drivers.
- Visit your PC manufacturer’s support website (e.g., Dell, HP, Lenovo, ASUS).
- Enter your computer’s model number or service tag.
- Download the latest network (Ethernet and Wi-Fi) drivers, chipset drivers, and potentially graphics drivers. Store them on a separate USB drive or external hard drive that won’t be formatted. This ensures you can install them immediately after the OS installation, even if Windows doesn’t provide them out of the box.
Step-by-Step Guide to Creating and Using Installation Media
With your preparations complete, the next phase involves creating the bootable USB drive and configuring your computer to use it.
Crafting Your Bootable USB Drive
This is where the Media Creation Tool comes into play.
- Run the Media Creation Tool: Double-click the
MediaCreationTool.exeyou downloaded. Accept the license terms. - Select Action: Choose “Create installation media (USB flash drive, DVD, or ISO file) for another PC” and click Next.
- Language, Architecture, and Edition: The tool will usually recommend settings based on your current PC. If you’re installing on the same PC, leave these defaults. If installing on a different PC, uncheck “Use recommended options for this PC” and select the appropriate Language, Windows 10 Edition (Home, Pro), and Architecture (64-bit is most common). Click Next.
- Choose Media Type: Select “USB flash drive” and click Next.
- Select USB Drive: From the list, choose the USB drive you wish to use. Double-check that you’re selecting the correct drive, as all data on it will be erased. Click Next.
- Download and Creation: The tool will now download the Windows 10 files and create the bootable USB drive. This process can take a significant amount of time, depending on your internet speed and the speed of your USB drive. Once complete, click “Finish.”
Configuring Your PC to Boot from USB
Now that you have your bootable USB, you need to tell your computer to start from it instead of your main hard drive. This usually involves entering the BIOS/UEFI settings or using a boot menu.
- Insert the USB Drive: With your PC turned off, insert the bootable USB flash drive into an available USB port.
- Access BIOS/UEFI or Boot Menu:
- Restart your PC.
- Immediately and repeatedly press the designated key to enter the BIOS/UEFI setup utility or the Boot Menu. Common keys include
F2,F10,F12,Del, orEsc. The specific key often appears briefly on the screen during startup.
- Change Boot Order:
- In BIOS/UEFI: Navigate to the “Boot” or “Boot Options” section. You’ll need to change the boot order to prioritize your USB drive (it might be listed as “USB HDD,” “Removable Device,” or by its brand name) over your primary hard drive.
- Using a Boot Menu: If your PC has a boot menu, you can simply select the USB drive from the temporary list of boot devices without permanently changing the boot order. This is often the preferred method.
- Save and Exit: Save your changes in the BIOS/UEFI settings (usually
F10) and exit. Your PC should now restart and boot from the USB drive. If it doesn’t, revisit your BIOS/UEFI settings.
Note on UEFI vs. Legacy: Most modern PCs use UEFI. The Media Creation Tool creates a USB drive compatible with both. If you encounter issues, you might need to disable “Secure Boot” or enable “CSM” (Compatibility Support Module) in your UEFI settings, especially if you’re dealing with older hardware or specific partition schemes.
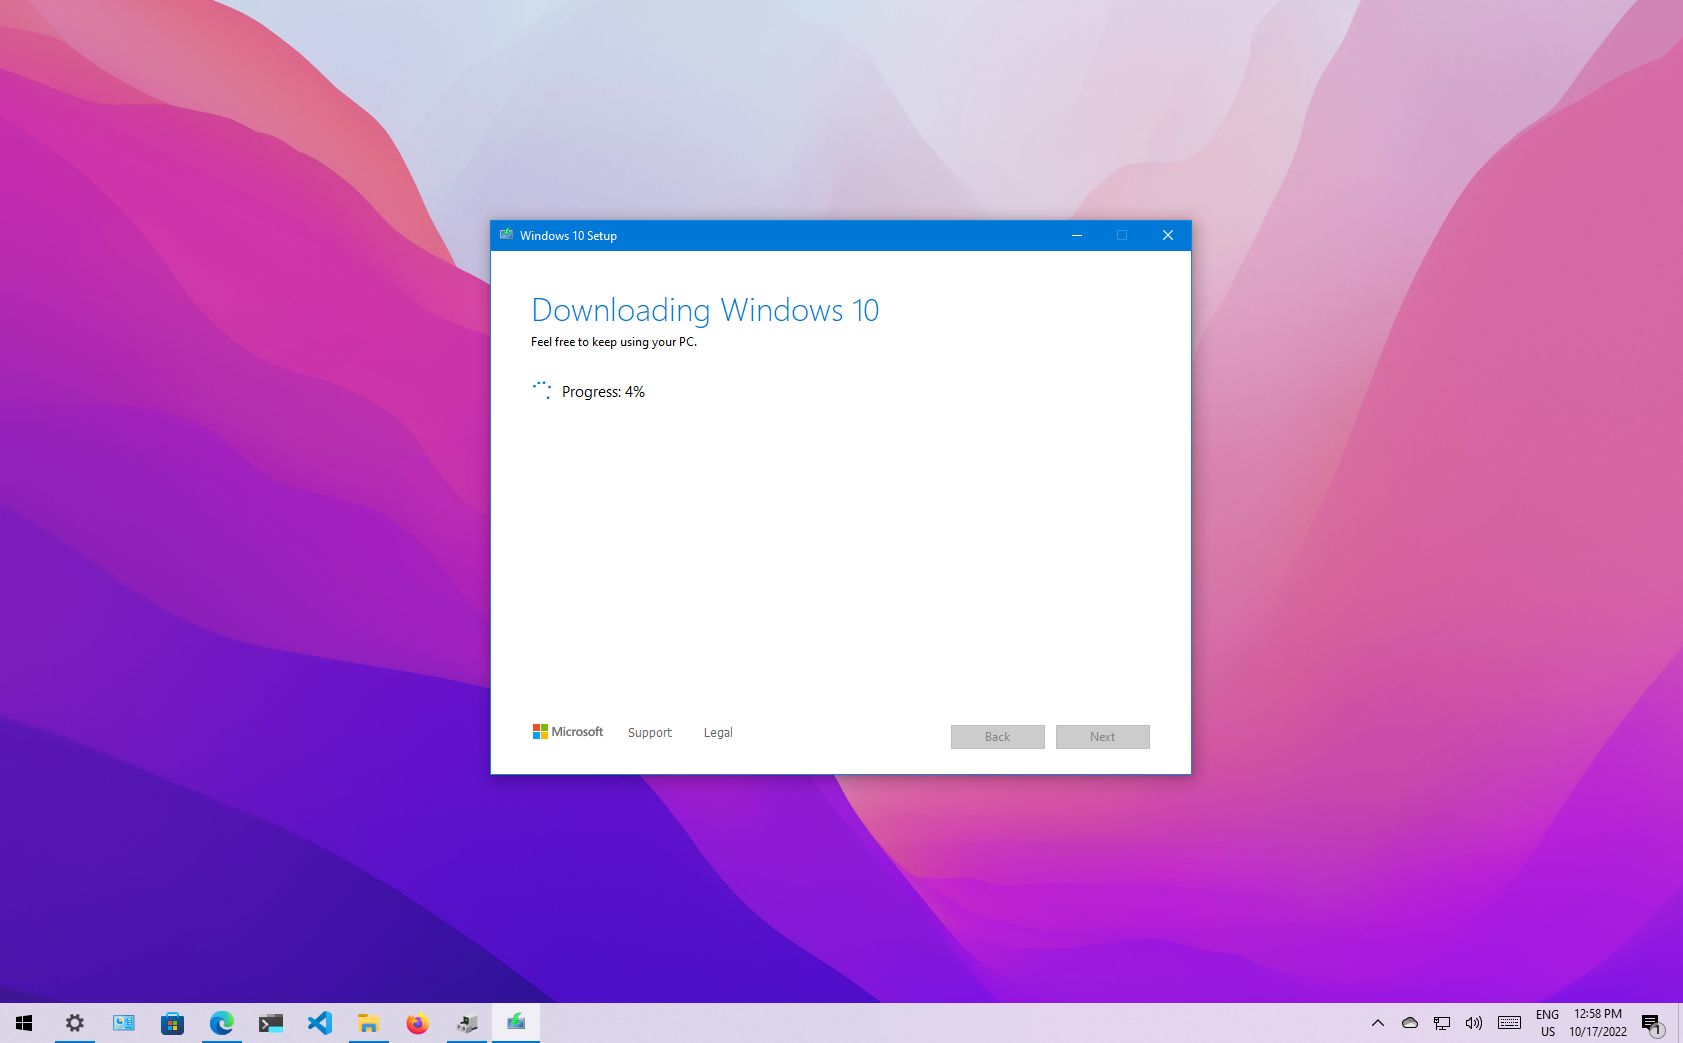
The Windows 10 Clean Installation Process
Once your PC successfully boots from the USB drive, the Windows setup wizard will begin. This is the core of the clean installation.
Initial Setup and Product Key Entry
- Windows Setup Screen: The first screen will ask you to select your language, time and currency format, and keyboard or input method. Make your selections and click “Next.”
- Install Now: Click the “Install now” button.
- Product Key: You’ll be prompted to enter your Windows 10 product key.
- If you have a digital license tied to your Microsoft account, or you plan to activate later, click “I don’t have a product key.” Windows will usually activate automatically after installation when connected to the internet.
- If you have a physical key, enter it now.
- Operating System Selection: If your product key covers multiple editions (e.g., Windows 10 Home and Pro), you might be asked to select which one to install. Choose the appropriate edition for your license.
- License Terms: Accept the Microsoft Software License Terms and click “Next.”
Custom Installation: Partitioning and Formatting
This is the most critical step for a clean install.
-
Choose Installation Type: Select “Custom: Install Windows only (advanced).” This option allows you to manage your disk partitions.
-
Where do you want to install Windows? This screen shows all the drives and partitions detected on your system.
- Identify your primary drive: This is usually “Drive 0.” You will likely see multiple partitions (e.g., “Recovery,” “System,” “MSR,” and your main “Primary” partition).
- Delete Existing Partitions: For a truly clean install, you should delete all existing partitions associated with your primary Windows installation (Drive 0 Partition 1, Drive 0 Partition 2, etc.) until you have a single “Drive 0 Unallocated Space.” This ensures no old data, corrupted files, or hidden recovery partitions remain. Be absolutely certain you’re deleting partitions on the correct drive if you have multiple internal drives, to avoid deleting important data.
- Create New Partition (Optional): Once you have “Unallocated Space,” you can click “New” to create a new partition. The setup wizard will typically create the necessary system partitions (Recovery, System) automatically alongside your main OS partition. You can simply accept the default maximum size.
- Select Installation Drive: Select the newly created “Primary” partition (or the largest one if you didn’t create new ones) and click “Next.”
Why delete partitions? This is what truly makes it a “clean” install. It completely erases the old operating system, data, and any hidden issues, providing a completely fresh canvas.
The Core Installation Phase
Windows will now begin the installation process, copying files and configuring the system.
- Copying Windows files: This is the first step and usually the fastest.
- Getting files ready for installation: This step takes the longest, as Windows extracts and prepares all the necessary components.
- Installing features, installing updates, finishing up: The installer will perform final configurations.
Your PC will restart multiple times during this phase. Do not remove the USB drive until after the first restart, when the “Getting devices ready” phase begins. Ideally, remove it when you see the “Let’s start with a region” screen, so your PC doesn’t accidentally try to boot from the USB again.
Initial Post-Installation Configuration
After the installation files are copied, Windows will guide you through the initial setup:
- Region: Select your country/region.
- Keyboard Layout: Choose your preferred keyboard layout. You can add a second one if needed.
- Network Connection: Connect to a Wi-Fi network or plug in an Ethernet cable. An internet connection is crucial for the next steps and for activating your digital license.
- Account Setup:
- Microsoft Account: Microsoft strongly encourages you to sign in with or create a Microsoft account. This links your digital license, enables OneDrive synchronization, and offers other integrated services.
- Local Account (Optional): If you prefer not to use a Microsoft account, you can often find an option to create an “Offline account” or “Skip for now” on the Microsoft account sign-in page, especially if you disconnect from the internet. This will create a local user profile.
- Privacy Settings: Review the various privacy settings (location, speech recognition, diagnostics, etc.) and adjust them to your preference. Microsoft typically enables many of these by default.
- Cortana, OneDrive, etc.: You might be prompted to set up Cortana or OneDrive. You can choose to accept or decline these features based on your needs.
- Desktop: Finally, you’ll arrive at your brand-new Windows 10 desktop.
Post-Installation Essentials for a Seamless Experience
Your Windows 10 is now installed, but the process isn’t quite finished. A few critical steps remain to ensure your system is fully functional, secure, and optimized.
Updating Windows and Drivers
This is paramount. A freshly installed Windows 10 might be missing crucial security patches and device drivers.
- Windows Update:
- Go to
Settings > Update & Security > Windows Update. - Click “Check for updates” and install all available updates. This process might take a while and require multiple restarts. Ensure your system is fully updated to the latest build.
- Go to
- Device Drivers:
- While Windows Update often installs many drivers, it might miss some, especially for specialized hardware or the latest graphics cards.
- Method 1 (Device Manager): Open Device Manager (right-click Start button), look for any devices with yellow exclamation marks. Right-click on them and select “Update driver.”
- Method 2 (Manufacturer Websites): For critical drivers like graphics cards (NVIDIA, AMD), chipset, and sound, it’s best to download the latest versions directly from your PC or component manufacturer’s website. This ensures you get the most optimized and stable drivers. If you downloaded drivers earlier, now is the time to install them.
Reinstalling Essential Software and Restoring Data
Now you can begin populating your clean system with the applications and data you need.
- Antivirus/Security Software: While Windows Defender provides basic protection, consider installing your preferred third-party antivirus solution if you use one.
- Web Browser: Download and install your preferred web browser (Chrome, Firefox, Edge Chromium, Brave, etc.).
- Productivity Suite: Install office software (Microsoft Office, LibreOffice, Google Workspace desktop apps).
- Utilities: Any essential utilities like file compression tools (7-Zip), media players (VLC), or cloud storage clients (OneDrive, Dropbox, Google Drive).
- Restore Your Data: Copy your backed-up personal files (documents, photos, videos) from your external drive or cloud storage back to their appropriate locations on your new Windows 10 installation. Be mindful of where you place files to maintain organization.

Optimizing Your Fresh Windows 10 Install
With a clean slate, you have a perfect opportunity to configure Windows 10 for optimal performance and privacy from day one.
- Privacy Settings: Revisit
Settings > Privacyand fine-tune permissions for apps, diagnostic data, advertising ID, etc., to your comfort level. - Default Apps: Set your preferred default apps for web browsing, email, photos, and media playback via
Settings > Apps > Default apps. - Startup Apps: Check
Task Manager (Ctrl+Shift+Esc) > Startup taband disable any non-essential programs from launching with Windows to speed up boot times. - Performance Tweaks: For users with lower-end hardware, consider adjusting visual effects (right-click This PC > Properties > Advanced system settings > Performance Settings > Adjust for best performance).
- Disk Cleanup: Periodically run Disk Cleanup (search for it in the Start menu) to remove temporary files and system clutter, keeping your system lean.
A clean install of Windows 10 is more than just a repair; it’s a revitalization. By following this comprehensive guide, you’ve not only restored your PC to its peak performance but also gained a deeper understanding of its inner workings. This process empowers you to maintain a more secure, stable, and highly productive computing environment, ensuring your technology serves you efficiently for years to come. Remember, a well-maintained system is a testament to savvy tech use, extending the lifespan of your hardware and enhancing your overall digital experience.
aViewFromTheCave is a participant in the Amazon Services LLC Associates Program, an affiliate advertising program designed to provide a means for sites to earn advertising fees by advertising and linking to Amazon.com. Amazon, the Amazon logo, AmazonSupply, and the AmazonSupply logo are trademarks of Amazon.com, Inc. or its affiliates. As an Amazon Associate we earn affiliate commissions from qualifying purchases.