
In the intricate world of computing, few components are as vital yet as often overlooked as Random Access Memory, or RAM. Much like the working memory of your own brain, RAM is where your computer temporarily stores the data it needs for immediate access, allowing it to run applications, switch between tasks, and process information at lightning speed. Understanding the specifics of your RAM – its capacity, speed, and type – is not merely a technical curiosity; it’s a fundamental aspect of maximizing your system’s performance, making informed upgrade decisions, and even troubleshooting potential issues.

Whether you’re a seasoned tech enthusiast looking to fine-tune your rig, a casual user wondering why your applications feel sluggish, or someone exploring the lucrative world of online income where system performance directly impacts productivity, knowing your RAM is the first step towards unlocking your computer’s full potential. This comprehensive guide, tailored for the discerning reader interested in Tech, Brand, and Money, will walk you through various methods to precisely identify the RAM sticks installed in your system, empowering you with the knowledge to make smart decisions for your digital life and financial well-being.
Why Understanding Your RAM is Crucial
Before diving into the “how-to,” let’s explore why this knowledge is so important. In an age where digital engagement permeates every facet of our lives – from cutting-edge AI tools to complex software applications and demanding multimedia tasks – your computer’s responsiveness hinges significantly on its RAM. Knowing what you have isn’t just about curiosity; it’s about strategic advantage.
Boosting Performance and Productivity
Adequate RAM is the cornerstone of a smooth and efficient computing experience. When your system has enough RAM, it can keep more applications and data readily available, leading to faster loading times, seamless multitasking, and reduced stuttering or freezing. For professionals leveraging AI tools, graphic designers using intensive software, or even students juggling multiple research tabs, insufficient RAM can be a major bottleneck, directly impacting productivity and, by extension, your earning potential or academic success. Understanding your current RAM setup allows you to identify if a lack of memory is hindering your workflow and pinpoint precisely what kind of upgrade would deliver the most significant performance boost. This direct link to operational efficiency ties directly into our “Tech” and “Productivity” pillars.
Informed Upgrade Decisions
One of the most common reasons users want to check their RAM is to plan an upgrade. RAM upgrades are often one of the most cost-effective ways to breathe new life into an aging computer, significantly extending its usable lifespan without the hefty investment of a brand-new system. However, not all RAM is compatible with all motherboards. Mixing different types or speeds of RAM incorrectly can lead to instability or even prevent your system from booting. By knowing your current RAM’s specifications – its DDR generation (e.g., DDR4, DDR5), clock speed (MHz), capacity (GB), and form factor (DIMM/SODIMM) – you can confidently select compatible and optimal replacement or additional modules. This prevents costly mistakes, ensures you get the best value for your money, and aligns perfectly with the “Money” aspect of smart personal finance and investing in your digital assets.
Troubleshooting and System Health
Beyond upgrades, identifying your RAM sticks can be invaluable for troubleshooting. Persistent system crashes, “blue screens of death,” or random freezes can sometimes be attributed to faulty RAM. If you suspect a memory issue, knowing your specific RAM modules allows you to research common problems, check for manufacturer recalls, or even perform targeted testing. Furthermore, simply monitoring your RAM usage, easily done once you know your baseline, can help you identify memory-hogging applications. This knowledge empowers you to maintain your system’s health, ensuring stable operation and protecting your valuable data, reinforcing the “Digital Security” and “Tech” elements by maintaining a robust computing environment.
Software Methods: The Easiest Way to Check Your RAM
For most users, the quickest and safest way to ascertain your RAM specifications is through software. Your operating system (OS) typically provides built-in tools that can offer a wealth of information without ever needing to open your computer case. These methods are non-invasive, quick, and highly reliable.
Using Task Manager (Windows)
The Task Manager is Windows’s Swiss Army knife for system monitoring, and it provides an excellent overview of your RAM.
- Open Task Manager: Press
Ctrl + Shift + Escsimultaneously. Alternatively, right-click on the taskbar and select “Task Manager.” - Navigate to the Performance Tab: Click on the “Performance” tab at the top.
- Select Memory: In the left-hand pane, click on “Memory.”
- Decipher the Information:
- Installed RAM (e.g., 16.0 GB): This is your total memory capacity.
- Speed (e.g., 3200 MHz): This indicates the clock speed of your RAM.
- Slots used (e.g., 2 of 4): This is incredibly useful for upgrade planning, telling you how many memory slots are currently occupied and how many are free.
- Form factor (e.g., DIMM): While not explicitly stated for desktop DIMMs, Task Manager usually implies the type.
- Type (e.g., DDR4): Windows 10 and 11 often display the DDR generation.
While Task Manager is fantastic for a quick overview, it doesn’t always provide the brand or specific part number, which can be crucial for exact matching.
Using System Information (Windows)
For a slightly more detailed, yet still built-in, approach on Windows, System Information is your friend.
- Open System Information: Press
Windows Key + Rto open the Run dialog, typemsinfo32, and pressEnter. - Navigate to System Summary: In the System Information window, ensure “System Summary” is selected in the left pane.
- Locate Memory Details: Scroll down the right pane until you find entries like:
- Installed Physical Memory (RAM): Shows total capacity.
- Total Physical Memory: Same as above.
- Available Physical Memory: How much is currently free.
System Information provides the total installed RAM but generally lacks details on speed, manufacturer, or the number of modules. It’s more of a confirmation tool for total capacity.
Using Third-Party Tools (Windows/Mac/Linux)
For the most comprehensive data on your RAM, including manufacturer, model number, timings, voltage, and even temperature (with some tools), third-party software is the gold standard. These tools are often free and provide granular detail that built-in OS utilities might omit.
- CPU-Z (Windows): This is arguably the most popular and revered tool for hardware information.
- Download and Install: Get it from the official CPUID website.
- Open CPU-Z: Navigate to the “Memory” tab for overall RAM details (Type, Size, Channels, DRAM Frequency, CAS Latency).
- Switch to the “SPD” Tab: This tab is where the magic happens. Select each “Slot #” from the dropdown menu to see individual details for each RAM stick: module size, manufacturer, part number, serial number, JEDEC timings, and XMP profiles. This is indispensable for exact matching during upgrades.
- Speccy (Windows): A robust system information tool from Piriform (makers of CCleaner).
- Download and Install: Available from the official Piriform website.
- Open Speccy: Look for the “RAM” or “Memory” section in the left-hand navigation. It presents a beautiful overview of total RAM, type, channels, frequency, CAS latency, and then lists each individual memory slot with its module details (manufacturer, part number, serial, etc.).
- HWMonitor (Windows): Another CPUID tool, excellent for monitoring real-time sensor data, including RAM usage and sometimes temperature, though CPU-Z is better for static specs.

Checking on macOS
Apple’s macOS offers a straightforward way to check basic RAM information.
- Click the Apple Menu: Located in the top-left corner of your screen.
- Select “About This Mac”:
- Review Memory Details: In the window that appears, look for the “Memory” entry. It will display the total installed RAM, its type (e.g., 16 GB 2133 MHz DDR4), and how it’s configured (e.g., “16 GB (2 x 8 GB)”).
- For More Detail (on older macOS): Click “System Report…” (or “System Information…”) and then navigate to the “Memory” section under “Hardware.” This will show you each slot’s status, size, and type, and often the manufacturer and part number.
Checking on Linux
For Linux users, the command line provides powerful tools for extracting RAM information.
- Open Terminal: Use
Ctrl + Alt + Tor search for “Terminal.” - Basic RAM Overview:
- Type
free -hand pressEnter. This command shows the total, used, and free physical memory (RAM) and swap space in a human-readable format. It gives you the total capacity but not individual stick details.
- Type
- Detailed RAM Information (requires root/sudo):
- Type
sudo dmidecode -t memoryand pressEnter. You’ll need to enter your password. This command reads the DMI (Desktop Management Interface) table, which contains detailed hardware information. It will list each memory device (RAM stick) with its array handle, size, speed, manufacturer, part number, serial number, and form factor. This is the Linux equivalent of CPU-Z’s SPD tab.
- Type
Physical Inspection: When Software Isn’t Enough
While software methods are convenient, there are situations where a physical inspection becomes necessary or preferred. This is often the case when:
- Your computer isn’t booting, preventing software access.
- You need to verify details like specific heat sink designs or sticker information that software might not capture.
- You simply prefer to see the hardware for yourself.
Important Note: Opening your computer case involves risks. Always ensure you follow safety precautions to prevent damage to your components or injury to yourself. If you’re uncomfortable, consult a professional.
Preparing for Physical Inspection
Safety first! This step is critical to prevent electrostatic discharge (ESD) damage and electrical hazards.
- Power Down Completely: Shut down your computer, don’t just put it to sleep.
- Unplug Everything: Disconnect the power cable, monitor cables, USB devices, and any other peripherals.
- Discharge Static Electricity: Touch a grounded metal object (like a metal water pipe or an unpainted metal part of your computer case) before touching any internal components. Using an anti-static wrist strap connected to a grounded object is highly recommended.
- Gather Tools: You’ll typically only need a Phillips head screwdriver for most cases.
Locating and Identifying RAM Sticks
Once your system is safely prepared, you can proceed with opening it up.
- Open the Computer Case (Desktop):
- Lay the computer case on its side on a clean, flat surface.
- Remove the side panel (usually secured with thumbscrews or Phillips screws at the back).
- Locate the RAM slots: These are typically long, narrow slots on the motherboard, usually near the CPU. RAM sticks are held in place by clips on either end.
- Accessing RAM (Laptop):
- Laptop access varies widely by model. Some have dedicated RAM access panels on the bottom, secured by a few screws. Others require removing the entire bottom cover or even the keyboard. Consult your laptop’s manual or an online guide for your specific model.
- Locate SODIMM slots: Laptop RAM (SODIMM) is smaller than desktop RAM (DIMM) and usually lies flat in its slot, secured by small metal clips.
- Identifying Information on the Stick:
- Once you’ve located the RAM sticks, you’ll see a label or sticker on them. This label contains all the vital information:
- Capacity: (e.g., 8GB, 16GB)
- Speed: (e.g., PC4-25600, DDR4-3200MHz)
- Manufacturer: (e.g., Corsair, Kingston, Crucial, Samsung, Hynix)
- Model/Part Number: (e.g., CMK16GX4M2B3200C16, KVR32N22D8/16) – This is crucial for exact matching.
- Voltage: (e.g., 1.35V, 1.2V)
- CAS Latency: (e.g., CL16)
- You might need to carefully remove a stick from its slot to read the label clearly. To do this, gently push down the clips on either side of the stick, and it should pop up at an angle, allowing you to pull it out. Be careful not to touch the gold contacts. Reinsert it by aligning it, pushing it firmly into the slot until the clips engage.
- Once you’ve located the RAM sticks, you’ll see a label or sticker on them. This label contains all the vital information:
Deciphering RAM Specifications
Once you’ve gathered the information, whether via software or physical inspection, understanding what those numbers and abbreviations mean is paramount. This knowledge empowers you to speak the language of hardware, making you a more informed consumer and tech enthusiast.
Key RAM Metrics Explained
- Capacity (GB): This is the total amount of data the RAM can temporarily hold. Common capacities for individual sticks are 4GB, 8GB, 16GB, and 32GB. For most modern usage, 16GB is a good baseline, with 32GB or more preferred for heavy multitasking, gaming, content creation, or running demanding AI models. More capacity means fewer trips to the slower storage drive (SSD/HDD), resulting in a smoother experience.
- Speed (MHz/MT/s): This refers to how quickly the RAM can read and write data.
- DDR Generation (DDR4, DDR5): This is the generation of Double Data Rate synchronous dynamic random-access memory. Each generation is physically incompatible with previous ones (e.g., DDR5 RAM won’t fit in a DDR4 slot). Newer generations offer higher speeds and often lower power consumption.
- Clock Speed (e.g., 3200 MHz, 4800 MHz): Measured in Megahertz (MHz) or Mega Transfers per second (MT/s), this indicates the raw speed. Higher numbers generally mean faster performance, but compatibility with your CPU and motherboard is key. Most modern systems default to a lower JEDEC speed and require enabling an XMP (Extreme Memory Profile) or DOCP (DRAM Overclock Profile) in the BIOS to reach advertised speeds.
- CAS Latency (CL): This is a measure of the delay between when the memory controller requests data from the RAM and when the data is available. Lower CL numbers are better, but it’s important to consider CL in conjunction with speed. For example, DDR4-3200 CL16 might perform similarly to DDR4-3600 CL18 in some real-world scenarios due to the interplay of speed and latency.
- Form Factor (DIMM/SODIMM):
- DIMM (Dual In-line Memory Module): The standard, larger RAM stick used in desktop computers.
- SODIMM (Small Outline Dual In-line Memory Module): The smaller, compact version used in laptops, mini-PCs, and some all-in-one desktops.
- ECC vs. Non-ECC:
- ECC (Error-Correcting Code) RAM: Includes extra circuitry to detect and correct common types of internal data corruption. This is critical for servers, workstations, and systems where data integrity is paramount (e.g., scientific computing, financial transactions), but it’s generally not found in consumer-grade PCs and requires motherboard/CPU support.
- Non-ECC RAM: The standard consumer RAM, more affordable and perfectly suitable for most gaming, general use, and content creation tasks.
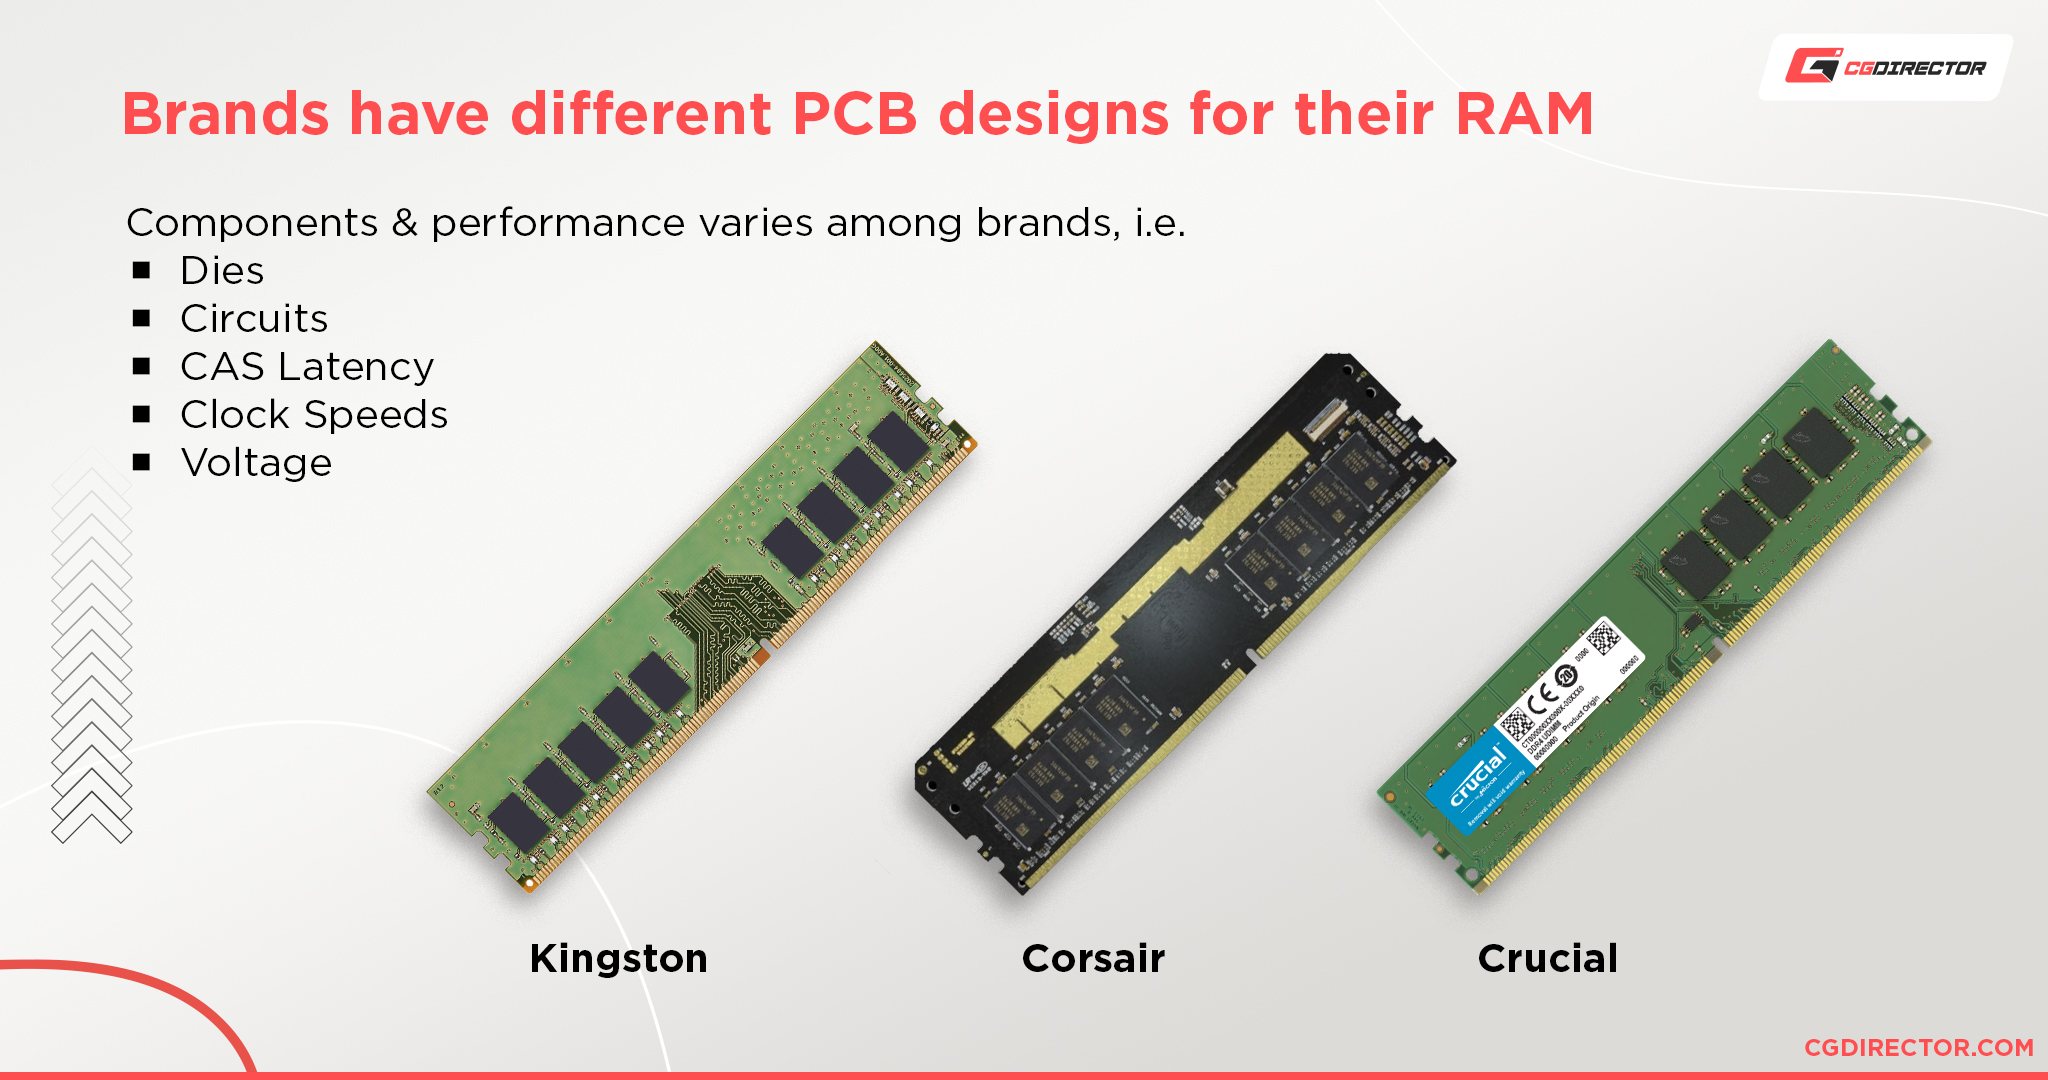
- Brand: While not a performance metric, the brand (e.g., Corsair, G.Skill, Crucial, Kingston, TeamGroup, ADATA) can be important for warranty, customer support, and aesthetic preference (e.g., RGB lighting). Reputable brands often have better quality control.
Matching RAM for Upgrades
When planning an upgrade, compatibility is paramount.
- DDR Generation: You must match the DDR generation (e.g., if you have DDR4, you can only add more DDR4).
- Capacity: You can mix capacities (e.g., an 8GB stick with a 16GB stick), but it’s often recommended to use identical sticks for optimal performance, especially for dual-channel setups.
- Speed and Latency: While RAM will usually downclock to the slowest stick’s speed and highest latency, it’s best to match these as closely as possible. Ideally, buy a new kit that matches your existing sticks perfectly or replace all sticks with a new, matched kit.
- Dual-Channel vs. Single-Channel: Most modern motherboards support dual-channel memory, which doubles the memory bandwidth by allowing the CPU to access two RAM sticks simultaneously. To utilize dual-channel, you need two (or four) identical RAM sticks installed in the correct slots (consult your motherboard manual). Matching RAM sticks in pairs ensures your system runs at its peak.
By meticulously understanding these specifications, you transform from a passive computer user into an empowered digital strategist. You’re not just adding “more RAM”; you’re making an investment in your system’s longevity, performance, and ultimately, your productivity and financial return on your tech assets.
In conclusion, knowing “how to check what RAM sticks I have” is far more than a simple technical query. It’s a foundational skill for anyone navigating the modern digital landscape. From boosting your productivity with cutting-edge software and AI tools to making savvy financial decisions about upgrading your personal tech, understanding your RAM empowers you. Whether through the convenience of software utilities or the hands-on approach of physical inspection, the information you gain will equip you to maintain a healthy system, optimize performance, and ensure that your technology continues to serve your personal, professional, and financial goals effectively.
aViewFromTheCave is a participant in the Amazon Services LLC Associates Program, an affiliate advertising program designed to provide a means for sites to earn advertising fees by advertising and linking to Amazon.com. Amazon, the Amazon logo, AmazonSupply, and the AmazonSupply logo are trademarks of Amazon.com, Inc. or its affiliates. As an Amazon Associate we earn affiliate commissions from qualifying purchases.