
In the current era of digital transformation, the traditional leather wallet is rapidly becoming a relic of the past. As our smartphones evolve into the ultimate all-in-one tools, the transition to digital payment systems has moved from a futuristic convenience to an everyday necessity. Google Wallet, the successor to various iterations of Google’s payment ecosystems, stands as a premier example of how software can streamline human interaction with the global economy. By centralizing credit cards, debit cards, loyalty programs, transit passes, and even digital car keys, Google Wallet offers a seamless, encrypted, and highly efficient way to navigate the modern world. Understanding how to integrate your physical cards into this digital ecosystem is the first step toward a more secure and streamlined lifestyle.
Getting Started with Google Wallet: Prerequisites and Compatibility
Before diving into the technical steps of adding a card, it is essential to understand the underlying infrastructure required to make Google Wallet function effectively. Unlike simple storage apps, Google Wallet relies on sophisticated hardware and software synchronization to ensure that transactions are both fast and secure.
Device Requirements and Operating Systems
To utilize Google Wallet, your device must meet specific hardware and software benchmarks. Primarily, the application requires an Android smartphone running a relatively modern version of the operating system—typically Android 9.0 or higher. This requirement ensures that the device supports the necessary security patches and API layers required for financial data encryption. Furthermore, the most critical hardware component is Near Field Communication (NFC). NFC is the short-range wireless technology that allows your phone to communicate with payment terminals. Without an NFC chip, your device can store cards for online purchases, but it will not be able to perform “tap-to-pay” transactions in physical stores.
Supported Banks and Card Types
While Google Wallet supports a vast array of financial institutions globally, compatibility depends on the partnership between Google and individual banks. Most major international banks and credit card issuers (such as Visa, Mastercard, and American Express) are fully integrated. However, some smaller credit unions or regional banks may still be in the process of rolling out support. It is also important to note that Google Wallet isn’t limited to standard payment cards; it also supports government-issued IDs in certain jurisdictions, health insurance cards, and corporate badges, depending on local software regulations and institutional support.
Ensuring Your Google Play Services are Updated
Google Wallet does not operate in a vacuum; it is deeply integrated with Google Play Services. This background software manages the security protocols and communication between the app and the Android OS. Before attempting to add a new card, users should ensure their Google Play Store and Google Play Services are updated to the latest versions. An outdated service layer can lead to verification failures or errors during the tokenization process, which is the method Google uses to mask your real card number during transactions.
Step-by-Step Instructions: Adding Your First Payment Card
The process of adding a card to Google Wallet is designed to be intuitive, leveraging the smartphone’s hardware (like the camera) to minimize manual data entry. The goal is to create a digital “token” that represents your card without exposing its actual details to merchants.
Adding a Card via Camera Scan
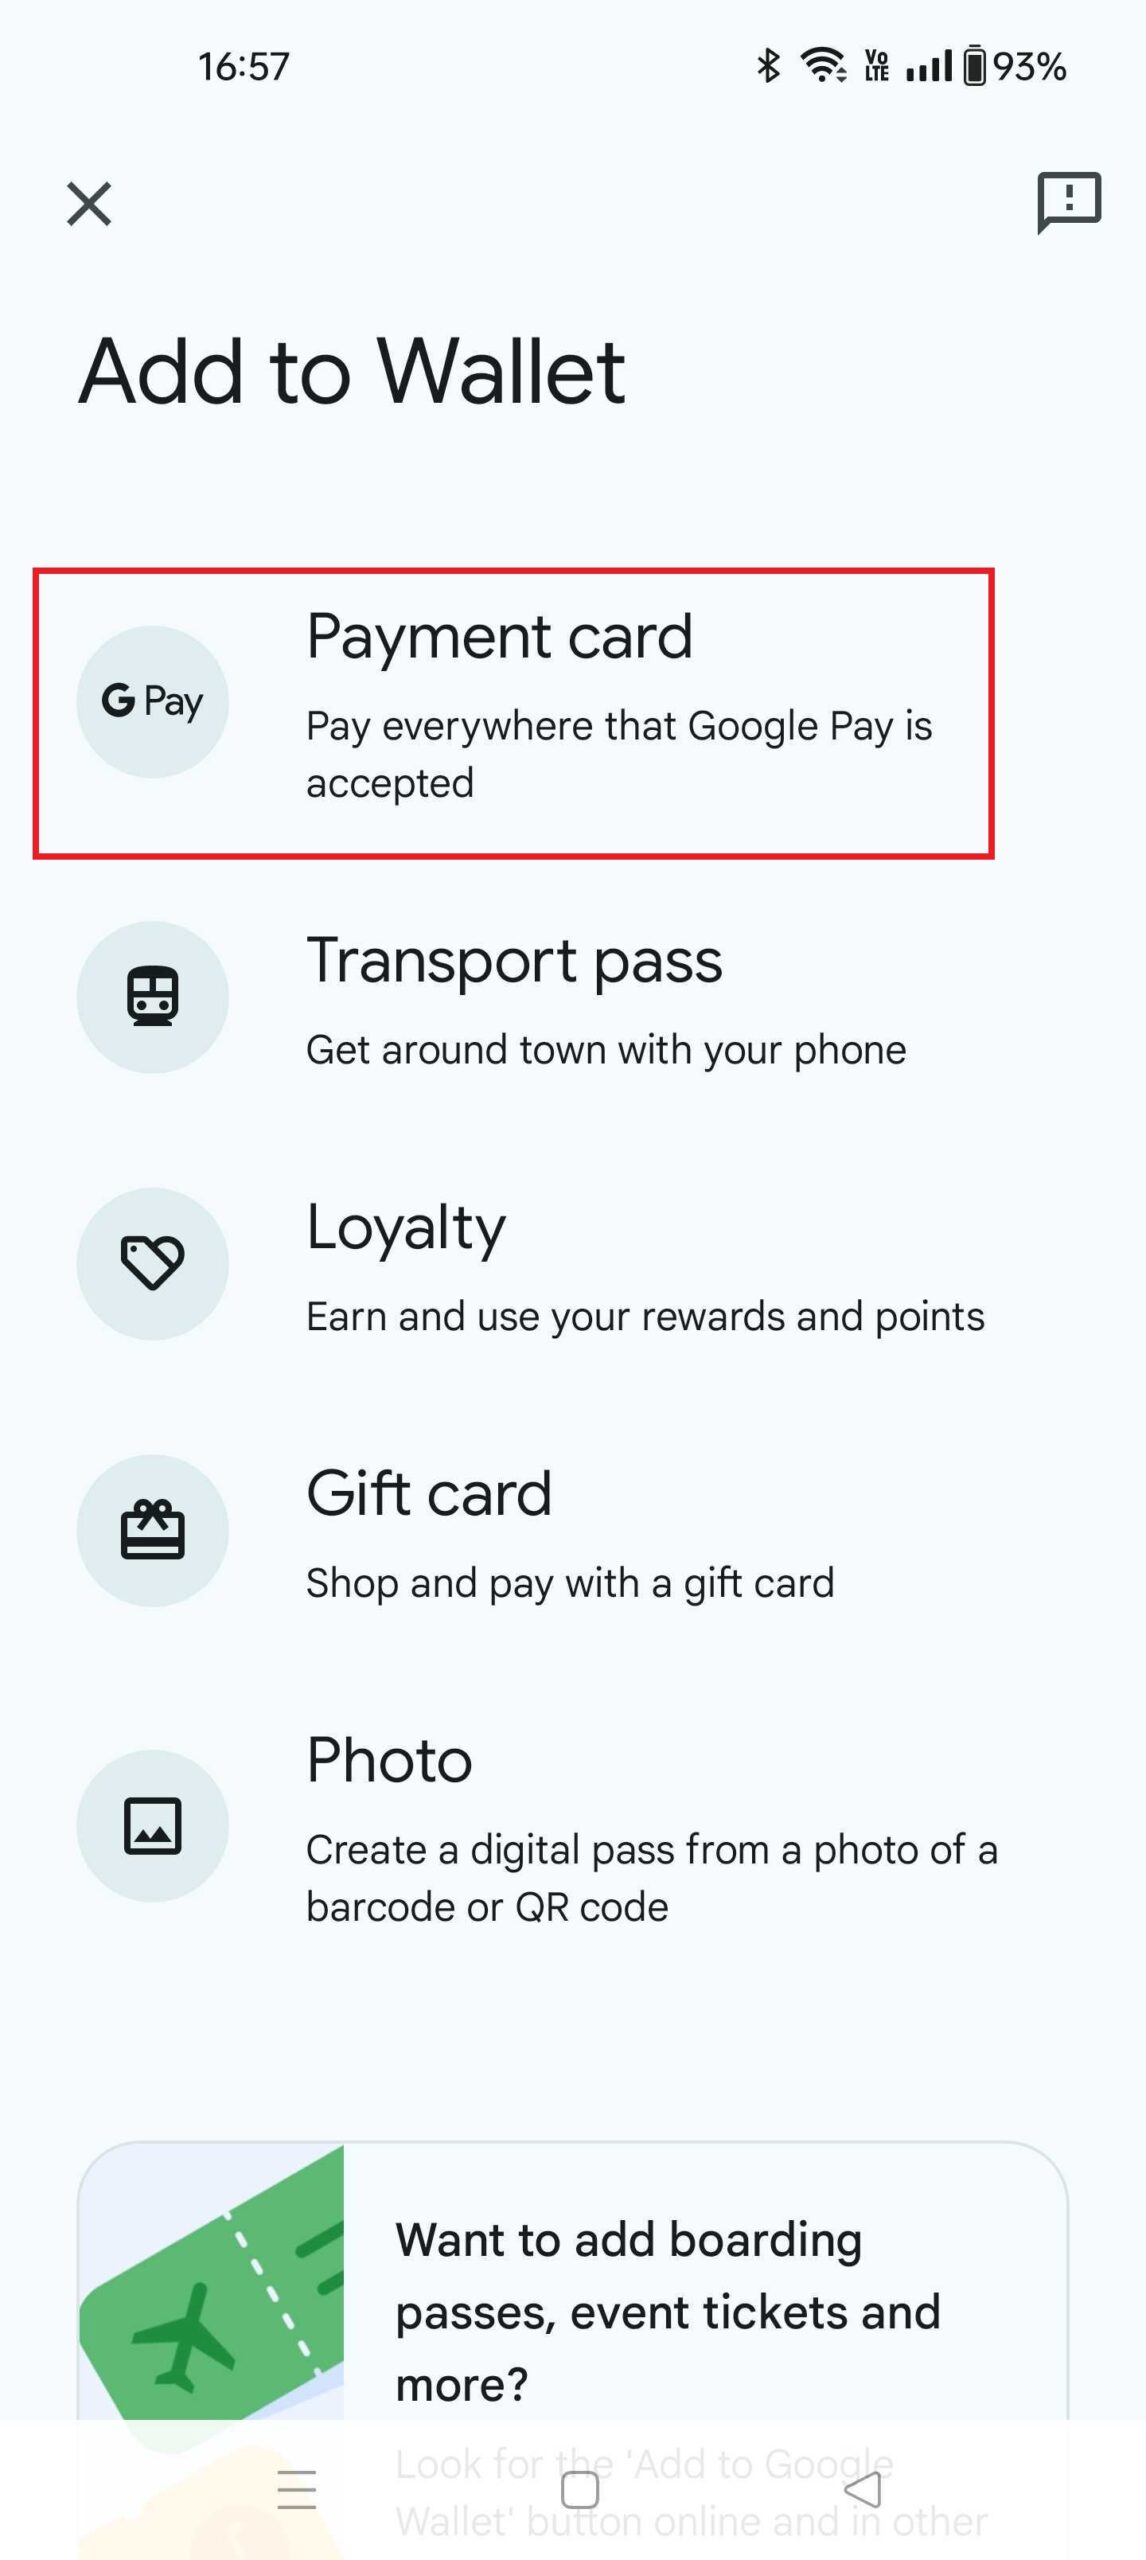
The most efficient way to add a card is by using the integrated OCR (Optical Character Recognition) software within the Google Wallet app. Once you open the app and select the “Add to Wallet” option followed by “Payment card,” the app will activate your device’s camera. By aligning your physical card within the on-screen frame, the software automatically detects the card number, expiration date, and sometimes the cardholder’s name. This method significantly reduces the risk of typographical errors that could lead to authorization failures.
Manual Entry for Precision
In instances where a card is worn down or features a non-standard design that the camera cannot read, manual entry remains a reliable fallback. Users can opt to “Enter details manually,” which allows for the input of the Primary Account Number (PAN), the Security Code (CVV/CVC), and the billing address associated with the account. It is vital to ensure that the billing address matches exactly what the bank has on file, as discrepancies often trigger the security flags of the issuing bank, resulting in a declined setup.
Verification Methods: SMS, Email, and Bank Apps
Security is the cornerstone of the Google Wallet experience. Once the card details are entered, your bank must verify that the person adding the card is the legitimate owner. This is typically handled through a Multi-Factor Authentication (MFA) process. Most banks will offer a choice: receiving a code via SMS, receiving a code via email, or authenticating through the bank’s own mobile banking app. The latter is often the most secure and seamless, as it leverages the existing biometric login of your banking software to authorize the addition of the card to Google Wallet.
Managing and Customizing Your Digital Cards
Once your cards are successfully digitized, the power of Google Wallet lies in its organizational capabilities. Managing your digital stack effectively ensures that you are always using the right card for the right transaction without fumbling through menus.

Setting a Default Card for Seamless Transactions
For most users, there is one “primary” card used for the majority of daily purchases. Google Wallet allows you to set a default card for “Contactless Payments.” This means that when you unlock your phone and hold it near a terminal, the app will automatically use that specific card without requiring you to open the app manually. This feature is a significant time-saver at busy checkout lines or transit turnstiles. To change the default, one simply needs to navigate to the card’s details and toggle the “Default for contactless” setting.
Organizing Loyalty Programs and Transit Passes
The utility of Google Wallet extends far beyond financial transactions. You can add loyalty cards from grocery stores, pharmacies, and coffee shops by scanning their barcodes. When you are near a saved merchant, Google Wallet can often provide a notification or a shortcut to the loyalty card, ensuring you never miss out on points. Additionally, in many major cities, transit passes can be added directly to the wallet. This allows for “Express Mode” in some regions, where you don’t even need to wake or unlock your device to pass through a subway or bus gate.
Removing or Updating Expired Cards
Digital hygiene is just as important as physical organization. When a card expires or is replaced by a bank due to a security breach, the old digital token in Google Wallet must be removed. This is easily done by selecting the card and choosing “Remove payment method.” When your bank sends a replacement card, they may sometimes automatically update the token in Google Wallet, but it is best practice to manually verify and re-add the new card to ensure that the CVV and expiration dates are current.
Security Protocols: How Google Wallet Protects Your Financial Data
One of the most common concerns regarding digital wallets is the security of the transmitted data. From a technical standpoint, using Google Wallet is often significantly more secure than using a physical plastic card.
Virtual Account Numbers and Tokenization
The primary security feature of Google Wallet is “Tokenization.” When you add a card, Google does not store or share your actual credit card number with merchants. Instead, it creates a Virtual Account Number (a token). When you tap your phone at a terminal, the terminal receives this token, which is only valid for that specific transaction environment. Even if a merchant’s database is compromised, the hackers would only find useless tokens rather than your actual financial information.
Biometric Authentication and Screen Locks
Google Wallet leverages the robust security of the Android operating system. To perform a transaction, the device generally requires the user to have a screen lock enabled (PIN, pattern, or password). More importantly, it supports biometric authentication, such as fingerprint scanning or facial recognition. This adds a physical layer of security that a plastic card lacks; if you lose your phone, a stranger cannot use your cards without your biometric data, whereas a lost physical card can be used by anyone until it is reported stolen.
Remotely Disabling Wallet via “Find My Device”
In the event of a lost or stolen phone, Google provides a powerful fail-safe through the “Find My Device” ecosystem. Users can log into their Google account from any web browser to locate, lock, or remotely wipe their device. Wiping the device immediately deletes all stored digital card tokens, ensuring that your financial data remains inaccessible even if the hardware is never recovered.
Troubleshooting Common Integration Issues
Despite the polished nature of the software, users may occasionally encounter hurdles when adding cards or performing transactions. Most of these issues are rooted in software settings or hardware limitations rather than the app itself.
Resolving “Card Not Supported” Errors
If you receive a message stating your card is not supported, the issue usually falls into one of two categories: the bank has not yet partnered with Google for digital payments, or the specific card type (such as some prepaid or corporate cards) is restricted. In these cases, contacting the bank’s customer service is the best course of action to see if there is a specific “opt-in” required for mobile payments.
NFC Connectivity and Hardware Limitations
If you have added a card but the terminal does not react when you tap, the problem is likely NFC-related. First, ensure that NFC is toggled “On” in your phone’s connection settings. Secondly, be aware of the “NFC antenna” location on your device—on most modern phones, it is located near the top of the device or around the camera module. Positioning this area precisely against the terminal’s sensor is key to a successful handshake between the two devices. Additionally, thick or metallic phone cases can occasionally interfere with the NFC signal, requiring a more direct contact.

Regional Availability and Cross-Border Use
Google Wallet’s functionality varies by region due to local financial regulations. If you are traveling, Google Wallet generally works anywhere that accepts contactless payments, but adding a new card while in a different country can sometimes trigger fraud alerts from your bank. It is always recommended to set up your Google Wallet in your home region before traveling to ensure that the verification process proceeds without being flagged by automated security systems.
By mastering the integration of cards into Google Wallet, users embrace a sophisticated intersection of hardware security and software convenience. As the ecosystem continues to grow, incorporating more forms of digital identification and payment methods, the smartphone will continue to solidify its role as the central hub of our digital and physical lives.
aViewFromTheCave is a participant in the Amazon Services LLC Associates Program, an affiliate advertising program designed to provide a means for sites to earn advertising fees by advertising and linking to Amazon.com. Amazon, the Amazon logo, AmazonSupply, and the AmazonSupply logo are trademarks of Amazon.com, Inc. or its affiliates. As an Amazon Associate we earn affiliate commissions from qualifying purchases.