Venturing into solar energy is a smart decision for homeowners and businesses alike, promising environmental benefits, significant cost savings, and enhanced energy independence. One of the most common initial questions for anyone considering this transition is, “How long does it take to install solar panels?” While the physical act of mounting panels on a roof might seem quick, the complete journey from initial inquiry to generating your own clean electricity involves several distinct stages, each with its own timeline. Understanding this comprehensive process is key to setting realistic expectations and ensuring a smooth transition to solar power.
This article delves into the typical solar installation timeline, breaking down each phase, highlighting the factors that can influence the overall duration, and offering insights rooted in technology, financial savvy, and smart planning. We’ll explore not just the immediate installation day, but the critical pre- and post-installation steps, helping you navigate your path to sustainable energy with confidence.
Beyond Installation Day: The Full Solar Journey Timeline
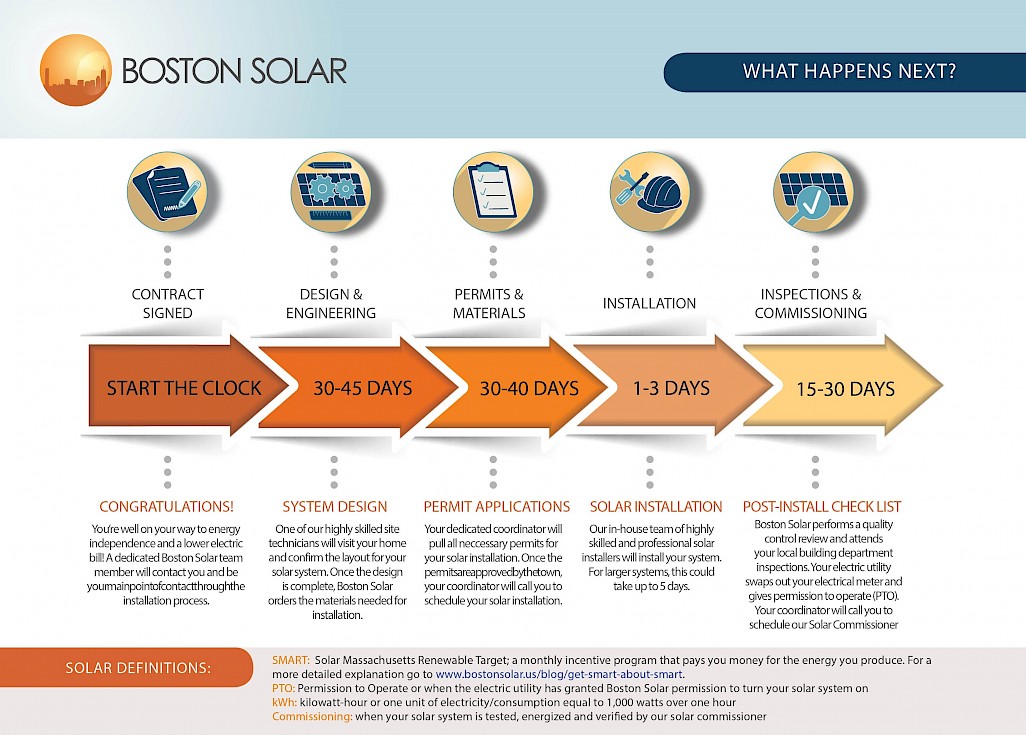
Many people envision solar panel installation as a single-day event. While the on-site work is often completed within a day or two, the entire process, from your initial interest to flipping the switch and seeing your meter spin backward, typically spans several weeks to a few months. This holistic timeline can be categorized into three main phases: pre-installation, the immediate installation, and post-installation.
The Immediate Installation Day: What to Expect
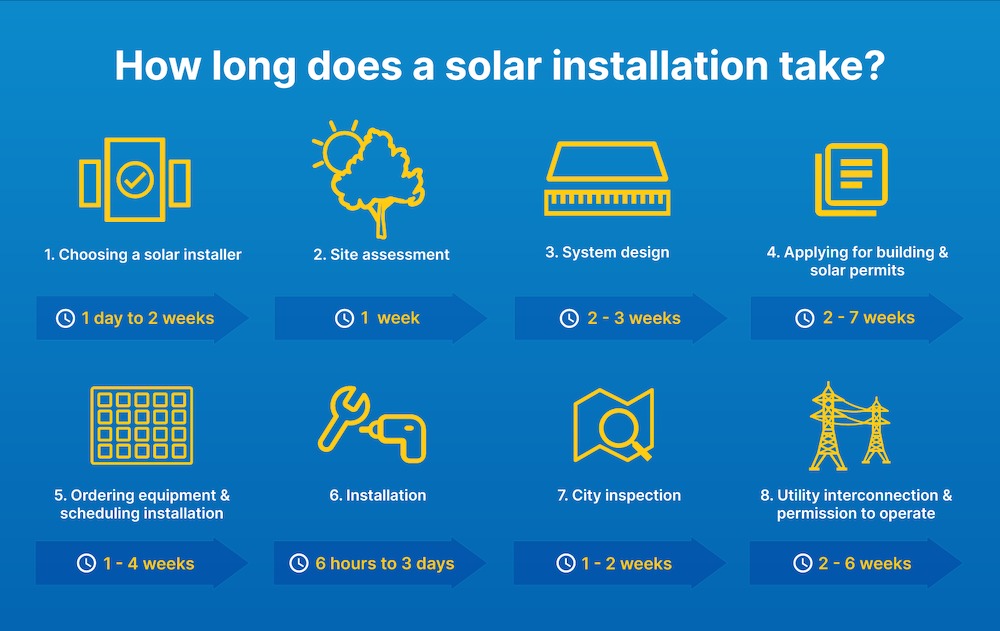
The actual physical installation of solar panels is often the quickest part of the entire process. Once all necessary permits are acquired and equipment is on site, a professional installation crew can usually complete the work on a standard residential system in 1 to 3 days. For larger or more complex commercial installations, this might extend to a week or more.
During this phase, the crew will typically:
- Prepare the Roof: This involves minor adjustments or cleaning, and sometimes laying down protective barriers.
- Install Mounting Hardware: Racking systems are securely attached to your roof structure, providing the foundation for the panels.
- Mount Solar Panels: The photovoltaic (PV) modules are then carefully placed and bolted onto the racking.
- Wire the System: This includes connecting panels to each other, running conduit, installing the inverter (which converts DC power from the panels into AC power for your home), and connecting it to your home’s electrical panel and potentially a battery storage system.
- Grounding and Safety Checks: Ensuring all electrical components are properly grounded and meet safety codes is paramount.
The efficiency of the installation team, the weather conditions, and the complexity of your roof (e.g., multiple angles, obstructions) can all affect the exact duration of this on-site work. Choosing an experienced installer with a strong reputation (a key “Brand” consideration) can significantly streamline this critical stage, ensuring quality and adherence to timelines.
Pre-Installation Milestones: From Inquiry to Design
This is often the longest phase of the solar journey, encompassing all the preparatory steps before a single panel is mounted. It typically takes 2 weeks to 3 months, depending heavily on local regulations, installer availability, and your responsiveness.
-
Initial Consultation & Site Assessment (1-2 weeks): Your journey usually begins with contacting solar companies. Reputable firms will offer a free consultation, discussing your energy needs, budget, and potential savings. A site assessment, often conducted remotely using satellite imagery or with an in-person visit, determines your roof’s suitability (size, angle, shading), structural integrity, and electrical capacity. This initial engagement helps them propose a system tailored to your specific situation, incorporating the latest “Tech” in panel efficiency and inverter technology.
-
System Design & Proposal (1-2 weeks): Based on the assessment, the solar provider designs a custom system. This includes selecting the type and number of panels, inverter technology (string, micro-inverters, or power optimizers), and potentially battery storage. They’ll generate a detailed proposal outlining the system’s specifications, projected energy production, cost, and financing options. This is a critical “Money” decision point, where you evaluate the upfront investment against long-term savings and incentives.
-
Financing & Contract Signing (1-4 weeks): Once you approve the design and proposal, you’ll finalize financing. Options typically include cash purchase, solar loans, power purchase agreements (PPAs), or leases. This stage involves credit checks, paperwork, and signing contracts. Understanding the financial implications and choosing the best option for your budget is crucial.
-
Permitting & Approvals (2 weeks to 2 months or more): This is often the most variable and time-consuming part of the pre-installation phase. Solar installations require permits from your local municipality to ensure they meet safety and building codes. The application, review, and approval process can vary dramatically by location, from a few weeks in some progressive areas to several months in others with slower bureaucratic processes. Your installer usually handles this, but understanding the local “Tech” requirements and regulations is important.
-
Equipment Procurement (1-4 weeks): Once permits are secured, your installer orders the specific panels, inverters, racking, and other components for your system. Lead times can vary depending on manufacturer availability, supply chain issues, and the popularity of certain “Brand” components.
Post-Installation Steps: Energizing Your Home
Even after the panels are on your roof, there are a couple more crucial steps before your system goes live. This final phase typically takes 2 weeks to 1 month.
-
Inspection (1-2 weeks): After the physical installation is complete, a local building inspector will need to examine the system to ensure it was installed correctly and complies with all local building and electrical codes. This is a mandatory safety check before the system can be interconnected with the grid.
-
Utility Interconnection (1-3 weeks): Once your system passes inspection, your installer will submit the final paperwork to your utility company for grid interconnection. The utility needs to approve the connection and often install a special net meter that tracks both the electricity you consume from the grid and the excess electricity your solar panels send back to it. Only after the utility grants permission to operate (PTO) can your system be officially activated.
Key Factors Influencing Your Solar Installation Timeline
While the general timeline provides a framework, several variables can significantly accelerate or delay your solar journey. Understanding these factors can help you anticipate potential hurdles and choose strategies to mitigate them.
System Size and Complexity
A larger solar array, requiring more panels, inverters, and intricate wiring, will naturally take longer to design, install, and inspect than a smaller system. Similarly, complex rooflines with multiple gables, skylights, or unusual angles demand more intricate planning and careful installation, extending the on-site duration. Integrating advanced “Tech” solutions like battery storage or specific smart home energy management systems also adds layers of complexity and components, potentially lengthening the process.
Your Home’s Unique Characteristics
The structural integrity of your roof needs to be able to support the weight of the panels and racking. If your roof requires repairs or structural reinforcement, this must be completed before solar installation can begin, adding time and potentially cost (“Money” consideration). The age and condition of your electrical panel can also be a factor; an older panel may need to be upgraded to accommodate the new solar system, a process that can add a few days to a week to the timeline.
Permitting and Regulatory Landscape
As mentioned, local government permitting offices are a major wildcard. Some cities have streamlined “Tech” processes for solar permits, while others have lengthy review periods or require multiple rounds of revisions. The volume of applications they receive can also cause backlogs. Similarly, the specific requirements of your utility company for interconnection can vary; some are highly efficient, while others have more bureaucratic procedures. Researching the local permitting environment and choosing an installer with extensive experience in your area can help you navigate this complex landscape.
The Installer’s Efficiency and Reputation
The choice of your solar installer (“Brand” consideration) plays a pivotal role in the overall timeline. A reputable, experienced company will have streamlined processes for design, permitting, and installation. They’ll have dedicated teams for each stage, strong relationships with local permit offices and utility companies, and efficient supply chains for equipment. Conversely, a less organized or inexperienced installer can lead to delays due to errors in paperwork, scheduling conflicts, or inefficient workflow. Always check reviews, ask for references, and ensure your chosen installer has a proven track record.
Financial and Technological Considerations for Your Solar Investment
While the focus is on time, the underlying “Money” and “Tech” aspects of solar installation are intrinsically linked to the timeline and overall success of your project. Making informed decisions here can optimize both the speed and return on your investment.
Understanding the Return on Investment (ROI) and Financial Incentives
The financial aspect is a driving force for many going solar. Understanding the return on investment (ROI) is crucial. While the upfront cost can be substantial, various financial incentives can significantly reduce it and shorten the payback period. These include:
- Federal Solar Investment Tax Credit (ITC): A significant credit on the cost of your solar system. Staying updated on current tax laws (a “Money” topic) is vital.
- State and Local Rebates/Incentives: Many states and municipalities offer additional programs, grants, or property tax exemptions for solar installations.
- Net Metering: This policy allows you to sell excess electricity back to the grid, earning credits on your utility bill.
- Increased Home Value: Solar panels are considered a home improvement that can increase property value, a long-term “Money” benefit.
The process of applying for these incentives, while often handled by your installer, still contributes to the overall administrative timeline. Delays in securing financing or understanding incentive structures can hold up the project.
Choosing the Right Technology and Installer Brand
The “Tech” you choose for your solar system directly impacts its efficiency, longevity, and ultimately, its financial return. Modern solar panels boast higher efficiency rates, meaning they can generate more electricity from less space. Advanced inverter technologies, like micro-inverters, can optimize power production from individual panels, making systems more resilient to shading. Exploring these “Tech” trends is important.
Equally important is the “Brand” of your installer. A strong brand reputation signifies:
- Expertise: Knowledgeable staff who can design optimal systems and navigate complex regulations.
- Reliability: Consistent performance, adherence to timelines, and minimal errors.
- Customer Service: Proactive communication, quick resolution of issues, and post-installation support.
- Warranty Support: Robust warranties on labor and components, ensuring peace of mind for decades.
Choosing a reputable installer might seem like a small detail, but their operational efficiency and commitment to quality can significantly impact the smoothness of your installation process and the long-term performance of your solar investment.
Maximizing Efficiency: Tips for a Smooth Solar Installation
While some delays are unavoidable, there are proactive steps you can take to help keep your solar installation on track and ensure a positive experience.
Proactive Planning and Communication
Being prepared and responsive can significantly streamline the process.
- Gather Information Early: Have your past electricity bills (12-24 months) ready for the initial consultation. This helps installers accurately assess your energy consumption.
- Clear Communication: Maintain open lines of communication with your installer. Respond promptly to requests for information or document approvals.
- Understand the Timeline: Ask your installer for a detailed project timeline, including expected durations for each phase. This helps you anticipate waiting periods.
- Review Contracts Carefully: Before signing, thoroughly read all contracts, understanding the terms of service, warranties, financing agreements, and what responsibilities fall on you versus the installer.
Navigating Permits and Paperwork
This phase is often the biggest bottleneck.
- Local Permitting Knowledge: Choose an installer with proven experience navigating the permitting process in your specific municipality. They should be familiar with local codes and typical review times.
- Follow-Up (Respectfully): While your installer handles most of the legwork, a periodic, polite check-in on the status of permits can sometimes help.
- Be Accessible for Inspections: Ensure you (or an authorized adult) are available during scheduled times for site assessments and post-installation inspections. Delays here can push back utility interconnection.
The Long-Term Value: Why the Wait is Worth It
Despite the multi-week or multi-month timeline, the investment in solar energy is overwhelmingly worthwhile. The wait for your system to become operational is a small trade-off for the substantial benefits you’ll reap for decades to come.
From a “Money” perspective, solar panels offer:
- Significant Savings on Electricity Bills: Potentially eliminating or drastically reducing your monthly energy costs.
- Protection Against Rising Energy Prices: You lock in a predictable energy source, insulating you from market fluctuations.
- Increased Home Value: A well-installed solar system is a desirable feature for future buyers.
- Financial Incentives: Tax credits and rebates make the initial investment more palatable.
From a “Tech” and environmental standpoint, solar offers:
- Reduced Carbon Footprint: Contributing to a cleaner environment by using renewable energy.
- Energy Independence: Less reliance on traditional utility grids, enhancing self-sufficiency.
- Advanced Monitoring: Modern systems often come with apps that allow you to monitor your energy production and consumption in real-time, leveraging smart home “Tech.”
Ultimately, while the question “how long does it take to install solar panels” might have a multi-faceted answer, the journey culminates in a powerful, sustainable asset for your home or business. By understanding each stage, choosing a reputable “Brand” installer, being prepared for the administrative process, and embracing the financial and technological benefits, you can confidently embark on your solar energy transition. The time spent in preparation and installation is a prudent investment in a greener, more financially secure future.
aViewFromTheCave is a participant in the Amazon Services LLC Associates Program, an affiliate advertising program designed to provide a means for sites to earn advertising fees by advertising and linking to Amazon.com. Amazon, the Amazon logo, AmazonSupply, and the AmazonSupply logo are trademarks of Amazon.com, Inc. or its affiliates. As an Amazon Associate we earn affiliate commissions from qualifying purchases.