In today’s increasingly connected and safety-conscious world, a dash cam has transitioned from a niche gadget for tech enthusiasts to a widely adopted tool for drivers seeking enhanced security, reliable evidence in case of accidents, and even a way to capture memorable road trips. The allure of a dash cam is undeniable: a silent witness that records your journeys, offering peace of mind and practical benefits. However, for many, the prospect of installing one can seem daunting, conjuring images of complex wiring and technical jargon. This guide aims to demystify the process, providing a clear, step-by-step approach to installing a dash cam, empowering you to take control of your vehicle’s safety and documentation, all while seamlessly integrating with the broader themes of technology, brand reputation, and even financial prudence.

Understanding Your Dash Cam: More Than Just a Camera
Before diving into the installation, it’s crucial to understand what you’re working with. Dash cams, at their core, are sophisticated pieces of technology designed to capture video footage from your vehicle’s perspective. Their functionality extends far beyond simple recording, often incorporating features that leverage advancements in AI and digital security.
The Technological Core of Your Dash Cam
Modern dash cams are packed with impressive technology. They utilize high-resolution lenses, often with wide-angle capabilities, to capture as much of the road and surrounding environment as possible. Advanced sensors, such as G-sensors, are integral to their operation. These sensors detect sudden impacts or movements, automatically triggering the dash cam to save the current footage as an “event” file, crucial for accident reconstruction.
Beyond basic recording, many dash cams now integrate Artificial Intelligence (AI) tools. This can manifest in various ways, from sophisticated lane departure warnings and forward collision alerts to intelligent parking modes that conserve battery while still detecting impacts when the vehicle is parked. The software powering these devices is also a critical component, offering features like GPS logging for tracking your routes, Wi-Fi connectivity for easy access to footage via smartphone apps, and even cloud storage options. These advancements transform a simple camera into a comprehensive driving assistant and security system.
Choosing the Right Dash Cam for Your Needs
The market is flooded with dash cams, each with its unique set of features and price points. When selecting a dash cam, consider your primary needs. Are you looking for simple front-facing recording, or do you require a dual-channel system to capture both the front and rear of your vehicle? Do you need advanced driver-assistance systems (ADAS) features, or is raw video footage sufficient?
Budget is also a significant consideration. While high-end models offer superior video quality, advanced features, and better low-light performance, more affordable options can still provide excellent value and essential recording capabilities. Think of this as an investment in your personal finance and vehicle security. A reliable dash cam can potentially save you money in the long run by providing irrefutable evidence in insurance claims, thus avoiding costly disputes and protecting your financial well-being.
The Installation Process: A Practical Walkthrough
Installing a dash cam typically involves two main aspects: mounting the device and connecting it to power. While the specifics may vary slightly depending on your chosen dash cam model, the general principles remain consistent.
Mounting Your Dash Cam: Strategic Placement for Optimal Recording
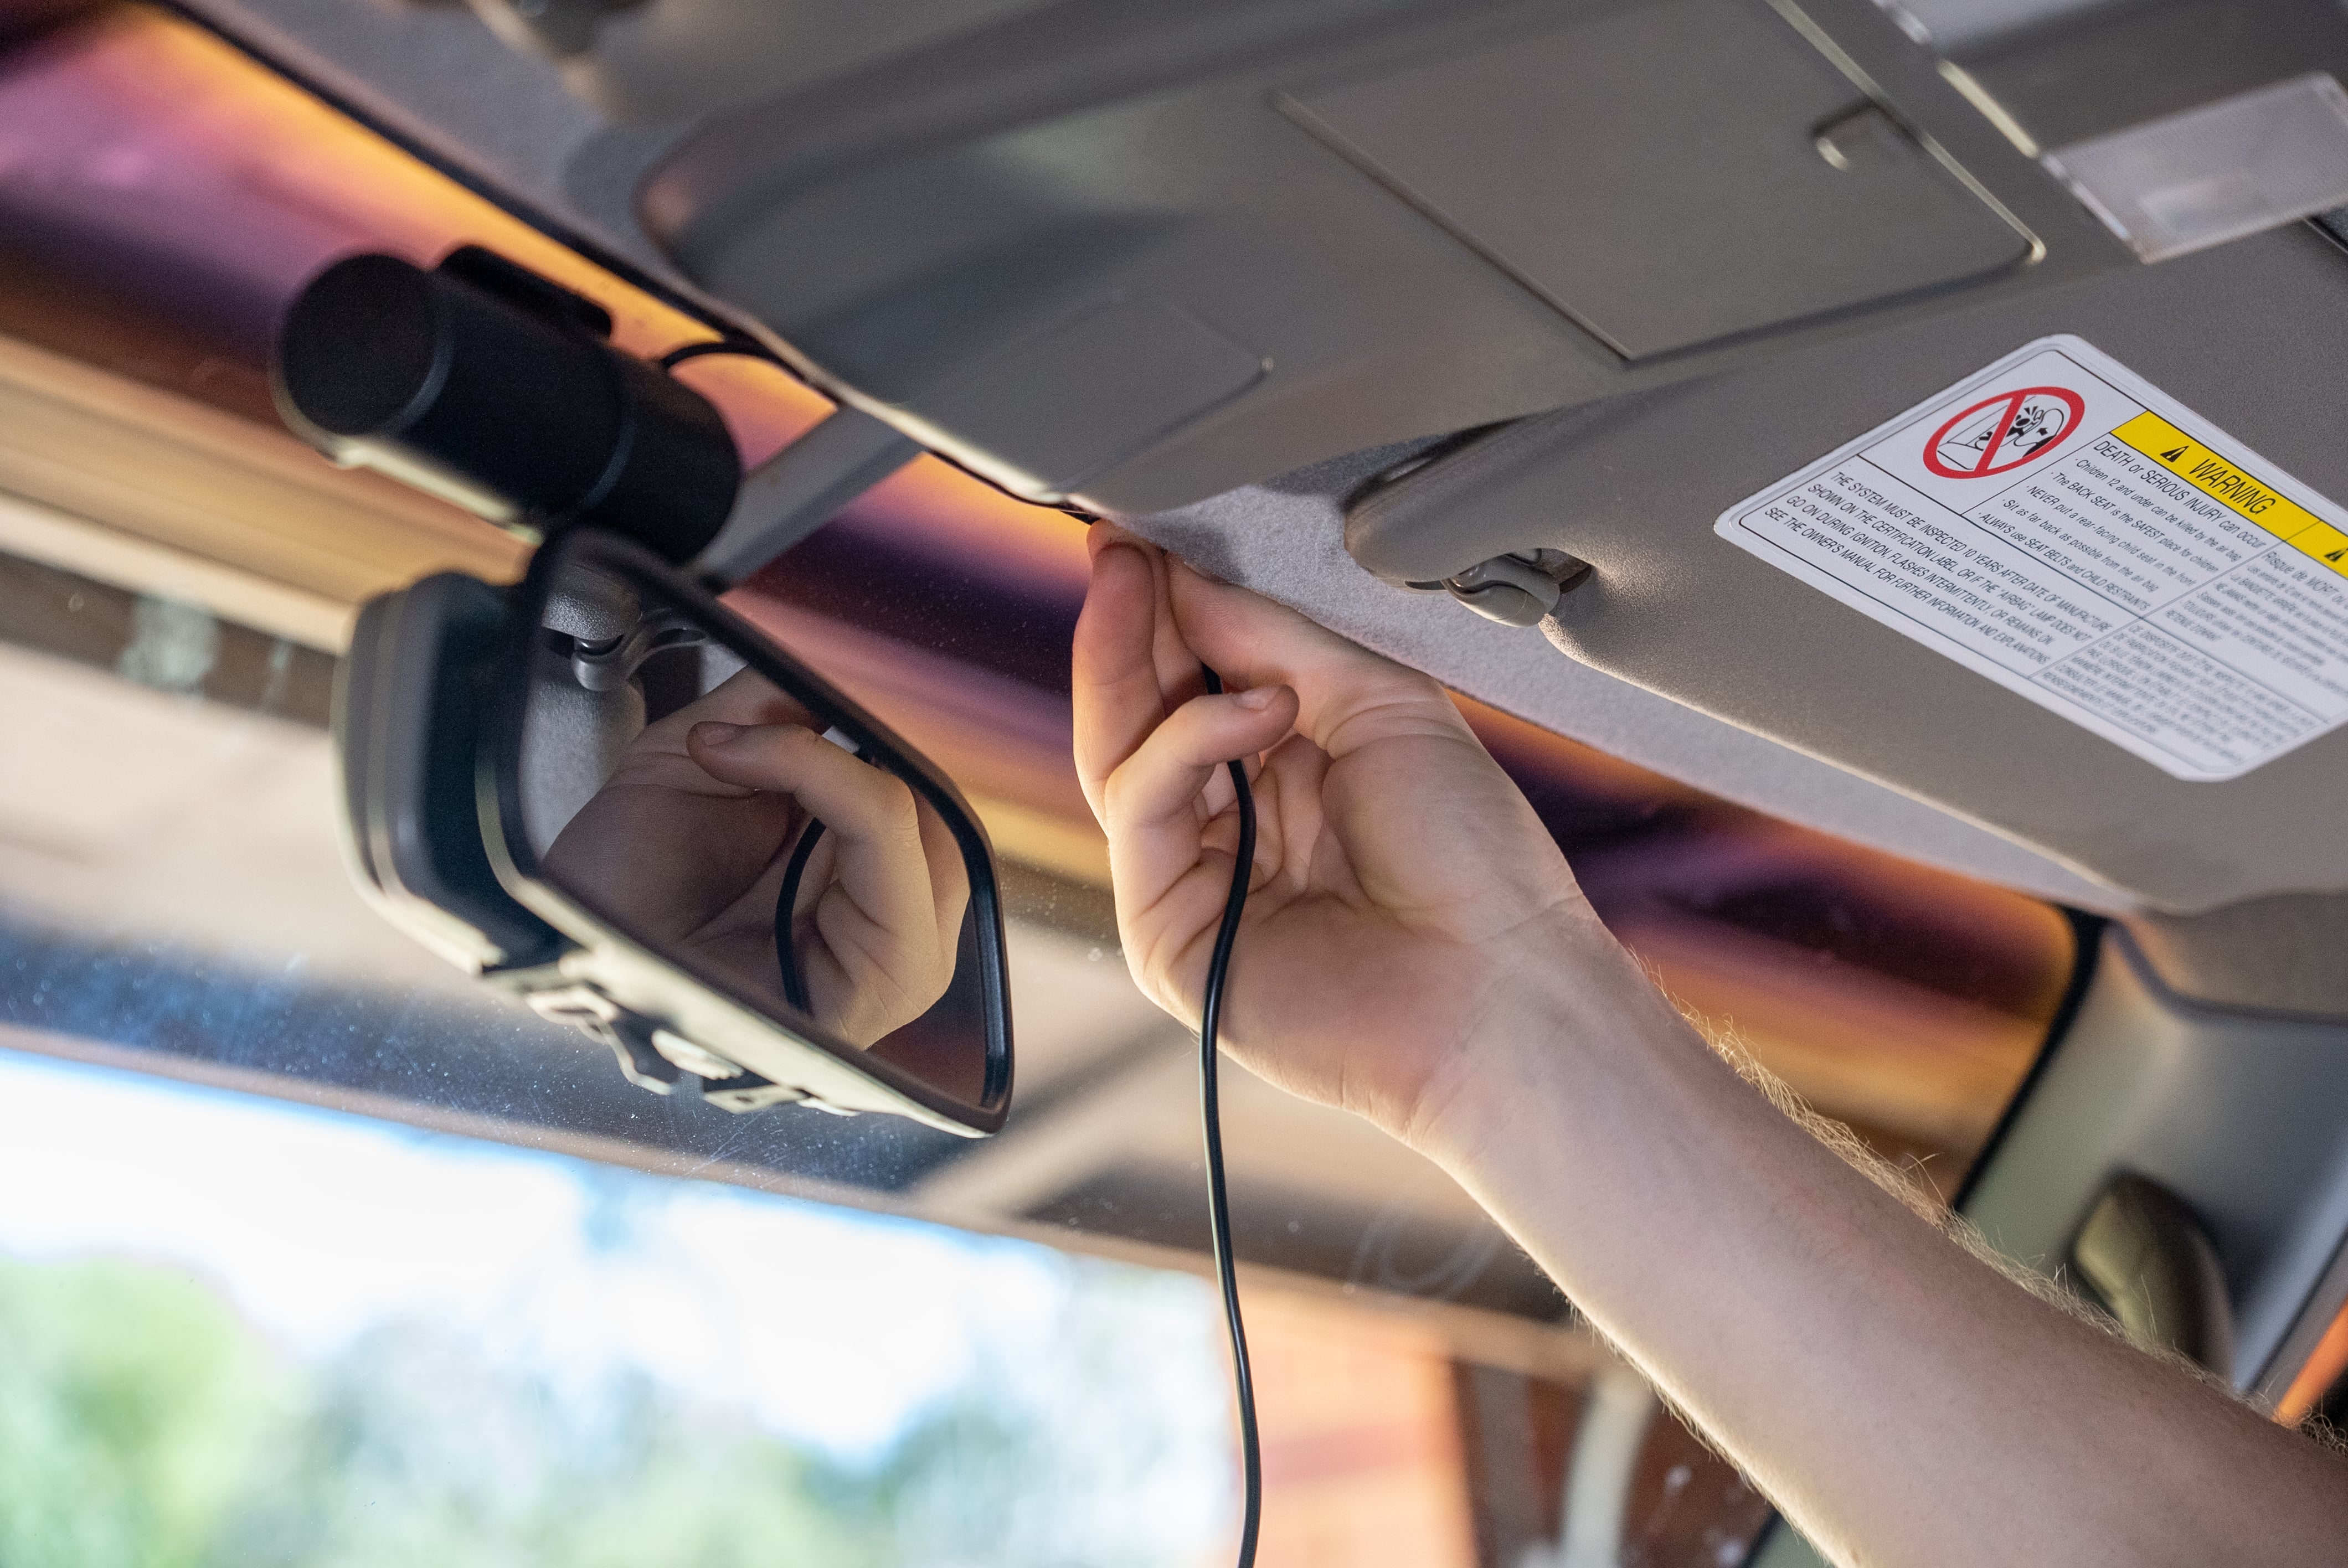
The most common mounting location for a dash cam is on the windshield, behind the rearview mirror. This position offers an unobstructed view of the road ahead and is often discreet, minimizing interference with your driving visibility.
Step 1: Cleaning the Mounting Area
Before attaching the dash cam, thoroughly clean the area of the windshield where you intend to mount it. Use a glass cleaner and a microfiber cloth to remove any dust, dirt, or film. A clean surface ensures a strong and secure bond for the adhesive mount or suction cup.
Step 2: Attaching the Mount
Most dash cams come with either an adhesive mount or a suction cup mount.
- Adhesive Mounts: These are generally more permanent and offer a very secure hold. Peel off the protective backing from the adhesive tape and firmly press the mount onto the cleaned windshield. Hold it in place for the manufacturer-recommended duration to ensure a proper bond.
- Suction Cup Mounts: These are ideal if you plan to frequently remove or reposition your dash cam. Moisten the suction cup slightly with water and press it firmly against the windshield. Many suction cup mounts also have a small lever to create a vacuum seal for added security.
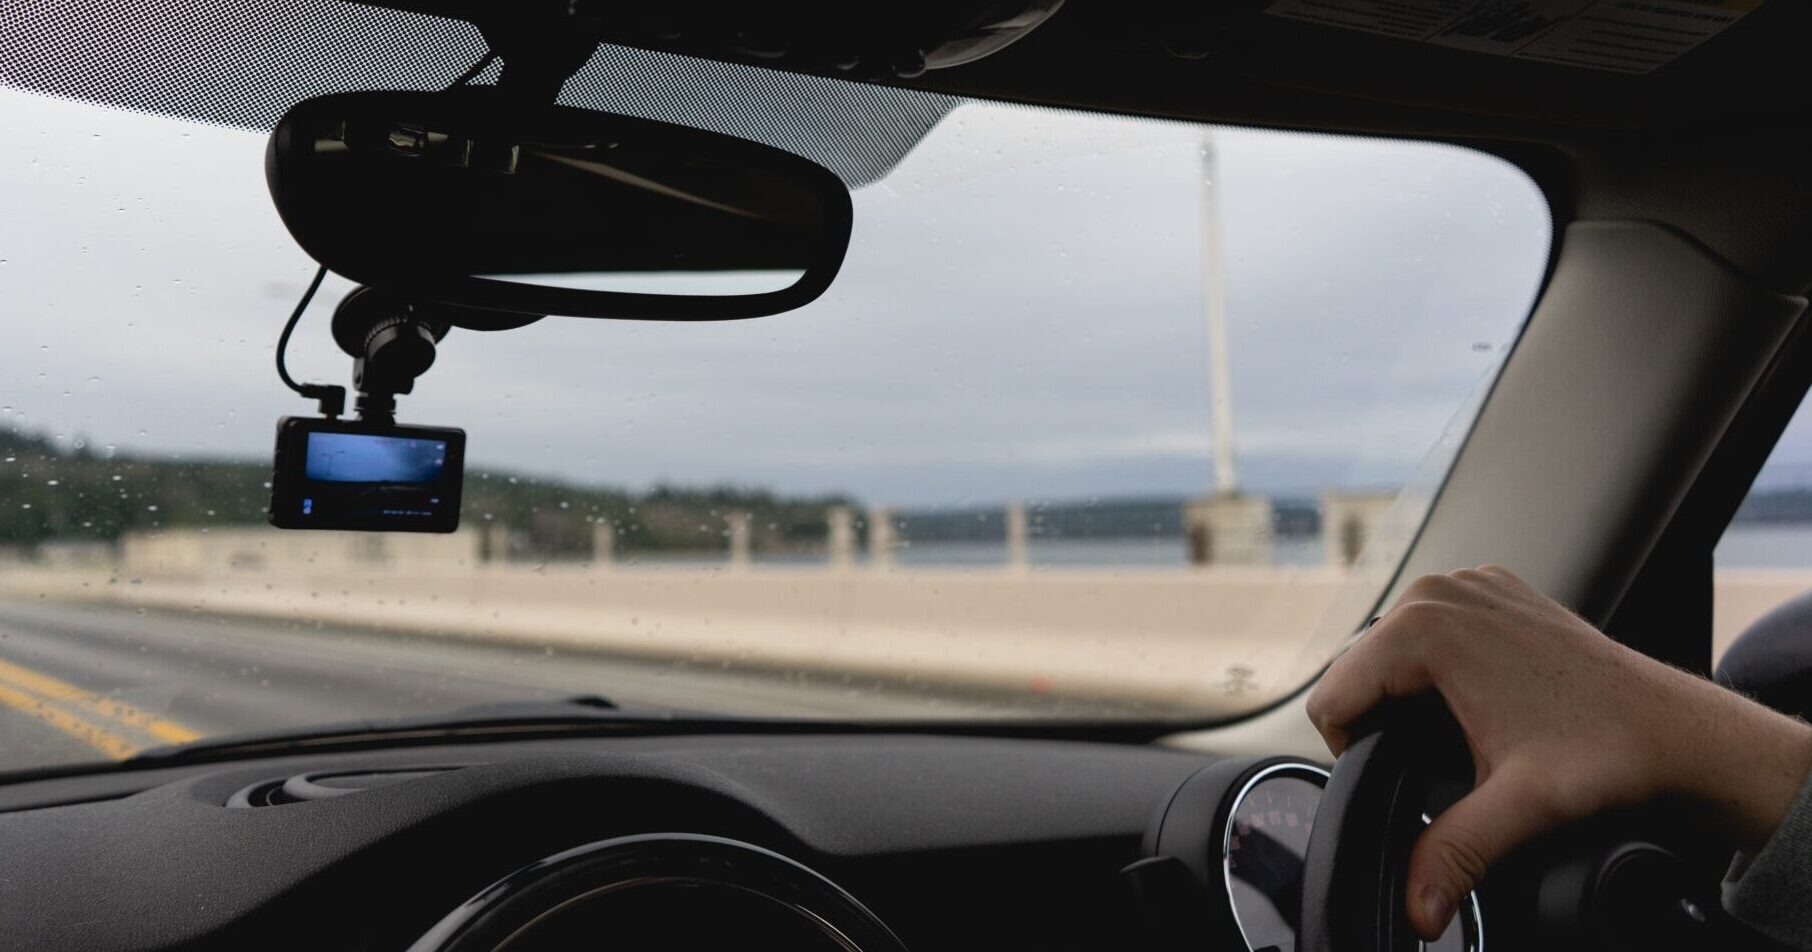
Step 3: Attaching the Dash Cam to the Mount
Once the mount is securely in place, attach the dash cam itself. This usually involves sliding it into a bracket or clipping it onto the mount. Ensure it’s firmly attached and oriented correctly to capture your desired view. Many mounts allow for adjustable angles, so take a moment to position the camera for the best possible field of view.
Powering Your Dash Cam: Options for Continuous Recording
The way you power your dash cam is crucial for its continuous operation. There are a few common methods, each with its advantages.
Option 1: Using the Included Power Adapter (Cigarette Lighter Socket)
This is the simplest and most common method for powering a dash cam.
- Locate Your Vehicle’s 12V Accessory Outlet: This is commonly known as the cigarette lighter socket.
- Connect the Power Adapter: Plug the dash cam’s power adapter into the 12V outlet.
- Route the Power Cable: Carefully route the power cable from the dash cam to the 12V outlet. Most vehicles have trim panels around the dashboard and A-pillars that can be gently pulled away to tuck the wire discreetly. This not only looks cleaner but also prevents the cable from dangling and obstructing your view or getting caught. Use the included cable clips or zip ties to secure the wire neatly along the edges of the headliner and down the A-pillar.
Option 2: Hardwiring for a Cleaner Installation and Advanced Features
For a more integrated and professional look, and to enable features like parking mode without draining your car battery, hardwiring is the preferred method. This involves connecting the dash cam directly to your vehicle’s electrical system. This option may require a bit more technical comfort, but the result is a seamless installation.
Step 1: Understanding Your Vehicle’s Fuse Box
Locate your vehicle’s fuse box. This is typically found under the dashboard, in the glove compartment, or in the engine bay. Consult your vehicle’s owner’s manual for the exact location.
Step 2: Obtaining a Fuse Tap (Add-a-Circuit)
You will need a fuse tap (also known as an add-a-circuit) to safely connect your dash cam to a fuse. These allow you to tap into an existing circuit without interrupting its normal function. Ensure you purchase the correct type of fuse tap for your vehicle’s fuse size.
Step 3: Identifying Suitable Fuses
You’ll want to tap into two types of circuits:
- Constant Power Fuse: This fuse powers the dash cam at all times, allowing it to function in parking mode even when the ignition is off. Look for fuses that power accessories that don’t turn off when the car is off, like the radio or interior lights.
- Switched Power Fuse: This fuse powers the dash cam only when the ignition is turned on. This is crucial for preventing battery drain when the car is not in use. Look for fuses that power accessories that turn off when the ignition is switched off, like the stereo system or power outlets that cut out.
It’s advisable to use a multimeter to confirm which fuses provide constant and switched power.
Step 4: Installing the Fuse Tap
- Remove the Existing Fuse: Carefully remove the appropriate fuse from the fuse box.
- Insert the Fuse Tap: Insert the original fuse into the lower slot of the fuse tap.
- Insert a New Fuse: Insert a new fuse (usually a lower amperage, typically 2A or 5A) into the upper slot of the fuse tap. This fuse is for the dash cam circuit.
- Connect the Dash Cam Wire: Connect the dash cam’s power wire to the fuse tap’s pigtail. Ensure a secure connection.
- Insert the Fuse Tap: Plug the fuse tap into the empty fuse slot in the fuse box.
Repeat this process for both the constant and switched power fuses, ensuring you correctly identify which wire from your dash cam connects to which fuse tap.
Step 5: Grounding the Dash Cam
Your dash cam will also have a ground wire. This needs to be connected to a clean, unpainted metal surface within the vehicle’s chassis. Look for a bolt or screw that is directly connected to the vehicle’s metal frame. Use a wire brush to clean any paint or rust from the connection point before securing the ground wire with a ring terminal.
Step 6: Testing the Installation
Before reassembling any trim panels, test your dash cam. Turn on the ignition and ensure the dash cam powers up and begins recording. Then, turn off the ignition and verify that the dash cam either shuts down (if not using parking mode) or enters parking mode as expected.
Enhancing Your Driving Experience and Brand Reputation
The benefits of installing a dash cam extend beyond mere accident documentation. They contribute to a broader sense of security and can even indirectly influence your personal and corporate brand.
Leveraging Dash Cam Footage for Safety and Security
In the event of an accident, dash cam footage provides an objective and irrefutable account of what transpired. This can be invaluable for insurance claims, as it helps to determine fault accurately, potentially reducing your premiums and avoiding lengthy disputes. Furthermore, the presence of a dash cam can act as a deterrent to reckless drivers and even deter potential thieves or vandals. The clear, recorded evidence can also be used to report dangerous driving behavior to authorities, contributing to safer roads for everyone.
The Impact of Dash Cams on Brand Perception and Reputation
While not directly about marketing, the decision to install a dash cam can subtly influence perceptions. For individuals, it signifies a responsible and safety-conscious attitude. For businesses operating fleets, equipping vehicles with dash cams demonstrates a commitment to driver safety, operational efficiency, and the protection of both employees and company assets. This proactive approach to risk management can bolster a company’s reputation as being professional, reliable, and forward-thinking. It aligns with principles of good corporate identity and can be a positive talking point in case studies or marketing materials that highlight safety initiatives.
Conclusion: A Smart Investment for Peace of Mind
Installing a dash cam is a straightforward process that offers significant returns in terms of safety, security, and peace of mind. By understanding the technology, following these installation steps, and appreciating the broader benefits, you can effectively integrate this valuable gadget into your driving routine. Whether you choose the simple plug-and-play method or opt for a more integrated hardwired solution, the investment in a dash cam is an investment in protecting yourself, your vehicle, and potentially even your reputation. It’s a proactive step towards a safer and more documented driving experience, aligning perfectly with the evolving landscape of technology and responsible personal and corporate conduct.
aViewFromTheCave is a participant in the Amazon Services LLC Associates Program, an affiliate advertising program designed to provide a means for sites to earn advertising fees by advertising and linking to Amazon.com. Amazon, the Amazon logo, AmazonSupply, and the AmazonSupply logo are trademarks of Amazon.com, Inc. or its affiliates. As an Amazon Associate we earn affiliate commissions from qualifying purchases.