In the rapidly evolving landscape of digital finance, peer-to-peer (P2P) payment applications have become indispensable tools for managing everyday transactions. Among these, Venmo stands out as a pervasive platform, renowned for its user-friendly interface and social payment features. Whether you’re splitting a dinner bill, sending your share of rent, or contributing to a group gift, Venmo offers a swift and convenient method to transfer funds directly from your smartphone. This comprehensive guide will walk you through the entire process of sending money on Venmo, from initial setup to advanced features and essential security considerations, ensuring you can navigate the app with confidence and proficiency.

Getting Started with Venmo: Setting Up Your Account for Seamless Transactions
Before you can enjoy the convenience of sending money via Venmo, a foundational setup of your account is necessary. This initial phase is straightforward, designed to get you up and running quickly while establishing the secure linkages required for financial transfers.
Downloading and Installing the Venmo App
The first step involves acquiring the Venmo application. It is available for free download on both the Apple App Store for iOS devices and the Google Play Store for Android devices. Simply search for “Venmo” in your respective app store, initiate the download, and allow the installation to complete. Upon launching the app for the first time, you will be prompted to either sign up for a new account or log in if you’re an existing user.
Creating Your Profile and Linking a Funding Source
Signing up for a new account requires a few pieces of essential information: your full legal name, email address, phone number, and a strong password. You’ll also need to verify your phone number or email address, a critical step for account security.
Crucially, to send money, Venmo requires you to link a funding source. The most common and recommended method is linking a bank account directly via your bank’s online login credentials (a secure process facilitated by Venmo’s integration partners). Alternatively, you can link a debit card. While credit cards can also be linked, be aware that Venmo typically charges a 3% fee for sending money using a credit card, which is not applied when using a bank account or debit card. Having at least one verified funding source is essential as it’s where Venmo will draw funds from if your Venmo balance is insufficient, or if you prefer not to use your balance.
Understanding Venmo’s Privacy Settings
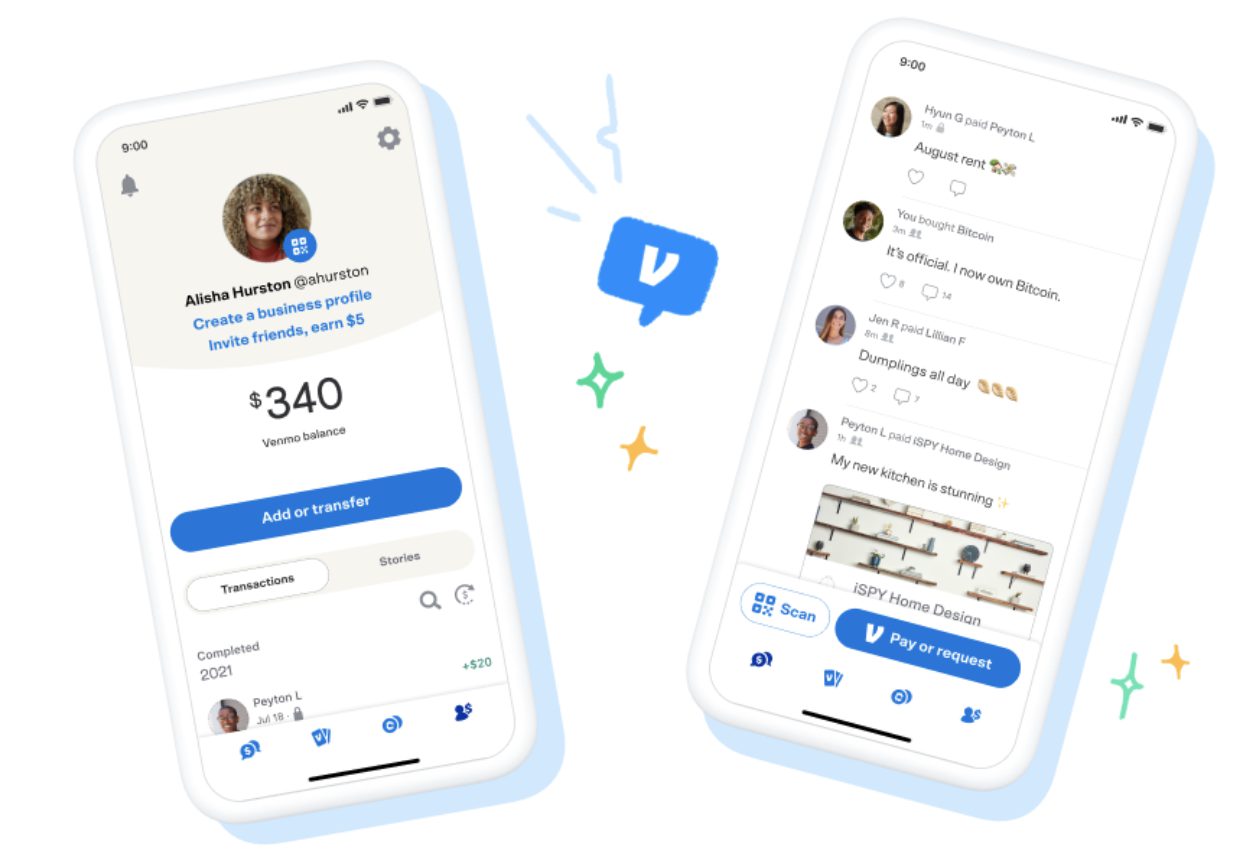
Venmo incorporates a social feed that displays transactions, often with emojis and brief descriptions. Before you send your first payment, it’s wise to familiarize yourself with Venmo’s privacy settings. You can choose from three visibility options for each transaction:
- Public: Anyone on Venmo can see the transaction in their feed.
- Friends: Only your Venmo friends can see the transaction.
- Private: Only you and the recipient can see the transaction details.
You can set a default privacy preference for all future transactions in your settings, and then adjust it on a per-transaction basis as needed. This control ensures your financial interactions align with your desired level of privacy.
The Core Process: Sending Money Step-by-Step with Precision
Once your account is set up and a funding source is linked, sending money on Venmo is an intuitive process. Following these steps will ensure your funds reach the intended recipient without hassle.
Initiating a Payment
To begin a new payment, tap the “Pay & Request” button, usually located at the bottom center or top right of the app interface (its exact placement might vary slightly with app updates). This action will open a new screen where you can initiate a transaction.
Finding Your Recipient
Venmo offers several ways to locate the person you wish to pay:
- Username: If you know their Venmo username (e.g., @JaneDoe), simply type it into the recipient field.
- Phone Number/Email: You can enter their phone number or email address if it’s associated with their Venmo account.
- Friends List: If the person is already in your Venmo friends list, they will appear as you type their name or username.
- QR Code: Venmo allows you to scan a recipient’s unique QR code directly from their phone, which is particularly useful for in-person transactions.
Always double-check the recipient’s identity before proceeding to avoid sending money to the wrong person. A profile picture or the first few letters of their name can help confirm.
Entering the Amount and Adding a Note
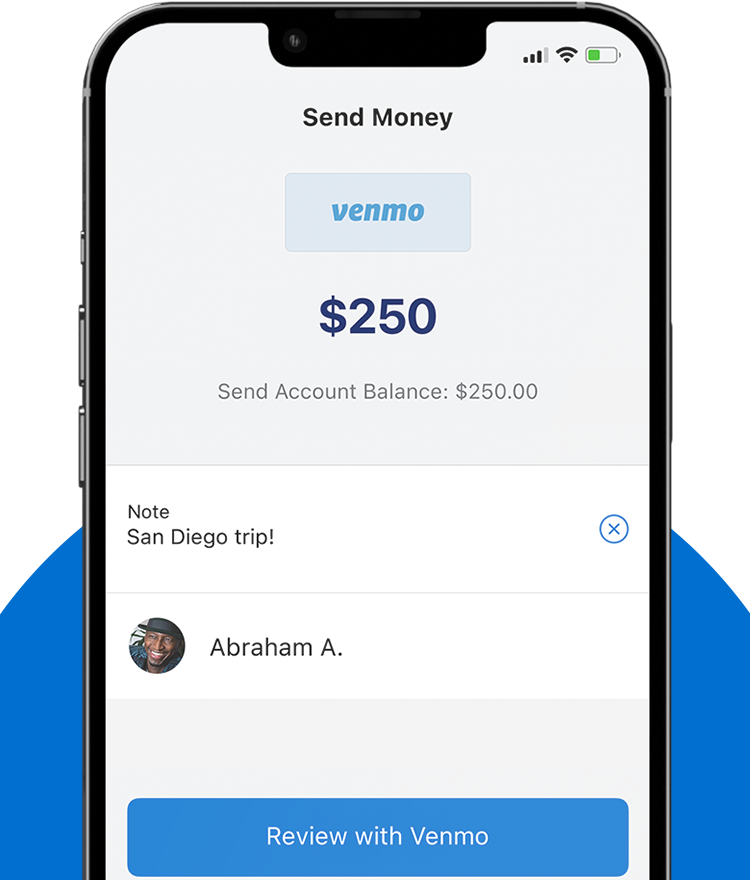
Once you’ve selected your recipient, you’ll be prompted to enter the monetary amount you wish to send. Type in the exact figure. Below the amount, there’s a crucial field for adding a note or description. This isn’t just for fun; it serves as a vital record for both you and the recipient, detailing the purpose of the payment (e.g., “Dinner last night,” “Rent for October,” “Gift for Sarah’s birthday”). Venmo’s social aspect encourages creative notes with emojis, but for clarity and record-keeping, a concise description is always recommended. Here, you’ll also select the privacy setting for this specific transaction.
Reviewing and Confirming the Transaction
Before the money leaves your account, Venmo provides a summary screen. Carefully review all the details: the recipient’s name/username, the amount, the note, and the chosen privacy setting. This is your last chance to catch any errors. If everything looks correct, select your preferred funding source (Venmo balance, linked bank, debit card, or credit card) and tap the “Pay” button to confirm and send the funds.
What Happens After You Send Money?
Immediately after sending, the transaction’s status will typically appear as “Completed.” The recipient will receive a notification (push notification, email, or SMS, depending on their settings) informing them of the incoming payment. The funds are usually available in their Venmo balance instantly. In rare cases, especially for new accounts or large transactions, a payment might be briefly “Pending” for security review.
Advanced Features and Considerations for Sending Money
Venmo is more than just a simple payment transfer tool; it integrates several advanced features that enhance its utility, particularly for group payments and interactions with businesses.
Splitting Bills and Group Payments
One of Venmo’s most popular features is its ability to simplify bill splitting. While you manually calculate and send individual payments, Venmo’s “Request” functionality is often used for this. One person pays the full bill, then uses the “Request” feature to ask others for their share. The notes can be used to clarify who owes what. For truly integrated group payments, Venmo allows users to create group chats where payment requests and shared expenses can be tracked and settled more easily among participants. This transforms awkward calculations into seamless digital transactions.
Using QR Codes for Quick Payments
Venmo’s QR code functionality offers an incredibly fast and error-proof way to exchange payments, especially in person. Each Venmo user has a unique QR code accessible from their profile. To pay someone, you can tap the “Scan” icon in the app and point your phone’s camera at their QR code. This automatically populates their username as the recipient, minimizing the chance of typing errors and speeding up the transaction process. Many small businesses and street vendors also use Venmo QR codes for contactless payments, offering a convenient alternative to cash or card readers.
Business Profiles and Paying Merchants
Beyond peer-to-peer transfers, Venmo has expanded to allow payments to authorized businesses. Many businesses now accept Venmo payments directly, either through their online checkout processes or via QR codes in physical stores. When paying a business, the process is very similar to paying a friend, but the transaction might be categorized differently in your activity feed and may offer purchase protection in some cases. Always ensure you are paying an official business profile to benefit from any applicable protections.
Understanding Transaction Limits and Fees
Venmo implements certain transaction limits to ensure security and compliance. These limits typically apply to the total amount you can send within a rolling week. For unverified accounts, limits are generally lower. Verifying your identity with Venmo (which may involve providing your date of birth and the last four digits of your Social Security number) significantly increases these limits, often to thousands of dollars per week. It’s important to check your specific limits within the Venmo app’s settings. As mentioned, sending money from a linked bank account or debit card typically incurs no fee, while using a credit card usually carries a 3% fee. Receiving money is generally free, though instant transfers out of Venmo to your bank account incur a small percentage fee (usually 1.75%, with a minimum and maximum), while standard bank transfers are free but take 1-3 business days.
Ensuring Secure Transactions on Venmo
The convenience of digital payments must always be balanced with robust security practices. Venmo employs various measures to protect your money and data, but user vigilance is equally important.
Best Practices for Account Security
Protecting your Venmo account starts with strong personal security habits. Always use a unique, complex password for your Venmo account that is not reused on other sites. Enable multi-factor authentication (MFA) or two-factor authentication (2FA) if available, which adds an extra layer of security by requiring a code from your phone in addition to your password for logins. Be cautious about public Wi-Fi networks when accessing sensitive financial apps. Regularly review your transaction history for any unauthorized activity. If you ever lose your phone or suspect unauthorized access, change your password immediately and contact Venmo support.
Recognizing and Avoiding Scams
Scammers frequently target P2P payment apps. Be highly skeptical of unsolicited payment requests or offers that seem too good to be true. Never send money to someone you don’t know or trust, especially if they claim you’ve won a prize or need to pay a fee to release funds. Be wary of “overpayment” scams where someone sends you more money than requested and asks you to send the difference back – the initial payment can often be reversed later, leaving you out of pocket. Venmo transactions are generally irreversible between individuals, so treat sending money as seriously as handing over cash. Always confirm the identity of the recipient independently, especially for large sums or unfamiliar contacts.
What to Do if You Send Money to the Wrong Person
Mistakes can happen. If you accidentally send money to the wrong Venmo user, immediate action is crucial. First, try to “request” the money back from the incorrect recipient. Include a clear, polite note explaining the error. Many users are understanding and will return the funds. If the recipient doesn’t respond or refuses to send the money back, you must contact Venmo Support immediately. While Venmo often cannot force a recipient to return funds due to the nature of P2P transactions, they can investigate and, in some specific cases (e.g., if the user account is fraudulent), might be able to assist. Prompt communication with Venmo support is your best course of action.
Troubleshooting Common Issues
Even with a user-friendly app like Venmo, occasional issues can arise. Knowing how to troubleshoot them can save you time and frustration.
Payment Delays or Holds
While Venmo transactions are usually instant, delays can occur. Sometimes, a payment might be held for security review if it’s unusually large, involves a new recipient, or triggers Venmo’s fraud detection algorithms. If your payment is pending for an extended period (more than a few minutes), check your email or Venmo notifications for any messages from Venmo regarding the transaction. Ensure your linked funding source has sufficient funds and is in good standing.
Rejected Payments
A payment can be rejected for several reasons: insufficient funds in your linked bank account, an expired or invalid debit/credit card, or issues with your bank’s security protocols. If a payment is rejected, Venmo will typically provide a reason. Check your bank account balance, verify your card details, or contact your bank to ensure there are no blocks on your account for Venmo transactions. Sometimes, simply trying again or using an alternative funding source can resolve the issue.
Contacting Venmo Support
For any persistent issues, suspicious activity, or questions not covered in the app’s help section, contacting Venmo Support is essential. You can usually find support options within the Venmo app under “Get Help” or “Contact Us” in your settings. Venmo offers help articles, email support, and sometimes phone support during business hours. When contacting them, have your account details, transaction IDs, and a clear description of your issue ready to expedite the process.
Venmo has transformed the way many of us handle small financial transfers, making it faster and more social than ever before. By understanding its core functionalities, leveraging its advanced features, and adhering to best security practices, you can confidently use Venmo to manage your digital payments. Its intuitive design and robust set of features make it a powerful tool in your digital financial toolkit, simplifying the act of sending money one tap at a time.
aViewFromTheCave is a participant in the Amazon Services LLC Associates Program, an affiliate advertising program designed to provide a means for sites to earn advertising fees by advertising and linking to Amazon.com. Amazon, the Amazon logo, AmazonSupply, and the AmazonSupply logo are trademarks of Amazon.com, Inc. or its affiliates. As an Amazon Associate we earn affiliate commissions from qualifying purchases.