In an increasingly digital world, the operating system you choose can profoundly impact your productivity, digital security, and even your financial outlays. While Windows and macOS dominate the mainstream, a vibrant, open-source alternative called Linux Mint has steadily gained a loyal following. It offers a refreshing blend of stability, security, and user-friendliness, all without the price tag often associated with proprietary software. If you’re looking to dive into the world of Linux, enhance your tech skills, and potentially save some money on software licenses, installing Linux Mint is an excellent starting point. This comprehensive guide will walk you through every step, from preparation to post-installation optimization, ensuring a smooth transition to your new operating environment.
Why Choose Linux Mint? Unlocking a World of Open-Source Potential
Before we delve into the technicalities of installation, let’s explore why Linux Mint stands out as a compelling choice, especially for those interested in expanding their tech horizons, optimizing their digital life, and making smart financial decisions regarding software.
The Mint Advantage: Stability, Security, and User-Friendliness
Linux Mint is celebrated for its robust stability. Built on the solid foundation of Ubuntu (which itself is based on Debian Linux), Mint provides a rock-solid platform for all your computing needs. Crashes are rare, and the system generally runs smoothly, even on older hardware.
Security is another cornerstone of the Linux ecosystem. While no operating system is impervious to threats, Linux distributions like Mint are inherently more secure than their proprietary counterparts, largely due to their open-source nature, which allows for constant peer review and rapid patching of vulnerabilities. Furthermore, the way user permissions are structured in Linux makes it harder for malware to gain system-wide access. For anyone concerned about digital security in an era of increasing cyber threats, Mint offers a significant advantage.
Perhaps its most appealing feature for newcomers is its user-friendliness. Linux Mint’s Cinnamon desktop environment, in particular, offers a familiar interface that will feel instantly comfortable to users transitioning from Windows. It features a taskbar, a start menu, and intuitive file management, making the learning curve remarkably gentle. This blend of familiarity with underlying power makes Mint an ideal gateway into the Linux universe.
Financial Freedom: The Cost-Saving Power of Open Source
One of the most attractive aspects of Linux Mint, especially from a “Money” perspective, is its complete freeness. Unlike Windows or macOS, which can cost hundreds of dollars, Linux Mint is entirely free to download, install, and use. This extends beyond the operating system itself; a vast ecosystem of high-quality, open-source software is also available at no cost. Imagine having access to a full office suite (LibreOffice), advanced photo editing tools (GIMP), video editors (Kdenlive), and web browsers (Firefox, Chromium) — all without recurring subscriptions or one-time purchases. For individuals, students, small businesses, or anyone looking to reduce their software budget, Mint presents a formidable financial advantage. It allows you to reallocate funds towards hardware, training, or other business ventures, truly embodying the spirit of smart personal finance.
Boosting Productivity and Digital Security
From a “Tech” and “Productivity” standpoint, Linux Mint empowers users with control and efficiency. Its lightweight nature means it often runs faster on hardware that struggles with more resource-intensive operating systems. This can breathe new life into older computers, preventing the need for costly upgrades and contributing to sustainable tech practices. The customizable nature of Mint also allows users to tailor their environment to maximize productivity, installing only the software they need and optimizing workflows. With fewer background processes and a lean design, your system resources are freed up for the tasks that matter most. Furthermore, the inherent security features mean less time spent worrying about viruses or malware, allowing you to focus on your work with greater peace of mind.
Preparing for Your Linux Mint Migration: Essential Pre-Installation Steps
A successful Linux Mint installation begins with thorough preparation. These crucial steps ensure your data is safe and your system is ready for the transition.
Checking System Requirements: Is Your Machine Ready?
While Linux Mint is known for its efficiency, it’s always wise to confirm your hardware meets the minimum requirements. For Linux Mint 21 (Vanessa), the recommendations are:
- RAM: 2GB (4GB recommended for comfortable usage).
- Disk Space: 20GB (100GB recommended).
- Processor: x86 processor (64-bit recommended for most modern installations).
- Graphics: Graphics card capable of 1024×768 resolution.
Most computers purchased within the last decade should easily meet these criteria. If you have older hardware, Mint’s XFCE edition is even lighter than the default Cinnamon desktop and might be a better fit.
Safeguarding Your Data: The Golden Rule of Backup
This is arguably the most critical step. Installing a new operating system involves partitioning and formatting hard drives, which can lead to data loss if not done carefully. Before you proceed, back up all your important files, documents, photos, and any other irreplaceable data. You can use an external hard drive, a cloud service (like Google Drive, Dropbox, or OneDrive), or a network-attached storage (NAS) device. Do not skip this step, as there is no guarantee against unforeseen issues during the installation process. Consider creating a full disk image if you want to be able to restore your entire previous system.
Acquiring the ISO: Downloading Linux Mint
The first piece of software you’ll need is the Linux Mint ISO file.
- Visit the Official Website: Go to the official Linux Mint website (linuxmint.com).
- Navigate to Downloads: Look for the “Download” section.
- Choose Your Edition: Linux Mint offers several editions, primarily differentiated by their desktop environment:
- Cinnamon: The flagship edition, elegant, modern, and feature-rich. Recommended for most users.
- MATE: A more traditional and lightweight desktop, great for older hardware or users who prefer simplicity.
- XFCE: The lightest edition, ideal for very old hardware or maximum performance.
- Select an Image: Choose the 64-bit version (this is standard for most modern computers). You’ll then be presented with a list of mirror servers. Select one close to your geographical location for faster download speeds. The ISO file will be several gigabytes in size.
Crafting Your Bootable USB Drive: Your Installation Key
Once you have the ISO file, you need to write it to a USB drive to create a bootable installer. This USB drive will be used to boot your computer into the Linux Mint installer environment.
- Get a USB Drive: You’ll need a USB drive of at least 8GB capacity. Be aware that this process will erase all data on the USB drive.
- Choose a Tool: Several tools can create bootable USB drives. Popular options include:
- Etcher (BalenaEtcher): A cross-platform, user-friendly tool available for Windows, macOS, and Linux. Highly recommended for its simplicity.
- Rufus: A powerful and popular tool specifically for Windows.
- UNetbootin: Another cross-platform option.
- Create the Bootable Drive (using Etcher as an example):
- Download and install Etcher.
- Launch Etcher.
- Click “Flash from file” and select your downloaded Linux Mint ISO file.
- Click “Select target” and choose your USB drive (double-check that you’ve selected the correct one!).
- Click “Flash!” and wait for the process to complete. Etcher will verify the drive after writing, which takes a bit longer but ensures a good flash.
The Installation Journey: A Step-by-Step Guide to Linux Mint Setup
With your bootable USB ready, you’re now poised to begin the installation. This section details the steps you’ll encounter in the Linux Mint installer.
Booting from Your USB: Initiating the Process
The first challenge is to tell your computer to boot from the USB drive instead of its internal hard drive.
- Insert USB: Insert the bootable USB drive into an available USB port.
- Restart Computer: Restart your computer.
- Access Boot Menu/BIOS/UEFI: As your computer starts, you’ll need to press a specific key to enter the boot menu or your computer’s BIOS/UEFI settings. Common keys include
F2,F10,F12,DEL, orESC. The exact key often flashes briefly on the screen during startup. - Select USB Drive: In the boot menu, select your USB drive (it might be listed as “USB-HDD,” “Removable Device,” or by its brand name) and press Enter.
- Start Linux Mint: You’ll be presented with a GRUB menu. Select “Start Linux Mint” and press Enter. This will boot you into a live Linux Mint environment directly from the USB drive. You can test Mint here without installing it, but for a permanent setup, we’ll proceed with installation.
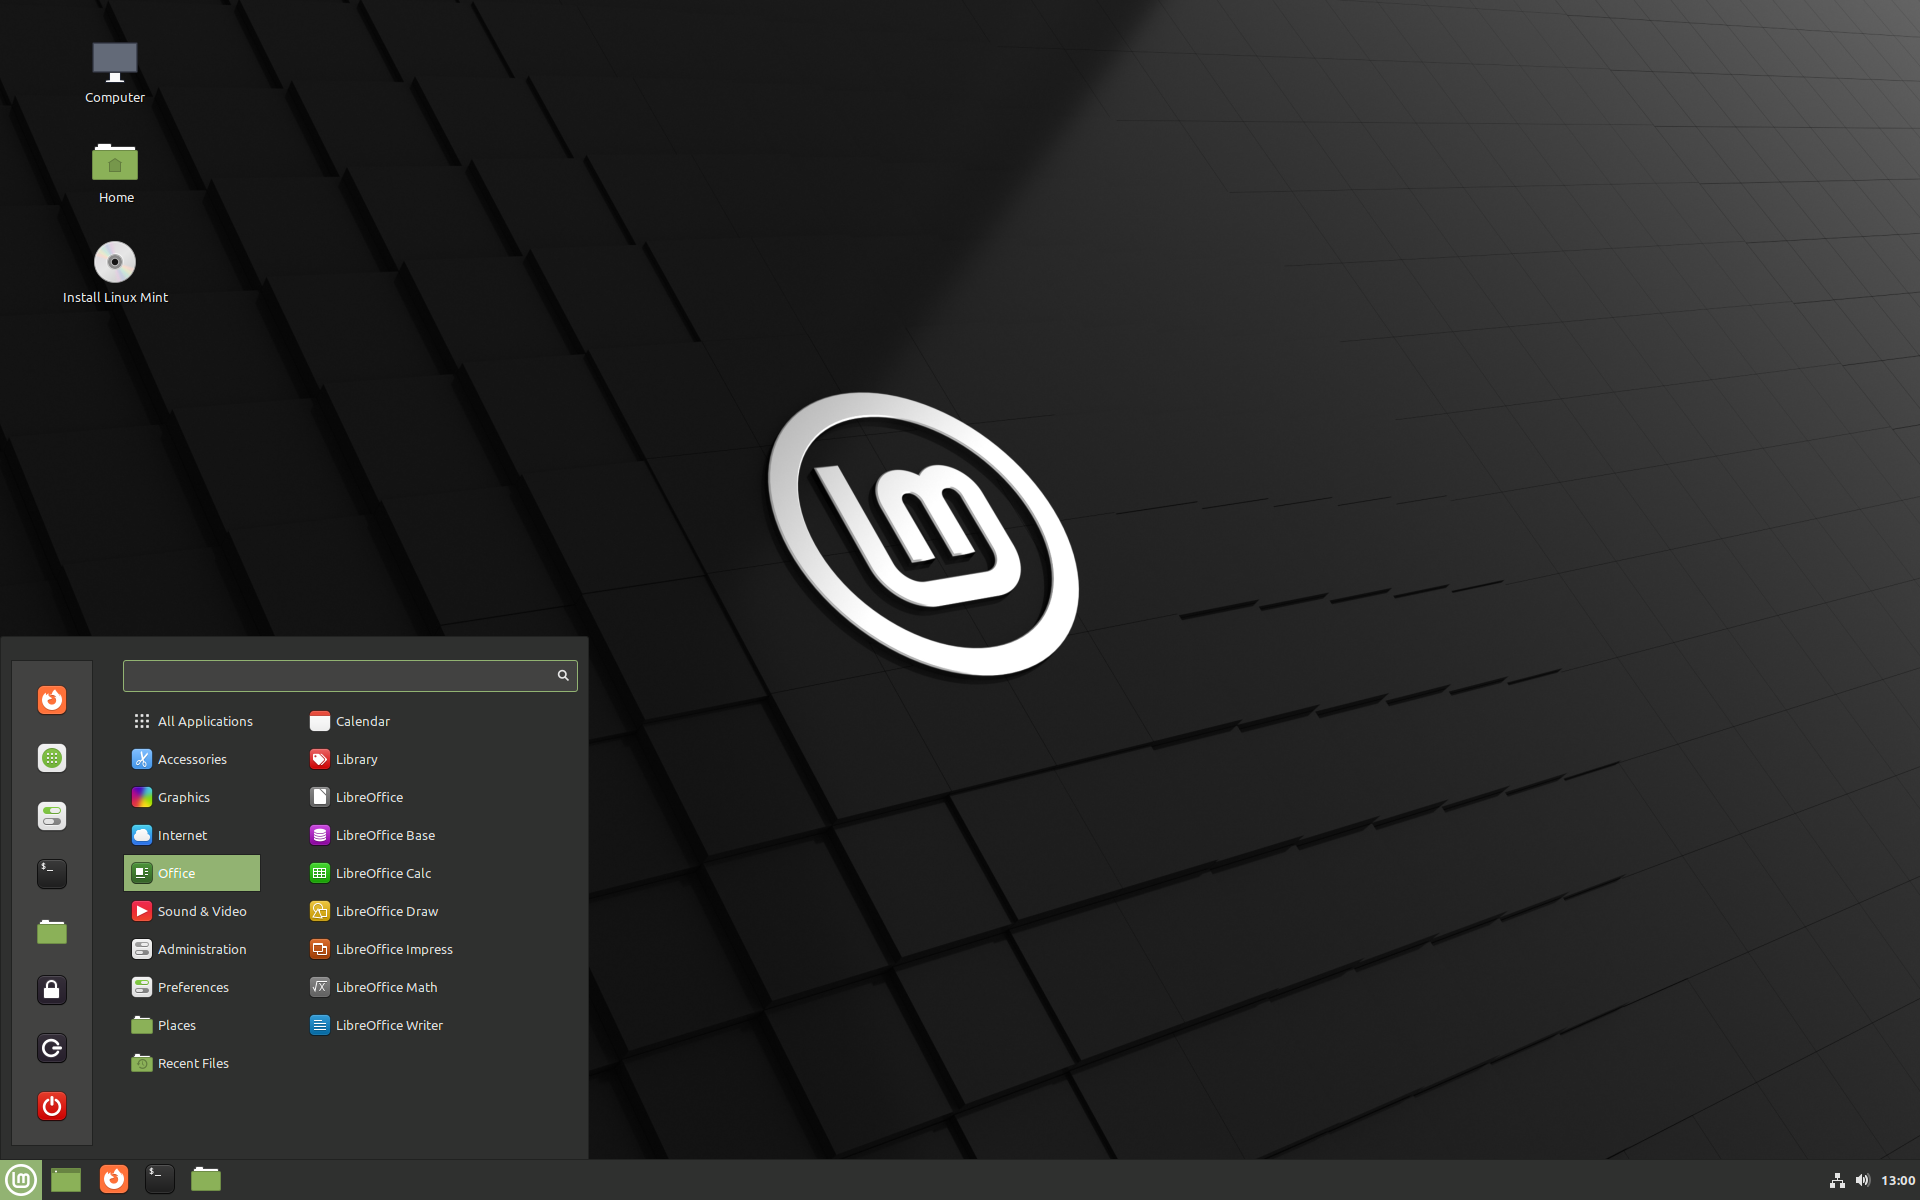
- Launch Installer: On the live desktop, you’ll see an icon named “Install Linux Mint.” Double-click it to start the installation wizard.
Navigating the Installer: Initial Choices
The installer is designed to be straightforward.
- Welcome Screen: Choose your preferred language and click “Continue.”
- Keyboard Layout: Select your keyboard layout. You can also type in the test box to ensure it’s correct. Click “Continue.”
- Multimedia Codecs: The installer will ask if you want to install multimedia codecs. It’s highly recommended to check this box. These codecs enable playback of common media formats like MP3s, MP4s, and various video types, improving your out-of-the-box experience. You’ll need an internet connection for this. Click “Continue.”
Partitioning Your Disk: The Heart of the Installation
This is where you decide how Linux Mint will use your hard drive. This step requires careful attention.
Automatic Installation (Erase Disk)
- Option: “Erase disk and install Linux Mint”
- Best for: Users who are dedicating their entire hard drive to Linux Mint, or who have backed up all data and want a clean slate.
- Warning: This option will wipe your entire hard drive, including any existing operating systems (like Windows) and all your data. Only proceed if you are certain you want to remove everything else from the disk.
- Procedure: If you choose this, the installer will automatically create the necessary partitions (root, swap, EFI System Partition if needed). It’s the simplest method.
Manual Partitioning (Something Else)
- Option: “Something else”
- Best for:
- Users who want to dual-boot Linux Mint alongside another operating system (e.g., Windows).
- Users who want custom partition layouts.
- Advanced users who understand disk management.
- Procedure (simplified for dual-booting with Windows – assumes you’ve already shrunk your Windows partition):
- Select “Something else” and click “Continue.”
- You’ll see a list of your disk partitions. Identify the free space you created for Linux Mint (it will be listed as “free space”).
- Create a Root Partition (
/):- Select “free space” and click the
+button. - Size: Allocate most of your free space here (e.g., 50-100GB or more).
- Type for the new partition: “Primary” or “Logical” (Primary is generally fine).
- Location for the new partition: “Beginning of this space.”
- Use as: “Ext4 journaling file system.”
- Mount point:
/(this is your root directory, where the OS will be installed). - Click “OK.”
- Select “free space” and click the
- Create a Swap Partition:
- Select the remaining “free space” and click the
+button. - Size: Typically, this should be equal to your RAM, or 2GB if you have ample RAM (8GB+). If you plan to hibernate, make it equal to your RAM.
- Use as: “swap area.”
- Click “OK.”
- Select the remaining “free space” and click the
- Choose Boot Loader Installation: At the bottom, ensure the “Device for boot loader installation” is set to the correct drive (usually
/dev/sdaor/dev/nvme0n1if you’re installing to the main drive, NOT a partition like/dev/sda1). If dual-booting, this should point to the main disk device, not a specific partition. - Review your changes carefully before clicking “Install Now.” The installer will show a summary of the partition changes. Confirm if everything looks correct.
Setting Up Your User Account and Location
- Who are you? Enter your name, your computer’s name (how it will appear on the network), your username, and a strong password. Remember your password, as it’s crucial for system changes. You can choose to log in automatically or require a password. For security, requiring a password is recommended. Click “Continue.”
- Where are you? Click on your location on the map, or type it in. This sets your time zone. Click “Continue.”
The Final Countdown: Installation Completion
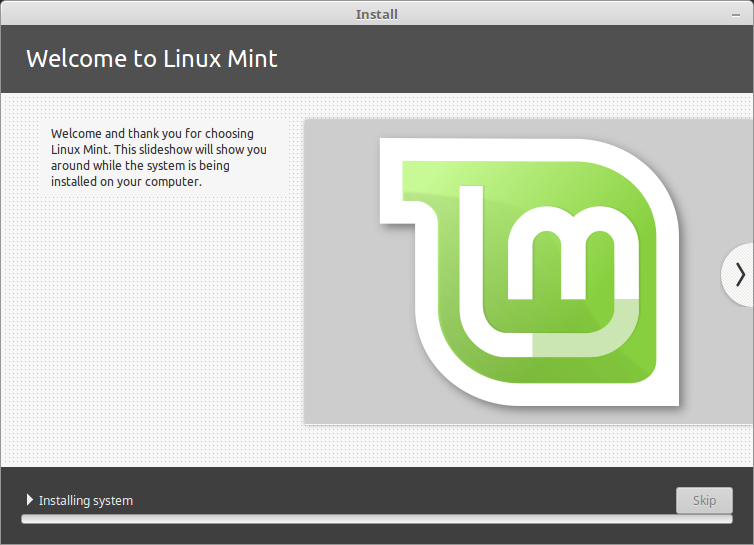
The installer will now begin copying files and setting up your system. This process can take anywhere from 15 to 45 minutes, depending on your computer’s speed. You’ll see a slideshow of Linux Mint features and tips while you wait.
Once the installation is complete, a prompt will appear asking you to restart your computer. Remove the USB installation media when prompted (or before restarting if no prompt appears). If you don’t remove it, your computer might boot back into the live environment.
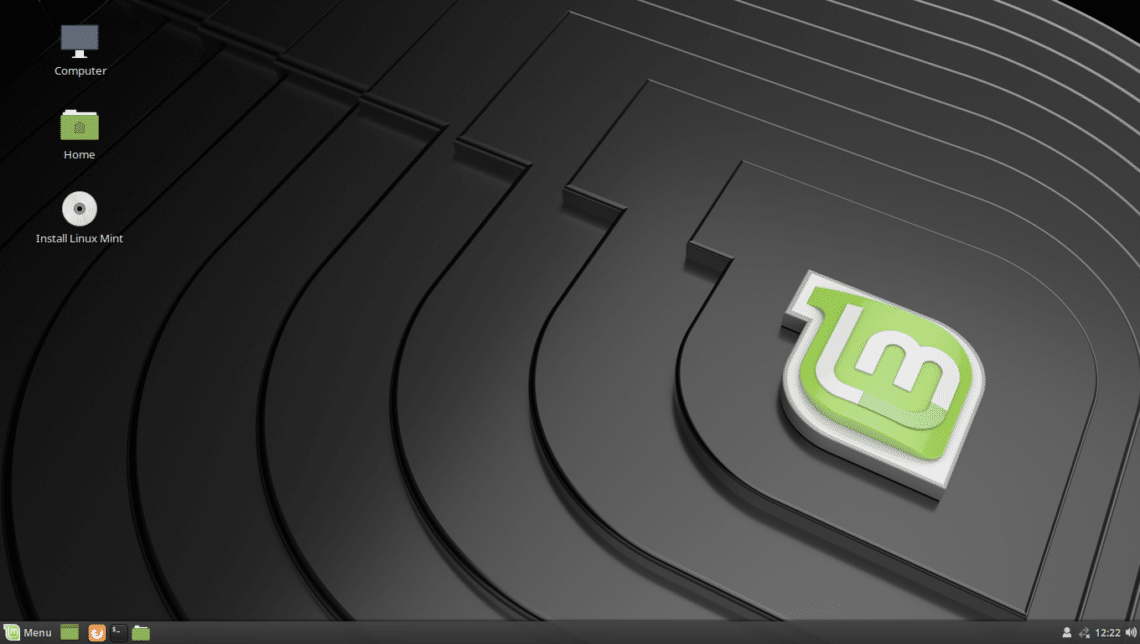
Congratulations! Your computer should now boot into your brand-new Linux Mint system.
Post-Installation Essentials: Optimizing Your Linux Mint Experience
Installing Linux Mint is just the beginning. A few crucial steps after installation will ensure your system is up-to-date, secure, and fully functional. This is where you truly start to personalize and optimize your “Tech” environment.
Updating Your System: Keeping Mint Fresh and Secure
This is the most important step after installation.
- Launch Update Manager: Find the “Update Manager” in your applications menu (usually under “Administration” or just search for “Update Manager”).
- Switch Mirrors (Optional, Recommended): The Update Manager will likely suggest switching to a local mirror for faster updates. This is a good idea. Click “Yes,” choose a local mirror for both main and base, and click “OK.”
- Refresh and Install Updates: Once the mirrors are set, click “Refresh” and then “Install Updates.” This will download and apply all the latest security patches, bug fixes, and software updates. It’s common to have a large number of updates after a fresh installation. You may be prompted to restart your system after a major kernel or system update.
Installing Drivers and Essential Software: Enhancing Functionality
While Linux Mint works well out of the box, some hardware (especially graphics cards or Wi-Fi adapters) might require proprietary drivers for optimal performance.
- Driver Manager: Open the “Driver Manager” from your applications menu. This tool will scan your system for hardware that might benefit from proprietary drivers. If it finds any, it will list them and allow you to install them with a few clicks. This is particularly relevant for NVIDIA graphics cards or certain Wi-Fi chips.
- Essential Software: Consider installing software you rely on. While many open-source alternatives exist, some proprietary applications are available for Linux:
- Browsers: Google Chrome, Brave, Opera (Firefox is pre-installed).
- Communication: Discord, Skype, Zoom, Telegram.
- Productivity: WPS Office (alternative to LibreOffice), Dropbox client.
- Gaming: Steam (for Linux-compatible games).
Exploring the Software Manager: Your Gateway to New Apps
The Software Manager is Mint’s central hub for discovering and installing applications.
- Browse Categories: It’s organized into categories, making it easy to find software for specific tasks (e.g., Graphics, Internet, Office, Sound & Video).
- Search: Use the search bar to find specific applications.
- One-Click Installation: Once you find an app, simply click “Install” to add it to your system. The Software Manager handles all dependencies and ensures a smooth installation process. This is a much simpler and more secure way to install software than downloading random executables from the internet.
Personalizing Your Desktop: Making Mint Your Own
Linux Mint is highly customizable, allowing you to tailor your desktop to your preferences and boost your personal “Brand” identity through your digital workspace.
- System Settings: Access “System Settings” from the menu. Here you can change:
- Themes: Adjust the look and feel of your desktop, windows, icons, and controls.
- Backgrounds: Choose from a wide selection or use your own images.
- Applets & Desklets: Add small utilities to your panel (like weather widgets) or desktop (like clocks).
- Fonts: Customize fonts for improved readability or aesthetic appeal.
- Panel Settings: Right-click on the panel (taskbar) to access its settings, where you can move it, change its size, and add or remove items.
- Desktop Settings: Right-click on the desktop to access settings for icons, grid, and other display options.
Troubleshooting Common Issues and Further Resources
Even with a smooth installation, you might encounter minor hiccups. Here are some common issues and where to find help.
Dealing with Boot Problems
- No Boot after Installation (Dual Boot): If you installed alongside Windows and your computer always boots into Windows, you might need to adjust your BIOS/UEFI settings to prioritize the Linux Mint boot loader (GRUB). Alternatively, you can use a tool like “Boot-Repair” (which can be run from your live USB) to fix GRUB issues.
- Black Screen/Freezing: This can sometimes indicate a graphics driver issue. Try booting into “Compatibility Mode” from the GRUB menu during startup, or boot with the
nomodesetkernel parameter (search online for instructions on how to add this).
Graphics and Wi-Fi Driver Challenges
- Graphics Issues: If your screen resolution is off, or graphics performance is poor, try the Driver Manager again. For NVIDIA cards, installing the proprietary driver is often necessary. If that fails, consult the Linux Mint forums or an online search for your specific graphics card model.
- Wi-Fi Not Working: Some wireless cards require specific drivers that aren’t open source. The Driver Manager should catch most of these. If not, identifying your Wi-Fi card’s model (e.g., using
lspci -nnk | grep -i netin the terminal) and searching online for “[your Wi-Fi card model] Linux Mint driver” will often lead to a solution.
Embracing the Linux Community: Where to Find Help
One of the greatest strengths of Linux is its vibrant and supportive community.
- Linux Mint Forums: The official Linux Mint forums (forums.linuxmint.com) are an excellent resource for asking questions, finding solutions, and learning from experienced users.
- Documentation: The Linux Mint documentation and user guides are comprehensive and a great starting point for understanding your new OS.
- Online Search Engines: A quick search on DuckDuckGo, Google, or your preferred search engine for “Linux Mint [your problem]” will often yield numerous forum posts, blog articles, and tutorials addressing common issues.
- YouTube Tutorials: Many content creators offer visual guides and troubleshooting tips for Linux Mint.
By leveraging these resources, you’ll not only resolve your issues but also deepen your understanding of Linux, enhancing your overall “Tech” proficiency.
Installing Linux Mint is more than just putting a new operating system on your computer; it’s an entry point into a world of open-source innovation, enhanced digital security, and potential financial savings. By following this guide, you’ve taken a significant step towards mastering your digital environment and embracing a powerful, community-driven platform. Welcome to the Linux Mint family!
aViewFromTheCave is a participant in the Amazon Services LLC Associates Program, an affiliate advertising program designed to provide a means for sites to earn advertising fees by advertising and linking to Amazon.com. Amazon, the Amazon logo, AmazonSupply, and the AmazonSupply logo are trademarks of Amazon.com, Inc. or its affiliates. As an Amazon Associate we earn affiliate commissions from qualifying purchases.