In the digital realm, the way we communicate, present information, and even the aesthetic appeal of our digital workspaces are heavily influenced by typography. From crafting a compelling presentation to designing a brand’s visual identity, the right font can make all the difference. Windows 10, a ubiquitous operating system, offers robust capabilities for managing and integrating new fonts, empowering users to personalize their computing experience and enhance their creative projects. This comprehensive guide will walk you through the straightforward process of installing fonts in Windows 10, covering various methods and offering insights into why font management is crucial for both personal productivity and professional endeavors.
The ability to install custom fonts in Windows 10 isn’t just about aesthetics; it’s a vital aspect of digital customization and professional output. For designers, marketers, and content creators, fonts are fundamental tools for establishing a unique brand voice and ensuring visual consistency across all platforms. For individuals, it’s a way to personalize their digital environment, making documents and presentations more engaging. This article aims to demystify the process of font installation, making it accessible to users of all technical skill levels.
Understanding Font Files and Formats
Before diving into the installation process, it’s helpful to understand what font files are and the common formats you’ll encounter. Fonts are essentially digital files that contain information about how characters, letters, numbers, and symbols should be displayed on your screen and printed on paper. These files dictate the typeface, size, weight (boldness), and style (italic) of the text.
Common Font File Types
The most prevalent font file formats you’ll come across for Windows are:
- TrueType Fonts (.ttf): This is one of the oldest and most widely supported font formats. TrueType fonts are scalable, meaning they look sharp at any size. They are compatible with both Windows and macOS.
- OpenType Fonts (.otf): An evolution of TrueType, OpenType fonts offer more advanced typographic features, such as ligatures, stylistic alternates, and glyph substitutions. They are also scalable and cross-platform compatible. While they can offer richer design possibilities, not all applications may fully support their advanced features.
- Font Collections (.ttc): A TrueType Collection file can contain multiple TrueType fonts within a single file. This is often used for languages with large character sets.
- Web Open Font Format (.woff/.woff2): While primarily designed for web use, you might encounter these formats. However, they are generally not directly installable in Windows for desktop application use without conversion.
When you download fonts from online repositories, they often come bundled in a ZIP archive. You’ll need to extract these files to access the actual font files (.ttf or .otf) before you can install them.
Methods for Installing Fonts in Windows 10
Windows 10 provides several intuitive methods to install new fonts. Whether you prefer a drag-and-drop approach or a more structured menu-driven process, you’ll find a method that suits your workflow.
Method 1: The “Right-Click and Install” Method (Quickest for Single Fonts)
This is the most straightforward and fastest way to install a single font file.
- Locate the Font File: Navigate to the folder where you have saved your downloaded font files (e.g., your “Downloads” folder). Ensure you have extracted the font file from any ZIP archives.
- Right-Click the Font File: Find the .ttf or .otf file for the font you wish to install. Right-click on it.
- Select “Install”: In the context menu that appears, you will see an “Install” option. Click on it.
- Admin Permissions (if prompted): Windows might ask for administrator permission to install the font. Click “Yes” to proceed.
The font will be installed silently in the background. You should now be able to find and use it in most Windows applications. This method is ideal for installing one or a few fonts at a time.
Method 2: Installing Fonts via the Font Settings Panel (Recommended for Multiple Fonts)
The Font settings panel within Windows 10 offers a centralized location to manage your fonts and is excellent for installing multiple fonts simultaneously.
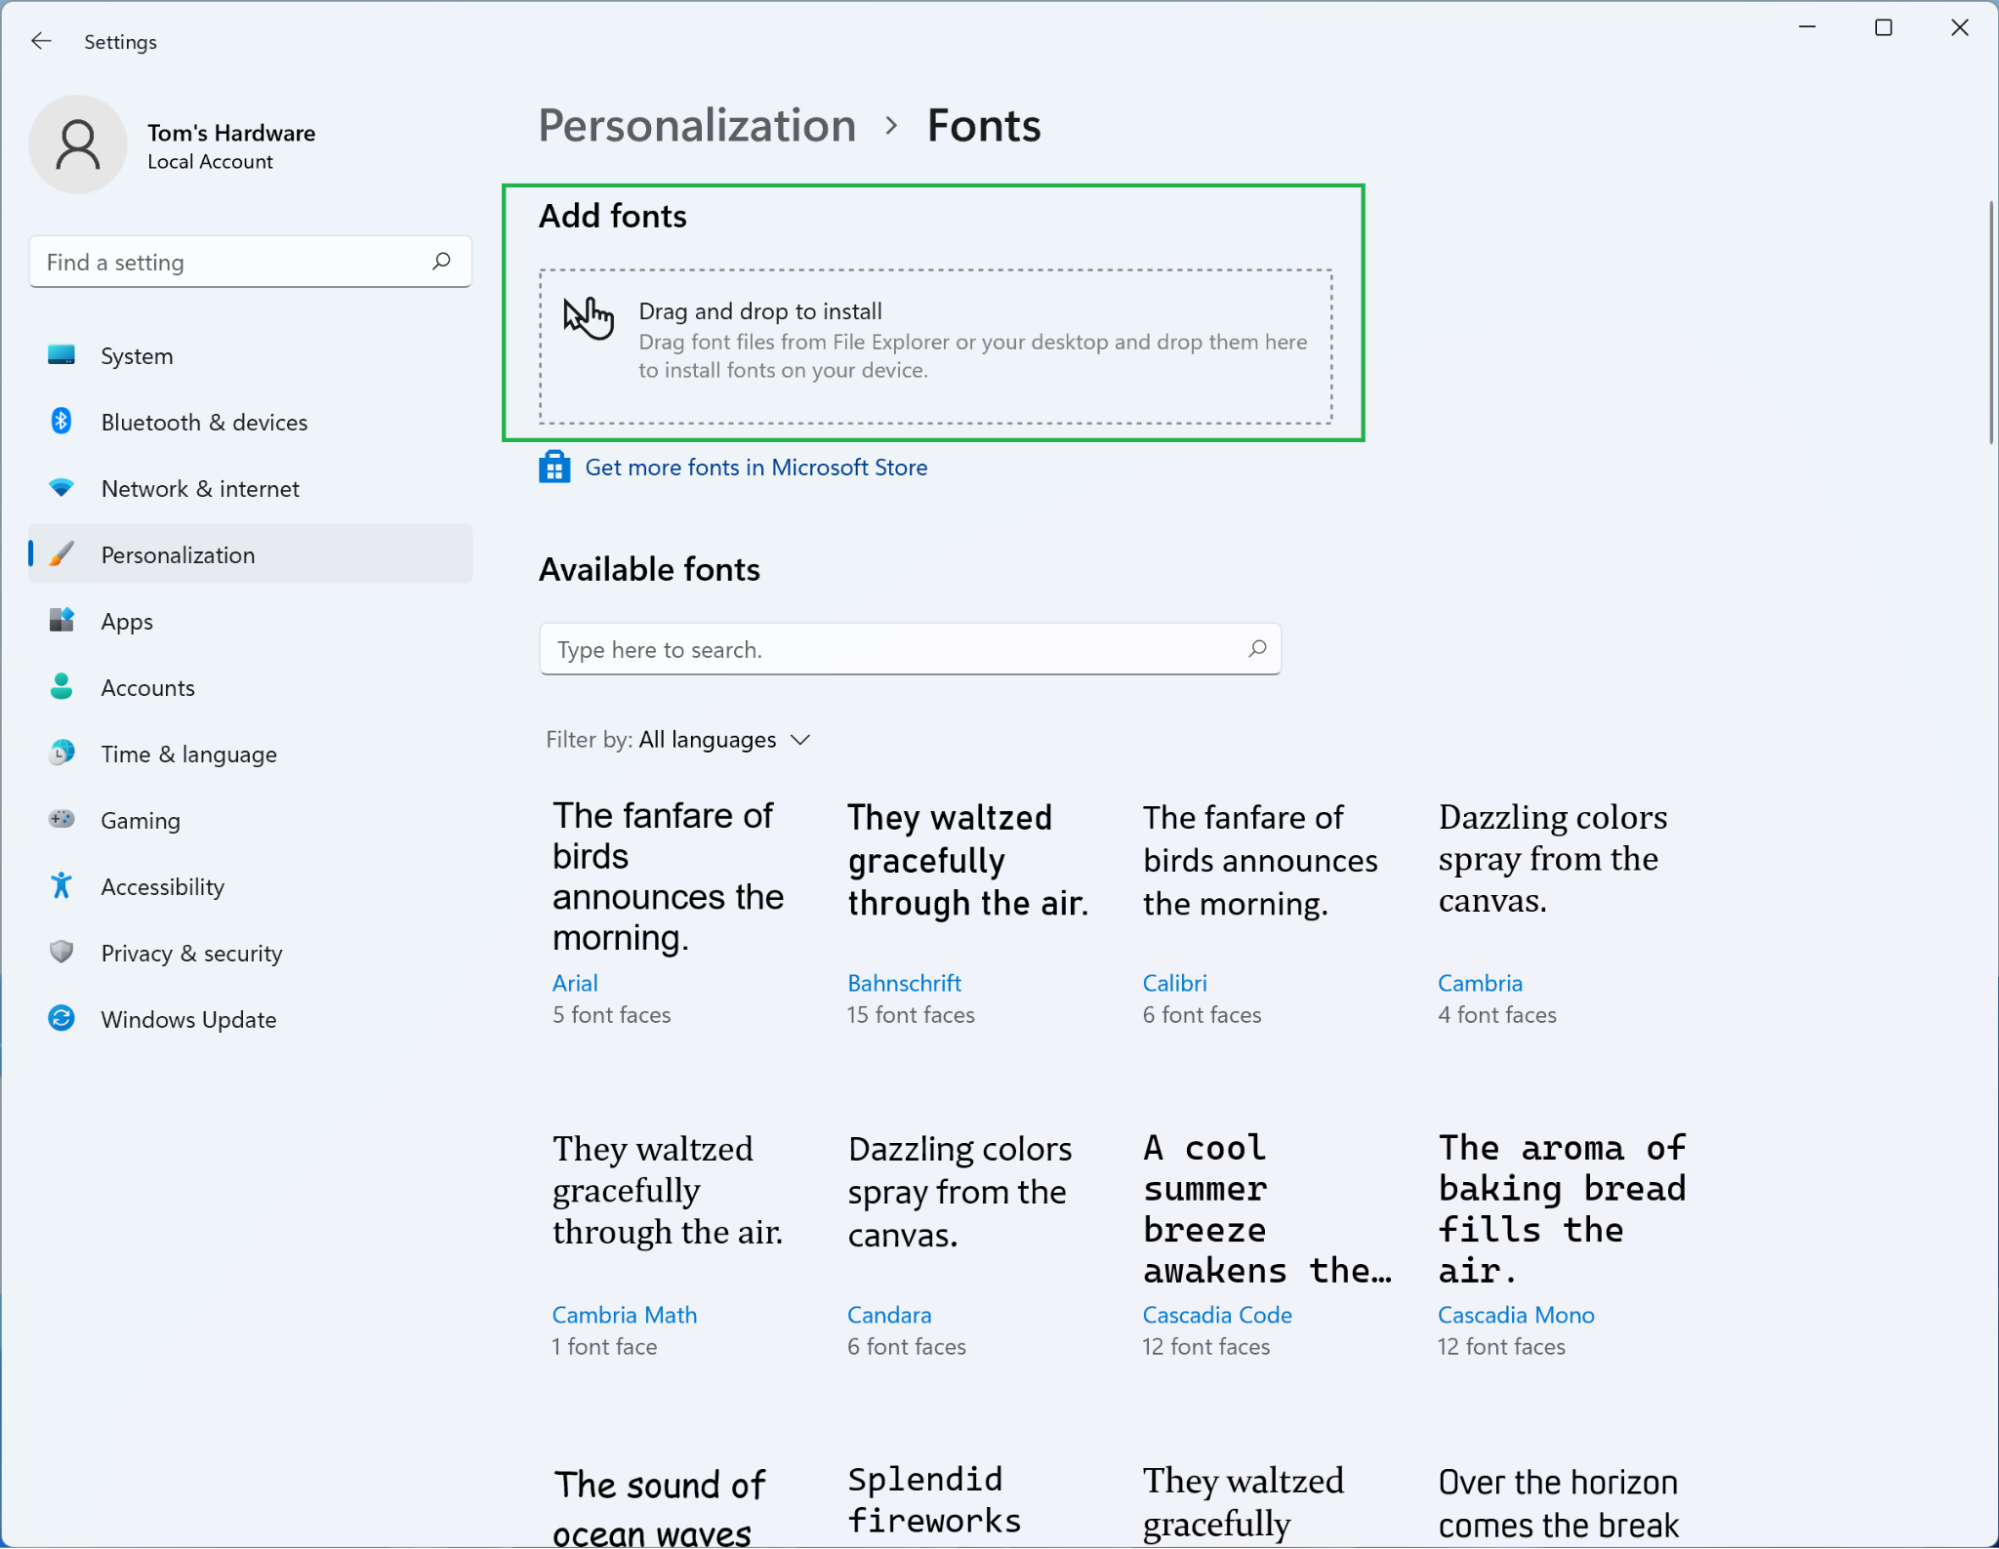
- Open Windows Settings: Click the Start button (Windows logo in the bottom-left corner) and then click on the gear icon to open “Settings.”
- Navigate to Personalization: In the Settings window, click on “Personalization.”
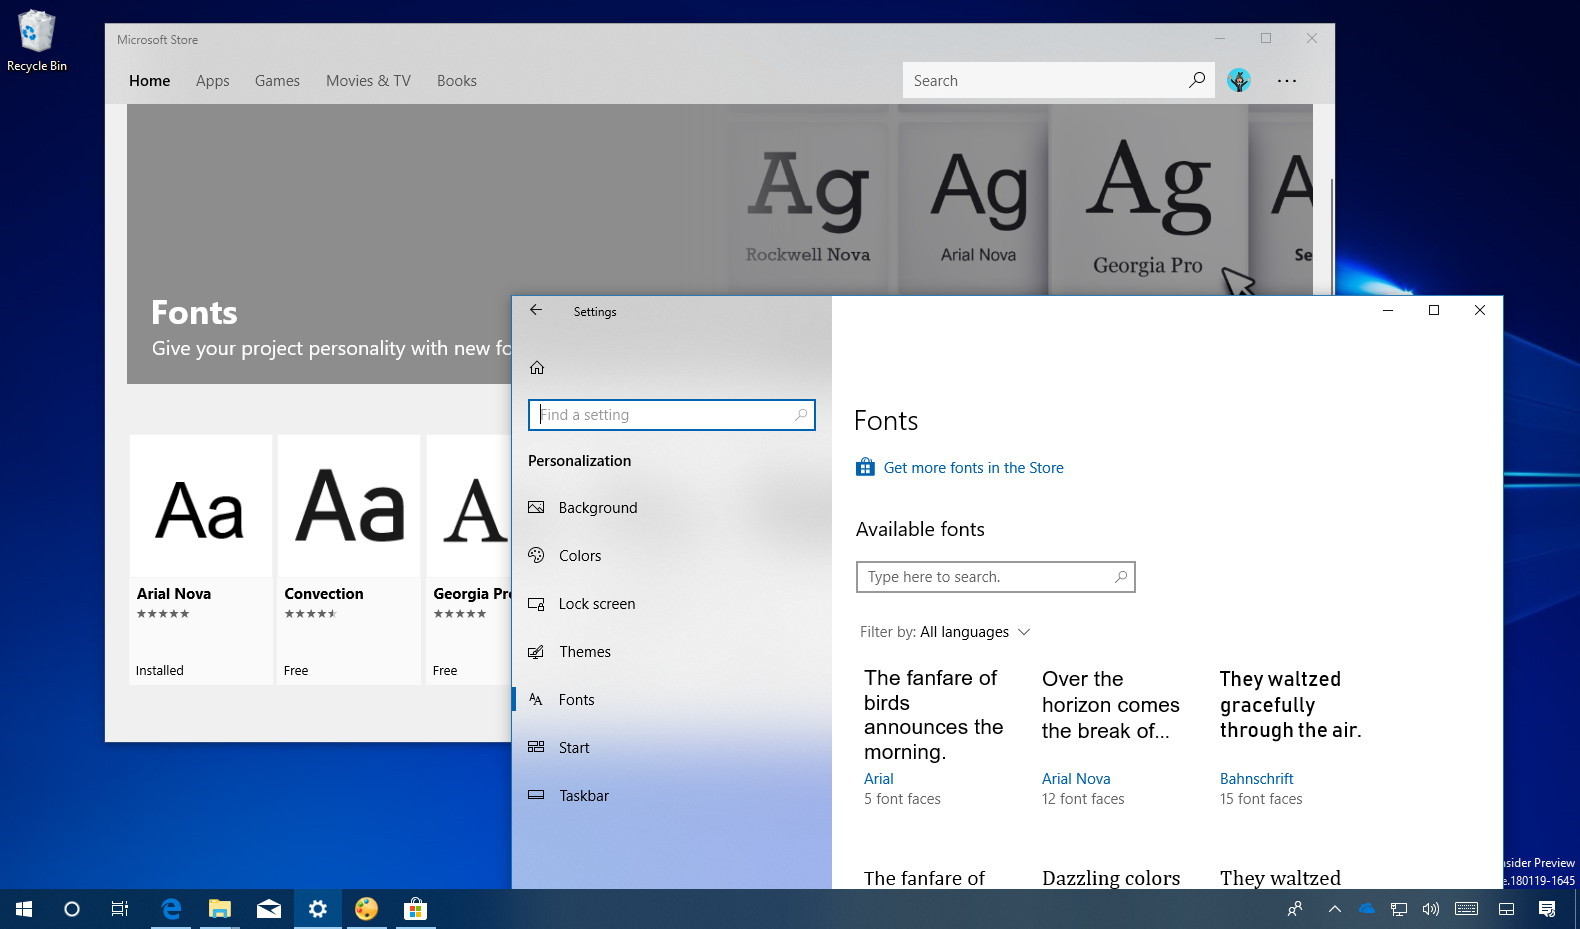
- Select “Fonts”: On the left-hand sidebar of the Personalization settings, click on “Fonts.”
- Drag and Drop to Install: You will see a section labeled “Add fonts” with a dotted box that says “Drag and drop to install.” Open your File Explorer and navigate to the folder containing your font files. Drag the .ttf or .otf font files from File Explorer directly into this dotted box in the Fonts settings.
- Automatic Installation: Windows will automatically detect and install the fonts you drag into the box. You’ll see the newly installed fonts appear in the list of available fonts below.
Alternatively, within the same Font settings panel, you can click on the “Get more fonts in Microsoft Store” link. This will open the Microsoft Store, where you can browse and download free and paid fonts directly to your system. While this is a convenient option for discovering new fonts, the drag-and-drop method is generally preferred for fonts you’ve already acquired from other sources.
Method 3: Installing Fonts via the Control Panel (Classic Method)
For users who are more accustomed to the traditional Windows interface, the Control Panel still offers a way to manage fonts.
- Open Control Panel: Search for “Control Panel” in the Windows search bar and open it.
- Navigate to Appearance and Personalization: If your Control Panel view is set to “Category,” click on “Appearance and Personalization.” If it’s set to “Large icons” or “Small icons,” look for “Fonts.”
- Open the Fonts Folder: Click on the “Fonts” option. This will open the classic Fonts folder, which displays all the fonts installed on your system.
- Drag and Drop into the Fonts Folder: Open your File Explorer and locate your font files. Drag and drop the .ttf or .otf font files directly into this Fonts folder.
- Automatic Installation: As with the Settings panel, Windows will automatically install the fonts you place in this folder.
This method achieves the same result as using the Font settings panel but provides access through the older Control Panel interface.
Managing Your Installed Fonts
Once you’ve installed new fonts, you might want to know how to view them, uninstall them, or even organize them. Windows 10 provides tools for this.
Viewing and Previewing Fonts
Both the “Settings” > “Personalization” > “Fonts” panel and the “Control Panel” > “Fonts” folder allow you to see all your installed fonts. Clicking on any font in these lists will open a preview window. This preview shows you how the font looks at different sizes and displays all the characters available in that typeface. It’s a handy way to verify an installation or to get a quick look at a font before using it in an application.
Uninstalling Fonts
If you find that you no longer need a particular font, or if it’s causing conflicts, you can uninstall it.
- Open Font Settings: Go to “Settings” > “Personalization” > “Fonts.”
- Select the Font to Uninstall: Click on the font you wish to remove.
- Click “Uninstall”: A large “Uninstall” button will appear. Click it.
- Confirm Uninstallation: Windows will ask for confirmation. Click “Uninstall” again to proceed.
Similarly, you can uninstall fonts directly from the “Control Panel” > “Fonts” folder by right-clicking on the font and selecting “Delete.” Be cautious when uninstalling system fonts, as removing essential fonts can impact the display of certain applications or even the operating system itself. It’s generally best to only uninstall fonts you’ve personally installed and are sure you no longer need.
Why Font Installation Matters: Beyond Aesthetics
The ability to install and manage fonts extends far beyond simply making your documents look pretty. In various professional contexts, it’s a critical aspect of branding, communication, and productivity.
Brand Identity and Marketing
For businesses and individuals building a brand, typography is a cornerstone of their corporate identity. A consistent brand voice is built on visual elements, and fonts play a significant role.
- Brand Recognition: Using specific, unique fonts for logos, marketing materials, and website headers can create strong brand recognition. Think of iconic logos like Coca-Cola or Google – their distinctive typography is instantly recognizable.
- Communicating Tone and Personality: Different fonts evoke different emotions and messages. A serif font might convey tradition, authority, and sophistication, while a sans-serif font could communicate modernity, simplicity, and clarity. A script font might suggest elegance or casualness. Choosing the right font for marketing collateral helps convey the intended tone and personality of the brand.
- Professionalism and Credibility: Using high-quality, well-chosen fonts enhances the perceived professionalism and credibility of a brand’s communications. Conversely, using default or poorly chosen fonts can make materials look amateurish.
Content Creation and Productivity
Whether you’re a student writing a report, a blogger creating content, or a professional preparing a presentation, fonts directly impact how your message is received and how efficiently you can work.
- Readability and Accessibility: Choosing fonts that are easy to read is paramount for effective communication. Poorly chosen or overly decorative fonts can make text difficult to comprehend, leading to reader fatigue or misinterpretation. This is especially important for long-form content.
- Visual Hierarchy: Fonts, along with their sizes and weights, are essential for establishing visual hierarchy within a document. Using different font styles for headings, subheadings, and body text helps guide the reader’s eye and makes information easier to digest.
- Personalization and Engagement: For personal projects like invitations, scrapbooks, or even just personal documents, custom fonts allow for a unique and expressive touch. This personalization can make projects more engaging and enjoyable.
- Software Compatibility: Many design and office productivity applications (like Adobe Creative Suite, Microsoft Office, etc.) allow you to import and use custom fonts. This integration is crucial for designers and professionals who rely on specific typefaces for their work.
Digital Security Considerations
While font installation is generally safe, it’s worth noting a few points regarding digital security:
- Source Reliability: Always download fonts from reputable websites. Unofficial sources might bundle malware or viruses with font files. Be cautious of free font sites that seem too good to be true.
- System Integrity: As mentioned, avoid uninstalling system-critical fonts. This can lead to instability or display errors within Windows.

Conclusion
Installing fonts in Windows 10 is a remarkably simple process that unlocks a world of customization and creative potential. Whether you’re leveraging the quick right-click method for individual fonts, utilizing the user-friendly Font settings panel for bulk installations, or relying on the classic Control Panel, the steps are clear and accessible.
Beyond mere aesthetic enhancement, the ability to effectively manage your font library is a fundamental aspect of digital literacy. It empowers individuals and businesses to craft compelling brand identities, communicate messages with clarity and impact, and boost overall productivity. By understanding the different font file formats and employing the straightforward installation methods outlined in this guide, you can confidently personalize your Windows 10 experience and elevate your digital creations to new heights. So, go ahead, explore the vast landscape of typography, and let your chosen fonts speak volumes for you.
aViewFromTheCave is a participant in the Amazon Services LLC Associates Program, an affiliate advertising program designed to provide a means for sites to earn advertising fees by advertising and linking to Amazon.com. Amazon, the Amazon logo, AmazonSupply, and the AmazonSupply logo are trademarks of Amazon.com, Inc. or its affiliates. As an Amazon Associate we earn affiliate commissions from qualifying purchases.