
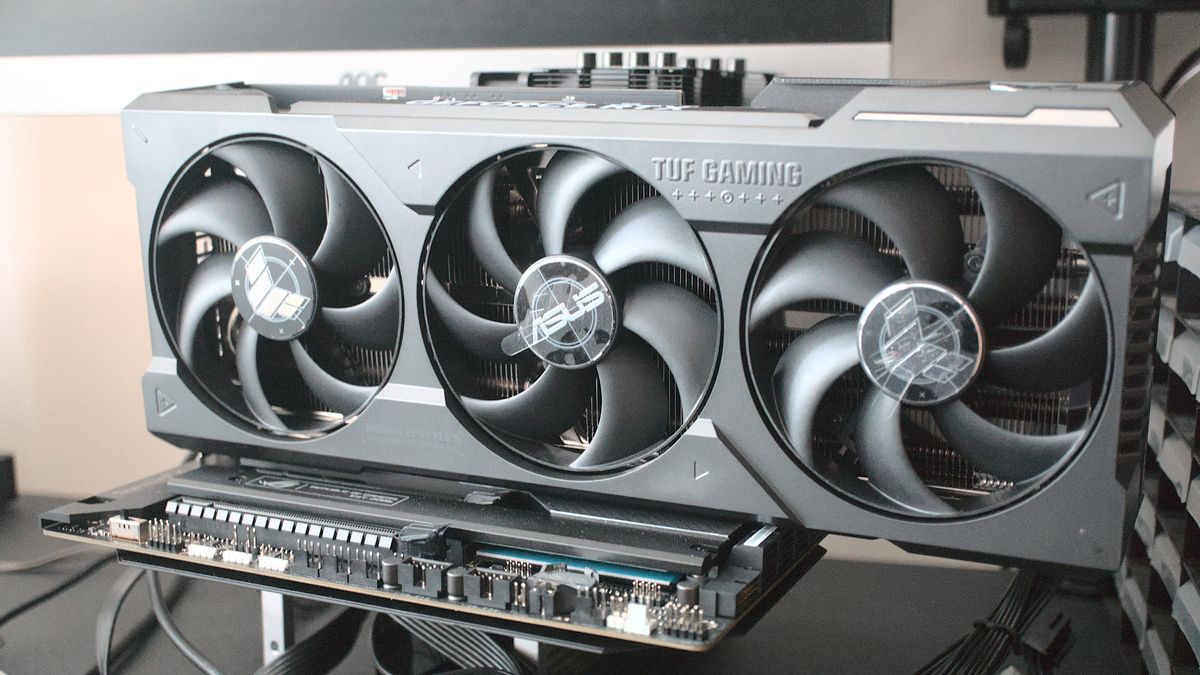
In the dynamic world of personal computing, few upgrades offer as significant a boost to performance and user experience as installing a new graphics card. Whether you’re a dedicated gamer chasing ultra-high frame rates, a creative professional demanding accelerated rendering times, or simply looking to future-proof your system for upcoming applications and virtual reality experiences, a powerful Graphics Processing Unit (GPU) is the beating heart of visual computing. This comprehensive guide will walk you through every step of installing a new graphics card, ensuring a smooth and successful transition, empowering you to unlock the full potential of your PC.
The Imperative of a Graphics Card Upgrade
Before we dive into the nuts and bolts of installation, it’s crucial to understand why a GPU upgrade is often the most impactful enhancement you can make to your system, and what foundational knowledge you need to acquire before making your purchase.
Why Upgrade Your GPU?
The reasons for upgrading a graphics card are varied, but they all converge on the desire for improved visual performance and system responsiveness.
- Gaming Dominance: For gamers, a new GPU is the holy grail. It translates directly into higher frame rates, allowing for smoother gameplay, more immersive visuals with advanced graphical settings (ray tracing, higher resolutions), and a competitive edge in fast-paced titles. As game engines evolve and demand more from hardware, an upgrade becomes necessary to keep pace with the latest releases.
- Professional Productivity and Creativity: Beyond gaming, professional applications heavily rely on GPU acceleration. Video editors experience faster rendering and real-time playback, 3D artists see quicker viewport manipulation and shorter render times, and data scientists leverage GPU compute power for complex calculations and machine learning tasks. For these users, a robust GPU isn’t just a luxury; it’s a critical tool for productivity and efficiency.
- Virtual Reality (VR) and Augmented Reality (AR): The immersive worlds of VR and AR demand incredibly high and consistent frame rates to prevent motion sickness and provide a seamless experience. Older or mid-range GPUs often struggle to meet these stringent requirements, making an upgrade essential for anyone looking to delve into these cutting-edge technologies.
- Future-Proofing Your Rig: While no PC component can truly be “future-proof,” investing in a powerful, current-generation graphics card ensures your system remains relevant and capable of handling future software and hardware demands for a longer period. It allows you to defer subsequent upgrades and enjoy the latest advancements without immediate bottlenecks.
- Display Technology Advancement: With the advent of high-refresh-rate monitors (144Hz, 240Hz, 360Hz), 4K resolutions, and ultrawide displays, an older GPU might struggle to drive these panels to their full potential. A new graphics card is often required to fully appreciate the crisp visuals and fluid motion offered by modern monitor technology.
Understanding Compatibility and Power Requirements
Before purchasing a new graphics card, meticulous research into compatibility and power is paramount. Skipping this step can lead to frustration, wasted money, or even damage to your system.
- PCIe Slot Compatibility: Modern graphics cards utilize the PCI Express (PCIe) x16 slot. Almost all motherboards manufactured in the last decade will have at least one PCIe x16 slot. While newer GPUs often use PCIe 4.0 or even 5.0, they are backward compatible with older PCIe 3.0 slots. However, using a newer card in an older slot might result in a slight performance bottleneck, though often negligible for most users. Ensure your motherboard has an available x16 slot, typically the topmost long slot closest to the CPU.
- Power Supply Unit (PSU) Wattage: This is arguably the most critical compatibility factor. Graphics cards are power-hungry components, and your existing power supply must have sufficient wattage to comfortably support the new GPU, alongside your CPU, motherboard, storage, and other peripherals. Graphics card manufacturers always specify a recommended minimum PSU wattage. It’s wise to aim for a PSU that offers a bit more headroom than the minimum recommended, ideally 100-200W above, to account for future upgrades, overclocking, and power efficiency losses over time. Undersized PSUs can lead to system instability, crashes, or even component damage.
- Power Connectors: Beyond raw wattage, modern GPUs often require dedicated PCIe power connectors (6-pin, 8-pin, or even 12-pin or 16-pin for the newest cards). Your PSU must have the correct number and type of these connectors. Modular PSUs offer flexibility, but ensure your existing unit has the necessary cables. Adapters exist but are generally not recommended for high-power cards due to potential instability.
- Physical Dimensions and Case Clearance: Graphics cards vary significantly in length, height, and thickness. Always check the dimensions of your desired GPU against the available space within your PC case. Measure the clearance from the rear of the case to the front (e.g., drive bays or front fans) and ensure the card won’t obstruct other components or chassis elements. Also, consider the card’s thickness; some high-end cards are “triple-slot” designs, meaning they occupy the space of three expansion slots, which can block other PCIe slots.
- CPU Bottlenecking: While a powerful GPU is excellent, an ancient or underpowered CPU might struggle to “feed” it enough data, leading to a CPU bottleneck. This means your GPU isn’t being fully utilized. Research your existing CPU’s performance relative to your chosen GPU to ensure a balanced system. Websites and forums often provide guides on CPU/GPU pairing.
Essential Preparations Before Installation
A successful installation hinges on thorough preparation. This isn’t just about gathering tools; it’s about setting the stage for a smooth hardware transition and ensuring software harmony.
Gathering Your Tools and Workspace Setup
Preparation minimizes potential issues and maximizes safety.
- Phillips Head Screwdriver: Essential for opening your PC case, removing the old GPU, and securing the new one.
- Anti-Static Wrist Strap: Critical for preventing electrostatic discharge (ESD) which can irreversibly damage sensitive electronic components. Attach it to an unpainted metal part of your PC chassis. If you don’t have one, regularly touch an unpainted metal part of your case to ground yourself.
- Flashlight or Headlamp: PC interiors can be dark. A light source helps you see intricate connections and slots.
- Zip Ties or Velcro Cable Ties: For effective cable management, which improves airflow and aesthetics.
- Can of Compressed Air: Useful for cleaning dust from your PC case and the PCIe slot before installing the new card.
- Clean, Well-Lit Workspace: A tidy, spacious area free of clutter ensures you have room to work and can easily see small components. Avoid working on carpeted surfaces, which generate static electricity.
Software Housekeeping: Driver Uninstallation
Before physically installing your new GPU, it’s crucial to remove all traces of your old graphics drivers. This prevents potential software conflicts that can lead to display issues, crashes, or performance problems with your new card.
- Utilize Display Driver Uninstaller (DDU): This is the industry-standard tool for a clean driver uninstallation. Download DDU from a reputable source (like Guru3D) and save it to your desktop.
- Boot into Safe Mode: Disconnect your PC from the internet. Run DDU in Windows Safe Mode. This ensures that no parts of the graphics driver are actively running, allowing for a thorough removal. DDU will guide you through the process, prompting you to select your GPU manufacturer (AMD or NVIDIA) and then offering options to “Clean and restart.”
- Why a Clean Uninstall Matters: Residual driver files from a previous card, especially if switching between AMD and NVIDIA, can cause severe instability, display artifacts, or even prevent your new card from being recognized correctly. A clean slate ensures your new drivers install without interference.
Physical Prep: Disconnecting Peripherals and Opening the Case
Safety is paramount when working inside a PC. Always take precautions to protect yourself and your components.
- Power Down and Unplug: Completely shut down your computer. Crucially, unplug the power cable from the wall outlet or the back of your PSU. Press and hold the power button on your PC for a few seconds to drain any residual power from the system.
- Disconnect Peripherals: Unplug all cables connected to your PC: monitor, keyboard, mouse, speakers, network cable, USB devices, etc. This gives you full access to the case and prevents accidental snagging.
- Move to Your Workspace: Carefully move your PC to your prepared, clean workspace.
- Open the Case: Typically, this involves unscrewing two thumb screws or regular screws on the back panel of your PC, then sliding off the side panel. Refer to your PC case manual if you’re unsure.
The Step-by-Step Graphics Card Installation Process
With preparations complete, you’re ready for the core task. Take your time, be gentle but firm, and follow these steps.
Removing the Old GPU (If Applicable)
If you’re upgrading an existing graphics card, this is your first physical step.
- Locate the Old GPU: It’s the large component usually connected to your monitor, sitting in the topmost PCIe x16 slot.
- Disconnect Power Cables: Gently unclip and unplug any PCIe power cables connected to your old GPU. These are typically 6-pin or 8-pin connectors.
- Unscrew the Retention Bracket: Graphics cards are secured to the PC case with one or two screws at the back, near the display outputs. Unscrew and remove these.
- Release the PCIe Latch: At the end of the PCIe x16 slot (opposite the display outputs), there’s a small plastic or metal latch. Carefully press or pull this latch to release the graphics card. It might be stiff.
- Gently Pull Out the Old GPU: With the screw removed and the latch released, grasp the old graphics card firmly by its sides (avoid touching the circuit board or fans) and gently but steadily pull it straight up out of the PCIe slot. Place it in an anti-static bag or its original packaging for safe storage.
Seating the New Graphics Card

Now for the main event – installing your brand new GPU.
- Unbox the New GPU: Carefully remove the new graphics card from its anti-static packaging. Hold it by its edges or the cooler shroud, avoiding contact with the gold PCIe contacts or sensitive components.
- Open the PCIe Latch: Ensure the PCIe x16 latch on the motherboard is in the open position.
- Align and Insert: Carefully align the gold PCIe contacts of the new graphics card with the PCIe x16 slot on your motherboard. The card should slide in smoothly. Apply firm, even pressure to both ends of the card until it clicks into place and the PCIe latch automatically closes (or you manually close it). You should hear a distinct click. Double-check that the card is fully seated and level.
- Secure with Screws: Re-insert and tighten the screws that secure the graphics card to the PC case bracket. This prevents the card from sagging or wiggling.
Connecting Power Cables
Modern graphics cards require dedicated power directly from the PSU.
- Identify PCIe Power Ports: Locate the PCIe power ports on your new graphics card. These are typically on the top or side of the card. Your card’s manual will confirm the required connectors (e.g., one 8-pin, two 6+2-pin).
- Route Cables Neatly: Route the corresponding PCIe power cables from your PSU to the graphics card. Try to route them behind the motherboard tray or along the case frame for cleaner aesthetics and better airflow.
- Plug In Connectors: Firmly plug the PCIe power connectors into the card’s ports. Ensure they click into place and are fully seated. Never force a connector that doesn’t fit; PCIe power connectors are keyed to prevent incorrect insertion.
- Don’t Forget Secondary Power (If Applicable): Some very high-end cards might have additional power requirements (e.g., an extra 12VHPWR connector). Consult your GPU manual.
Reassembling Your PC
Once the card is physically installed and powered, it’s time to button everything up.
- Cable Management: Use zip ties or Velcro straps to tidy up any loose cables, especially the new power cables to your GPU. Good cable management isn’t just for looks; it improves airflow within your case, contributing to better cooling for all components.
- Close the Case: Carefully slide the side panel back onto your PC and secure it with the screws you removed earlier.
- Reconnect Peripherals: Reconnect your monitor (ensuring it’s plugged into the new graphics card’s display outputs, not the motherboard’s integrated graphics ports), keyboard, mouse, power cable, and all other peripherals.
- Connect to Internet: Reconnect your Ethernet cable or ensure your Wi-Fi adapter is plugged in. This is crucial for downloading drivers.
Post-Installation: Bringing Your New GPU to Life
The physical installation is only half the battle. Software configuration is equally vital for unlocking your new GPU’s potential.
Initial Boot-Up and BIOS/UEFI Check
The moment of truth: power on your system.
- First Boot: Press the power button. Your PC should boot up normally. You might see a black screen initially, or it might boot directly into Windows with a basic display driver.
- Verify in BIOS/UEFI (Optional but Recommended): If you’re encountering issues or just want to confirm, enter your system’s BIOS/UEFI settings (usually by pressing DEL, F2, F10, or F12 repeatedly during boot). Navigate to the “Advanced” or “Peripherals” section and look for information related to “PCIe slots” or “Graphics Card.” You should see your new GPU listed or the PCIe slot it’s in marked as occupied. Ensure your primary display output is set to “PCIe” or “Discrete Graphics Card” if there’s an option. Save and exit.
Installing the Latest Graphics Drivers
This is the most critical software step. Without proper drivers, your new GPU will not perform optimally or even function correctly.
- Download Latest Drivers: Go directly to the manufacturer’s official website (NVIDIA or AMD). Navigate to their “Drivers” or “Support” section. Select your specific GPU model and operating system. Download the latest stable drivers. Avoid using drivers from the disc included with your GPU, as they are often outdated.
- Clean Install the New Drivers: Run the downloaded driver installer. Most modern installers offer an option for a “Custom” or “Clean Installation.” Select this option. A clean installation ensures any basic drivers Windows might have automatically installed are replaced, and you start fresh with the manufacturer’s optimized drivers.
- Restart Your PC: After the driver installation is complete, the installer will typically prompt you to restart your computer. Do so. This allows the new drivers to fully integrate with your operating system.
- Verify Installation: Once Windows reboots, right-click on your desktop and look for the NVIDIA Control Panel or AMD Radeon Software. Open it to confirm that your new graphics card is recognized and the software is functional. You can also check in Windows Device Manager under “Display adapters.”
Testing and Optimization
With drivers installed, it’s time to test your new powerhouse.
- Run Benchmarks: Download and run reputable benchmarking software like 3DMark, Unigine Heaven, or Cinebench (for GPU rendering). These tools will stress your GPU and provide objective performance scores you can compare online to ensure your card is performing as expected.
- Stress Test: Use tools like FurMark or MSI Kombustor for a few minutes to stress test your GPU and monitor temperatures. This helps identify any instability or overheating issues under heavy load.
- Gaming Performance: Launch your favorite demanding games. Go into the game settings and experiment with higher resolutions, increased texture quality, anti-aliasing, and other graphical enhancements. Monitor your frame rates (using in-game overlays or tools like MSI Afterburner).
- Monitoring Tools: Install monitoring software like MSI Afterburner or HWMonitor. These allow you to track GPU temperature, clock speeds, VRAM usage, and fan speeds in real-time, helping you optimize performance and ensure stable operation.
- Game-Specific Optimization: Many games have specific settings that are more taxing than others. Research optimal settings for your favorite titles to strike a balance between visual quality and frame rate.
Troubleshooting Common Issues and Maximizing Your Investment
Even with careful preparation, issues can arise. Knowing how to troubleshoot and maintain your GPU will ensure longevity and consistent performance.
Addressing Installation Hurdles
- No Display/Black Screen:
- Check Monitor Connection: Ensure your monitor cable is plugged into the new GPU’s display outputs, not the motherboard’s integrated graphics ports.
- Reseat the Card: Power down, unplug, open the case, and firmly push down on the graphics card to ensure it’s fully seated in the PCIe slot. Re-engage the latch.
- Check Power Cables: Verify all PCIe power connectors are securely plugged into the GPU and the PSU.
- Clear CMOS: If your system doesn’t POST, you might need to clear your motherboard’s CMOS (refer to your motherboard manual).
- Integrated Graphics: If you have integrated graphics, remove the new GPU, revert to integrated graphics, install the new GPU’s drivers, then reinstall the new GPU.
- System Instability/Crashes:
- Driver Conflict: Re-run DDU in Safe Mode, then reinstall the latest drivers.
- Insufficient PSU: If your PSU is borderline, consider an upgrade.
- Overheating: Monitor temperatures. Ensure proper case airflow and that GPU fans are spinning.
- Driver Installation Errors:
- Internet Connection: Ensure a stable internet connection for driver downloads.
- Antivirus: Temporarily disable your antivirus during driver installation.
- Corrupt Download: Re-download the driver package.
Maintaining Your GPU for Longevity and Performance
Your graphics card is an investment. Proper maintenance ensures it continues to deliver peak performance for years.
- Regular Cleaning: Over time, dust accumulates in the GPU’s heatsink fins and fans. Use a can of compressed air to regularly (e.g., every 3-6 months) blow dust out of your GPU and PC case. Always hold the fan blades when blowing air to prevent them from over-spinning and potentially damaging their bearings.
- Monitor Temperatures: Keep an eye on your GPU temperatures, especially under load. Tools like MSI Afterburner provide real-time monitoring. Excessive temperatures (consistently above 80-85°C) can reduce performance and lifespan. Consider improving case airflow with additional fans if temperatures are high.
- Keep Drivers Updated: Graphics card manufacturers frequently release driver updates that include performance optimizations, bug fixes, and support for new games or software. Regularly check for and install these updates (using the clean installation method as a best practice).
- Fan Curve Optimization: Software like MSI Afterburner allows you to create custom fan curves, where you can dictate how aggressively your GPU fans spin at different temperatures. This can help manage temperatures and noise levels to your preference.
- Power Efficiency Settings: In your NVIDIA Control Panel or AMD Radeon Software, explore power management settings. While “Prefer Maximum Performance” is good for gaming, you might opt for “Optimal Power” for desktop use to save energy and reduce heat.
- Physical Inspection: Every few months, briefly open your case to visually inspect your GPU. Ensure all power cables are snug, the card isn’t sagging, and there are no strange noises coming from the fans.
By meticulously following these steps, from preparation and installation to post-setup and ongoing maintenance, you’ll successfully upgrade your graphics card, revitalizing your PC and enhancing your digital experience across gaming, creative work, and everyday use. This crucial tech upgrade empowers you to stay ahead in the rapidly evolving landscape of technology, ensuring your system remains a powerful and efficient tool for years to come.
aViewFromTheCave is a participant in the Amazon Services LLC Associates Program, an affiliate advertising program designed to provide a means for sites to earn advertising fees by advertising and linking to Amazon.com. Amazon, the Amazon logo, AmazonSupply, and the AmazonSupply logo are trademarks of Amazon.com, Inc. or its affiliates. As an Amazon Associate we earn affiliate commissions from qualifying purchases.