For many, the Chromebook represents simplicity, speed, and security. It’s a device designed around the web browser, offering a streamlined experience perfect for students, casual users, and those who primarily live in the cloud. However, as technology evolves and user demands grow, a common question arises: “Can I install Linux on my Chromebook?” The definitive answer is a resounding yes, and in doing so, you can transform your lightweight, web-centric device into a versatile powerhouse capable of handling far more than just browser tabs. This guide will explore the possibilities, methods, and implications of bringing the open-source world of Linux to your Chromebook, helping you understand how this move can unlock new levels of productivity, customization, and even financial shrewdness.
The “Why”: Deeper Dive into Linux on Chromebook
The decision to install Linux on a Chromebook isn’t just about technical possibility; it’s about expanding horizons. While ChromeOS excels at its intended purpose, its tightly controlled ecosystem can feel limiting for users who crave more flexibility, deeper software access, or a robust development environment. Bringing Linux into the fold dramatically changes the game, offering a gateway to a universe of applications and capabilities previously out of reach.
Beyond the Browser: What Linux Brings to the Table
Imagine a Chromebook that can run full-fledged desktop applications like GIMP for advanced image editing, LibreOffice for comprehensive document creation, or even powerful Integrated Development Environments (IDEs) like VS Code or IntelliJ for coding and software development. This is the promise of Linux. ChromeOS, with its focus on web apps, naturally restricts the installation of traditional desktop software. Linux shatters these restrictions, providing access to a vast repository of free and open-source software (FOSS) applications covering virtually every use case imaginable.
For developers, the allure is particularly strong. A Linux environment offers a native command-line interface, access to programming languages and compilers like Python, Java, C++, Ruby, and Node.js, and essential developer tools that are either cumbersome or impossible to run directly on ChromeOS. This makes your Chromebook an ideal, portable machine for coding, scripting, web development, and even dabbling in emerging fields like AI and machine learning through specialized libraries and frameworks. It transforms a simple browsing device into a genuine workstation, ready for serious computational tasks without needing to invest in a more expensive laptop.
Beyond specific applications, Linux also offers unparalleled customization. From choosing your desktop environment (like GNOME, KDE Plasma, XFCE) to tweaking system settings, installing custom themes, and automating tasks with shell scripts, Linux puts you in complete control. This level of personalization allows you to tailor your computing experience precisely to your preferences and workflows, fostering a more efficient and enjoyable interaction with your device.
Reimagining Your Chromebook: A Cost-Effective Powerhouse
From a “Money” perspective, installing Linux on a Chromebook can be a remarkably shrewd move. Many older Chromebooks, while still perfectly functional for browsing, might struggle with the ever-increasing demands of modern web applications or feel dated. Instead of discarding them or selling them for a pittance, installing Linux can give these devices a new lease on life. This strategy effectively recycles hardware, turning a potentially obsolete gadget into a highly capable machine for productivity, learning, or development, all without spending a dime on new hardware.
Consider the cost savings on software. The vast majority of applications available for Linux are open source and free. This means no licensing fees for office suites, image editors, video editors, or developer tools. For small businesses, startups, or individuals on a budget, this can represent significant savings, channeling funds towards other critical areas instead of proprietary software licenses. Furthermore, by equipping an affordable Chromebook with a robust Linux environment, you empower yourself with tools to pursue online income opportunities, develop new skills, or manage business finances using powerful, free software. It’s an investment in functionality without the hefty price tag.
Methods for Linux Installation: Choose Your Adventure
Installing Linux on a Chromebook isn’t a one-size-fits-all process. Google itself has embraced the idea, leading to a spectrum of methods ranging from officially supported features to more advanced, unofficial modifications. Your choice will depend on your technical comfort level, the desired depth of integration, and the specific model of your Chromebook.
Crostini: The Official and Easiest Path (Linux Beta)
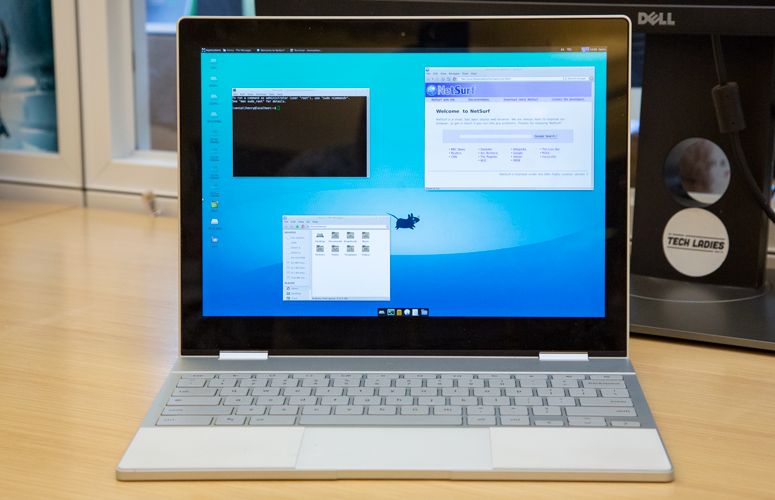
For the vast majority of modern Chromebook users, Crostini is the recommended starting point. Officially known as the “Linux development environment (Beta),” Crostini allows you to run a full Debian-based Linux distribution (typically Debian 11 “Bullseye” or 12 “Bookworm”) within a virtual machine and container setup directly on your ChromeOS device. This method is incredibly user-friendly, non-invasive, and Google-supported, meaning it integrates seamlessly with ChromeOS.
How it works: Crostini runs Linux applications in a secure container, isolated from the main ChromeOS system. You’ll find Linux apps appearing in your ChromeOS launcher, allowing you to run them alongside your web apps as if they were native. Files can be shared easily between ChromeOS and the Linux environment.
Pros:
- Easy Setup: Enabled with a few clicks in ChromeOS settings.
- Safe and Secure: Runs in a sandbox, minimizing risk to ChromeOS.
- Seamless Integration: Linux apps appear in the ChromeOS launcher and can access your ChromeOS files.
- No Developer Mode Required: Your device remains in verified boot mode, maintaining security.
- Automatic Updates: Linux container updates are handled by ChromeOS.
Cons:
- Performance Overhead: Being a virtualized environment, it might not offer raw bare-metal performance.
- Hardware Limitations: Access to hardware resources (like GPUs for intensive tasks) can be limited.
- Storage Consumption: The Linux container requires a significant chunk of internal storage.
- Not a Full Desktop Experience: While you can install desktop apps, you don’t get a full Linux desktop environment in the traditional sense; apps are launched individually.
Getting Started (Overview): Navigate to Settings > Developers > Linux development environment. Click “Turn on,” follow the on-screen prompts for setup, choose your username, and allocate storage space. Once complete, you’ll have a Debian terminal ready for apt install commands.
Dual-Booting with chrx: A Balanced Approach
If Crostini doesn’t provide enough freedom or performance, or if you have an older Chromebook, dual-booting with tools like chrx (Chromebook Linux) offers a more integrated Linux experience. This method involves partitioning your Chromebook’s internal storage to create space for a separate Linux installation, allowing you to choose between booting into ChromeOS or a full-fledged Linux distribution (like Ubuntu, Fedora, or GalliumOS) at startup.
How it works: To enable dual-booting, you must first switch your Chromebook into “Developer Mode.” This disables ChromeOS’s verified boot, allowing unsigned code (like the chrx script and your Linux distro) to run. The chrx script then resizes your ChromeOS partition and installs a bootloader, enabling you to select your OS.
Pros:
- Full Native Performance: Linux runs directly on the hardware, offering better performance than virtualization.
- Complete Linux Desktop: You get a full, customizable Linux desktop environment.
- Wider Distribution Choice: Greater flexibility in choosing your preferred Linux distribution.
Cons:
- Requires Developer Mode: This significantly reduces your device’s security and triggers a “scary screen” warning at boot.
- More Complex Setup: Involves command-line operations and understanding partitioning.
- Risk of Data Loss: Incorrect steps can lead to data loss or a “bricked” device.
- Warranty Concerns: Enabling Developer Mode can potentially void your warranty.
- ChromeOS Powerwash: Entering or exiting Developer Mode will factory reset your ChromeOS partition.
Getting Started (Overview): Backup your data. Enter Developer Mode (specific key combos vary by device). Open a shell, download the chrx script from GitHub, and run it. The script guides you through partitioning and installing your chosen Linux distribution.
Full Linux Replacement: Ultimate Freedom, Ultimate Challenge
For the most adventurous and technically proficient users, it’s possible to completely replace ChromeOS with a full Linux distribution. This method involves flashing custom firmware (like a UEFI/BIOS replacement) onto your Chromebook, which then allows it to boot virtually any Linux distribution or even Windows, just like a standard laptop.

How it works: This typically requires removing the “write-protect screw” (or disabling write-protect digitally on some models) from your Chromebook’s motherboard and then flashing a custom firmware like those developed by MrChromebox. Once the firmware is flashed, your Chromebook behaves like a regular PC, allowing you to install any OS.
Pros:
- Absolute Freedom: Your Chromebook becomes a standard laptop, free from ChromeOS limitations.
- Maximized Performance: No overhead from ChromeOS or virtualization.
- Broadest OS Compatibility: Install any Linux distro, and even Windows on compatible hardware.
Cons:
- Highest Risk: Incorrect flashing can permanently brick your device.
- Voids Warranty: Almost certainly.
- Hardware Modification: May require physical manipulation of the motherboard.
- Complex and Time-Consuming: Not for the faint of heart; requires significant technical expertise.
- Loss of ChromeOS: No going back to the native ChromeOS experience without reflashing original firmware.
Getting Started (Overview): Strongly discourage unless you know exactly what you’re doing. Research your specific Chromebook model for firmware compatibility. Disable write-protect. Use a script from reputable sources (e.g., MrChromebox’s firmware utility script) to flash the new firmware. Then, install your desired Linux distribution from a USB drive.
Key Considerations Before You Begin
Before embarking on your Linux installation journey, it’s crucial to weigh several factors to ensure a smooth and successful experience.
Hardware, Storage, and Performance Expectations
Chromebooks come in a variety of configurations. Older or lower-end models with less RAM (e.g., 2GB or 4GB) and smaller eMMC storage (e.g., 16GB or 32GB) might struggle to run a full Linux environment efficiently, especially with demanding applications. While Crostini is relatively resource-friendly, dual-booting or a full replacement will still benefit greatly from more RAM (8GB+ recommended) and a larger SSD (64GB+).
Also, consider the processor architecture. Most modern Chromebooks use Intel or AMD processors, which are fully compatible with mainstream Linux distributions. However, some Chromebooks use ARM-based processors. While Linux supports ARM, the range of available software and distributions might be more limited or require specific ARM builds. Adjust your performance expectations accordingly; a Chromebook, even with Linux, is generally not a gaming rig, but it can be an excellent productivity and development machine.
Navigating Developer Mode and Security Implications
Choosing methods like dual-booting or full replacement necessitates enabling Developer Mode. This is a critical security trade-off. In Developer Mode, ChromeOS’s “verified boot” feature is disabled, meaning the system no longer checks the integrity of the operating system code at startup. This makes your device vulnerable to tampering and malware that could persist across reboots.
Every time you boot a Chromebook in Developer Mode, you’ll see a stark warning screen (the “scary screen”) prompting you to press Ctrl+D to continue or spacebar to re-enable verified boot (which powerwashes your device). This constant reminder underscores the security implications. If security is paramount, Crostini is the only method that keeps your Chromebook in its secure, verified boot state.
Furthermore, entering or exiting Developer Mode triggers a “powerwash” – a complete factory reset of your ChromeOS data. Always back up any local files on your ChromeOS partition before making these changes.
The Learning Curve and Community Support
Linux, especially for newcomers, has a learning curve. While modern distributions are more user-friendly than ever, you’ll still encounter the command line, package managers (apt, dnf, pacman), and different ways of managing software and the system. The beauty of Linux, however, lies in its vast and vibrant community. Forums, wikis, and online communities are replete with guides, troubleshooting tips, and helpful users ready to assist. Distributions like Ubuntu, Linux Mint, or GalliumOS are particularly popular among Chromebook users due to their extensive documentation and large support bases. Embrace the learning process, and you’ll soon find yourself mastering your new environment.
Step-by-Step Overview: Getting Started with Linux
While a full, detailed installation guide is beyond the scope of this article (and varies significantly by method and Chromebook model), here’s a high-level overview of how you might proceed with each primary method. Always consult specific, up-to-date guides for your Chromebook model before starting.
Setting Up Crostini: A Quick Start
- Backup: Ensure important ChromeOS files are synced to the cloud.
- Enable Linux: Go to
ChromeOS Settings > Developers > Linux development environment. Click “Turn on.” - Configure: Follow the on-screen prompts to choose a username and allocate disk space (start with at least 10-15GB if possible).
- Launch Terminal: Once installation is complete, a Linux terminal window will open.
- Update and Install: Run
sudo apt update && sudo apt upgrade -yto update the package lists, thensudo apt install <package-name>to install your desired software.
The chrx Process: A Glimpse
- Backup Everything: Crucial, as developer mode powerwashes ChromeOS.
- Enter Developer Mode: Specific key combination (often Esc+Refresh+Power, then Ctrl+D). This will powerwash and reboot.
- Open Shell: At the ChromeOS login, press
Ctrl+Alt+Tto open a Crosh shell, then typeshelland press Enter. - Run
chrx: Download and execute thechrxscript from its official GitHub page. The script will guide you through partitioning and installing your chosen Linux distro. - Reboot: After
chrxcompletes, reboot. At the warning screen, pressCtrl+Lto access the Linux bootloader.
Replacing ChromeOS: A High-Level Guide
- Extreme Backup: This is a highly invasive process. Back up everything you value.
- Research Your Model: Determine if your specific Chromebook model supports custom UEFI firmware and identify any write-protect disabling procedures.
- Disable Write-Protect: This might involve removing a screw from the motherboard or following software-based instructions.
- Flash Firmware: Boot into ChromeOS (or a recovery environment), open a shell, download, and run a custom firmware script (e.g., from MrChromebox).
- Create Bootable USB: Prepare a USB drive with your chosen Linux distribution’s ISO image.
- Install Linux: Boot from the USB drive and proceed with a standard Linux installation, erasing the entire internal drive.

Conclusion: Empowering Your Chromebook for the Future
The question “Can I install Linux on Chromebook?” is no longer a niche inquiry but a gateway to a significantly enhanced computing experience. Whether you opt for the simplicity of Crostini, the balance of dual-booting, or the ultimate freedom of a full Linux replacement, you are taking control of your device and unlocking its true potential.
For the tech-savvy, this means access to a boundless ecosystem of software, robust development tools, and unparalleled customization. For the budget-conscious, it offers a powerful way to extend the life and utility of existing hardware, turning an affordable Chromebook into a versatile machine capable of handling demanding tasks and fostering new skills without additional investment. This intersection of “Tech” innovation and “Money” saving makes the move to Linux on Chromebooks not just a technical upgrade, but a smart strategic decision.
As technology trends continue to push the boundaries of what’s possible with compact, efficient devices, integrating Linux with Chromebooks stands out as a prime example of user empowerment. It demonstrates that with a bit of curiosity and effort, you can transform a seemingly simple gadget into a sophisticated tool perfectly tailored to your digital life and aspirations. Dive in, explore, and redefine what your Chromebook can do.
aViewFromTheCave is a participant in the Amazon Services LLC Associates Program, an affiliate advertising program designed to provide a means for sites to earn advertising fees by advertising and linking to Amazon.com. Amazon, the Amazon logo, AmazonSupply, and the AmazonSupply logo are trademarks of Amazon.com, Inc. or its affiliates. As an Amazon Associate we earn affiliate commissions from qualifying purchases.