
In the rapidly evolving landscape of digital assets, managing your cryptocurrency effectively requires a nuanced understanding of various platforms and their functionalities. For many, Coinbase serves as the initial gateway into the crypto world, offering a user-friendly experience for purchasing, selling, and holding a wide array of digital currencies. However, as users mature in their crypto journey, the desire for greater control, enhanced security, and access to the burgeoning decentralized finance (DeFi) ecosystem often leads them to explore self-custodial solutions like the Coinbase Wallet. This guide delves into the technical process of transferring your crypto assets from the Coinbase exchange to your Coinbase Wallet, framing it within the broader context of digital security, software tools, and the empowerment of self-custody. Understanding this transfer is not just about moving funds; it’s about leveraging technology to take full ownership of your digital wealth.
Understanding Your Digital Asset Ecosystem: Coinbase vs. Coinbase Wallet
Before initiating any transfer, it’s crucial to distinguish between Coinbase as a centralized exchange and Coinbase Wallet as a decentralized, self-custodial software application. Both are integral parts of the crypto ecosystem but serve fundamentally different roles, each with its own set of technological implications and security models.
Coinbase: The Centralized Gateway
Coinbase, at its core, is a centralized cryptocurrency exchange platform. When you purchase cryptocurrencies on Coinbase, you are effectively entrusting your assets to the company. While Coinbase employs robust enterprise-grade security measures, including cold storage, multi-signature wallets, and extensive insurance policies, your private keys are managed by them. This means you do not have direct control over the cryptographic keys that prove ownership of your assets. The platform offers convenience, simplified transactions, and regulatory compliance, making it an ideal starting point for beginners. However, this convenience comes with a trade-off: you are reliant on a third party for the security and accessibility of your funds. Technologically, Coinbase acts as a custodian, managing a large database of user accounts and balances, abstracting away the complexities of blockchain interaction for the end-user.
Coinbase Wallet: Your Self-Custodial Digital Fortress
In contrast, Coinbase Wallet is a non-custodial (or self-custodial) software wallet. This means you, and only you, hold the private keys to your cryptocurrencies. When you set up a Coinbase Wallet, you are provided with a 12- or 24-word seed phrase (also known as a recovery phrase or mnemonic phrase). This seed phrase is the master key to your digital assets; anyone with access to it can control your funds. The Coinbase Wallet application itself is a user interface that interacts with various blockchain networks, allowing you to send, receive, and manage your cryptocurrencies, as well as interact with decentralized applications (dApps) and smart contracts. From a technological standpoint, it empowers you with direct control over your assets by giving you sole management of your cryptographic private keys. This fundamental shift from third-party custody to self-custody represents a significant leap in leveraging blockchain technology for personal financial autonomy.
The Strategic Imperative of Transferring Digital Assets
The decision to transfer assets from a centralized exchange like Coinbase to a self-custodial wallet like Coinbase Wallet is driven by several key technological and philosophical considerations. Primarily, it’s about enhancing control and mitigating platform-specific risks. By moving your crypto to a self-custodial wallet, you eliminate the risk of an exchange being hacked or experiencing technical failures that could prevent you from accessing your funds. It also protects your assets from potential government seizures or regulatory actions directed at the exchange. Furthermore, self-custodial wallets are the primary gateway to the vast and innovative world of decentralized finance (DeFi), NFTs, and other Web3 applications. These applications often require direct interaction with your wallet’s private keys, which is only possible with a self-custodial solution. This transfer is thus a strategic technical maneuver, shifting from a managed service to a self-managed, blockchain-native interaction model.
Preparing for a Secure Digital Asset Transfer
A successful and secure transfer of digital assets necessitates thorough preparation. This involves securing both your sending platform (Coinbase) and your receiving platform (Coinbase Wallet), as well as understanding the technical nuances of blockchain networks and their associated costs.
Verifying Your Coinbase Account Security
Before initiating any transaction, ensure your Coinbase account is as secure as possible. This means having two-factor authentication (2FA) enabled, preferably using an authenticator app (like Google Authenticator or Authy) rather than SMS, which can be vulnerable to SIM-swapping attacks. Use a strong, unique password for your Coinbase account. It’s also advisable to review your account activity for any suspicious logins and consider enabling address whitelisting if available. Address whitelisting allows you to pre-approve specific wallet addresses, preventing funds from being sent to unapproved destinations, adding an extra layer of security. This preemptive security audit minimizes the risk of unauthorized access during the transfer process.
Setting Up and Securing Your Coinbase Wallet
If you haven’t already, download and set up your Coinbase Wallet application. During setup, you will be prompted to generate and securely store your 12-word seed phrase. This is the single most critical step. Write down your seed phrase on paper, store it offline, and in multiple secure, discreet locations. Never store it digitally (e.g., in cloud storage, screenshots, or email), as this exposes it to hacking risks. Ensure no one is watching you when you write it down. Set a strong PIN or enable biometric authentication (fingerprint, Face ID) for quick access to the app on your device. Understanding that the seed phrase is the ultimate key to your funds is paramount from a digital security perspective; its compromise means losing all your assets.
Understanding Network Fees and Compatibility
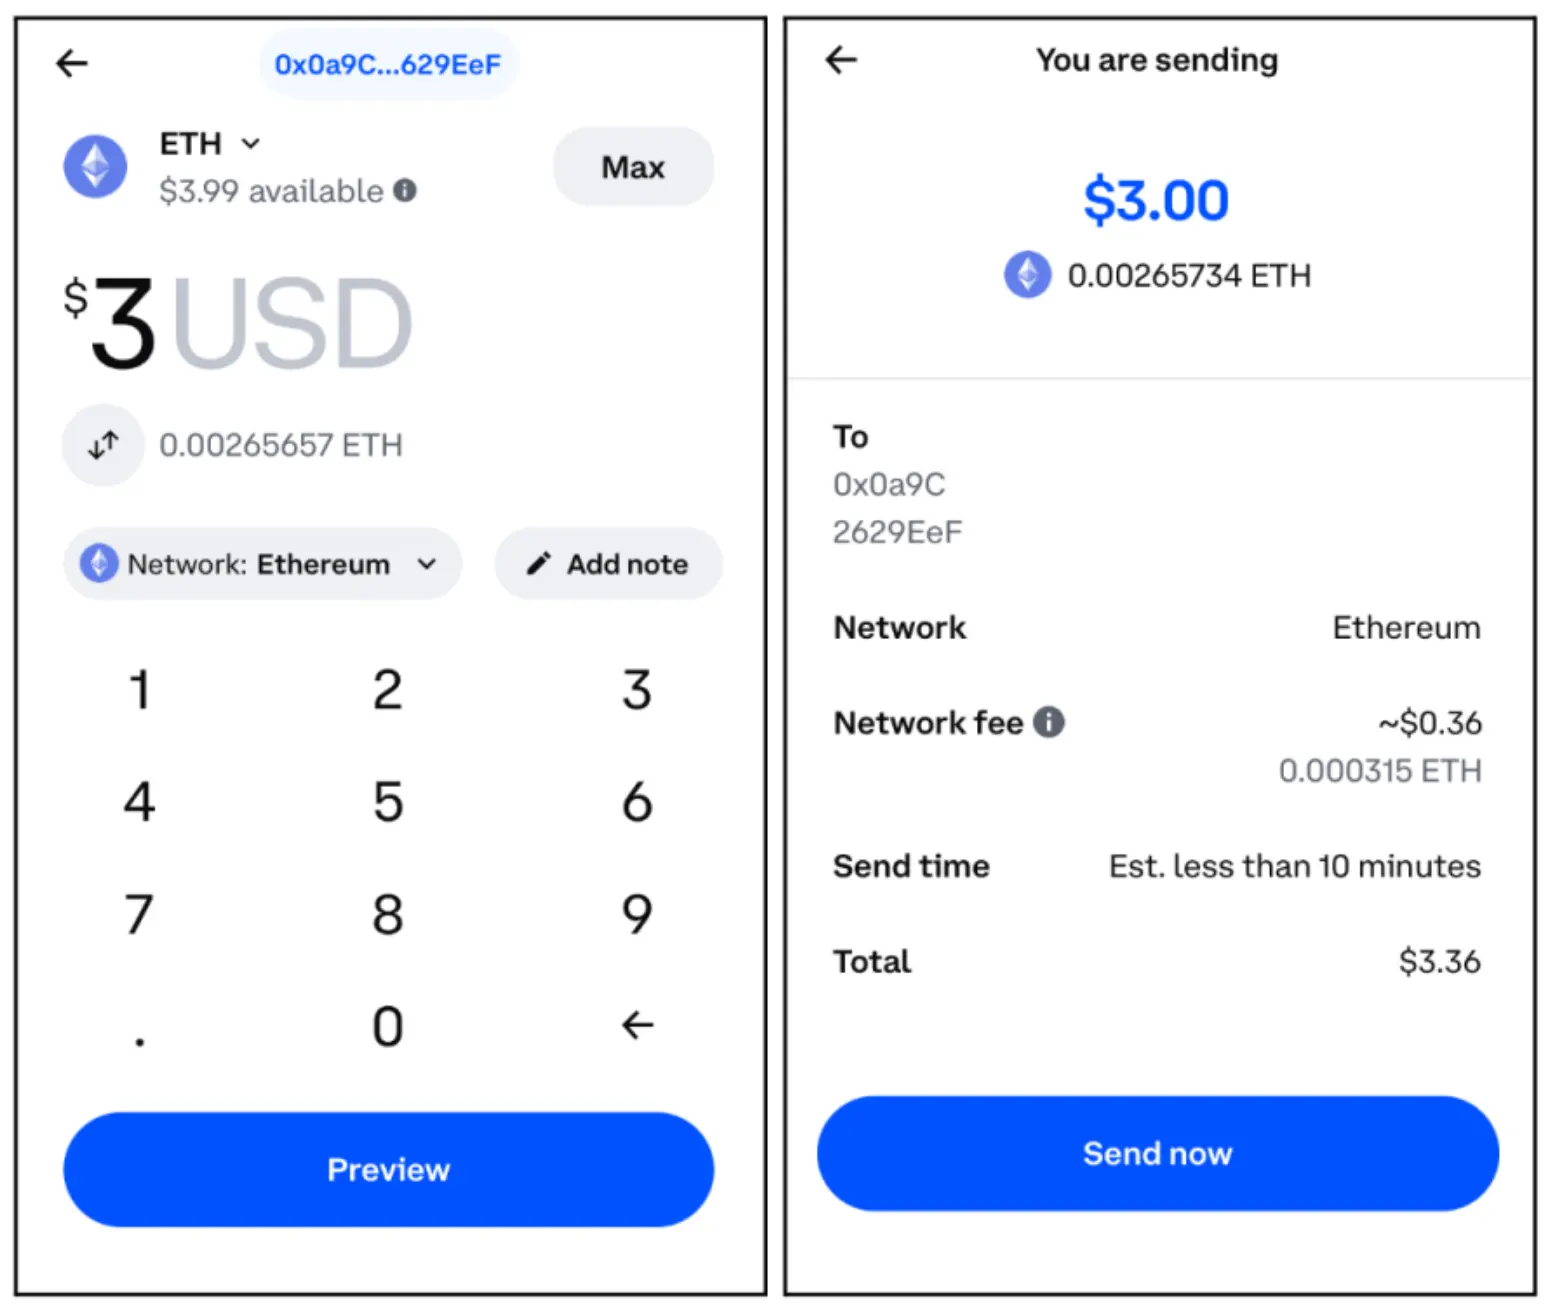
Each cryptocurrency operates on its own blockchain network, and transactions on these networks incur fees, often referred to as “gas fees” for Ethereum-based tokens. The amount of the fee can fluctuate based on network congestion. It’s vital to ensure that the cryptocurrency you are transferring is supported by both Coinbase and Coinbase Wallet and that you are sending it over the correct network. For instance, sending an ERC-20 token (like ETH or USDC on the Ethereum network) to an address on a different network (like Binance Smart Chain) will likely result in permanent loss of funds. Coinbase Wallet supports a wide range of cryptocurrencies and networks, but always double-check compatibility for specific tokens. Be aware that the transfer process involves two distinct entities: Coinbase’s internal systems and the external blockchain network. While Coinbase might not charge a fee for sending to Coinbase Wallet, the underlying blockchain network will always charge a transaction fee, which Coinbase typically passes on to the user.
A Step-by-Step Technical Guide to Transferring Your Crypto
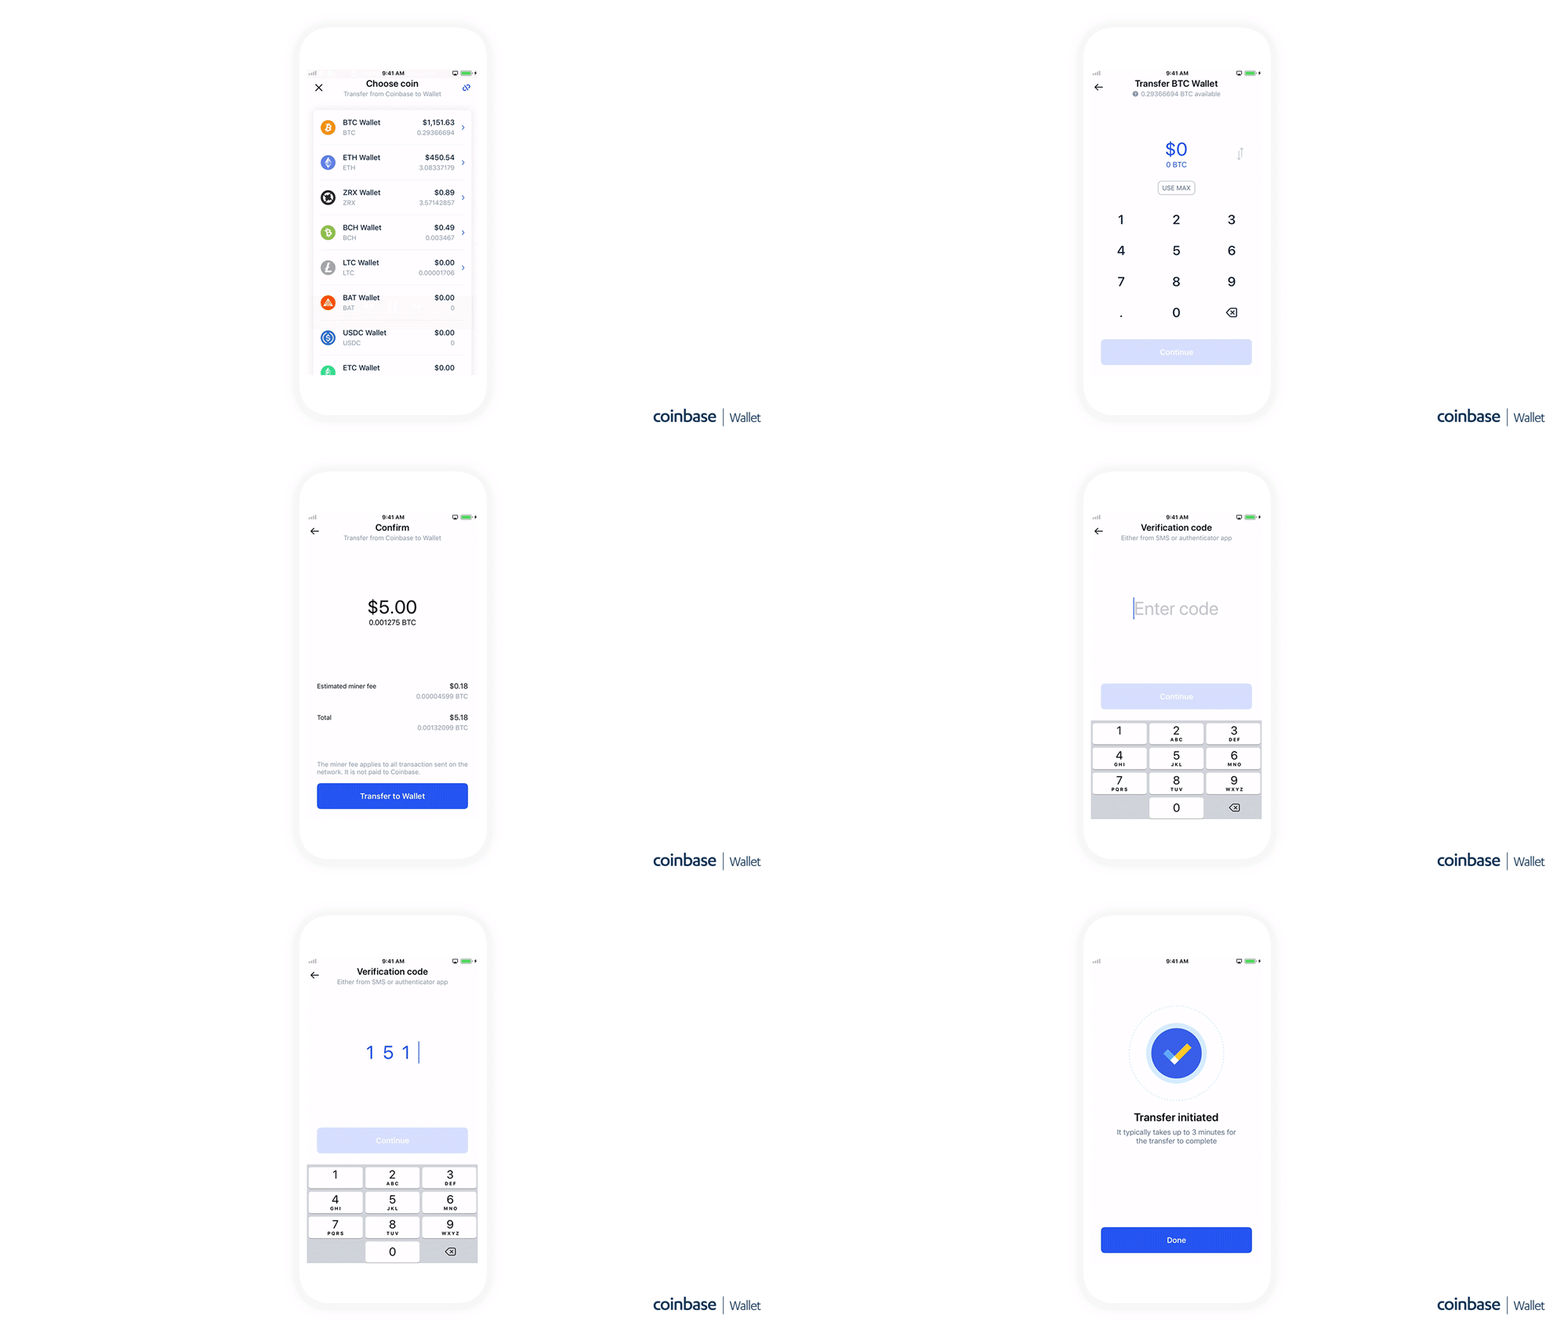
With your accounts secured and an understanding of the underlying mechanics, you are ready to execute the transfer. This sequence of steps ensures a smooth and technically sound movement of your digital assets.
Initiating the Transfer on Coinbase
- Log in to your Coinbase account: Access your account via the website or mobile app.
- Navigate to your assets: Go to the “Assets” or “Portfolio” section to view your holdings.
- Select the cryptocurrency to send: Click on the specific cryptocurrency you wish to transfer.
- Click “Send/Receive” or “Send”: This action will open the transaction interface.
- Enter the amount: Specify the quantity of crypto you want to send.
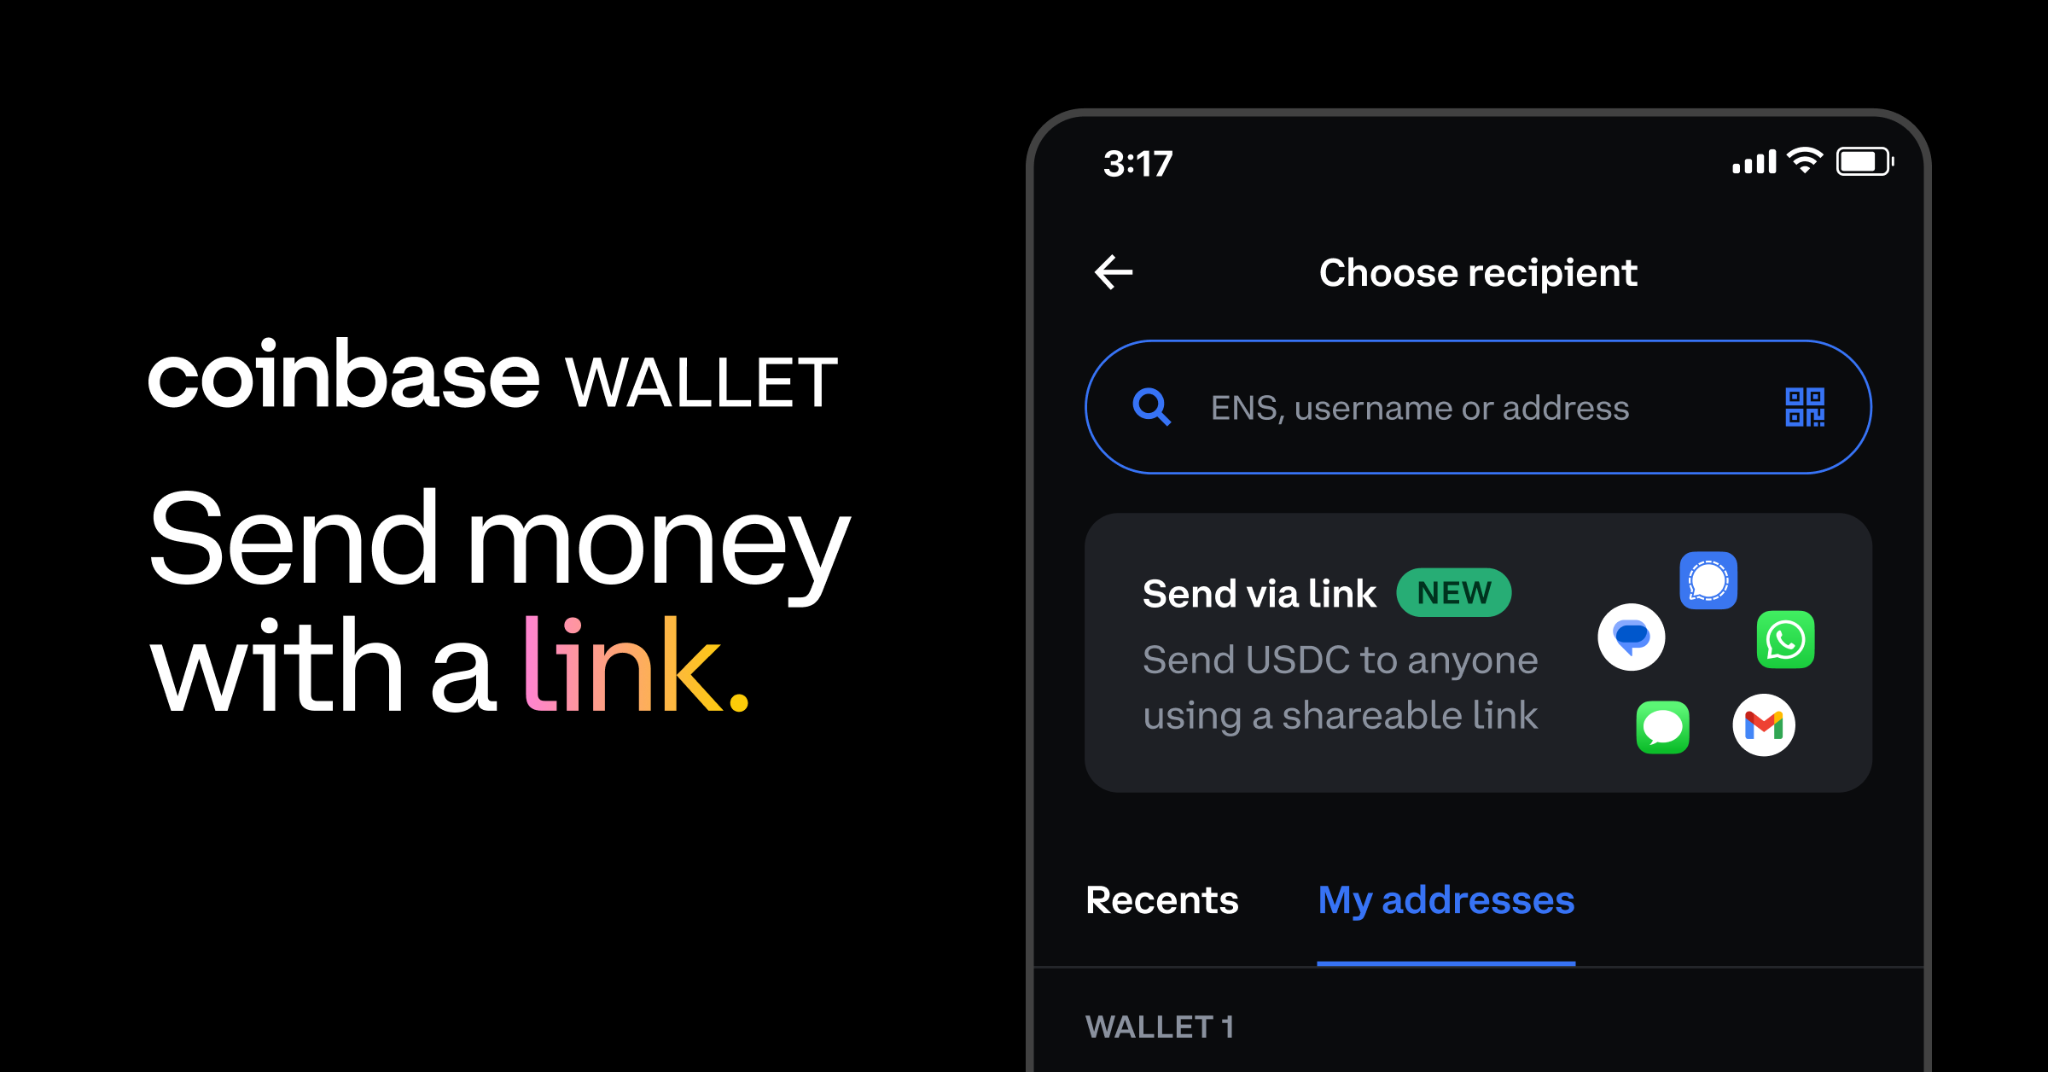
- Input the recipient’s address: This is where you will paste your Coinbase Wallet receiving address. Crucially, ensure this address is correct and corresponds to the exact cryptocurrency and network you are sending. Even a single incorrect character can lead to irreversible loss of funds.
Generating Your Coinbase Wallet Receiving Address
- Open your Coinbase Wallet app: Unlock it using your PIN or biometrics.
- Select the cryptocurrency: On the main screen, find and tap the cryptocurrency you intend to receive.
- Tap “Receive”: This will display your public wallet address for that specific asset. You will typically see a QR code and the alphanumeric address.
- Copy the address: Use the copy function to accurately copy the entire address. Do not attempt to type it out manually.
Confirming and Executing the Transaction
Once you have copied the Coinbase Wallet receiving address:
- Paste the address into Coinbase’s send field.
- Double-check the address: Critically compare the first few and last few characters of the pasted address on Coinbase with the original address in your Coinbase Wallet. Many successful hacks involve malware that swaps a copied wallet address with a malicious one.
- Review transaction details: Confirm the amount, the receiving address, and any associated network fees.
- Confirm the transaction: Coinbase will likely prompt you for your 2FA code as a final security check. Enter the code to authorize the transfer.
- Monitor the transaction: After confirmation, the transaction will be broadcast to the blockchain. You can often view its status on Coinbase or by using a blockchain explorer with the transaction ID provided by Coinbase. Transaction finality varies by blockchain; Ethereum transactions usually take a few minutes, while others might be faster or slower.
Optimizing Digital Security and Transaction Efficiency
The transfer is merely the first step in a journey of self-custody. Ongoing vigilance and adherence to best practices are essential for maintaining the security and efficiency of your digital assets.
Best Practices for Wallet Security Beyond Transfer
Now that your assets are in your self-custodial Coinbase Wallet, you bear the full responsibility for their security.
- Secure your seed phrase: Reiterate storing your seed phrase offline in multiple, physically secure locations. Consider advanced methods like steel plates for fire and water resistance.
- Be wary of phishing: Never click on suspicious links or respond to unsolicited messages asking for your seed phrase or private keys. Coinbase support will never ask for these.
- Hardware wallets: For significant amounts of crypto, consider upgrading to a hardware wallet (e.g., Ledger, Trezor). These devices store your private keys in a secure, offline chip, requiring physical confirmation for transactions, providing the highest level of security against online threats. Your Coinbase Wallet can often be connected to or restored on a hardware wallet for enhanced protection.
- Regular backups: Ensure your seed phrase backups are intact and readable.
- Software updates: Keep your Coinbase Wallet app updated to benefit from the latest security patches and features.
Monitoring Transaction Status and Troubleshooting Common Issues
After sending, it’s normal to feel anxious. Blockchain transactions are immutable once confirmed, but they aren’t always instantaneous.
- Blockchain Explorers: Use a blockchain explorer (e.g., Etherscan for Ethereum, PolygonScan for Polygon) by pasting your transaction ID (hash) from Coinbase to monitor its real-time status. This provides transparent, verifiable information directly from the network.
- Network Congestion: If a transaction is pending for an unusually long time, it might be due to network congestion or low gas fees. While you typically can’t reverse a transaction, some wallets offer “speed up” or “cancel” options for pending transactions, though these can be complex and involve higher fees.
- Incorrect Address: If you sent funds to an incorrect address, especially one that isn’t yours, the funds are almost certainly lost forever. This underscores the critical importance of double-checking addresses.
- Coinbase Support: If you encounter issues on the Coinbase side (e.g., the transaction not showing as sent), contact Coinbase support. For issues with the Coinbase Wallet or blockchain network, support might be more limited, as self-custody implies self-responsibility.
The Future of Self-Custody and Decentralized Finance (DeFi)
The act of transferring crypto to a self-custodial wallet is a significant step towards embracing the full potential of blockchain technology and decentralized finance. It represents a move away from traditional financial intermediation towards an empowered, user-centric model. As the DeFi ecosystem continues to innovate with lending protocols, decentralized exchanges (DEXs), yield farming, and NFT marketplaces, having direct control over your assets via a self-custodial wallet like Coinbase Wallet becomes increasingly vital. This technological shift not only enhances security and autonomy but also opens doors to participating in a new financial paradigm built on transparency, programmability, and decentralization. The future of finance, powered by robust digital tools and a deep understanding of their technical implications, lies firmly in the hands of the individual.
aViewFromTheCave is a participant in the Amazon Services LLC Associates Program, an affiliate advertising program designed to provide a means for sites to earn advertising fees by advertising and linking to Amazon.com. Amazon, the Amazon logo, AmazonSupply, and the AmazonSupply logo are trademarks of Amazon.com, Inc. or its affiliates. As an Amazon Associate we earn affiliate commissions from qualifying purchases.