
In an increasingly digitized world, peer-to-peer (P2P) payment applications have become indispensable tools for managing day-to-day transactions. Among these, Venmo stands out as a pioneering platform, transforming the way individuals send and receive money with its user-friendly interface and social integration. Far more than just a payment processor, Venmo is a technological solution designed to simplify financial interactions, making it effortless to split bills, pay friends, or even receive payments for small services.
For anyone looking to embrace the convenience of digital payments, understanding the precise steps involved in setting up a Venmo account is crucial. This guide delves into the technical process of getting started with Venmo, from initial download to securing your account, ensuring a smooth entry into the world of seamless digital transactions. We’ll explore the application’s core functionalities from a user experience and technical standpoint, emphasizing the ease of use and integrated features that define its place in the modern digital ecosystem.
The Digital Gateway: Understanding Venmo and Why It Matters
Before diving into the setup process, it’s beneficial to grasp what Venmo is at its core and why it has garnered such widespread adoption. From a technological perspective, Venmo represents an evolution in financial software, bridging traditional banking with modern mobile accessibility and social networking principles.
What is Venmo? A Seamless Payment App
At its heart, Venmo is a mobile payment service owned by PayPal, designed primarily for P2P transactions. It allows users to send and receive money using a mobile app, linking directly to bank accounts, debit cards, or credit cards. The application’s architecture is built to facilitate instant, or near-instant, transfers, eliminating the delays often associated with traditional bank transfers or the inconvenience of cash. Unlike more formal banking applications, Venmo prioritizes a streamlined user experience, making transactions feel as simple as sending a text message. Its underlying technology ensures that funds are processed securely while maintaining a high degree of accessibility for the average smartphone user.
The Convenience Factor: Bridging Digital Payments
The primary appeal of Venmo lies in its unparalleled convenience. For splitting dinner bills, sharing rent, or even reimbursing a friend for concert tickets, Venmo removes the friction often associated with these financial exchanges. Instead of fumbling for cash or navigating complex online banking portals, users can initiate and complete transactions with just a few taps. This digital convenience is especially pronounced in scenarios where physical proximity or immediate access to an ATM might be an issue. The application’s design focuses on reducing the number of steps required for a transaction, optimizing for speed and clarity in the user journey.
Beyond Transactions: A Social Payment Experience
One of Venmo’s distinguishing features, and a key aspect of its technological design, is its integrated social feed. Each transaction on Venmo can be accompanied by a note and shared publicly, with friends, or kept private. This optional social layer transforms what would typically be a purely utilitarian financial action into a more engaging, almost social media-like experience. While some users opt for complete privacy, the public feed often showcases fun, emoji-laden summaries of everyday exchanges, fostering a sense of community around financial interactions. This blend of financial utility and social engagement is a unique technological innovation that has significantly contributed to Venmo’s popularity, especially among younger demographics.
Your First Steps: Downloading and Account Creation
Embarking on your Venmo journey begins with the fundamental steps of acquiring the application and establishing your personal account. This initial phase is crucial for laying the groundwork for all future transactions and requires careful attention to detail for security and functionality.
Acquiring the App: iOS and Android
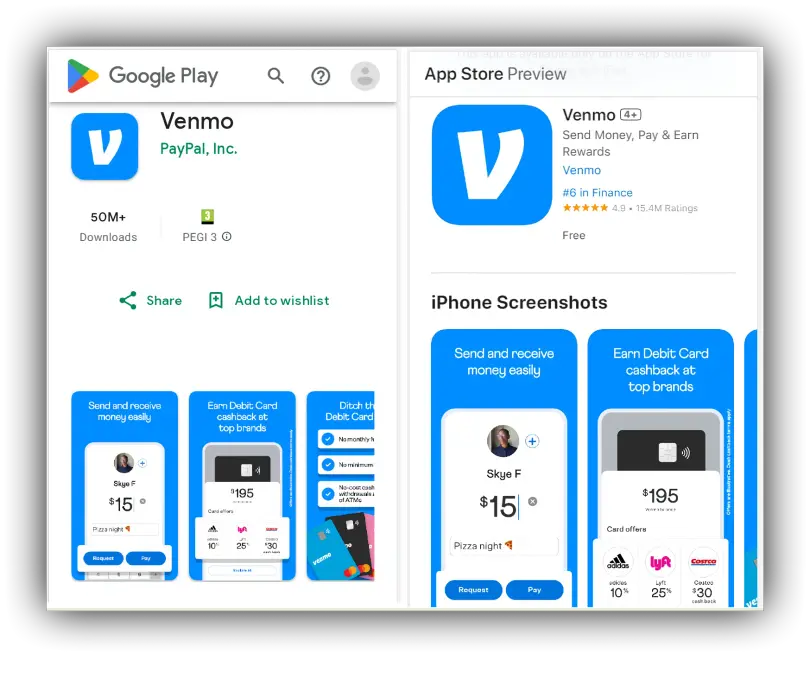
The Venmo application is universally available across the two dominant mobile operating systems: Apple’s iOS and Google’s Android. To begin, navigate to your device’s respective app store: the App Store for iOS users or the Google Play Store for Android users. In the search bar, type “Venmo” and look for the official application, identifiable by its distinct blue icon and “Venmo” branding. Once located, tap the “Download” or “Install” button. The application file size is relatively small, ensuring a quick download over Wi-Fi or mobile data. Upon successful installation, the Venmo icon will appear on your device’s home screen or app drawer, ready for launch.
The Sign-Up Process: Crafting Your Digital Identity
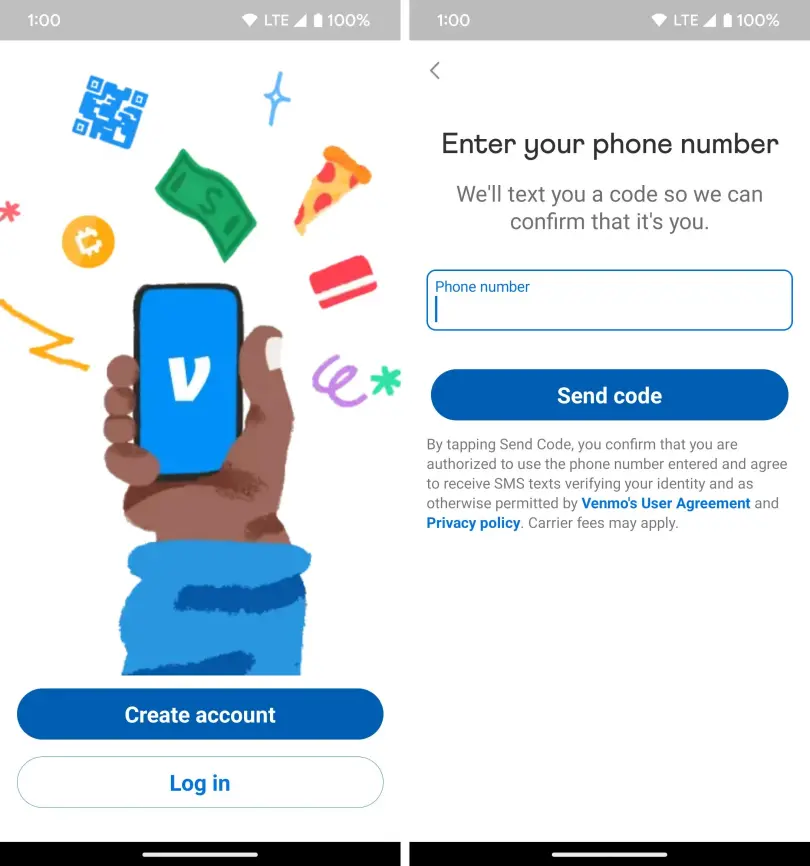
With the app installed, open Venmo to initiate the account creation process. You will be presented with an option to “Get Started.” Venmo offers multiple sign-up methods to streamline the process:
- Phone Number: This is the most common method. You’ll enter your mobile number, which Venmo will use for verification and as a primary identifier.
- Email Address: Alternatively, you can opt to sign up using an email address.
- Facebook: For added convenience, Venmo allows users to sign up using their Facebook account. This can expedite the process by pre-filling some personal information and connecting with friends already on Venmo.
Regardless of the method chosen, you will be prompted to create a secure password. It’s imperative to choose a strong, unique password that combines uppercase and lowercase letters, numbers, and symbols to protect your financial information. Next, you’ll enter your legal first and last name, which is necessary for compliance and transaction tracking. Finally, you’ll be asked to choose a unique username, which serves as your public identifier on Venmo and is how friends can easily find and pay you.
Essential Verification: Securing Your Account
Security and compliance are paramount for any financial technology application. After providing your basic information, Venmo will initiate a verification process to confirm your identity and secure your account.
- Phone Number Verification: If you signed up with your phone number, Venmo will send a verification code via SMS. You’ll need to enter this code into the app to confirm ownership of the number. This step helps prevent unauthorized account creation and ensures that critical alerts can reach you.
- Email Verification: If you used an email address, a verification link will be sent to your inbox. Clicking this link will authenticate your email address.
- Identity Verification (KYC): For certain features, such as sending large sums of money, accessing Venmo balance for cash-out, or using Venmo Debit/Credit cards, Venmo may require more extensive identity verification, often referred to as Know Your Customer (KYC) compliance. This typically involves providing your date of birth, the last four digits of your Social Security Number (SSN), or sometimes even a photo ID. This is a standard security measure designed to comply with financial regulations and protect users from fraud and illicit activities. While this step might seem intrusive, it is a crucial component of digital security in financial applications.
Connecting Your Financial Lifelines: Linking Payment Methods
Once your Venmo account is successfully created and verified, the next critical step is to link a funding source. Without a connected bank account or card, you won’t be able to send money or cash out any funds you receive. Venmo provides robust options for integrating with your existing financial infrastructure.
Integrating Your Bank Account: The Preferred Method
Linking a bank account is generally the most recommended method for funding Venmo transactions. It allows for direct debit of funds for payments and provides a pathway to transfer your Venmo balance to your bank account without incurring fees for standard transfers.
- Navigate to Settings: From the Venmo home screen, tap on the “Me” tab (your profile icon) and then the “Settings” gear icon, usually located in the top right corner.
- Payment Methods: Within Settings, find and select “Payment Methods.”
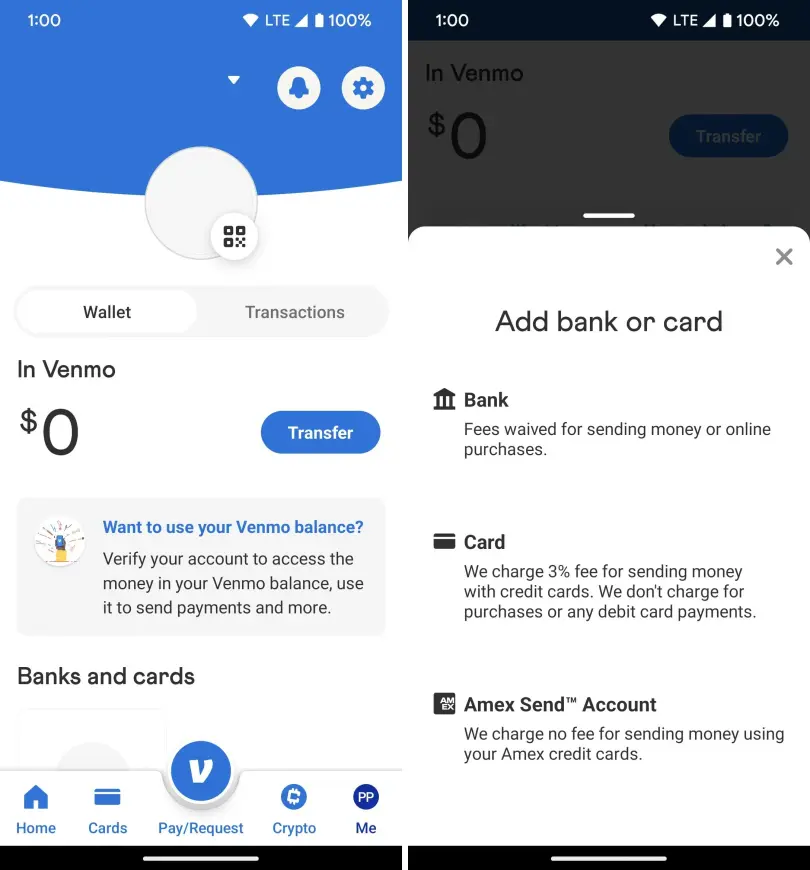
- Add a Bank or Card: Tap “Add a bank or card” and then choose “Bank.”
- Instant Verification: Venmo typically uses Plaid, a secure third-party service, for instant bank verification. This involves securely logging into your online banking portal through Venmo’s interface. This method is fast and generally recommended as it instantly links and verifies your account.
- Manual Verification: If instant verification isn’t possible or preferred, you can choose “Manually verify.” This requires you to input your bank’s routing number and your account number. Venmo will then send two small deposits (micro-deposits) to your bank account, which usually appear within 1-3 business days. Once they arrive, you’ll return to Venmo and input the exact amounts of these deposits to confirm your bank account. This ensures you are the legitimate owner of the bank account.
Adding Debit and Credit Cards: Flexibility in Funding
In addition to bank accounts, Venmo allows you to link debit and credit cards for greater flexibility.
- Follow Steps 1-3 above, but select “Card” instead of “Bank.”
- Enter Card Details: You’ll be prompted to enter your card number, expiration date, CVV (the three or four-digit security code on the back), and billing zip code.
- Automatic Verification: Debit cards are typically verified instantly. Credit cards, while accepted, often incur a 3% fee for sending money, as this helps Venmo cover processing costs. Receiving money via a credit card is free. Debit cards, like bank accounts, generally do not incur fees for sending money.
Understanding Payment Prioritization and Instant Transfers
Once multiple payment methods are linked, Venmo allows you to set a preferred payment method. When sending money, Venmo will default to this method, though you always have the option to select a different source for a specific transaction. It’s important to note the differences in transfer speeds:
- Standard Bank Transfers: Transferring your Venmo balance to a linked bank account typically takes 1-3 business days and is free of charge.
- Instant Transfers: For a small fee (usually 1.75% of the transfer amount, with a minimum fee of $0.25 and a maximum fee of $25), Venmo offers an “Instant Transfer” option, which moves funds from your Venmo balance to your linked debit card, typically within minutes. This feature provides immediate access to funds and highlights Venmo’s commitment to flexible, on-demand financial services.
Mastering the Venmo Interface: Sending, Receiving, and Privacy
With your account established and funding sources linked, you’re ready to engage with Venmo’s core functionalities. The app’s interface is designed for intuitive navigation, but understanding its nuances, particularly regarding privacy, is key to a smooth user experience.
Initiating Payments: Sending Money Made Simple
Sending money is arguably Venmo’s most frequently used feature. The process is straightforward:
- Tap the Pay/Request Icon: On the Venmo home screen, look for the “Pay/Request” icon (often a pen and paper or a dollar sign within a square) located prominently at the bottom or top right.
- Select Recipient: You can search for a recipient by their username, phone number, or email address. If they are in your phone’s contacts and also on Venmo, they will often appear automatically. You can also scan a Venmo QR code for quick payment.
- Enter Amount and Note: Input the amount you wish to send. Crucially, add a descriptive note explaining the payment (e.g., “Dinner,” “Rent,” “Concert Tickets”). This context is helpful for both parties and is a core element of Venmo’s social feed.
- Choose Privacy Setting: Below the note, you’ll see a globe icon representing the transaction’s privacy setting. You can choose from:
- Public: Visible to everyone on Venmo.
- Friends: Visible only to you and the recipient’s Venmo friends.
- Private: Visible only to you and the recipient.
For financial transactions, especially those of a sensitive nature, opting for “Private” is often the safest choice.
- Select Payment Method: Confirm the payment method you wish to use from your linked bank accounts or cards.
- Confirm and Send: Review all details carefully, then tap the “Pay” button. The funds are typically transferred almost instantly.
Requesting Funds: Getting Paid with Ease
Venmo also simplifies the process of requesting money from others, making it ideal for splitting costs.
- Tap the Pay/Request Icon: Similar to sending money, start by tapping the “Pay/Request” icon.
- Select Recipient and Switch to Request: Choose the person you want to request money from. Ensure the toggle at the top of the screen is switched to “Request.”
- Enter Amount and Note: Input the amount and a clear note explaining the request.
- Confirm and Request: Review and tap “Request.” The recipient will receive a notification and can then choose to pay you through Venmo.
Navigating the Social Feed and Privacy Controls
The Venmo social feed, while a unique feature, also requires understanding to manage your digital footprint.
- The Global Feed: By default, many transactions are public, appearing on a global feed that showcases anonymized transactions from users worldwide.
- Friends Feed: A more personalized feed displays transactions between you and your Venmo friends.
- Privacy Settings: Venmo’s settings allow for granular control over default privacy. Navigate to
Settings > Privacyto adjust who can see your future payments and past transactions. You can also retroactively change the privacy of individual past transactions if desired. Regularly reviewing these settings ensures your activity aligns with your comfort level regarding public visibility. This control over data visibility is a critical aspect of responsible use of social payment apps.
Managing Your Venmo Balance
Any money you receive on Venmo accumulates in your “Venmo balance.” This balance can be used to send payments to others, or it can be transferred to your linked bank account or debit card.
- Using Balance for Payments: When sending money, Venmo will automatically prioritize using your existing Venmo balance before drawing from your linked bank account or card.
- Transferring to Bank: To cash out your balance, go to the “Me” tab, tap “Transfer,” enter the amount, and choose your linked bank account. Select either “Standard” (free, 1-3 business days) or “Instant” (fee applies, minutes).
Enhancing Your Venmo Experience and Ensuring Digital Security
Beyond its core functionalities, Venmo offers several advanced features that cater to diverse user needs, further solidifying its position as a comprehensive digital payment solution. Crucially, understanding and implementing robust digital security practices is paramount when dealing with any financial application.
Exploring Advanced Features: Direct Deposit and Venmo Cards
Venmo has expanded its offerings to move beyond simple P2P transactions, integrating features that approach traditional banking services.
- Direct Deposit: Users can set up direct deposit to receive their paychecks directly into their Venmo balance. This feature transforms Venmo into more than just a payment app, enabling it to act as a primary financial hub for some users, effectively bypassing traditional bank accounts for certain income streams. From a technical standpoint, this involves generating specific routing and account numbers within the app that employers can use for direct deposit.
- Venmo Debit Card: This Mastercard-branded debit card is linked directly to your Venmo balance, allowing you to spend your funds anywhere Mastercard is accepted, both online and in physical stores. It effectively bridges your digital Venmo balance with the broader financial ecosystem, providing ATM access and cashback rewards for certain purchases.
- Venmo Credit Card: Introduced in partnership with Synchrony Bank, the Venmo Credit Card offers a traditional credit line with dynamic reward categories tailored to your spending habits. While a credit card, its integration with the Venmo app for management and rewards makes it a technologically cohesive offering within the Venmo ecosystem. These cards extend Venmo’s utility beyond peer-to-peer, moving into everyday spending and credit management.
Best Practices for Digital Security on Venmo
Given that Venmo deals with your money, maintaining stringent digital security is non-negotiable.
- Strong, Unique Password: Always use a complex password that is unique to your Venmo account. Avoid reusing passwords from other online services. Consider using a password manager.
- Two-Factor Authentication (2FA): Enable 2FA immediately. This adds an extra layer of security, requiring a code from your phone (sent via SMS or generated by an authenticator app) in addition to your password when logging in from a new device. This significantly reduces the risk of unauthorized access.
- Regular Review of Activity: Periodically check your Venmo transaction history for any unauthorized or unfamiliar payments. Report suspicious activity to Venmo support immediately.
- Beware of Phishing Scams: Be highly skeptical of unsolicited emails or messages claiming to be from Venmo, especially those asking for personal information, passwords, or clicking suspicious links. Always verify the sender and, if in doubt, navigate directly to the Venmo app or official website.
- Public Wi-Fi Caution: Avoid accessing your Venmo account or making transactions when connected to unsecured public Wi-Fi networks, as these can be vulnerable to eavesdropping.
- Device Security: Ensure your mobile device is password-protected, kept updated with the latest security patches, and has reliable antivirus/anti-malware software installed. Lost or stolen devices are a common vector for account compromise.
- Link Trusted Accounts Only: Only link bank accounts and cards that you solely control. Avoid linking shared accounts or cards belonging to others.
- Default Privacy to Private: For most transactions, setting the default privacy to “Private” (or “Friends” if you prefer some visibility among your network) is a wise practice to control your financial data exposure.
Troubleshooting Common Setup Issues
While Venmo setup is generally smooth, users might encounter minor hurdles.
- Verification Codes Not Arriving: Check your spam folder for email codes or ensure your phone has signal for SMS. Double-check the phone number/email entered. Contact your carrier if SMS issues persist.
- Bank Account Linking Problems: Ensure you’re entering the correct routing and account numbers. If using instant verification, verify your online banking credentials. If issues persist, manual verification is an alternative. Sometimes, a temporary hold from your bank’s security system might be the cause; contacting your bank can clarify.
- Identity Verification Delays: If providing documents for KYC, ensure they are clear, legible, and match the information you’ve provided. Processing times can vary, so patience is key.
- App Crashes/Freezes: Ensure your Venmo app is updated to the latest version. Try clearing the app’s cache or reinstalling the app. A stable internet connection is also crucial.
By diligently following these setup steps and adhering to best practices for digital security, users can confidently leverage Venmo’s powerful features to streamline their personal finances and enjoy the convenience of modern digital payments. Venmo is not just an application; it’s a testament to how technology can simplify, secure, and even socialize everyday financial interactions.
aViewFromTheCave is a participant in the Amazon Services LLC Associates Program, an affiliate advertising program designed to provide a means for sites to earn advertising fees by advertising and linking to Amazon.com. Amazon, the Amazon logo, AmazonSupply, and the AmazonSupply logo are trademarks of Amazon.com, Inc. or its affiliates. As an Amazon Associate we earn affiliate commissions from qualifying purchases.