In the increasingly digital landscape, the humble printer might seem like a relic to some, yet for countless individuals and businesses, it remains an indispensable tool. From printing essential documents and contracts to vibrant photos and creative projects, a reliable printer bridges the gap between the digital and physical realms. Among the myriad brands, HP (Hewlett-Packard) has long stood as a titan in the printing industry, renowned for its diverse range of printers catering to every need, from compact home models to robust office workhorses. Their commitment to innovation and user-friendly technology has solidified their reputation, making them a go-to choice for many.

However, the excitement of unboxing a new HP printer often gives way to a common question: “How do I install this thing?” While modern printers are designed for easier setup than their predecessors, the process can still seem daunting, particularly with the various connection methods, software requirements, and potential troubleshooting hurdles. This comprehensive guide aims to demystify the HP printer installation process, transforming what might appear as a complex technical task into a straightforward, step-by-step journey. We’ll explore everything from the initial physical setup to software installation and essential post-setup tips, ensuring your new HP printer is up and running smoothly, ready to enhance your productivity and creativity. By following these guidelines, you’ll not only successfully install your printer but also gain a deeper understanding of its functionalities, ensuring optimal performance and longevity.
Preparing for Installation: The Foundation of Seamless Printing
Before delving into the digital intricacies of software and drivers, a successful HP printer installation begins with meticulous physical preparation. Skipping these foundational steps can lead to frustrating delays and complications down the line. Think of it as laying the groundwork for a robust technological experience; a solid foundation ensures everything else falls into place effortlessly.
Unboxing and Physical Setup
Your printer’s journey from the factory to your desk starts with its unboxing. This phase is more than just removing cardboard; it’s about carefully preparing the device for its first use.
- Choose the Right Location: Select a stable, flat surface near a power outlet. Consider proximity to your computer if you plan to use a wired connection, or a central location for optimal Wi-Fi signal if going wireless. Ensure adequate space for paper trays, output trays, and ventilation.
- Remove All Packaging Materials: HP printers often come with numerous protective tapes, foam inserts, and plastic films designed to secure components during transit. Methodically remove all of them from the exterior and interior of the printer. Pay close attention to the ink cartridge area and paper path. Consult your printer’s quick start guide or manual for specific instructions, as missing even one piece of tape can prevent the printer from functioning correctly.
- Connect to Power: Plug the power cord firmly into the printer and then into a wall outlet. Avoid using surge protectors or power strips initially, as some printers require a direct connection for optimal power delivery, especially during initial startup. Turn the printer on using the power button, usually located on the front or top panel.
- Load Paper: Open the input tray and load a stack of fresh, unused paper. Adjust the paper guides to snugly fit the paper size you’re using (e.g., Letter, A4).
- Install Ink Cartridges or Toner: This is a crucial step. Open the ink cartridge access door as instructed by your printer’s manual or the on-screen prompts (if available). Remove the protective tape or seals from the new cartridges and insert them into their corresponding slots until they click into place. For laser printers, carefully unbox the toner cartridge, remove any protective seals, and insert it into the drum unit (if separate) or directly into the printer. The printer will often go through an initialization process, which may include alignment procedures.
Essential Pre-Installation Checks
Before connecting your printer to your computer or network, a few quick checks can prevent common setup headaches. These ensure your environment is ready to integrate your new tech gadget seamlessly.
- Verify System Requirements: While most modern operating systems are compatible with new HP printers, it’s wise to double-check. Ensure your computer’s operating system (Windows, macOS, ChromeOS, etc.) meets the minimum requirements specified by HP for your printer model. This information is typically found on the printer’s box or HP’s support website.
- Internet Connection (for Wireless Setup): If you plan to connect your printer wirelessly, ensure your Wi-Fi network is active, stable, and you have the network name (SSID) and password handy. A strong, reliable internet connection is vital for downloading drivers and firmware updates.
- USB Cable (for Wired Setup): If opting for a USB connection, ensure you have a standard USB A-to-B cable. This is the common printer cable with a flat rectangular end for your computer and a square-shaped end for the printer. Note that many newer HP printers, especially those designed primarily for wireless use, may not include a USB cable in the box.
- Clear USB Ports: If using a USB connection, ensure you have an available USB port on your computer. Avoid using USB hubs during the initial installation if possible, to eliminate potential points of failure.
- Disable Antivirus/Firewall (Temporarily): In rare cases, overly aggressive antivirus software or firewall settings can interfere with driver installation or network discovery. If you encounter issues, temporarily disabling them might help, but remember to re-enable them immediately after installation for digital security.
Connecting Your HP Printer: Bridging the Digital Divide
Once your HP printer is physically prepared, the next step is to establish a connection with your computer or network. HP offers various connection methods, each with its own advantages, catering to different user needs and environments. Understanding these options will help you choose the best fit for your setup, whether you prioritize simplicity, mobility, or network reliability.
USB Connection: The Classic Approach
The USB connection remains a popular choice for its simplicity and directness, particularly for home users who primarily print from a single computer.
- Do NOT Connect USB Yet: A common mistake is plugging in the USB cable before software installation. For many HP printers, it’s recommended to install the drivers first, and the software will prompt you when to connect the USB cable. This ensures the correct drivers are loaded before the operating system attempts to recognize the new hardware.
- Software Installation First: Proceed to the software installation step (covered in the next major section) and follow the on-screen prompts.
- Connect When Prompted: During the software setup, you will be explicitly instructed to connect the USB cable. Plug the square end into the printer’s USB port (usually at the back) and the rectangular end into an available USB port on your computer.
- Automatic Detection: Your computer should then detect the printer, and the software installation will proceed, recognizing the newly connected device. This method ensures that all necessary drivers and utilities are properly installed for seamless operation.
Wi-Fi Setup: Embracing Wireless Freedom
Wireless connectivity offers unparalleled convenience, allowing you to print from multiple devices (computers, smartphones, tablets) anywhere within your network’s range without being tethered by cables. This aligns perfectly with modern “Tech Trends” and “Productivity” needs.
- HP Smart App Method (Recommended): This is often the easiest and most recommended method for modern HP printers.
- Download HP Smart App: On your computer, smartphone, or tablet, download the HP Smart app from 123.hp.com, your device’s app store (Windows Store, Apple App Store, Google Play Store), or the HP support website.
- Follow In-App Instructions: Open the HP Smart app and follow the guided setup. It will prompt you to add a new printer. The app will search for available printers on your network or guide you through connecting your printer to your Wi-Fi network. You might need to temporarily connect your mobile device to a direct printer Wi-Fi signal during setup.
- Enter Wi-Fi Details: If prompted, enter your Wi-Fi network name (SSID) and password. Ensure your printer and the device running the HP Smart app are connected to the same Wi-Fi network (e.g., 2.4 GHz vs. 5 GHz; most printers prefer 2.4 GHz).
- WPS Button Method (Wi-Fi Protected Setup): If your router has a WPS button, this can be a quick way to connect without entering a password.
- Initiate WPS on Printer: On your HP printer’s control panel, navigate to the Wireless settings menu and select “Wi-Fi Protected Setup” or “WPS.” Choose the “Push Button” method. The printer will start searching for a WPS signal.
- Press WPS on Router: Within two minutes, press the WPS button on your wireless router.
- Confirmation: The printer will connect to the network, and a confirmation message will usually appear on the printer’s display.
- Manual Wi-Fi Setup from Printer Control Panel: If the HP Smart app or WPS method isn’t suitable, you can manually connect your printer using its built-in display.
- Access Wireless Settings: On the printer’s control panel, navigate to the “Wireless,” “Network,” or “Setup” menu.
- Select Network: Choose “Wireless Setup Wizard” or “Wi-Fi Setup.” The printer will scan for available networks.
- Enter Password: Select your Wi-Fi network from the list and enter the network password (WPA/WPA2 passphrase) using the printer’s keypad. Pay close attention to capitalization and special characters.
Ethernet Connection: For Network Reliability
For office environments or users who demand the utmost in network stability and speed, an Ethernet connection is an excellent choice. This method plugs the printer directly into your local area network (LAN) router or switch.
- Connect Ethernet Cable: Plug one end of a standard Ethernet cable into the Ethernet port on the back of your HP printer and the other end into an available LAN port on your router or network switch.
- Power On: Turn on your printer. Most Ethernet-capable HP printers will automatically obtain an IP address from your network’s DHCP server.
- Install Software: Proceed to install the full feature software package from HP’s website (as detailed below). The software will usually detect the printer on the network.
- Verify Network Connectivity: You can usually check the printer’s control panel for its network settings, including its assigned IP address, to confirm a successful connection.
Software Installation: Empowering Your Printer’s Potential
With your HP printer physically set up and connected, the next critical phase involves installing the necessary software and drivers. This is where your computer truly learns how to communicate with and control your new device, unlocking its full range of features. Proper software installation is paramount for smooth operation, scanning, and advanced printing options.
The HP Smart App: A Modern Solution
As mentioned earlier, the HP Smart app is HP’s recommended modern interface for managing your printer. It’s a versatile tool that enhances “Productivity” and embodies current “Tech” trends in simplifying device management.
- Download and Install: If you haven’t already, download the HP Smart app from 123.hp.com or your device’s app store. Install it on all the computers and mobile devices from which you wish to print.
- Add Your Printer: Open the app. If your printer isn’t automatically detected (especially after a Wi-Fi or Ethernet setup), click the “Add Printer” button (often a plus sign “+”) and follow the prompts to find and add your printer to the app.
- Enjoy Features: The HP Smart app allows you to:
- Print documents and photos directly from your device.
- Scan documents directly to your computer or cloud storage.
- Check ink levels and order supplies.
- Manage printer settings and maintenance tasks.
- Access HP support.
- Utilize “Print Anywhere” functionality to print remotely.
Manual Driver Installation: When Specificity Matters
While the HP Smart app streamlines the process, there are instances where a more direct approach to driver installation is necessary, especially if you encounter issues or prefer a full feature software package.
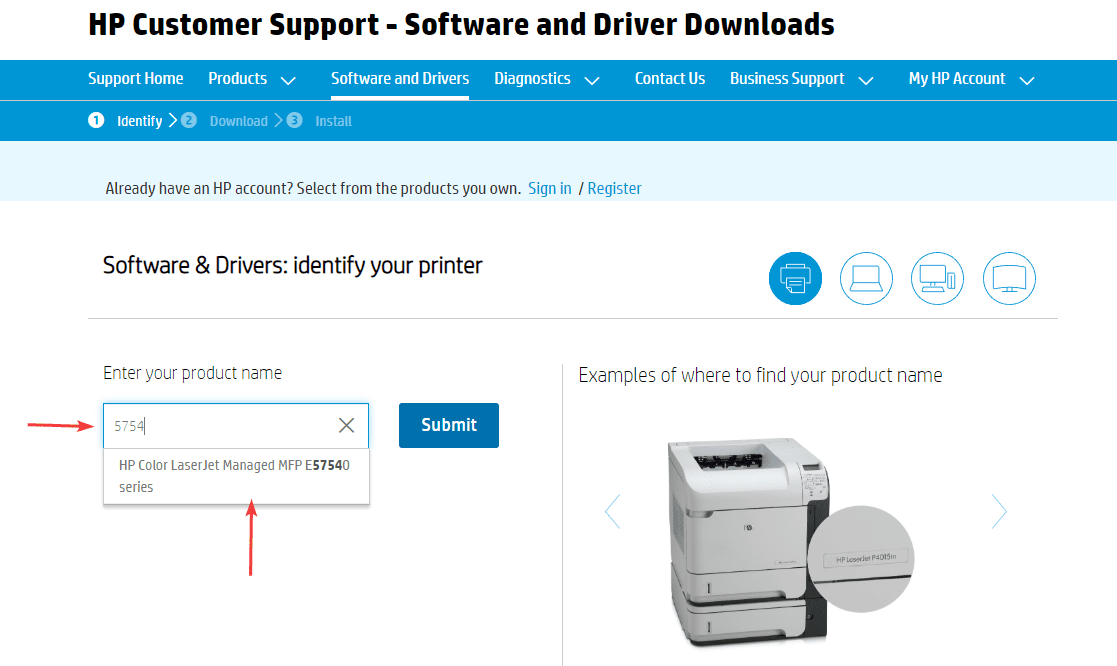
- Identify Your Printer Model: Locate the exact model number of your HP printer. This is usually on a label on the printer itself, on the box, or in the quick start guide.
- Visit HP Support Website: Go to support.hp.com. Navigate to the “Software & Drivers” section.
- Enter Model Number: Enter your printer’s model number into the search bar.
- Select Operating System: Ensure the website correctly identifies your computer’s operating system (Windows, macOS). If not, manually select it.
- Download Full Feature Software: Download the “Full Feature Software and Driver” package. This is usually a larger file that includes not just the basic print driver but also utilities for scanning, faxing (if applicable), and printer management. Avoid downloading only the basic driver unless you have specific reasons to.
- Run the Installer: Once downloaded, run the installer file. Follow the on-screen instructions carefully. The installer will guide you through connecting your printer (if using USB) and configuring network settings (if using Wi-Fi/Ethernet). Restart your computer if prompted.
Utilizing Operating System Resources
Sometimes, your operating system can provide basic printer functionality even without installing HP’s full software package. This is particularly true for basic print jobs, though you might miss out on advanced features.
- Windows:
- Go to “Settings” > “Devices” > “Printers & Scanners.”
- Click “Add a printer or scanner.” Windows will search for connected printers.
- If found, select it and follow the prompts. Windows Update may automatically download a basic driver.
- macOS:
- Go to “System Preferences” (or “System Settings” on newer macOS) > “Printers & Scanners.”
- Click the “+” button to add a printer. macOS will search for network or USB-connected printers.
- Select your HP printer, and macOS will usually find and install the appropriate driver.
Post-Installation & Maintenance: Maximizing Your Printer’s Lifespan
Congratulations! Your HP printer is now installed. However, successful installation is just the beginning. A few final steps and ongoing practices will ensure your printer performs optimally, stays secure, and delivers consistent results, contributing to your overall “Productivity” and preserving your investment.
Testing Your Printer and Initial Calibration
Before you dive into your first big printing project, it’s wise to perform some initial tests and calibration.
- Print a Test Page: Most printer software (including HP Smart app) or the printer’s control panel offers an option to print a test page. This confirms basic connectivity and printing functionality.
- Perform Alignment and Cleaning: If your printer has just been set up, it’s a good idea to run printhead alignment and cleaning cycles. These are typically found in the printer’s maintenance settings (either on the control panel or through the HP Smart app/software). Alignment ensures sharp, straight text and images, while cleaning clears any blocked nozzles.
- Test All Functions: If your printer includes a scanner or copier, test these functions as well. Place a document on the scanner bed or in the automatic document feeder (ADF) and initiate a scan or copy job. This verifies that all integrated components are functioning correctly.
Common Troubleshooting Tips
Even with the best preparation, you might encounter minor hiccups. Here are some quick solutions for common HP printer issues:
- “Printer Offline” Error:
- Check all cables (power, USB, Ethernet) are securely connected.
- Ensure the printer is powered on.
- For wireless printers, verify the printer is connected to the correct Wi-Fi network and the network is active. Restart your router.
- In Windows, go to “Printers & Scanners,” select your printer, and ensure “Use Printer Offline” is unchecked.
- Restart both your computer and the printer.
- Print Jobs Stuck in Queue:
- Open the print queue (double-click the printer icon in “Printers & Scanners”).
- Right-click any stuck jobs and select “Cancel.”
- Restart the “Print Spooler” service in Windows (search for “Services,” find “Print Spooler,” right-click and restart).
- Poor Print Quality:
- Check ink/toner levels. Replace low cartridges.
- Run printhead cleaning and alignment cycles from the printer’s maintenance settings.
- Ensure you are using genuine HP ink/toner. While third-party alternatives might seem like a “Money” saving option, they can often lead to reduced print quality and potential damage to your printer.
- Check paper type settings in your print dialog box – make sure it matches the paper you’re using.
- Connectivity Issues:
- For Wi-Fi: Move the printer closer to the router, reduce interference from other devices, ensure the printer’s Wi-Fi is enabled.
- For USB: Try a different USB port on your computer or a different USB cable.
- Temporarily disable any VPN software, as it can interfere with local network discovery.
- Driver Not Found/Installed:
- Re-download and re-install the full feature software package from support.hp.com.
- Ensure your operating system is up-to-date.
Securing Your Printer
In an era of increasing “Digital Security” concerns, your printer, especially a network-connected one, can be a potential vulnerability. Protecting it is just as important as protecting your computer.
- Update Firmware: Regularly check for and install firmware updates for your HP printer. These updates often include security patches and performance enhancements. You can usually initiate firmware updates via the HP Smart app or the printer’s control panel.
- Strong Passwords: If your printer has a built-in web server or administrative interface (accessible via its IP address in a web browser), ensure it’s protected with a strong, unique password. Do not use default passwords.
- Network Isolation (Advanced): For businesses, consider placing network printers on a separate VLAN to isolate them from critical data networks, limiting potential access points for unauthorized users.
- Physical Security: Ensure the printer is in a secure location, especially in shared environments, to prevent unauthorized physical access.
By following this comprehensive guide, installing your HP printer transforms from a potential chore into an empowering experience. From the careful unboxing to leveraging the sophisticated features of the HP Smart app and understanding essential maintenance, you’re now equipped to get the most out of your printing investment. A properly installed and maintained printer isn’t just a convenience; it’s a productivity enhancer, a creative tool, and a secure extension of your digital workspace, ready to meet the demands of both personal and professional tasks. Embrace the full potential of your HP device and enjoy seamless, high-quality printing for years to come.
aViewFromTheCave is a participant in the Amazon Services LLC Associates Program, an affiliate advertising program designed to provide a means for sites to earn advertising fees by advertising and linking to Amazon.com. Amazon, the Amazon logo, AmazonSupply, and the AmazonSupply logo are trademarks of Amazon.com, Inc. or its affiliates. As an Amazon Associate we earn affiliate commissions from qualifying purchases.