In today’s digitally interconnected world, a stable and reliable internet connection is paramount, whether you’re working remotely, gaming, or simply browsing the web. While Wi-Fi has become ubiquitous, the humble Ethernet connection often provides superior speed, lower latency, and enhanced security. However, like any piece of hardware, your Ethernet adapter requires the correct software – a driver – to function. This guide will walk you through the essential steps of installing an Ethernet driver, ensuring your wired network connection is up and running smoothly.
Understanding Ethernet Drivers and Their Importance
Before diving into the installation process, it’s crucial to understand what an Ethernet driver is and why it’s so vital. Think of a driver as a translator between your operating system (like Windows or macOS) and the physical Ethernet hardware on your computer. Without this translator, your OS wouldn’t know how to communicate with the Ethernet port, effectively rendering it useless.
What is an Ethernet Driver?
An Ethernet driver, also known as a network interface controller (NIC) driver or LAN driver, is a piece of software specifically designed to enable your operating system to interact with your computer’s Ethernet adapter. This adapter is the physical component that allows you to plug in an Ethernet cable. The driver handles all the low-level communication, data transmission, and reception, managing the flow of information between your computer and the network.
Why are Ethernet Drivers Important?
- Connectivity: The most obvious reason is to establish a network connection. Without the correct driver, your computer won’t recognize the Ethernet hardware, and you won’t be able to plug in and get online via an Ethernet cable.
- Performance: A well-optimized driver can significantly impact your network speed and stability. Outdated or incorrect drivers can lead to slow connection speeds, dropped packets, and intermittent connectivity issues, hindering your online experience.
- Feature Support: Drivers often unlock advanced features of your Ethernet adapter, such as specific power management options, advanced diagnostics, or support for higher network speeds (e.g., Gigabit Ethernet).
- Security: While not a primary function, proper driver installation can sometimes address security vulnerabilities related to network hardware. Keeping drivers updated is a good practice for overall digital security.
- Troubleshooting: When network problems arise, a correctly installed and up-to-date driver is often the first point of troubleshooting. If the driver is corrupted or missing, it’s a common culprit for connectivity issues.
In essence, an Ethernet driver is the invisible bridge that allows your computer to participate in a wired network. Ensuring it’s properly installed and maintained is fundamental for anyone relying on a wired connection.
Identifying Your Ethernet Adapter and Driver Needs
The first step in installing any driver is to know what you’re working with. This involves identifying the specific Ethernet adapter installed in your computer and then determining the correct driver for it. This might seem daunting, but your operating system provides built-in tools to help you gather this information.
Identifying Your Ethernet Hardware
The most common way to identify your Ethernet adapter is through your operating system’s Device Manager (on Windows) or System Information (on macOS).
On Windows:
- Open Device Manager:
- Right-click on the Start button and select “Device Manager.”
- Alternatively, press
Windows Key + R, typedevmgmt.msc, and press Enter.
- Locate Network Adapters: In the Device Manager window, expand the “Network adapters” category.
- Identify Your Ethernet Controller: Look for an entry that typically includes terms like “Ethernet,” “Gigabit Ethernet,” “LAN,” or the manufacturer’s name (e.g., Intel, Realtek, Broadcom, Killer). There might be multiple entries if you have both wired and wireless adapters. You’re looking for the one associated with your wired connection.
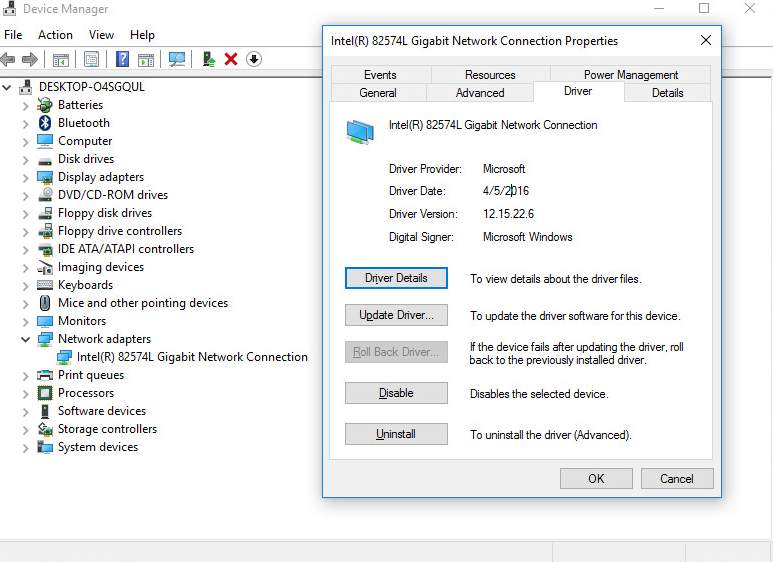
- Note the Device Name: Double-click on your Ethernet adapter. In the Properties window, the “General” tab will display the full name of your adapter. Make a note of this name, as it will be crucial for finding the correct driver.
On macOS:
- Open System Information:
- Click the Apple menu in the top-left corner of your screen.
- Hold down the Option key and select “System Information.”
- Navigate to Network: In the left-hand sidebar, under the “Hardware” section, click on “Network.”
- Select Ethernet: In the list of network interfaces on the right, select “Ethernet.”
- Note the Hardware Details: The information pane will display details about your Ethernet adapter, including its name and manufacturer.
Determining the Correct Driver
Once you have the name of your Ethernet adapter, you need to find the corresponding driver. There are a few primary sources for this:
- Your Computer Manufacturer’s Website: This is usually the most reliable source. Visit the support section of your laptop or desktop manufacturer’s website (e.g., Dell, HP, Lenovo, Apple). Enter your computer’s model number or serial number to find drivers specific to your hardware configuration. Look for “Network” or “LAN” drivers.
- The Ethernet Adapter Manufacturer’s Website: If you know the specific brand of your Ethernet chip (e.g., Intel, Realtek), you can visit their website directly. This is more common for custom-built PCs or if you’ve upgraded your network card.
- Windows Update (Automatic Installation): In many cases, Windows will automatically detect your Ethernet adapter during installation or after a driver update and install a suitable driver through Windows Update. This is often the easiest method if it works.
Crucially, you need to download the driver that matches your operating system version (e.g., Windows 10 64-bit, Windows 11, macOS Ventura) and architecture.
Methods for Installing Ethernet Drivers
Once you have identified your Ethernet adapter and obtained the correct driver file, you can proceed with the installation. There are several methods, ranging from automatic to manual.
Method 1: Automatic Installation via Windows Update
For many users, this is the simplest and most hassle-free method.
- Connect to the Internet (if possible): If you have an existing internet connection (perhaps via Wi-Fi or a temporary USB tether from your phone), this process is easier. If not, you’ll need to download the driver on another device and transfer it via USB drive.
- Open Windows Update:
- Go to
Settings>Update & Security(orWindows Updatein Windows 11). - Click on “Check for updates.”
- Go to
- Install Optional Updates: Windows often lists driver updates under “Optional updates.” Expand this section and look for any network or Ethernet driver updates. If found, select them and click “Download and install.”
- Restart Your Computer: After the update is installed, restart your computer. Windows will attempt to load the new driver automatically.
If Windows Update doesn’t find a suitable driver or if you’re experiencing issues, you’ll need to resort to manual installation.
Method 2: Manual Installation from Manufacturer Website
This is the most common manual method and often the most effective.
- Download the Driver:
- Navigate to your computer manufacturer’s support website (or the Ethernet adapter manufacturer’s website if applicable).
- Enter your model number or serial number.
- Locate the “Drivers” or “Downloads” section.
- Find the appropriate Ethernet or LAN driver for your specific operating system version (e.g., Windows 10 64-bit).
- Download the driver file. It will typically be an executable file (.exe) or a compressed archive (.zip, .rar).
- Extract if Necessary: If the downloaded file is a compressed archive, extract its contents to a folder you can easily find (e.g., your Desktop or a dedicated “Drivers” folder).
- Run the Installer (if executable): If you downloaded an executable file, simply double-click it and follow the on-screen instructions. The installer will guide you through the process, which usually involves agreeing to license terms and clicking “Next” or “Install.”
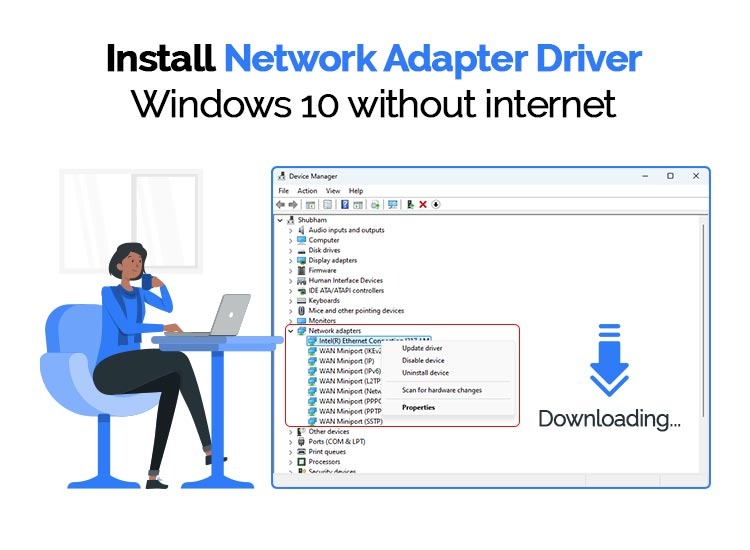
- Manual Installation via Device Manager (if no installer): If the downloaded driver doesn’t have an executable installer or if it fails, you can use Device Manager:
- Open Device Manager (as described in the “Identifying Your Ethernet Hardware” section).
- Locate Your Ethernet Adapter: Expand “Network adapters” and find your Ethernet adapter.
- Update Driver: Right-click on your Ethernet adapter and select “Update driver.”
- Choose “Browse my computer for drivers”: This option allows you to point Windows to the driver files you downloaded.
- Specify the Driver Location: Click “Browse” and navigate to the folder where you extracted or saved the driver files. Ensure “Include subfolders” is checked.
- Install: Click “Next.” Windows will search the specified folder for compatible driver files and install them.
- Restart: Once the installation is complete, restart your computer.
Method 3: Installing Drivers on macOS
macOS is generally good at automatically recognizing hardware and installing drivers. However, if you encounter issues or are using specialized hardware:
- Check for macOS Updates: The first step is always to ensure your macOS is up-to-date.
- Go to
Apple menu>System Settings(orSystem Preferences). - Click on
General>Software Update. - Install any available updates.
- Go to
- Reinstall macOS (Advanced): In rare cases, a fresh installation or reinstallation of macOS can resolve driver issues, especially if system files related to networking have become corrupted. This is a more drastic step and should be preceded by a full backup.
- Third-Party Drivers: If you are using an uncommon or specialized Ethernet adapter (e.g., a USB-to-Ethernet adapter from a niche brand), you might need to visit the manufacturer’s website for macOS drivers. Download the
.dmgfile and follow the installation instructions provided. This usually involves running a package installer.
Troubleshooting Common Ethernet Driver Issues
Even with the correct driver installed, you might encounter problems. Here are some common issues and their solutions:
No Internet Connection After Installation
- Check the Ethernet Cable: Ensure the cable is securely plugged into both your computer and the router/modem. Try a different Ethernet cable if possible.
- Verify Driver Status in Device Manager: Open Device Manager. If there’s a yellow exclamation mark next to your Ethernet adapter, it indicates a problem with the driver. Try updating or reinstalling it.
- Reboot Your Router/Modem: Sometimes, the issue isn’t with your computer but with the network equipment. Power cycle your router and modem by unplugging them for 30 seconds and plugging them back in.
- Check Network Adapter Settings: In Windows, search for “Network Status.” Click “Change adapter options.” Right-click your Ethernet adapter and ensure it’s enabled. If it’s disabled, click “Enable.”
Slow Internet Speeds
- Driver Version: Ensure you have the latest stable driver version. Manufacturers often release updates that improve performance.
- Check Network Card Capabilities: Your Ethernet port and router/modem have maximum speed capabilities (e.g., 100 Mbps, 1 Gbps). Ensure your driver and hardware are configured to match the highest common speed.
- Conflicting Software: Some VPNs, firewalls, or network monitoring tools can interfere with network performance. Temporarily disable them to see if speeds improve.
- Malware Scan: Malware can significantly impact network performance. Run a full system scan with reputable antivirus software.

Ethernet Adapter Not Detected
- Physical Connection: Ensure the Ethernet port on your motherboard or network card is physically intact.
- BIOS/UEFI Settings: On some motherboards, the onboard LAN controller can be disabled in the BIOS/UEFI settings. Reboot your computer and enter the BIOS/UEFI (usually by pressing
Del,F2, orF12during startup). Look for an “Integrated Peripherals” or “Onboard Devices” section and ensure the LAN controller is enabled. - Driver Corrupted: If you suspect a corrupted driver, uninstall it completely.
- Open Device Manager.
- Right-click your Ethernet adapter.
- Select “Uninstall device.”
- Check the box that says “Delete the driver software for this device” if available.
- Restart your computer. Windows will attempt to reinstall a generic driver, or you can then manually install the correct driver.
By following these steps, you should be able to successfully install and maintain your Ethernet driver, ensuring a robust and reliable wired network connection for all your digital activities.
aViewFromTheCave is a participant in the Amazon Services LLC Associates Program, an affiliate advertising program designed to provide a means for sites to earn advertising fees by advertising and linking to Amazon.com. Amazon, the Amazon logo, AmazonSupply, and the AmazonSupply logo are trademarks of Amazon.com, Inc. or its affiliates. As an Amazon Associate we earn affiliate commissions from qualifying purchases.