
The Raspberry Pi has revolutionized the world of affordable computing, empowering hobbyists, educators, and professionals alike to explore technology in new and exciting ways. From serving as a compact desktop computer to powering complex robotics, home automation, and IoT projects, its versatility is truly remarkable. At the heart of most Raspberry Pi projects lies its dedicated operating system, Raspberry Pi OS (formerly Raspbian), a Debian-based Linux distribution optimized for the ARM architecture of the Pi. This comprehensive guide will walk you through the entire process of installing Raspberry Pi OS, ensuring you have a solid foundation for your tech ventures.
Unpacking the Potential: Why Raspberry Pi OS Matters
Before diving into the installation, it’s worth understanding why Raspberry Pi OS is the go-to choice for millions of users. As a powerful, free, and open-source operating system, it offers a stable and secure environment tailored specifically for the Raspberry Pi’s hardware. Its lightweight nature ensures smooth performance even on less powerful models, while its extensive software repository provides access to a vast array of tools for programming, multimedia, networking, and general computing. For anyone stepping into the world of single-board computers, mastering the installation of Raspberry Pi OS is the critical first step towards unlocking its immense potential.
This guide is designed for beginners and seasoned tech enthusiasts alike, ensuring every detail is covered to get your Raspberry Pi up and running smoothly.
The Raspberry Pi Ecosystem: A Gateway to Innovation
The Raspberry Pi is more than just a piece of hardware; it’s an entire ecosystem that fosters learning and innovation. With Raspberry Pi OS, you gain access to a user-friendly interface (if you choose the desktop version), pre-installed applications for coding (Python, Scratch), office tasks, and web browsing. Beyond its initial setup, the Linux command line provides powerful control for advanced users, enabling everything from setting up web servers to running machine learning models. Understanding how to properly install and configure the OS is fundamental to leveraging this dynamic platform for education, personal projects, or even commercial applications, aligning perfectly with the “Tech” focus of our website.
Preparing for Installation: Essential Prerequisites
Before you begin the installation process, it’s crucial to gather all the necessary components. Having everything ready beforehand will streamline the setup and prevent frustrating interruptions. Think of this as preparing your digital toolkit.
Hardware Requirements
To successfully install and run Raspberry Pi OS, you will need the following hardware:
- A Raspberry Pi Board: Naturally, the star of the show. This guide applies to most modern Raspberry Pi models, including the Raspberry Pi 3, 4, 5, and Zero 2 W.
- A MicroSD Card: This will serve as your Pi’s hard drive. A minimum of 8GB is recommended, but for optimal performance and storage for your projects, a 32GB or 64GB (Class 10 or UHS-I rated) card is highly advisable. Speed matters here, as it directly impacts the boot time and overall responsiveness of your Pi.
- A Compatible Power Supply: Each Raspberry Pi model has specific power requirements. For Raspberry Pi 4/5, a USB-C power supply delivering at least 5V 3A (or 5V 5A for Pi 5) is essential. For older models, a 5V 2.5A micro-USB power supply is typically sufficient. Using an underpowered supply can lead to instability and unexpected issues.
- USB Keyboard and Mouse: Required for initial setup if you’re installing the desktop version and not opting for a headless setup immediately.
- HDMI Display (Monitor/TV) and Cable: Necessary for visual output during initial setup. Ensure your cable matches your Pi’s port (e.g., micro-HDMI for Raspberry Pi 4/5, standard HDMI for older models).
- An Internet Connection (Optional but Recommended): A Wi-Fi or Ethernet connection allows you to download updates and additional software during or after installation, significantly enhancing the initial experience.
- A Computer with an SD Card Reader: This host computer (Windows, macOS, or Linux) is needed to flash the Raspberry Pi OS onto your microSD card.
Software Requirements
Only one key piece of software is required on your host computer:
- Raspberry Pi Imager: This official tool makes flashing Raspberry Pi OS onto your microSD card incredibly simple and is available for Windows, macOS, and Ubuntu. It’s the recommended method for installation due to its ease of use and built-in features.
Before proceeding, ensure your microSD card is either empty or contains data you’re willing to lose, as the flashing process will erase all existing data.
The Installation Process: A Step-by-Step Guide
With all your components ready, it’s time to embark on the core installation process. This section will guide you through using the Raspberry Pi Imager to get Raspberry Pi OS onto your microSD card and prepare it for its first boot.
Step 1: Downloading and Installing Raspberry Pi Imager
The first crucial step is to obtain the Raspberry Pi Imager software for your host computer.
- Visit the Official Raspberry Pi Website: Open your web browser and navigate to
www.raspberrypi.com/software/. - Download the Imager: Locate the section for “Raspberry Pi Imager” and download the version corresponding to your operating system (Windows, macOS, or Ubuntu).
- Install the Imager:
- Windows: Run the downloaded
.exefile and follow the on-screen instructions. It’s a straightforward installer. - macOS: Open the downloaded
.dmgfile and drag the “Raspberry Pi Imager” application into your Applications folder. - Linux (Ubuntu/Debian): You can often install it via your package manager or use the
.debfile provided. For example,sudo apt install rpi-imager.
- Windows: Run the downloaded
Once installed, launch the Raspberry Pi Imager application.
Step 2: Choosing Your Operating System and Storage
Inside the Raspberry Pi Imager, you’ll be presented with a user-friendly interface to select your OS and target storage.
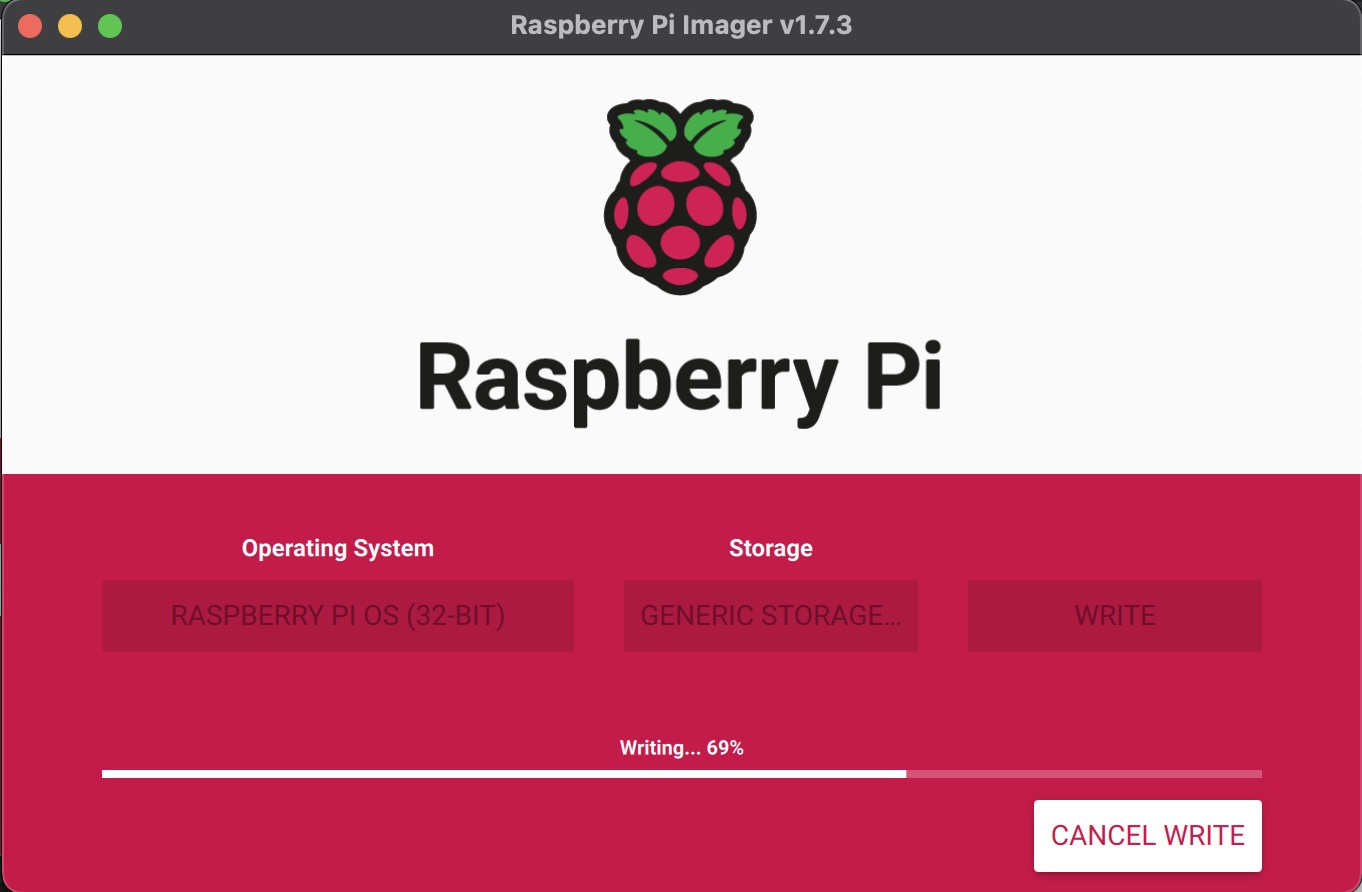
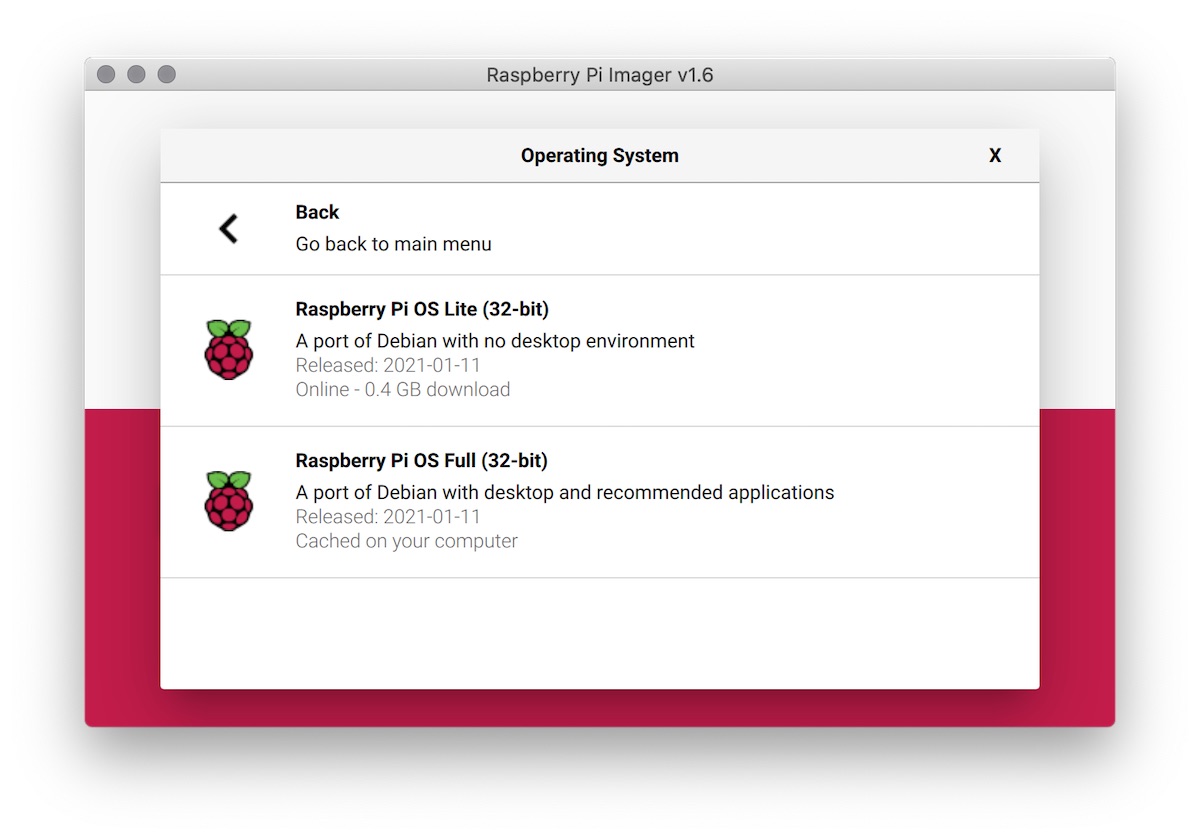
- Select OS: Click the “CHOOSE OS” button.
- You’ll see a list of available operating systems. For most users, “Raspberry Pi OS (32-bit)” or “Raspberry Pi OS (64-bit)” are the primary choices.
- Raspberry Pi OS (32-bit): Compatible with all Pi models, includes all necessary drivers. Good for general use.
- Raspberry Pi OS (64-bit): Recommended for Raspberry Pi 3, 4, 5, and Zero 2 W to take full advantage of their 64-bit processors. Offers better performance for demanding tasks and allows more than 4GB of RAM to be utilized on Pi 4/5 models.
- You can also choose between “Desktop” (with a graphical user interface) and “Lite” (command-line only). For beginners, “Desktop” is recommended. “Lite” is excellent for server applications or embedded projects where a GUI is unnecessary.
- Example Choice: For a Raspberry Pi 4/5, “Raspberry Pi OS (64-bit) (Desktop)” is usually the best starting point.
- Select Storage: Click the “CHOOSE STORAGE” button.
- Insert your microSD card into your computer’s SD card reader.
- The Imager should detect it. Carefully select your microSD card from the list. Double-check that you are choosing the correct device, as selecting the wrong drive could lead to data loss on your main computer’s hard drive. The Imager usually warns you if you try to select a larger drive.
Step 3: Advanced Options and Writing the OS
This step allows for critical pre-configuration, saving you time and effort after the first boot.
-
Access Advanced Options (Cogwheel Icon): Before clicking “WRITE,” notice a small cogwheel icon (⚙️) or “Advanced Options” button, usually located in the bottom right corner of the Imager window. Click this.
- Set hostname: Assign a unique name (e.g.,
my-raspberrypi) to your Pi for easier network identification. - Enable SSH: Highly recommended for headless setups (without a monitor/keyboard) or for remote access. Choose “Password authentication” or “Public-key authentication” and set a password.
- Set username and password: Crucial for security! Do NOT use the default
piusername andraspberrypassword. Create a strong, unique username and password. This is a vital security practice often overlooked. - Configure wireless LAN: Enter your Wi-Fi SSID (network name) and password. This will allow your Pi to connect to the internet automatically on first boot, even without a keyboard/monitor.
- Set locale settings: Choose your keyboard layout and timezone.
- Play sound when finished: Optional, but useful.
- Eject media when finished: Recommended.
- Set hostname: Assign a unique name (e.g.,
-
Review and Write: After configuring advanced options, click “SAVE”. Now, review your selections in the main Imager window. If everything looks correct, click the “WRITE” button.
-
Confirm and Wait: You’ll receive a warning that all data on the selected storage device will be erased. Confirm by clicking “YES.” The Imager will now download the OS (if not already cached), write it to the SD card, and then verify the write process. This can take several minutes, depending on your internet speed and the speed of your SD card.
-
Completion: Once complete, the Imager will notify you. Remove the microSD card safely from your computer.
Step 4: First Boot and Initial Setup
Now that your microSD card is prepared, it’s time to bring your Raspberry Pi to life.
- Insert the MicroSD Card: Carefully insert the flashed microSD card into the microSD card slot on your Raspberry Pi.
- Connect Peripherals:
- Connect your keyboard and mouse to the USB ports.
- Connect your HDMI display to the appropriate port(s) on your Pi.
- (Optional but Recommended) Connect an Ethernet cable if you prefer a wired network connection or if you didn’t configure Wi-Fi in the advanced options.
- Power On: Finally, connect the power supply to your Raspberry Pi. The Pi will power on automatically and begin the boot sequence.
- Initial Boot Sequence:
- You’ll see a series of text messages scrolling on your screen as the operating system boots up.
- If you installed the Desktop version, it will eventually boot into the graphical desktop environment.
- If you configured Wi-Fi and enabled SSH in the advanced options, your Pi should connect to the network automatically.
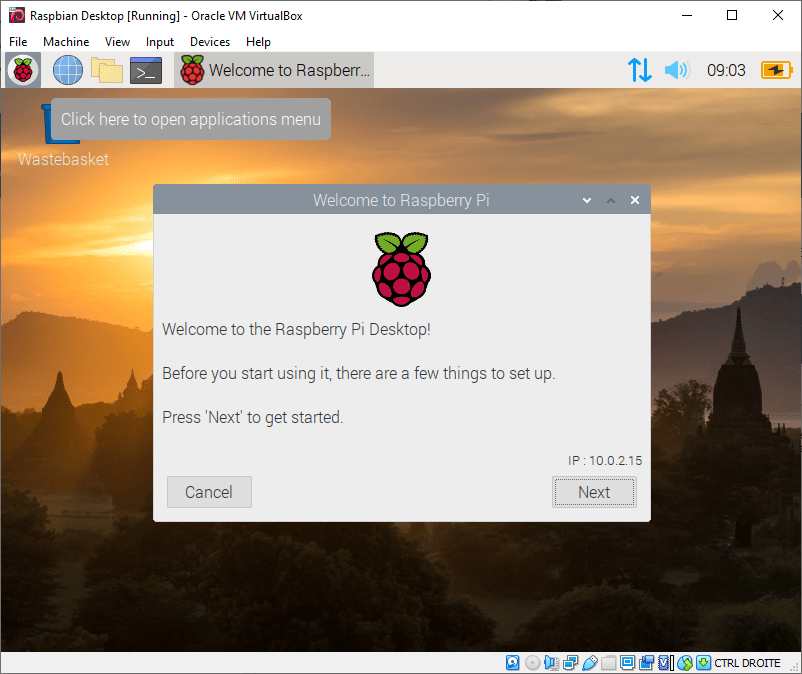
- Welcome to Raspberry Pi: If it’s a fresh install of the Desktop OS, a “Welcome to Raspberry Pi” wizard might appear. Follow the prompts to:
- Set your country, language, and timezone.
- (If not already done) Create a new password for your user account.
- Connect to Wi-Fi (if not already configured).
- Update the software (highly recommended). This step downloads and installs the latest updates for your OS and pre-installed software, which can take some time.
- Reboot: After the initial setup and updates, the wizard may prompt you to reboot. It’s a good idea to do so to ensure all changes take effect.
Congratulations! Your Raspberry Pi OS is now successfully installed and running.
Post-Installation Essentials: Optimizing Your Pi
Once you’ve completed the initial setup, there are several essential steps you can take to optimize your Raspberry Pi for security, performance, and usability. These steps ensure your Pi is not just working, but working efficiently and safely.
1. Updating and Upgrading Your System
Even if you updated during the first boot wizard, it’s a good habit to regularly update your system. This ensures you have the latest security patches and software improvements.
- Open a Terminal: Click the terminal icon on the desktop or press
Ctrl+Alt+T. - Update Package Lists: Type the following command and press Enter:
bash

sudo apt update
This command downloads the latest package information from the repositories. - Upgrade Installed Packages: After the update, run:
bash

sudo apt full-upgrade
This command upgrades all installed packages to their newest versions. This can take some time, especially on a fresh install.
2. Changing Default Password (If Not Done During Setup)
If you skipped setting a custom password during the advanced options or welcome wizard, it’s absolutely critical to change the default password (raspberry). This is a fundamental digital security measure.
- Open a Terminal.
- Change Password: Type
passwdand press Enter. - Follow the prompts to enter your current password (if any) and then set a new, strong password.
3. Enabling SSH for Headless Access
SSH (Secure Shell) allows you to remotely access your Raspberry Pi’s command line from another computer on your network. This is invaluable for headless setups or simply managing your Pi without a monitor. If you enabled it via Imager’s advanced options, it should already be active.
- Open Raspberry Pi Configuration: Go to
Menu > Preferences > Raspberry Pi Configuration. - Interfaces Tab: Navigate to the “Interfaces” tab.
- Enable SSH: Ensure the “SSH” option is set to “Enable.”
- Reboot: Click “OK” and reboot your Pi if prompted.
Now, from another computer, you can connect using a tool like PuTTY (Windows) or the terminal (macOS/Linux):
ssh your_username@your_pi_ip_address (e.g., ssh pi_user@192.168.1.100)
4. Expanding Filesystem (If Necessary)
Older versions of the OS sometimes required manually expanding the filesystem to use the entire SD card capacity. With recent versions of Raspberry Pi OS flashed via Imager, this is usually handled automatically. However, if you notice your available storage is less than expected, you can verify and expand it.
- Open Raspberry Pi Configuration: Go to
Menu > Preferences > Raspberry Pi Configuration. - System Tab: Navigate to the “System” tab.
- Expand Filesystem: Look for an “Expand Filesystem” option. If available and needed, click it. You may need to reboot afterward.
5. Installing Essential Software and Tools
Your Raspberry Pi is a versatile machine, and installing a few key utilities can greatly enhance its functionality.
- htop: A more powerful and interactive process viewer than the standard
top.
bash

sudo apt install htop
- Git: Essential for version control, collaborative coding, and downloading projects from GitHub.
bash

sudo apt install git
- Build-essential: A package that includes compilers and development libraries needed for compiling many software packages from source.
bash

sudo apt install build-essential
- VLC Media Player: If you’re using your Pi for media consumption, VLC is a versatile player.
bash

sudo apt install vlc
You can find and install countless other applications through the “Recommended Software” tool (Menu > Preferences > Recommended Software) or directly via sudo apt install.
Troubleshooting Common Issues
Even with a detailed guide, you might encounter minor hiccups. Here are some common problems and their solutions:
1. Raspberry Pi Not Booting
- No Power Light: Check your power supply. Is it correctly connected? Is it the correct voltage and amperage for your Pi model? Try a different power supply if possible.
- Red Light On, No Green Light: The red light indicates power. A blinking green light usually indicates SD card activity. If the green light doesn’t blink or flashes irregularly, it often points to a corrupt or improperly flashed SD card. Re-flash the OS, ensuring the download completed successfully and the card was ejected properly.
- Blank Screen:
- HDMI Connection: Ensure your HDMI cable is securely connected to both the Pi and the monitor. Try a different HDMI cable or port on your monitor.
- Display Settings: If you’re using an older or non-standard monitor, it might not be compatible with the Pi’s default resolution. You might need to manually edit the
config.txtfile on the boot partition of the SD card (accessible from your host PC) to force a specific resolution or disable HDMI hot-plug detection.
2. Wi-Fi Not Connecting
- Incorrect Credentials: Double-check your Wi-Fi SSID (network name) and password. Typographical errors are common.
- Out of Range: Ensure your Pi is within range of your Wi-Fi router.
- Country Code: In
Raspberry Pi Configuration > Localisation, ensure your Wi-Fi country is set correctly. This is crucial for regulatory compliance and proper Wi-Fi channel selection. - Hardware Issues: On older Pi models, a poor quality Wi-Fi adapter or driver issues could be a factor. Ensure your OS is fully updated.
3. SSH Connection Refused
- SSH Not Enabled: Verify that SSH is enabled via
Raspberry Pi Configuration > Interfaces. - Incorrect IP Address: Make sure you’re using the correct IP address for your Raspberry Pi. You can find it by typing
hostname -Iin the Pi’s terminal. - Firewall: Your host computer’s firewall might be blocking the connection.
- Password Issues: If using password authentication, ensure you’re using the correct username and password.
By addressing these common issues, you should be able to quickly resolve most installation and initial setup problems, allowing you to get back to enjoying your Raspberry Pi.
Conclusion: Your Journey with Raspberry Pi Begins
You’ve successfully navigated the path to installing Raspberry Pi OS, a foundational step that opens up a universe of possibilities. From this point forward, your Raspberry Pi can become anything you envision: a retro gaming console, a smart home hub, a personal web server, a learning platform for coding, or even a compact media center. The vibrant Raspberry Pi community offers endless resources, tutorials, and projects to fuel your imagination.
As you delve deeper, remember to keep your system updated, maintain strong security practices, and experiment with the vast array of software available. The journey with Raspberry Pi is one of continuous learning and creation, embodying the spirit of technological exploration. Welcome to the world of single-board computing – we can’t wait to see what you build!
aViewFromTheCave is a participant in the Amazon Services LLC Associates Program, an affiliate advertising program designed to provide a means for sites to earn advertising fees by advertising and linking to Amazon.com. Amazon, the Amazon logo, AmazonSupply, and the AmazonSupply logo are trademarks of Amazon.com, Inc. or its affiliates. As an Amazon Associate we earn affiliate commissions from qualifying purchases.