
In today’s digitally saturated world, a stable and speedy internet connection isn’t a luxury; it’s a necessity. While Wi-Fi has become the ubiquitous choice for convenience, it often falls short when it comes to raw performance, especially for demanding tasks. This is where Ethernet cables shine, offering a direct, wired connection that bypasses the potential interference and congestion that can plague wireless networks. Whether you’re a gamer seeking ultra-low latency, a remote worker needing unshakeable stability for video calls, a content creator uploading massive files, or simply someone who values the most robust internet experience, understanding how to install Ethernet is a valuable skill.

This guide will walk you through the entire process, from understanding the basics of Ethernet to physically connecting your devices. We’ll cover the essential components, different types of Ethernet installations, and provide step-by-step instructions to ensure you achieve a seamless and high-performing network.
Understanding Ethernet: The Backbone of Your Network
Before diving into the installation process, it’s crucial to grasp what Ethernet is and why it remains a superior choice for many applications. Ethernet, formally known as IEEE 802.3, is a family of wired networking technologies commonly used in local area networks (LANs), metropolitan area networks (MANs), and wide area networks (WANs). Its core principle is to provide a direct physical link between devices, ensuring data is transmitted with minimal loss and maximum speed.
Why Choose Ethernet Over Wi-Fi?
While Wi-Fi offers unparalleled convenience and mobility, Ethernet provides several distinct advantages:
- Speed and Bandwidth: Ethernet connections are inherently faster and offer more consistent bandwidth than Wi-Fi. This is particularly noticeable with newer Ethernet standards like Cat 6a and Cat 7, which can support speeds of 10 Gbps and beyond. For tasks like large file transfers, streaming high-resolution video, or online gaming, this speed difference can be game-changing.
- Stability and Reliability: Wi-Fi signals can be affected by a multitude of factors, including distance from the router, physical obstructions (walls, furniture), interference from other electronic devices (microwaves, Bluetooth devices), and the sheer number of connected devices hogging the bandwidth. Ethernet, on the other hand, creates a dedicated, shielded pathway for data, making it far less susceptible to these disruptions. This translates to fewer dropped connections and a more consistent online experience.
- Lower Latency: Latency, often referred to as “ping,” is the delay between sending a request and receiving a response. For online gaming, stock trading, or real-time communication applications, low latency is paramount. Ethernet connections typically have significantly lower latency than Wi-Fi, providing a more responsive and fluid experience.
- Security: While Wi-Fi security protocols have improved dramatically, wired connections are inherently more secure. It’s far more difficult for an unauthorized individual to “tap into” an Ethernet cable than it is to intercept a Wi-Fi signal.
Essential Ethernet Components
To set up an Ethernet connection, you’ll need a few key components:
-
Ethernet Cable (Network Cable): This is the physical medium that carries the data. Ethernet cables come in various categories, each with different performance specifications. The most common ones you’ll encounter are:
- Cat 5e: Supports speeds up to 1 Gbps over distances up to 100 meters. It’s a good choice for basic home and office networking.
- Cat 6: Offers improved performance over Cat 5e, with higher frequencies and better crosstalk resistance, supporting speeds up to 10 Gbps over shorter distances (up to 55 meters).
- Cat 6a: An augmented version of Cat 6, designed for 10 Gbps speeds over the full 100-meter distance. It’s ideal for demanding applications and future-proofing your network.
- Cat 7 & Cat 8: These are newer, higher-performance cables designed for even greater speeds and frequencies, often used in data centers and high-end professional environments. For most home users, Cat 6 or Cat 6a will suffice.
- Connectors: Most Ethernet cables have RJ45 connectors on each end. These are the standardized plugs that connect to ports on your devices.
-
Ethernet Port: This is the physical socket on your devices (computers, routers, gaming consoles, smart TVs, etc.) where you plug in the Ethernet cable. Most modern devices come equipped with at least one Ethernet port.
-
Router or Switch: Your router is the gateway to the internet for your entire network. It assigns IP addresses to your devices and manages traffic. A network switch, on the other hand, is used to expand the number of available Ethernet ports in a LAN, allowing more devices to connect directly to your router.
-
Modem: Your modem is the device that connects your home or office to your Internet Service Provider (ISP). It translates the digital signals from your network into analog signals that can travel over telephone lines, cable lines, or fiber optic cables, and vice versa.
Planning Your Ethernet Installation
Before you start plugging in cables, a little planning goes a long way. Consider where you need your wired connections and how you’ll route the cables.
Identifying Your Connectivity Needs
Think about which devices would benefit most from a wired connection. Common candidates include:
- Desktop Computers: For the most stable and fastest internet access.
- Gaming Consoles: To minimize lag and ensure a consistent online gaming experience.
- Smart TVs and Streaming Devices: For buffer-free 4K streaming and smoother interface navigation.
- Network Attached Storage (NAS) Devices: For fast and reliable file access and backups.
- Network Printers: For a dedicated and uninterrupted printing connection.
- Work-from-Home Setups: Ensuring uninterrupted video calls and access to cloud-based resources.
Cable Routing Strategies
The physical installation of Ethernet cables can range from simple plug-and-play to more involved wiring projects.
Simple, Temporary Connections
For immediate needs or temporary setups, the simplest approach is to use pre-made Ethernet cables of the appropriate length. These cables can be run across floors (use cable protectors for safety and to prevent damage), along walls, or under rugs.
Permanent Wiring Solutions
For a cleaner and more permanent installation, you might consider:
- Running Cables Through Walls and Ceilings: This is the most aesthetically pleasing option but requires more effort and potentially some DIY skills or professional help. You’ll need to consider the path the cables will take, avoiding electrical wiring and plumbing.
- Using Cable Raceways or Conduits: These are channels or tubes that can be mounted on walls or surfaces to hide and protect cables. They offer a cleaner look than exposed cables and are a good compromise between simplicity and a permanent installation.
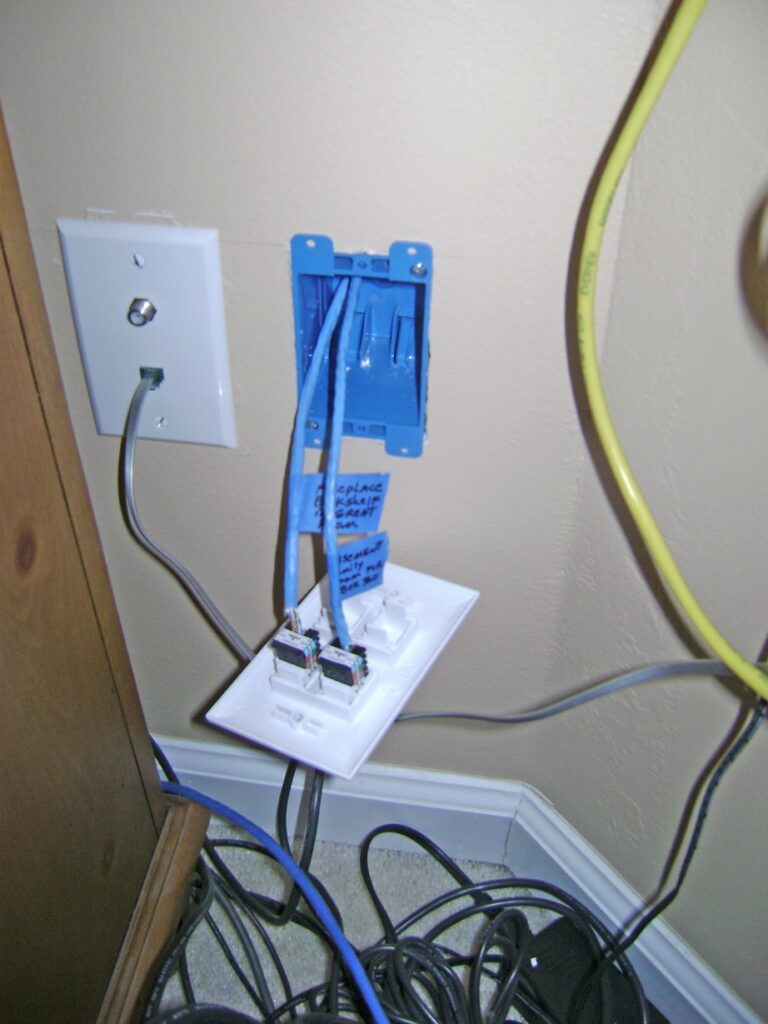
- Using Ethernet Wall Plates: For a professional finish, you can terminate your Ethernet cables behind wall plates, similar to how electrical outlets are installed. This requires a bit more technical skill and specialized tools like a punch-down tool.
Step-by-Step Ethernet Installation
Let’s get to the actual installation. For most users, this will involve connecting devices to a router or switch.
Connecting Devices Directly to Your Router or Switch
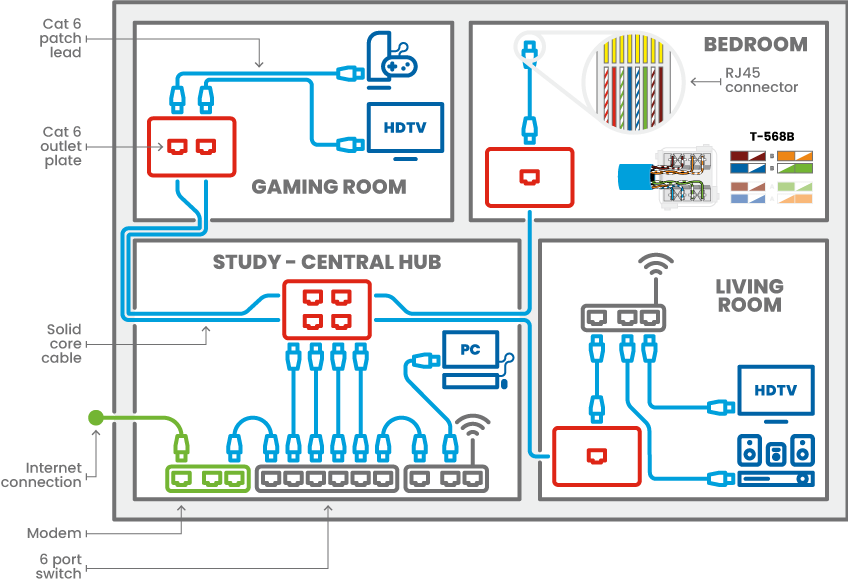
This is the most common and straightforward Ethernet installation.
Prerequisites:
- Your router or switch is powered on and connected to your modem.
- You have Ethernet cables of the appropriate length.
- Your devices have Ethernet ports.
Steps:
-
Locate the Ethernet Ports: On your router or switch, you’ll see several Ethernet ports, typically labeled “LAN” or numbered. On your device, find the rectangular Ethernet port.
-
Connect One End of the Cable: Take one end of your Ethernet cable and firmly insert the RJ45 connector into an available Ethernet port on your router or switch. You should hear a slight click, indicating it’s securely seated.
-
Connect the Other End of the Cable: Take the other end of the Ethernet cable and firmly insert the RJ45 connector into the Ethernet port on your device (e.g., your computer, gaming console). Again, listen for the click.
-
Verify the Connection:
- On your computer: Most operating systems will automatically detect the wired connection. You might see an Ethernet icon in your system tray (usually near the Wi-Fi icon) that indicates a connected status, often with link lights (green and orange lights next to the port) that will illuminate.
- On other devices: Refer to the device’s manual for specific instructions on how to verify a wired network connection.
-
Test Your Internet Access: Open a web browser and try visiting a few websites to confirm that your internet connection is working.
Tip: If you need to connect more devices than your router has available Ethernet ports, you can use a network switch. Simply connect one Ethernet cable from a LAN port on your router to any port on the switch, and then use the remaining ports on the switch to connect your other devices.
Advanced Ethernet Installation: Running Cables Through Walls (Optional)
This section outlines the general process for running Ethernet cables through walls. If you are not comfortable with DIY home improvements or electrical work, it is highly recommended to hire a professional low-voltage electrician or network installer. Improperly run cables can be a fire hazard or damage your home.
Tools and Materials You Might Need:
- Ethernet cable (Cat 6 or Cat 6a recommended for future-proofing)
- RJ45 connectors (if terminating your own cables)
- Punch-down tool (if using wall plates)
- Wall plates and low-voltage mounting brackets
- Fish tape or cable pulling tools
- Drill and appropriate drill bits
- Drywall saw or utility knife
- Stud finder
- Safety glasses and gloves
- Ladder
General Steps:
-
Plan Your Route: Determine the starting point (e.g., your router location) and the endpoint (e.g., your computer’s location). Map out the most efficient and safest path, avoiding electrical wires, plumbing, and HVAC ducts.
-
Locate Entry and Exit Points: Identify where you’ll drill holes to run the cable. This might involve drilling through studs, ceiling joists, or wall plates.
-
Drill Holes: Using a drill, carefully drill pilot holes and then larger holes for the cable to pass through.
-
Pull the Cable: Use fish tape or cable pulling tools to guide the Ethernet cable through the walls, ceilings, or floors. Take your time and avoid kinking or damaging the cable.
-
Terminate the Cable: At the endpoint, you’ll likely want to install an Ethernet wall plate. This involves stripping the outer jacket of the Ethernet cable and connecting the individual wires to the punch-down terminals on the wall plate according to the T568A or T568B wiring standard (ensure consistency on both ends).
-
Connect to Router/Switch: At the other end, you’ll either connect the cable directly to a patch panel or terminate it with an RJ45 connector to plug into your router or switch.
-
Test the Connection: Once everything is connected, test your internet speed and stability.
Troubleshooting Common Ethernet Issues
Even with the best installation, you might encounter occasional problems. Here are a few common issues and their solutions:
-
No Internet Connection:
- Check cable connections: Ensure both ends of the Ethernet cable are firmly plugged in. Try a different Ethernet cable.
- Check router/switch: Make sure your router or switch is powered on and functioning correctly. Restart your router and modem.
- Check device settings: Ensure your device’s network adapter is enabled and configured to obtain an IP address automatically (DHCP).
-
Slow Speeds:
- Cable quality: Ensure you’re using a sufficiently rated Ethernet cable (Cat 5e, Cat 6, or higher). Older or damaged cables can limit speed.
- Distance: While Ethernet is robust over distance, very long runs might experience some signal degradation.
- Router/Switch limitations: Your router or switch might have a maximum speed it can support.
- Device limitations: The Ethernet port on your device might be slower than your internet connection.
-
Intermittent Connection:
- Damaged cable: Inspect the cable for any visible damage.
- Loose connections: Ensure all connections are secure.
- Interference (less common for Ethernet): While rare, extremely strong electromagnetic interference could theoretically affect a cable, especially if it’s poorly shielded.
Conclusion: Investing in a Superior Network Experience
Installing Ethernet might seem like a more involved process than simply connecting to Wi-Fi, but the benefits in terms of speed, stability, and reliability are undeniable. Whether you opt for a simple plug-and-play setup or decide to undertake a more permanent wiring project, the end result is a robust network connection that will enhance your digital life. By understanding the components, planning your installation, and following these steps, you can ensure your devices are connected with the best possible performance, paving the way for a smoother, faster, and more dependable online experience.
aViewFromTheCave is a participant in the Amazon Services LLC Associates Program, an affiliate advertising program designed to provide a means for sites to earn advertising fees by advertising and linking to Amazon.com. Amazon, the Amazon logo, AmazonSupply, and the AmazonSupply logo are trademarks of Amazon.com, Inc. or its affiliates. As an Amazon Associate we earn affiliate commissions from qualifying purchases.