Project Zomboid, the isometric open-world survival horror game, has carved out a unique niche in the gaming landscape, celebrated for its intricate mechanics, unforgiving difficulty, and, perhaps most importantly, its vibrant modding community. While Steam provides a convenient platform for acquiring, managing, and updating the game and its vast array of modifications through the Workshop, there are compelling reasons why some players might seek to install Project Zomboid and its mods without relying on Valve’s ubiquitous digital storefront.
This comprehensive guide delves into the technical intricacies and considerations of going off-platform, offering a detailed tutorial for those who desire greater control over their game files, prefer offline play, manage private servers, or simply wish to understand the underlying architecture of their digital entertainment. We’ll explore the ‘why’ behind this decision, walk through the manual installation process for both the base game and its mods, address common troubleshooting scenarios, and touch upon the broader implications for digital security and personal autonomy in the realm of interactive software.
The Allure of Steam-Free Project Zomboid: Why Go Off-Platform?
The conventional method of acquiring and playing Project Zomboid involves Steam, which offers seamless updates, cloud saves, and the incredibly user-friendly Steam Workshop for mod management. However, a segment of the gaming community often seeks alternatives, driven by a variety of technical, practical, and philosophical reasons. Understanding these motivations is crucial before embarking on a Steam-free installation journey, as it highlights the benefits while also underscoring potential challenges.
Understanding the Appeal
For many, the primary draw of installing Project Zomboid without Steam is enhanced control and flexibility. When a game is managed outside a centralized platform, players gain direct access to its core files, configuration settings, and executable components. This allows for:
- Offline Play: Without Steam’s DRM (Digital Rights Management) checks, players can launch and enjoy Project Zomboid regardless of their internet connection status or Steam client availability. This is particularly valuable for those with unreliable internet, traveling, or simply preferring a truly offline experience.
- Specific Game Versions: Steam typically keeps games updated to the latest version. However, some players might want to stick with an older, specific build of Project Zomboid – perhaps to maintain compatibility with a particular set of legacy mods that haven’t been updated, or to avoid changes they dislike in newer patches. Manual installation facilitates this version control.
- Dedicated Servers and Private Communities: Running a dedicated Project Zomboid server often benefits from a standalone installation. This allows server administrators to manage their game files independently, apply specific server-side mods, and update their server at their own pace, decoupled from their personal Steam client or the Workshop’s auto-updates. This is essential for maintaining stable, long-term private communities.
- Troubleshooting and Development: For tech enthusiasts, mod developers, or those frequently experimenting with game files, a Steam-free installation provides a cleaner sandbox environment. It allows for deeper investigation of file structures, easier backups before making significant changes, and isolated testing without Steam’s overlay or background processes interfering. This aligns perfectly with the “Tech Tutorials” and “Software” aspects of our website’s focus.
- Digital Autonomy and Privacy: Some users prefer to minimize their reliance on large digital platforms for privacy reasons or a general desire for greater control over their software. Installing games without a client like Steam aligns with this philosophy, putting the user fully in charge of their game’s lifecycle.
Critical Considerations: Legality and Best Practices
While the motivations for a Steam-free installation are often valid, it’s imperative to address the ethical and legal implications. The most critical point is legitimate acquisition of the game. This guide assumes you already own a legitimate copy of Project Zomboid, typically purchased through Steam itself or another authorized retailer.
- Piracy vs. Legitimate Offline Play: Downloading Project Zomboid from unauthorized sources without purchasing it constitutes piracy. This guide does not condone or support such activities. Our focus is on users who have legitimately purchased the game and wish to manage their files differently. Often, this involves backing up your own Steam installation files or using a legitimate DRM-free version if available from a seller like GOG.com (though Project Zomboid is primarily on Steam).
- No Automatic Updates: A significant trade-off for manual installation is the loss of automatic updates. You will be responsible for manually downloading and applying any patches or new versions of the game. This requires diligence and awareness of official Project Zomboid releases.
- Mod Sourcing and Security: Similarly, you will not have the Steam Workshop’s integrated mod management. Sourcing mods manually requires vigilance. Always download mods from reputable sources (e.g., official forums, well-known modding websites) and exercise caution. The “Digital Security” aspect here is paramount: unchecked mod files can contain malware or cause system instability. Always scan downloaded files with antivirus software, especially if their origin is not absolutely trusted.
- Loss of Steam Features: Be prepared to lose Steam-specific features such as cloud saves, achievement tracking, easy multiplayer invitations (unless using direct IP connections or third-party tools), and friend list integration.
Proceeding with a clear understanding of these points ensures a responsible and secure Project Zomboid experience outside of Steam.
Foundation First: Installing the Base Game Manually
The first step in building your independent Project Zomboid setup is to get the base game running without any Steam dependencies. This process involves acquiring the necessary files and placing them correctly within your system.
Acquiring Your Game Files Legally
As stressed earlier, legitimate ownership is key. Here’s how you can typically obtain the game files:
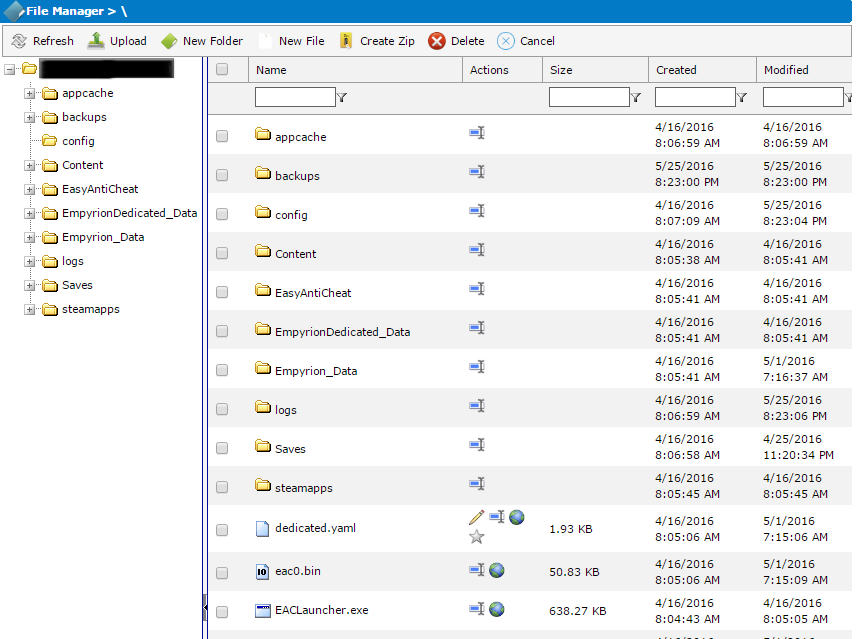
- From Your Existing Steam Installation: If you own Project Zomboid on Steam, you can navigate to its installation directory (e.g.,
C:Program Files (x86)SteamsteamappscommonProjectZomboid). Simply copy this entireProjectZomboidfolder to a new location on your hard drive (e.g.,D:GamesProjectZomboid). This is often the most straightforward method for legitimate owners. Ensure Steam is not running or at least not actively trying to update the game while you copy the files. - GOG.com (if available): If Project Zomboid were available on a DRM-free platform like GOG.com, that would be the ideal source for a truly independent installation. However, as of writing, Project Zomboid is primarily distributed via Steam.
- Developer-Provided DRM-Free Versions (rare for PZ): In some cases, developers might offer a DRM-free version directly. Always check the official Project Zomboid website or forums for such options.
Once you have your ProjectZomboid folder, copy it to a location that’s easy to access and manage, preferably on a drive with ample space and not within your Program Files directory, which can sometimes have permission issues. For example: D:GamesProjectZomboid_Standalone.
Setting Up Your Game Environment
Project Zomboid is a Java-based game, meaning it requires a Java Runtime Environment (JRE) to run. While the Steam version often bundles or manages this, your standalone installation might need a bit of attention.
- Java Runtime Environment (JRE):
- Check existing installation: Navigate to your copied
ProjectZomboidfolder. Look for ajreorjavasubfolder. If it exists and contains Java executable files, the game might already have its own bundled JRE, which is ideal as it prevents conflicts with other Java applications on your system. - If no bundled JRE: You might need to install a compatible JRE (usually Java 8 or newer) on your system. Download the appropriate JRE installer from Oracle (or an open-source alternative like Adoptium/Eclipse Temurin) and install it. Ensure you install the correct 64-bit version if your OS and game setup are 64-bit.
- Check existing installation: Navigate to your copied
- Running the Game:
- Open your
ProjectZomboid_Standalonefolder. - Locate the executable files. For Windows, these are typically
ProjectZomboid64.exe(for 64-bit systems) orProjectZomboid32.exe(for 32-bit systems). You might also find batch files (.bat) or shell scripts (.sh) designed to launch the game with specific Java parameters. - Double-click the appropriate executable to launch the game.
- Open your
Your First Launch and Verification
The first launch is a critical moment. If the game starts successfully, congratulations! You’ve successfully installed Project Zomboid without Steam.
- Initial Configuration: The game will likely create a
Zomboidfolder in yourC:Users[YourUsername]Zomboiddirectory (or similar on Linux/macOS). This folder contains your save games, settings, and where manually installed mods will often reside. Familiarize yourself with this location. - Verify Functionality: Play a short single-player game to ensure everything is working as expected – graphics, sound, controls, and saving/loading. This verifies the base installation before introducing mods.
- Troubleshooting Launch Issues:
- “Java not found” or similar errors: Ensure Java is correctly installed and accessible. If you’re using a system-wide JRE, you might need to adjust environment variables or launch the game via a script that specifies the Java path.
- Missing DLLs or other files: This usually indicates an incomplete copy. Recopy the entire
ProjectZomboidfolder from your legitimate source. - Performance issues: Check your graphics drivers. For Java games, sometimes specific Java Virtual Machine (JVM) arguments can optimize performance, though this is advanced troubleshooting.
With the base game successfully running, you’re ready to unlock its true potential through manual mod integration.
Mastering Manual Mod Integration: Beyond the Workshop
The Steam Workshop simplifies mod management, but manual installation offers unparalleled freedom, especially for specific server setups, custom compilations, or when dealing with legacy mods. This section details how to acquire, place, and activate Project Zomboid mods without Steam.
Sourcing and Preparing Your Mods
Without the Workshop, you’ll need to manually download mod files.
- Reputable Sources:
- Project Zomboid Official Forums: The “Modding” section on the official forums is an excellent place to find well-vetted mods, often directly from their creators.
- Modding Websites: Websites like Nexus Mods might host Project Zomboid mods, though the official forums tend to be the primary hub.
- Private Servers/Communities: If you’re joining a private server, the administrator will usually provide links or direct files for the necessary mods.
- File Format: Most Project Zomboid mods come as
.zipor.rararchives. You’ll need an archiving tool like 7-Zip or WinRAR to extract their contents. - Understanding Mod Structure: When you extract a mod, you’ll typically find a folder (or sometimes multiple folders) named after the mod. Inside, you’ll usually see subfolders like
media,lua,scripts,mods, etc., and often amod.infofile. Thismod.infofile is crucial as it tells the game about the mod. A properly structured mod folder will have themod.infofile directly inside the top-level mod folder (e.g.,MyAwesomeMod/mod.info).
The Art of Manual Mod Placement
Unlike Steam Workshop, where mods magically appear, manual installation requires knowing exactly where to put them. Project Zomboid looks for mods in a specific location:
-
The User’s Zomboid Directory: This is the primary location for manually installed mods.
- Windows:
C:Users[YourUsername]ZomboidMods - Linux:
~/.zomboid/mods/ - macOS:
~/Library/Application Support/Zomboid/mods/
If the
Modsfolder doesn’t exist, create it. - Windows:
-
Placing the Mod Files:
- After extracting your mod archive, take the top-level mod folder (the one containing
mod.info) and place it directly inside theZomboidModsdirectory. - Example: If you downloaded “Brita’s Weapon Pack” and extracted it, you’d find a folder named
Brita's Weapon Pack. You would then move thisBrita's Weapon Packfolder intoC:Users[YourUsername]ZomboidMods. The full path to themod.infofile would then beC:Users[YourUsername]ZomboidModsBrita's Weapon Packmod.info. - Common Mistake: Avoid nested folders (e.g.,
ZomboidModsBritasMod_v2BritasModmod.info). The game won’t find it. Themod.infomust be one level deep fromZomboidMods.
- After extracting your mod archive, take the top-level mod folder (the one containing
Activating and Configuring Your Mods
Simply placing the mod files isn’t enough; you need to tell Project Zomboid to load them.
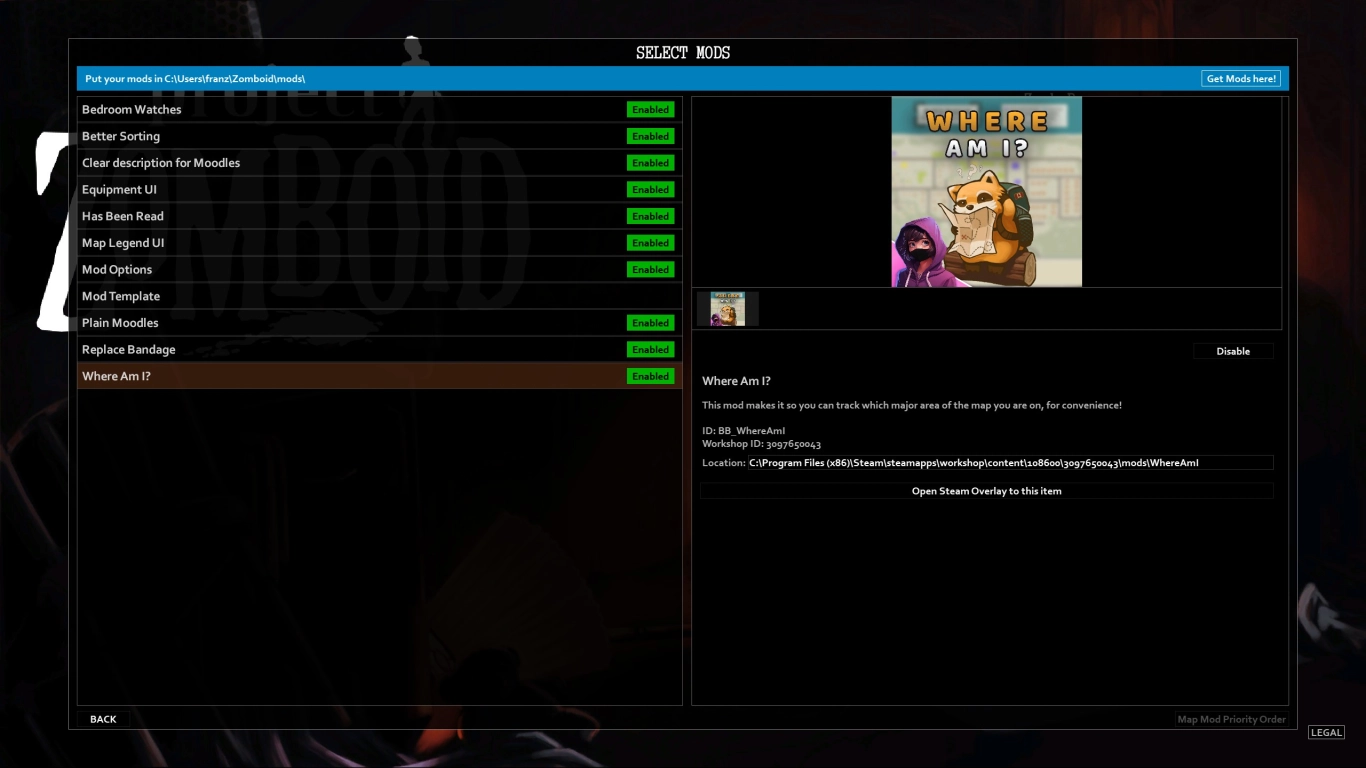
- In-Game Activation (Single Player):
- Launch Project Zomboid.
- From the main menu, go to
Mods. - You should see your manually installed mods listed. Use the checkboxes to activate the desired mods.
- Click
Backand thenLoadorNew Game. When creating a new game or loading an existing one, ensure the mods are enabled in the “Mod Options” tab for that specific save.
- Server-Side Activation (Dedicated Servers):
- For dedicated servers, mods are activated by modifying the server’s configuration files.
- Navigate to your server’s
Zomboiddirectory, then into theServerfolder (e.g.,C:Users[YourUsername]ZomboidServer). - Locate your server’s
.inifile (e.g.,servertest.inifor the default server). Open it with a plain text editor. - Find the
Mods=andMap=lines.Mods=: This line lists the folder names of the mods to be loaded, separated by semicolons. Use the exact folder names found inZomboidMods.- Example:
Mods=Brita's Weapon Pack;Tsar's Common Library
- Example:
Map=: Some large map mods might require their map names to be added to this line. Themod.infofile usually specifies themap=entry.- Example:
Map=Muldraugh, KY;Louisville, KY;ThePitt
- Example:
WorkshopItems=: This line is typically for Steam Workshop IDs. When installing manually, you can usually leave this empty or remove it unless you’re mixing manual mods with Workshop ones (which is complex and often not recommended for a purely Steam-free setup).- Save the
.inifile and restart your server. - Important: Ensure all players connecting to your server also have the exact same versions of the mods installed locally. Mismatched mods are a primary cause of connection issues.
Troubleshooting, Maintenance, and Advanced Insights
Working outside of Steam’s automated system means you’re responsible for the health and stability of your Project Zomboid installation. This brings both challenges and opportunities for deeper understanding.
Common Pitfalls and Solutions
Even with careful installation, issues can arise. Knowing how to diagnose and fix them is crucial.
- Game Crashes on Startup (with mods):
- Cause: Often a mod conflict, incorrect load order, or an outdated/corrupted mod.
- Solution: Deactivate all mods and test if the base game runs. If it does, reactivate mods one by one (or in small batches) to identify the culprit. Pay attention to load order for mods that modify the same game elements; some mods explicitly state their required load position.
- “Missing Assets” or Graphical Glitches:
- Cause: Mod files not correctly placed, or dependencies are missing.
- Solution: Double-check the mod’s folder structure within
ZomboidMods. Ensure all required base mods (e.g., a “library” mod) are installed and activated first.
- Performance Degradation:
- Cause: Too many mods, poorly optimized mods, or insufficient system resources.
- Solution: Review your mod list. Consider which mods are essential. Check mod descriptions for known performance impacts. Ensure your Java settings (e.g., allocated RAM for the JVM if manually configured) are appropriate for your system.
- Server Connection Issues:
- Cause: Mismatched mod versions between server and client, or incorrect server configuration.
- Solution: Verify that every client connecting has the exact same set of mods (and versions) as the server. Check the
Mods=andMap=lines in the server’s.inifile carefully.
Ensuring Security and Stability
Operating outside a curated platform like Steam Workshop places a greater onus on you for digital security.
- Antivirus Scans: Always run downloaded mod archives through a reputable antivirus program before extracting and installing them. While rare, malicious code can be hidden within game files. This directly ties into “Digital Security” from our website topics.
- Backups: Regularly back up your
Zomboiduser folder (containing saves and mod configurations) and yourProjectZomboid_Standalonegame installation folder. This provides a safety net if a mod breaks your game or you need to revert to a previous state. “Productivity” in this context includes efficient recovery methods. - Read Mod Descriptions: Before installing, thoroughly read the mod’s description, installation instructions, and user comments. Look for warnings about conflicts, required dependencies, or known bugs.
- Stay Informed: Keep an eye on Project Zomboid’s official channels for game updates. If a major game patch is released, be prepared for your manually installed mods to potentially break until updated by their creators.
The Broader Impact: Digital Autonomy and Community
Choosing to install Project Zomboid and its mods without Steam is more than just a technical workaround; it’s a statement about digital autonomy. It empowers users to understand and control the software they run, moving beyond mere consumption to active management and customization. This deeper engagement fosters technical literacy, an invaluable skill in an increasingly digital world.
Furthermore, it strengthens direct community ties. By engaging with mod creators on forums and dedicated modding sites, players contribute to a more direct and often more responsive feedback loop than relying solely on platform-based systems. This self-reliance and technical exploration align with the “Tech Trends” and “AI Tools” categories, as understanding underlying systems is fundamental to leveraging advanced technologies. It represents a practical application of “Productivity” by optimizing one’s gaming environment to specific needs.
![]()
Conclusion
Installing Project Zomboid and its mods without Steam is a journey that offers significant advantages in terms of control, customization, and understanding of your game environment. While it demands a more hands-on approach and vigilance regarding updates and security, the ability to fine-tune your apocalypse experience to your exact specifications is a powerful reward.
By carefully following the steps for legitimate file acquisition, precise mod placement, and thoughtful troubleshooting, you can unlock a Project Zomboid experience tailored entirely to your preferences, free from the constraints of any single platform. This guide serves not just as a tutorial for a specific game, but as a testament to the enduring spirit of player empowerment and technical exploration in the vast landscape of PC gaming. Embrace the challenge, learn the ropes, and enjoy Project Zomboid your way.
aViewFromTheCave is a participant in the Amazon Services LLC Associates Program, an affiliate advertising program designed to provide a means for sites to earn advertising fees by advertising and linking to Amazon.com. Amazon, the Amazon logo, AmazonSupply, and the AmazonSupply logo are trademarks of Amazon.com, Inc. or its affiliates. As an Amazon Associate we earn affiliate commissions from qualifying purchases.