In the ever-evolving landscape of technology, maintaining an optimal computing environment is paramount for productivity, security, and overall user experience. Over time, even the most robust operating systems can accumulate digital clutter, leading to sluggish performance, unexpected errors, and potential security vulnerabilities. This is where the concept of a “clean install” of Windows 10 becomes not just a troubleshooting step, but a strategic move for any tech-savvy individual or business aiming to maximize their digital efficiency. This comprehensive guide will walk you through every step of performing a clean installation of Windows 10, transforming your system into a streamlined, high-performance machine ready to tackle any task.

Understanding the “Clean Install” Advantage
Before diving into the technicalities, it’s crucial to grasp what a clean install entails and why it’s often the superior choice for rejuvenating your PC. Far more than just an upgrade, a clean install represents a complete system overhaul, stripping away years of digital baggage to provide a pristine foundation.
What is a Clean Install?
A clean install of Windows 10 involves erasing all existing data, applications, and the operating system itself from your computer’s primary storage drive, and then installing a fresh copy of Windows 10 onto that blank slate. Unlike an in-place upgrade, which attempts to preserve your files and settings while updating the OS, a clean install starts from scratch. This means every byte of data on your chosen installation drive is wiped, making way for a brand-new operating system environment. The result is a system free from remnants of old software, corrupted files, registry errors, and lingering malware that might have accumulated over time. It’s akin to moving into a brand new, unfurnished house, allowing you to design and decorate it exactly as you wish, without having to deal with the previous tenant’s clutter.
Why Opt for a Fresh Start?
The benefits of a clean Windows 10 installation extend far beyond mere aesthetics. For users focused on technology trends, productivity, and digital security, the advantages are significant:
- Unparalleled Performance Boost: This is perhaps the most immediate and noticeable benefit. A fresh installation eliminates bloatware (unnecessary pre-installed software), fragmented files, and registry entries that slow down your system. Your PC will boot faster, applications will launch quicker, and multitasking will become smoother, leading to a substantial increase in overall system responsiveness. This directly translates to improved productivity, as you spend less time waiting and more time working or creating.
- Troubleshooting and Stability: If you’ve been battling persistent errors, random crashes, or inexplicable slowdowns, a clean install is often the ultimate solution. It acts as a reset button, resolving deep-seated software conflicts and operating system corruption that conventional troubleshooting methods might miss. This enhanced stability ensures a more reliable computing experience, crucial for both personal and professional use.
- Enhanced Digital Security: Over time, your system can become a repository for various digital threats, even if they’re dormant. A clean install wipes away potential malware, rootkits, and other malicious software that might be lurking beneath the surface, providing a fresh and secure baseline. Coupled with up-to-date antivirus and security practices post-installation, this significantly bolsters your digital defenses.
- Elimination of Bloatware: Many new computers come pre-loaded with manufacturer-specific software that often consumes resources without providing significant value. A clean install allows you to avoid this “bloatware,” giving you full control over what applications reside on your system. This lean approach contributes to better performance and a more personalized computing experience.
- Improved System Health and Longevity: By regularly performing clean installs (perhaps every 1-2 years, depending on usage), you can significantly extend the perceived lifespan and usability of your hardware. A well-maintained software environment reduces strain on components and keeps your system feeling new, delaying the need for costly hardware upgrades.
Essential Preparations Before You Begin
A successful clean installation hinges on meticulous preparation. Skipping these crucial steps can lead to data loss, activation issues, or a frustrating installation process. Think of this as laying the groundwork for a robust digital infrastructure.
Safeguarding Your Data: The Backup Imperative
This is arguably the most critical step. Since a clean install will erase everything on your chosen drive, backing up your personal files, documents, photos, videos, and any other important data is not optional – it’s an absolute necessity. Losing precious memories or critical work files due to oversight is a nightmare you want to avoid.
- What to Back Up: Don’t just think about files in your “Documents” or “Pictures” folders. Consider your desktop files, downloads folder, browser bookmarks, email archives, game saves, and any specialized application data. It’s better to back up too much than too little.
- Backup Methods:
- External Hard Drive/USB Drive: A reliable and straightforward method. Simply copy and paste your important folders.
- Cloud Storage: Services like OneDrive, Google Drive, Dropbox, or iCloud offer convenient syncing and access from anywhere. Ensure you have enough storage space.
- Network Attached Storage (NAS): For those with a home network, a NAS provides centralized, robust backup capabilities.
- Backup Software: Dedicated backup solutions can create system images or selectively back up files, often with scheduling features.
- Verification: After backing up, take a moment to verify that your critical files are indeed accessible from your backup location. Connect your external drive, log into your cloud service, and open a few files to ensure their integrity. This small step can save immense heartache.
Gathering Your Tools: Product Key, Installation Media, and More
Once your data is safe, gather the necessary items for the installation itself.
- Windows 10 Product Key (If Applicable): If your copy of Windows 10 was pre-installed by the manufacturer, your license is usually tied to your motherboard (digital license) and will reactivate automatically after installation, provided you install the same edition (Home, Pro, etc.). If you purchased a retail key, make sure you have it written down or saved securely. You can often retrieve your current product key using third-party tools if needed. For digital licenses linked to your Microsoft account, simply logging in post-installation will typically activate Windows.
- A Blank USB Flash Drive (8GB or Larger): This will become your bootable Windows 10 installation media. Ensure it’s empty, as its contents will be erased during the media creation process.
- Stable Internet Connection: You’ll need this to download the Windows 10 ISO file and, importantly, to download drivers and updates after the installation is complete.
- Another Working Computer (If Your Current One is Unstable): If your current PC is too unstable to download files or create bootable media, you’ll need access to another computer to perform these steps.
Creating Your Bootable Windows 10 USB Drive
This USB drive will be the medium from which your computer boots and installs Windows 10. The easiest and most reliable way to create it is using Microsoft’s official Media Creation Tool.
- Download the Media Creation Tool: Visit the official Microsoft Windows 10 download page (search “Download Windows 10” on Google to find it). Look for the “Download tool now” button and click it to download the
MediaCreationTool.exe. - Run the Tool: Insert your blank USB flash drive into a USB port. Run the downloaded
MediaCreationTool.exefile. You may need to grant administrator permissions. - Accept Terms: Accept the license terms.
- Choose “Create installation media”: On the “What do you want to do?” screen, select “Create installation media (USB flash drive, DVD, or ISO file) for another PC” and click “Next.”
- Select Language, Edition, and Architecture: The tool will usually recommend options based on your current PC. If you’re installing on a different machine or want to change settings, uncheck “Use the recommended options for this PC.” Choose your desired language, Windows 10 edition (Home, Pro – ensure it matches your license), and architecture (64-bit is standard for most modern PCs). Click “Next.”
- Choose USB Flash Drive: Select “USB flash drive” as the media you want to use and click “Next.”
- Select Your USB Drive: From the list of available drives, select your empty USB flash drive. Double-check that you’re selecting the correct drive, as its contents will be erased. Click “Next.”
- Download and Create: The tool will now download the Windows 10 files and create the bootable USB drive. This process can take some time, depending on your internet speed. Once completed, you’ll see a message indicating that your USB flash drive is ready. Click “Finish.”
You now have your bootable Windows 10 installation media.
The Step-by-Step Clean Installation Process
With preparations complete, you’re ready to initiate the installation. This section details the critical steps within the Windows Setup environment.
Initiating the Boot Sequence
To begin, you need to instruct your computer to boot from the USB drive instead of its internal hard drive.
- Connect the USB Drive: Plug your newly created bootable Windows 10 USB flash drive into an available USB port on the computer where you intend to perform the clean install.
- Restart Your Computer: Restart your PC. As it starts up, you’ll need to repeatedly press a specific key to enter your computer’s BIOS/UEFI settings or a boot menu. Common keys include
Del,F2,F10,F12, orEsc. The exact key varies by manufacturer (e.g., Dell, HP, Lenovo, ASUS, Acer). Look for an on-screen prompt during startup. If you miss it, restart and try again. - Access Boot Menu or BIOS/UEFI:
- Boot Menu (Recommended for ease): If you can access a “Boot Menu,” select your USB drive from the list (it might appear as “UEFI: [USB Drive Name]” or simply “[USB Drive Name]”). This will temporarily boot from the USB without changing permanent settings.
- BIOS/UEFI Settings: If you enter the BIOS/UEFI setup utility, navigate to the “Boot” tab or section. Locate “Boot Order” or “Boot Priority” and change the order so that your USB drive is listed as the first boot device. Save your changes (often
F10) and exit.
- Boot from USB: Your computer should now boot from the USB drive, and you’ll see the Windows setup logo appear. If you see a “Press any key to boot from CD or DVD…” message, do so quickly.
Navigating the Windows Setup Wizard
The initial setup screens are straightforward.
- Language and Keyboard: On the first screen, select your preferred language, time and currency format, and keyboard or input method. Click “Next.”
- Install Now: Click the “Install now” button.
- Product Key (Optional): If prompted for a product key, you can enter it now. If you have a digital license linked to your Microsoft account or plan to activate later, you can click “I don’t have a product key” and continue. Windows will typically activate automatically once connected to the internet after installation, assuming your digital license is recognized.
- Choose Operating System: Select the edition of Windows 10 (Home, Pro) that your product key or digital license corresponds to. Click “Next.”
- Accept License Terms: Read the license terms, check the “I accept the license terms” box, and click “Next.”
Custom Installation and Disk Partitioning
This is the most crucial step for a “clean” installation. Proceed with caution, as incorrect choices here can lead to data loss.
- Choose Installation Type: On the “Which type of installation do you want?” screen, select “Custom: Install Windows only (advanced).” Do NOT choose “Upgrade,” as this will not perform a clean install.
- Delete Existing Partitions: You will see a list of drives and partitions. This is where you prepare your hard drive for a fresh Windows installation.
- Identify Your Main Drive: Locate the drive where you want to install Windows (usually
Drive 0). Be extremely careful if you have multiple physical drives installed, especially if one contains data you wish to keep. - Delete Partitions: Select each partition associated with your main Windows drive (e.g., “System Reserved,” “Primary,” “Recovery,” “OEM”) one by one, and click “Delete.” Confirm any warnings. Your goal is to reduce your chosen drive to a single “Unallocated Space.” Warning: This will permanently erase all data on these partitions.
- Why Delete? Deleting old partitions ensures that no remnants of previous operating systems, corrupted files, or bloatware remain, providing a truly clean slate.
- Identify Your Main Drive: Locate the drive where you want to install Windows (usually
- Create New Partition (Optional, but recommended): Once you have a single block of “Unallocated Space” on your target drive:
- Select the “Unallocated Space.”
- Click “New.” Windows will usually suggest the maximum available size. You can adjust this if you wish to create separate partitions for your operating system and data, but for most users, using the full size is fine. Click “Apply” and then “OK” when prompted that Windows might create additional partitions for system files.
- Windows will automatically create necessary small system partitions (e.g., Recovery, EFI System, MSR) and a main “Primary” partition for Windows.
- Select Primary Partition and Install: Select the newly created “Primary” partition (or the largest one created by Windows if you let it partition automatically) and click “Next” to begin the installation.
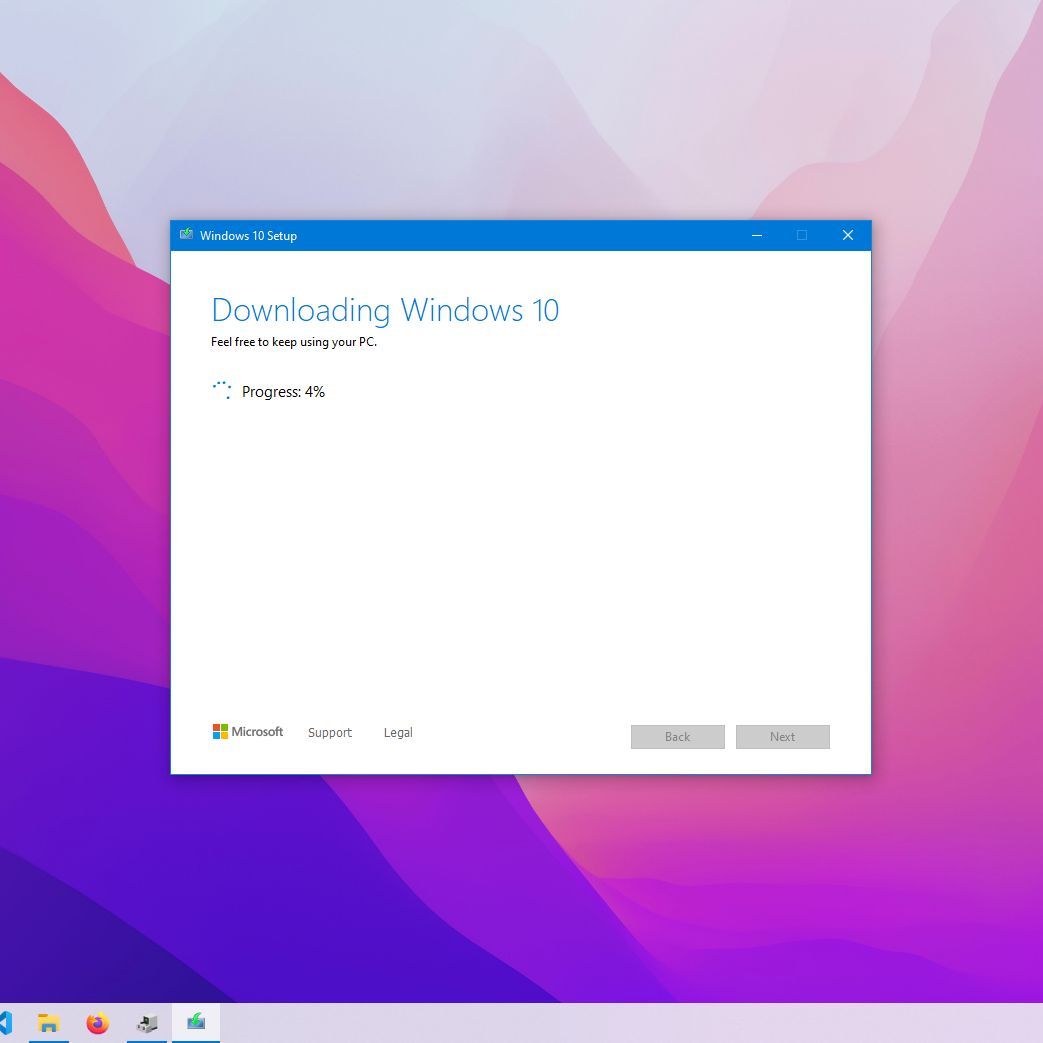
Windows will now start copying files, installing features, and performing the initial setup. Your computer will restart multiple times during this process. Do not remove the USB drive until after the first major restart, or better yet, until you reach the desktop environment.
Completing the Initial Setup
After the final restart, you’ll be greeted by the Out-of-Box Experience (OOBE) to configure your personal settings.
- Region and Keyboard Layout: Select your region and keyboard layout. You can add a second keyboard layout if needed.
- Network Connection: Connect to a Wi-Fi network or plug in an Ethernet cable. An internet connection is recommended for initial setup and updates.
- Account Setup:
- Microsoft Account: Sign in with your Microsoft account (Outlook.com, Live.com, Hotmail.com). This links your digital license for activation and syncs settings.
- Local Account: If you prefer not to use a Microsoft account, you might see an option to create a “Local Account.” On Windows 10 Home, you might need to temporarily disconnect from the internet during setup to get this option.
- Create PIN: Windows will prompt you to create a PIN for faster sign-ins.
- Privacy Settings: Review the privacy settings (location, diagnostics, advertising ID, etc.) and choose your preferences. Microsoft defaults tend to be less privacy-centric, so review carefully.
- Cortana, OneDrive, Timeline, etc.: You’ll be asked about enabling various Windows features. Accept or decline based on your preferences.
- Finalizing: Windows will go through some final setup screens (“Hi,” “Getting things ready,” “This might take a few minutes”). Eventually, you will arrive at your brand-new Windows 10 desktop.
Post-Installation Optimization and Security
Your clean Windows 10 installation is complete, but the work isn’t entirely done. To ensure optimal performance, security, and a full-featured experience, follow these post-installation steps. This stage is crucial for transforming your bare-bones OS into a truly productive and secure environment.
Installing Essential Drivers
One of the first and most critical tasks is installing the correct drivers for your hardware. While Windows 10 includes many generic drivers, manufacturer-specific drivers often provide better performance, stability, and access to all hardware features.
- Check Device Manager: Right-click the Start button and select “Device Manager.” Look for any devices with yellow exclamation marks, indicating missing or improperly installed drivers. Common culprits include graphics cards, chipsets, network adapters (Wi-Fi/Ethernet), and audio devices.
- Download from Manufacturer Websites:
- Motherboard/PC Manufacturer: Visit the support website for your computer manufacturer (e.g., Dell, HP, Lenovo) or your motherboard manufacturer (e.g., ASUS, Gigabyte, MSI) if you built your PC. Enter your specific model number.
- Identify Key Drivers: Focus on downloading the latest drivers for:
- Chipset: Crucial for overall system stability and communication between components.
- Graphics Card: Essential for display performance, especially for gaming or professional graphics work. Download directly from NVIDIA, AMD, or Intel if it’s a discrete GPU.
- Network (LAN/Wi-Fi): If you’re not already connected to the internet, you’ll need this first. You might need to download this on another PC and transfer it via USB.
- Audio: For sound functionality.
- USB 3.0/3.1/Thunderbolt: For full functionality of high-speed USB ports.
- Install Drivers: Install the drivers one by one, typically restarting your PC as prompted after each major driver installation.
Updating Windows and Your Software
Keeping your operating system and applications up-to-date is fundamental for security, performance, and accessing new features.
- Run Windows Update: Go to
Settings > Update & Security > Windows Updateand click “Check for updates.” Let Windows download and install all available updates. This may take some time and require multiple restarts. Repeat the process until no more updates are found. This ensures you have the latest security patches and system improvements. - Install Antivirus Software: While Windows Defender provides basic protection, many users prefer a third-party antivirus solution for enhanced features and protection. Install your chosen security software immediately after updating Windows.
- Install Essential Applications: Begin installing the software you use daily:
- Web Browser: (Chrome, Firefox, Edge, Brave, etc.)
- Productivity Suites: (Microsoft Office, LibreOffice, Google Workspace apps)
- Communication Tools: (Slack, Zoom, Teams, Discord)
- Creative Software: (Adobe Creative Cloud, GIMP, Audacity)
- Other Utilities: (File archivers like 7-Zip, media players like VLC, cloud storage clients like OneDrive/Dropbox/Google Drive).
Restoring Your Data and Personalizing Your Experience
Now that your system is stable and updated, it’s time to bring back your personal touch.
- Restore Your Backed-Up Data: Connect your external backup drive or log into your cloud storage and copy your personal files back to their respective locations (Documents, Pictures, Videos, Desktop, etc.). Organize them logically.
- Personalize Settings:
- Desktop Background, Themes: Customize your visual environment.
- Display Settings: Adjust resolution, scaling, and multiple monitors.
- Sound Settings: Configure audio output and input devices.
- Privacy Settings: Re-review and fine-tune your privacy options in
Settings > Privacy. - Notifications & Actions: Manage which apps can send notifications.
- Start Menu and Taskbar: Pin frequently used apps for quick access.
- Create a System Restore Point: Once your system is fully set up, drivers installed, and essential software in place, create a system restore point (
Search "Create a restore point" in Windows search). This acts as a snapshot, allowing you to easily revert to this stable state if future installations or updates cause issues.

Enhancing Security and Performance Further
Even after a clean install, continuous vigilance is key.
- Firewall Configuration: Ensure your Windows Firewall is active and properly configured. If you use a third-party security suite, its firewall might take over.
- Regular Maintenance:
- Disk Cleanup: Periodically run Disk Cleanup to remove temporary files.
- Defragmentation (for HDDs): If you have a traditional hard disk drive (HDD), Windows automatically defragments it. For Solid State Drives (SSDs), defragmentation is unnecessary and can reduce drive lifespan; Windows automatically optimizes SSDs differently.
- Software Updates: Regularly check for updates for all your installed applications, not just Windows.
- Digital Security Best Practices:
- Strong Passwords: Use unique, complex passwords for all your accounts. Consider a password manager.
- Two-Factor Authentication (2FA): Enable 2FA wherever possible for an extra layer of security.
- Be Wary of Phishing: Exercise caution with suspicious emails and links.
- Regular Backups: Continue your backup routine for ongoing data protection.
A clean installation of Windows 10 is a powerful tool for maintaining a fast, secure, and productive computing environment. By following these detailed steps, you can breathe new life into your PC, ensuring it remains a reliable asset for all your technological endeavors. This meticulous process not only enhances performance but also reinforces your digital security, allowing you to focus on innovation and efficiency in an increasingly digital world.
aViewFromTheCave is a participant in the Amazon Services LLC Associates Program, an affiliate advertising program designed to provide a means for sites to earn advertising fees by advertising and linking to Amazon.com. Amazon, the Amazon logo, AmazonSupply, and the AmazonSupply logo are trademarks of Amazon.com, Inc. or its affiliates. As an Amazon Associate we earn affiliate commissions from qualifying purchases.