In the dynamic world of technology, keeping your operating system fresh and optimized is crucial for maintaining peak performance, enhancing digital security, and boosting overall productivity. While simply upgrading Windows 11 might seem sufficient, a “clean install” offers a fundamentally different and far more beneficial experience. This comprehensive guide will walk you through the entire process of performing a clean installation of Windows 11 on your HP laptop, ensuring a streamlined, clutter-free, and lightning-fast computing environment. Whether your HP laptop is feeling sluggish, riddled with software conflicts, or you simply want to start anew, this detailed tutorial will equip you with all the knowledge and steps required to refresh your machine from the ground up.
Why a Clean Install? Understanding the Benefits
Many users opt for an in-place upgrade when a new version of Windows becomes available or when their system starts misbehaving. However, an upgrade often carries over existing files, settings, and even remnants of old software, which can lead to continued performance issues or even introduce new ones. A clean install, on the other hand, is akin to giving your HP laptop a complete digital detox.
A Fresh Start: Performance and Stability Boost
Imagine buying a brand-new car and immediately filling the trunk with old junk from your previous vehicle. That’s somewhat analogous to an in-place upgrade. A clean install wipes your primary drive entirely, installing Windows 11 from scratch. This process ensures that no leftover files, corrupted system entries, or fragmented data are carried over from your previous installation. The result is a genuinely fresh operating system that boots faster, runs applications more smoothly, and responds more snappily. For an HP laptop, which often comes with a specific suite of pre-installed software, a clean install allows you to selectively re-install only what you need, minimizing bloatware and freeing up valuable system resources. This translates directly into improved stability and a more responsive user experience, making your daily tasks and demanding applications run with newfound efficiency.
Eliminating Digital Clutter and Malware
Over time, every computer accumulates digital clutter: temporary files, leftover uninstalled program data, redundant registry entries, and even remnants of malware that might have been partially removed. This digital debris can bog down your system, consume disk space, and potentially compromise your laptop’s security. A clean install acts as a powerful digital disinfectant. By formatting your primary drive, you effectively erase all this accumulated clutter and any hidden malicious software that might be lurking deep within the system files. This fresh start significantly reduces vulnerabilities, offering a stronger foundation for your digital security protocols. It’s an excellent proactive measure against lingering threats and ensures that your HP laptop operates on a clean, secure slate, safeguarding your personal data and enhancing your online safety.
Optimizing Your HP Laptop’s Potential
HP laptops are renowned for their robust hardware and design. However, their full potential can often be stifled by an inefficient or overloaded operating system. A clean install of Windows 11 allows you to truly optimize your HP laptop’s capabilities. With a pristine OS, you can ensure that drivers are up-to-date and correctly installed, system resources are allocated efficiently, and there are no background processes unnecessarily consuming CPU cycles or RAM. This optimization is particularly beneficial for tasks requiring significant processing power, such as video editing, gaming, or running complex business applications. By eliminating unnecessary software and establishing a clean environment, you empower your HP laptop to perform at its peak, extending its lifespan and maximizing your return on investment in technology.
Essential Preparations Before You Begin
A clean install is a destructive process for your primary drive. Therefore, meticulous preparation is not just recommended, but absolutely mandatory. Skipping these crucial steps can lead to data loss and significant headaches.
Back Up Your Precious Data: A Non-Negotiable Step
This is perhaps the single most critical step. When you perform a clean install, the drive where Windows 11 will be installed will be completely wiped. This means all your personal files – documents, photos, videos, music, and any other data stored on that drive – will be permanently deleted.
What to Back Up:
- Personal Files: Your
Documents,Pictures,Videos,Music, andDownloadsfolders are prime candidates. - Browser Bookmarks/Favorites: Export these from your web browser.
- Email Data: If you use a desktop email client (like Outlook), back up your PST/OST files.
- Application Settings: For specific applications, you might need to back up their configuration files if you want to restore custom settings.
- Product Keys: Make a note of any essential software product keys you might need to reinstall.
How to Back Up:
- External Hard Drive: The most common and reliable method. Simply copy and paste your important folders.
- Cloud Storage: Services like OneDrive, Google Drive, or Dropbox offer convenient backup solutions, especially for smaller file sizes or frequently accessed documents.
- Network Attached Storage (NAS): If you have a home network server, this is another robust option.
- USB Flash Drive: Suitable for smaller sets of critical files.
Ensure your backups are verified and accessible before proceeding. Double-check that everything important is saved to an external location that will not be affected by the installation.
Gathering Your Tools: Windows 11 Installation Media
To install Windows 11, you’ll need bootable installation media, typically a USB flash drive (at least 8GB).
Using the Media Creation Tool
This is the recommended and easiest method provided by Microsoft.
- Download the Tool: Go to the official Microsoft Windows 11 download page. Under “Create Windows 11 Installation Media,” click “Download Now.”
- Run the Tool: Execute the downloaded
MediaCreationToolW11.exe. - Accept Terms: Agree to the license terms.
- Language and Edition: Confirm the language and Windows 11 edition (usually Home/Pro, it will match your existing license or prompt you later).
- Choose Media: Select “USB flash drive” and ensure your USB drive is connected.
- Select Drive: Choose the correct USB drive from the list. Be absolutely sure you select the correct drive, as the tool will erase all data on it.
- Create: The tool will then download Windows 11 and create the bootable USB drive. This can take some time depending on your internet speed.
Alternative: Rufus for Advanced Users
Rufus is a powerful utility for creating bootable USB drives, offering more control, such as bypassing certain Windows 11 hardware requirements (like TPM 2.0 or Secure Boot checks) if your HP laptop doesn’t officially meet them, though for most HP laptops made in the last few years, this won’t be necessary.
- Download Windows 11 ISO: First, you’ll need to download the Windows 11 ISO file directly from Microsoft’s website (under “Download Windows 11 Disk Image (ISO)”).
- Download Rufus: Get the latest version of Rufus from its official website.
- Run Rufus: Launch Rufus.
- Select USB Drive: Choose your USB flash drive under “Device.”
- Select ISO: Click “SELECT” and browse to your downloaded Windows 11 ISO file.
- Image Option: Rufus will detect the ISO and often suggest appropriate options. If you need to bypass requirements, look for options like “No TPM / No Secure Boot” during the setup.
- Start: Click “START” to begin the process. Again, all data on the USB drive will be erased.
Checking Your HP Laptop’s Readiness: System Requirements and Drivers
Before you proceed, it’s wise to ensure your HP laptop meets the basic Windows 11 system requirements:
- Processor: 1 gigahertz (GHz) or faster with 2 or more cores on a compatible 64-bit processor or System on a Chip (SoC).
- RAM: 4 gigabytes (GB).
- Storage: 64 GB or larger storage device.
- System Firmware: UEFI, Secure Boot capable.
- TPM: Trusted Platform Module (TPM) version 2.0.
- Graphics Card: Compatible with DirectX 12 or later with WDDM 2.0 driver.
- Display: High definition (720p) display that is greater than 9” diagonally, 8 bits per color channel.
- Internet Connection: Required for initial setup.
While most modern HP laptops meet these, older models might struggle with TPM or Secure Boot.
Gathering Drivers:
While Windows 11 has a good repository of built-in drivers, it’s a good practice to proactively download essential drivers for your specific HP laptop model, especially network (Wi-Fi/Ethernet) drivers, graphics drivers, and chipset drivers. These can be found on HP’s official support website by entering your laptop’s serial number or product name. Having them on a separate USB drive or an external hard drive (not the installation media) ensures you can get online and install other drivers immediately after the clean install, even if Windows 11 doesn’t automatically detect your Wi-Fi card.
Powering Up and BIOS/UEFI Access Considerations
Ensure your HP laptop is plugged into a power source throughout the entire installation process. A power interruption could corrupt the installation and render your laptop unbootable.
You’ll need to access your HP laptop’s BIOS/UEFI settings or Boot Menu to tell it to boot from the USB drive.
- Common HP Boot Keys:
- Esc: Often brings up a startup menu where you can select F9 for Boot Device Options or F10 for BIOS Setup.
- F9: Directly accesses the Boot Device Options menu.
- F10: Directly accesses the BIOS Setup.
- Procedure: Power on your HP laptop and repeatedly press the appropriate key (Esc, F9, or F10) until the menu appears.
Step-by-Step Guide to Clean Installing Windows 11
With your backup secured and installation media ready, it’s time to perform the clean install.

Booting from the Installation Media on Your HP
- Connect USB: Insert your bootable Windows 11 USB flash drive into an available USB port on your HP laptop.
- Restart Laptop: Restart your HP laptop.
- Access Boot Menu/BIOS: As the laptop powers on, repeatedly press the designated HP key (usually
Esc, thenF9for Boot Device Options, orF10for BIOS Setup).- If you enter the Boot Device Options (F9): Select your USB drive from the list (it might be labeled as “USB Hard Drive,” “UEFI: [USB Drive Name],” or the brand of your USB drive).
- If you enter the BIOS Setup (F10): Navigate to the “Boot Options” or “Boot Order” section. You might need to disable “Secure Boot” temporarily or enable “Legacy Support” if you’re having trouble booting from USB, though for most modern systems, UEFI with Secure Boot enabled will work fine. Move your USB drive to the top of the boot order. Save changes and exit.
- Boot from USB: Your HP laptop should now boot from the USB drive, and you’ll see the Windows 11 setup screen.
Navigating the Windows Setup Wizard
Once the Windows 11 setup loads, follow these steps carefully:
Initial Language and Region Settings
- Language, Time, and Keyboard: Select your preferred language to install, time and currency format, and keyboard or input method. Click “Next.”
- Install Now: Click the large “Install now” button.
Product Key and Edition Selection
- Product Key: The setup will ask for a product key.
- If you have a digital license linked to your Microsoft account, or your HP laptop came with Windows 10/11 pre-installed and you’re reinstalling the same edition, you can often click “I don’t have a product key.” Windows will activate automatically once you connect to the internet and sign in with your Microsoft account.
- If you have a new product key, enter it here.
- Choose Edition: If you didn’t enter a product key, you might be prompted to choose the edition of Windows 11 (e.g., Windows 11 Home, Windows 11 Pro). Select the edition you are licensed for. Click “Next.”
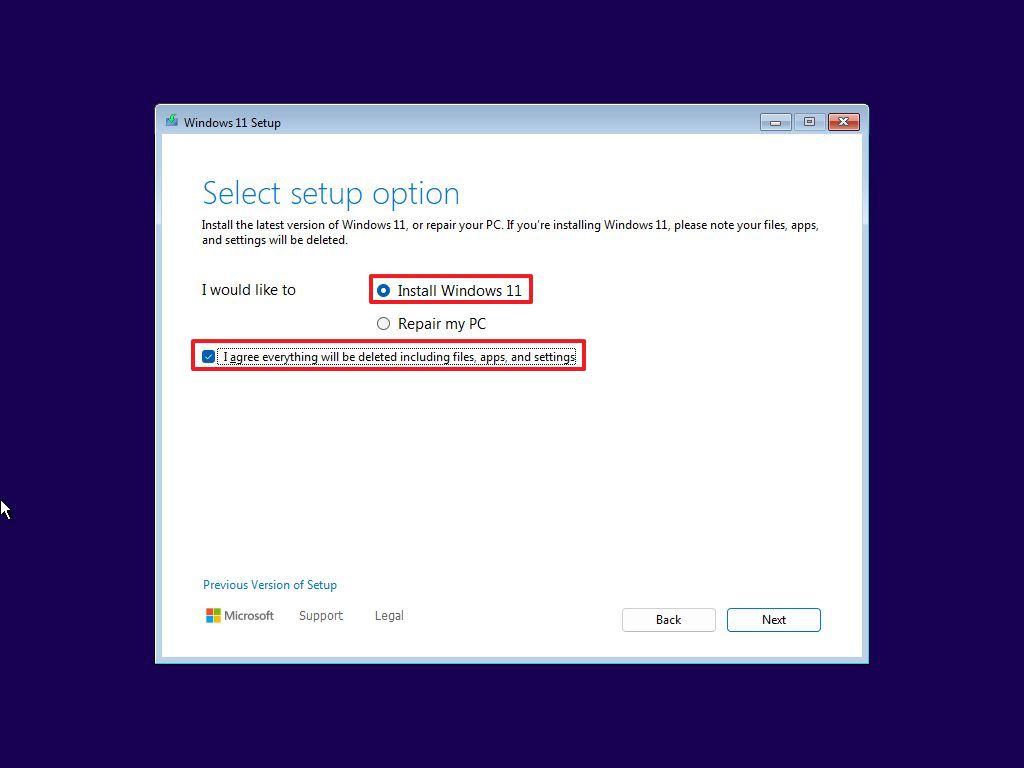
The Critical Step: Custom Installation and Disk Partitioning
- License Terms: Accept the Microsoft Software License Terms. Click “Next.”
- Type of Installation: This is where the “clean install” happens. Select “Custom: Install Windows only (advanced).” Do NOT select “Upgrade: Install Windows and keep files, settings, and applications.”
- Disk Partitioning: You will now see a list of drives and partitions. This is the most crucial part where data loss can occur if you’re not careful.
- Identify Your Drive: Locate the drive where you want to install Windows 11 (typically “Drive 0”). Be extremely careful to select the correct drive, especially if you have multiple internal drives.
- Delete Partitions: For a true clean install, you should delete all existing partitions related to your previous Windows installation (e.g., “Drive 0 Partition 1,” “Drive 0 Partition 2,” etc.). Select each partition on your target drive and click “Delete.” Confirm any warnings. This will turn the entire drive into “Unallocated Space.”
- Create New Partition: Select the “Unallocated Space” on your target drive and click “New” to create a new partition. The setup will usually suggest using the maximum available space, which is typically what you want for your primary Windows partition. Click “Apply” to create the partition(s) (Windows often creates a small system reserved partition automatically).
- Select Installation Partition: Select the newly created primary partition (e.g., “Drive 0 Partition 3: Primary”) and click “Next.”
Completing the Core Installation
Windows will now begin installing. This involves copying files, installing features, and installing updates. Your HP laptop will restart several times during this process. Do not remove the USB drive until after the first major restart, when you see the “Let’s start with region” screen.
Initial Setup and Personalization
After the core installation, your HP laptop will boot into the out-of-box experience (OOBE) for initial setup:
- Region and Keyboard Layout: Select your country/region and keyboard layout. You can add a second keyboard layout if needed.
- Network Connection: Connect to a Wi-Fi network (if applicable) or an Ethernet connection. An internet connection is required for subsequent steps.
- Name Your Device: You can name your HP laptop now or skip this step.
- Microsoft Account Sign-in: Sign in with your Microsoft account. This is crucial for linking your digital license and accessing cloud services like OneDrive. If you prefer a local account, there are methods to bypass the Microsoft account requirement, though it’s less straightforward in Windows 11 Home.
- PIN Creation: Create a PIN for faster and more secure login.
- Privacy Settings: Review and choose your privacy settings. Microsoft defaults to many tracking options, so customize these to your preference.
- Customize Your Experience: Windows 11 may ask about your intended use for the laptop (e.g., gaming, creativity, business) to tailor suggested apps and services.
- OneDrive Setup: Choose whether to back up your files to OneDrive.
- HP Specific Setup: Your HP laptop might have some initial HP setup screens. Follow them or skip as desired.
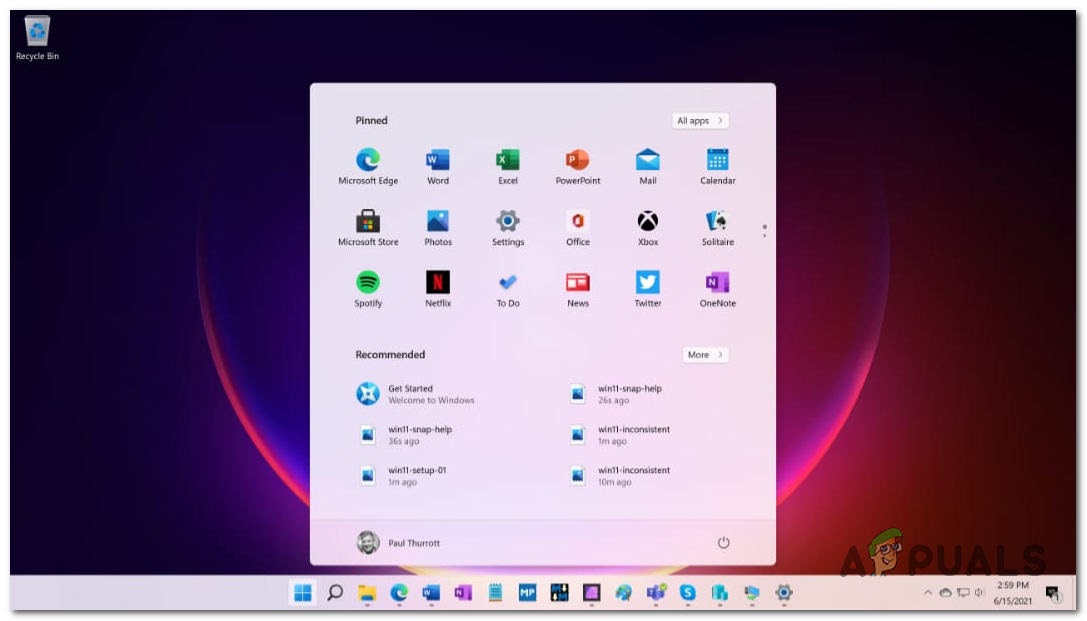
Once these steps are complete, you’ll be greeted by the brand-new Windows 11 desktop.
Post-Installation Essentials: Optimizing Your New Windows 11 System
A clean install provides the foundation, but a few crucial steps are needed to get your HP laptop fully operational and optimized.
Installing Drivers for Peak Performance (Especially on HP)
While Windows 11 usually installs generic drivers, it’s vital to install manufacturer-specific drivers to unlock your HP laptop’s full potential and ensure all hardware components function correctly.
- Network Drivers First: If your Wi-Fi or Ethernet isn’t working, install the network drivers you downloaded earlier. This is your gateway to further updates.
- HP Support Assistant / HP Website:
- HP Support Assistant: Many HP laptops come with or can install the HP Support Assistant, which automates driver detection and installation. This is highly recommended.
- Manual Download: Go to the official HP Support website, enter your laptop’s serial number or model, and navigate to the “Software and Drivers” section. Download and install all critical drivers, especially for:
- Chipset: Essential for motherboard communication.
- Graphics (Intel/AMD/NVIDIA): Crucial for display performance and gaming.
- Audio: For sound functionality.
- Touchpad/Keyboard: For proper input device functionality.
- Storage (e.g., Intel Rapid Storage Technology): For SSD/HDD optimization.
- BIOS Updates: Consider updating your BIOS (with caution, only if necessary and following HP’s instructions precisely) for improved compatibility and performance.
- Install in Order: It’s generally best to install chipset drivers first, followed by graphics, then audio, and then other peripheral drivers.
Windows Updates and Security Patches
Even with a fresh install, your Windows 11 might not have the absolute latest security patches or feature updates.
- Check for Updates: Go to
Settings > Windows Updateand click “Check for updates.” - Install All Updates: Download and install all available updates. This might involve multiple restarts. This ensures your system is secure against the latest threats and has the most recent feature enhancements.
- Microsoft Store Apps: Open the Microsoft Store, go to “Library,” and “Get updates” for pre-installed apps.
Restoring Your Data and Essential Software
Now that your system is stable and updated:
- Restore Data: Copy your backed-up personal files from your external drive or cloud storage back to the appropriate folders on your HP laptop.
- Install Essential Software: Reinstall all the applications you need for work, creativity, communication, and entertainment. This includes your web browser of choice, office suite (Microsoft Office, LibreOffice), security software (if not relying solely on Windows Defender), media players, and any specialized programs.
- Personalize Settings: Reconfigure your desktop background, themes, notification settings, and any other system preferences to your liking.
Fine-Tuning Your HP Laptop’s Settings
With a clean slate, you have the opportunity to configure Windows 11 optimally for your usage.
- Privacy Settings: Revisit
Settings > Privacy & securityto fine-tune app permissions, diagnostic data, and activity history to protect your privacy. - Power Options: Adjust your power plan in
Settings > System > Power & batteryto balance performance and battery life according to your needs. - Storage Sense: Enable
Storage SenseinSettings > System > Storageto automatically free up space by deleting temporary files and managing old downloads. - Startup Apps: Review
Settings > Apps > Startupto disable unnecessary programs from launching with Windows, further improving boot times and performance.
Troubleshooting and Advanced Tips
Even with a detailed guide, issues can sometimes arise. Knowing how to address them can save a lot of frustration.
Common Issues During Installation
- “No device drivers were found”: This usually means Windows couldn’t detect your storage controller. This is rare for modern HP laptops but can happen with certain NVMe SSDs or RAID configurations. You might need to manually load specific storage drivers (often Intel RST drivers) at the partition selection screen using the “Load driver” option.
- “Windows cannot be installed to this disk”:
- GPT/MBR Mismatch: If your drive is formatted as MBR and you’re trying to install in UEFI mode (or vice-versa), you’ll get this. Deleting all partitions (as described in the partitioning step) usually resolves this by allowing Windows to set up the correct GPT partition style for UEFI.
- Unsupported Hardware: Ensure your HP laptop meets the minimum requirements, especially TPM 2.0 and Secure Boot.
- Boot Loop after Installation: If your laptop gets stuck in a boot loop after the first restart, ensure the USB drive is removed and that your HP laptop is set to boot from its internal hard drive in the BIOS/UEFI.
BIOS/UEFI Settings for Secure Boot and TPM (If Encountering Problems)
Most modern HP laptops ship with Secure Boot and TPM 2.0 enabled, which are prerequisites for Windows 11. If you face issues, you might need to check these settings in your HP’s BIOS/UEFI (accessed via F10 at startup).
- Secure Boot: Located in the “Boot Options” or “Security” section. Ensure it’s enabled. If you temporarily disabled it to boot from USB (though typically not needed with a properly created UEFI USB drive), re-enable it after the initial installation.
- TPM (Trusted Platform Module): Look for settings related to “Security Device,” “TPM Device,” or “Trusted Platform Module” in the “Security” section. Ensure it is enabled and set to TPM 2.0.
Maintaining Your Clean Install
The benefits of a clean install last only as long as you maintain your system.
- Regular Updates: Keep Windows 11 and all your applications updated.
- Smart Software Installation: Only install software you genuinely need from reputable sources.
- Antivirus/Antimalware: Keep Windows Defender active or use a third-party security solution.
- Disk Cleanup: Periodically run Disk Cleanup or Storage Sense to remove temporary files.
- Backup Strategy: Continue to back up your data regularly.
Performing a clean install of Windows 11 on your HP laptop is a powerful way to revitalize your machine, ensuring it runs at its best. While the process requires careful attention, the reward of a fast, stable, and secure operating system is well worth the effort. By following this comprehensive guide, you’ve not only refreshed your HP laptop but also gained a deeper understanding of its operating system, empowering you to maximize your digital productivity and security. Enjoy your brand-new Windows 11 experience!
aViewFromTheCave is a participant in the Amazon Services LLC Associates Program, an affiliate advertising program designed to provide a means for sites to earn advertising fees by advertising and linking to Amazon.com. Amazon, the Amazon logo, AmazonSupply, and the AmazonSupply logo are trademarks of Amazon.com, Inc. or its affiliates. As an Amazon Associate we earn affiliate commissions from qualifying purchases.