In the fast-evolving world of technology, keeping your computer running at peak performance is often a game of strategic upgrades. At the heart of every powerful PC lies its Central Processing Unit (CPU) – the brain that dictates its speed, multitasking capabilities, and overall efficiency. Whether you’re a gamer seeking higher frame rates, a content creator demanding faster renders, or a professional aiming for unparalleled productivity, knowing how to install or upgrade your processor is an invaluable skill. It’s a hands-on journey into the core of your machine, one that promises not just enhanced performance but also a deeper understanding of the technology that powers your digital life.
This guide is designed to demystify the process, transforming what might seem like a daunting task into a straightforward, rewarding DIY project. We’ll walk you through every critical step, from ensuring compatibility and preparing your workspace to the delicate act of seating the new CPU and optimizing your system for its enhanced capabilities. Far from just a technical tutorial, this article embraces the spirit of smart tech utilization, offering a cost-effective pathway to extending the life and boosting the power of your existing setup, aligning perfectly with the ethos of informed tech consumption and savvy personal finance often discussed on our platform. Prepare to unlock the true potential of your PC and elevate your digital experience.
Laying the Groundwork: Essential Preparations and Compatibility Checks
Before you embark on the rewarding journey of upgrading your processor, meticulous preparation is paramount. Rushing this stage can lead to compatibility issues, wasted money, or even potential damage to your components. Think of this as the strategic planning phase in any significant tech endeavor – a thorough approach here ensures a smooth, successful execution later.
The Toolkit for Success
Having the right tools at hand not only simplifies the installation process but also minimizes the risk of damage. Here’s your essential toolkit:
- Phillips Head Screwdriver: This will be your primary tool for opening the PC case, removing the old CPU cooler, and installing the new one. Ensure you have one with a magnetic tip for easier handling of tiny screws.
- Anti-Static Wrist Strap: Static electricity is a silent killer of electronic components. An anti-static wrist strap, clipped to a metal part of your PC case (which should be plugged into a grounded outlet but turned off), safely grounds you, preventing accidental static discharge. This is a non-negotiable safety measure for any internal PC work.
- Thermal Paste: Essential for transferring heat from the CPU to the cooler. Even if your new cooler comes with pre-applied paste, it’s wise to have a small tube of high-quality thermal compound on hand.
- Isopropyl Alcohol (90% or higher) and Lint-Free Cloth/Coffee Filters: These are crucial for cleaning old thermal paste from the CPU and cooler, ensuring a pristine surface for the new application. Coffee filters are excellent as they leave no residue.
- Compressed Air: Useful for blowing dust out of your PC case, especially from fan blades and heatsinks, improving overall airflow and cooling efficiency.
- Zip Ties or Velcro Straps: For efficient cable management, improving airflow, and making your PC interior look much tidier. A well-managed internal space also aids in future maintenance.
- Your New Processor and CPU Cooler: Obvious, but ensure you have them unboxed and ready, along with their respective manuals for specific installation instructions.
- Motherboard Manual: An often-overlooked but incredibly valuable resource. It details your motherboard’s layout, CPU socket type, RAM slots, and front panel connectors, which can be immensely helpful during disassembly and reassembly.
Decoding Compatibility: Ensuring a Seamless Fit
The most critical step before even purchasing a new processor is verifying its compatibility with your existing system. A mismatch here is not just an inconvenience; it can render your new CPU unusable and potentially damage your motherboard. This is where a deep dive into your system’s specifications becomes essential.
- Motherboard Socket Type: This is the absolute first thing to check. CPUs are designed for specific socket types (e.g., Intel’s LGA1700, AMD’s AM4, AM5). You cannot install an Intel CPU on an AMD motherboard, or an AM4 CPU on an AM5 motherboard. Refer to your motherboard’s manual or use utilities like CPU-Z to identify your current socket type. Ensure your new CPU matches this exactly.
- Chipset Compatibility: Beyond the socket, your motherboard’s chipset also plays a role. Newer processors might require a newer chipset even if they share the same socket type (e.g., certain 12th gen Intel CPUs might require a 600-series chipset, even if an older 500-series motherboard has the same LGA1700 socket but lacks full support). Always consult your motherboard manufacturer’s QVL (Qualified Vendor List) or CPU support list on their website. A BIOS update might be required to support newer CPUs on older, but compatible, motherboards – this update should be done before swapping the CPU.
- CPU Cooler Compatibility: Your CPU cooler must be compatible with your new processor’s socket and thermal design power (TDP). A more powerful CPU will generate more heat, requiring a more robust cooling solution. Ensure your new cooler can handle the new CPU’s TDP. Also, check physical clearance – will the cooler fit in your case and clear your RAM modules?
- RAM Compatibility: While typically not a direct CPU-to-RAM issue, a processor upgrade is an excellent time to consider RAM. Modern CPUs benefit greatly from faster RAM. Ensure your motherboard supports the RAM speed and type (DDR4 vs. DDR5) your new CPU can utilize. XMP/DOCP profiles in your BIOS can help achieve advertised RAM speeds.
- Power Supply Unit (PSU) Wattage: A more powerful CPU, especially when paired with a high-end graphics card, will draw more power. Verify that your existing PSU has sufficient wattage to stably power all your components. Online PSU calculators can help estimate your system’s total power draw.
- Operating System Compatibility: While less common with CPU upgrades, extremely old operating systems might not fully support very new processor architectures. For most modern upgrades, this isn’t an issue, but it’s worth a quick check if you’re making a leap across many generations.
By diligently checking these compatibility points, you’re not just ensuring a successful installation; you’re making an informed tech investment that will seamlessly integrate into your existing system, providing optimal performance and productivity gains without unforeseen headaches.
The Surgical Procedure: Removing the Old and Seating the New
With all preparations in place and compatibility confirmed, we now move to the hands-on phase of processor installation. This segment requires a blend of caution, precision, and adherence to safety protocols. Remember, every step you take here contributes to the longevity and stability of your system.
Power Down and Prepare for Disassembly
Safety always comes first when working inside a computer. Neglecting proper power-down and anti-static measures can lead to irreparable damage.
- Complete Power Down: Turn off your computer completely from the operating system, then unplug the power cable from the back of the PSU.
- Discharge Residual Power: Press and hold the power button on your PC case for about 10-15 seconds. This helps drain any residual power stored in the capacitors, preventing accidental shocks or component damage.
- Ground Yourself: Put on your anti-static wrist strap and clip it to a bare metal part of your PC case. Ensure the PC case is connected to a grounded wall outlet (even if the PSU is off, the ground pin provides a path for static). Maintain this connection throughout the process.
- Open the PC Case: Remove the side panel(s) of your PC case, typically secured by thumbscrews or standard Phillips screws, to gain full access to the motherboard and components. Place the screws in a safe, easily accessible spot.
- Workspace Preparation: Clear your workspace of any clutter, and ensure you have good lighting. Work on a non-static surface like a wooden table, avoiding carpets.
Carefully Extracting the Existing CPU
If you’re upgrading an existing system, the first step is to safely remove the old processor and its cooling solution. This process is delicate, especially when dealing with the thermal paste and CPU socket.
- Disconnect the CPU Cooler Fan/Pump: Locate the CPU fan header on your motherboard (usually labeled “CPU_FAN”) and carefully disconnect the fan or pump cable from it. If you have an AIO liquid cooler, also disconnect any RGB or secondary pump power cables.
- Unmount the CPU Cooler: This step varies greatly depending on your cooler type (stock Intel/AMD cooler, aftermarket air cooler, AIO liquid cooler).
- Stock Coolers: For Intel, often involve pushing down and turning plastic pins. For AMD, typically a lever clip.
- Aftermarket Air Coolers: Usually involve unscrewing mounting screws from the motherboard backplate or front-side brackets.
- AIO Liquid Coolers: Involve unscrewing the pump block from the CPU bracket and then unscrewing the radiator from the case.
- Refer to your cooler’s manual for precise removal instructions. Once unscrewed, gently twist the cooler a few times to break the seal of the thermal paste before lifting it straight up. Avoid pulling at an angle, as this can bend CPU pins (especially on AMD CPUs).
- Clean Off Old Thermal Paste: Once the cooler is removed, both the top of the old CPU and the base of the cooler will likely have dried thermal paste. Saturate a lint-free cloth or coffee filter with isopropyl alcohol and gently wipe away all residue from both surfaces until they are spotless. This prevents contamination and ensures optimal thermal transfer for your new setup.
- Unlatch the CPU Socket:
- Intel (LGA sockets): Locate the metal retention arm beside the CPU socket. Press down on the arm and pull it out to the side, then lift the metal load plate that covers the CPU.
- AMD (AM4/AM5 sockets): There’s usually a single metal lever on one side of the socket. Push the lever down and pull it out to the side, then lift it upwards.
- Gently Remove the Old CPU: With the socket unlocked, carefully lift the old CPU straight up and out of the socket. Handle it only by its edges to avoid touching the gold contacts or pins. Place it in its original protective packaging or an anti-static bag for safekeeping. Inspect the socket for any dust or debris; use a puff of compressed air if needed, but do not touch the pins directly.
The Art of Processor Installation: Precision and Patience
This is the moment of truth. Installing the new processor requires extreme care and a light touch. Never force a CPU into its socket; it should drop in with minimal to no resistance.
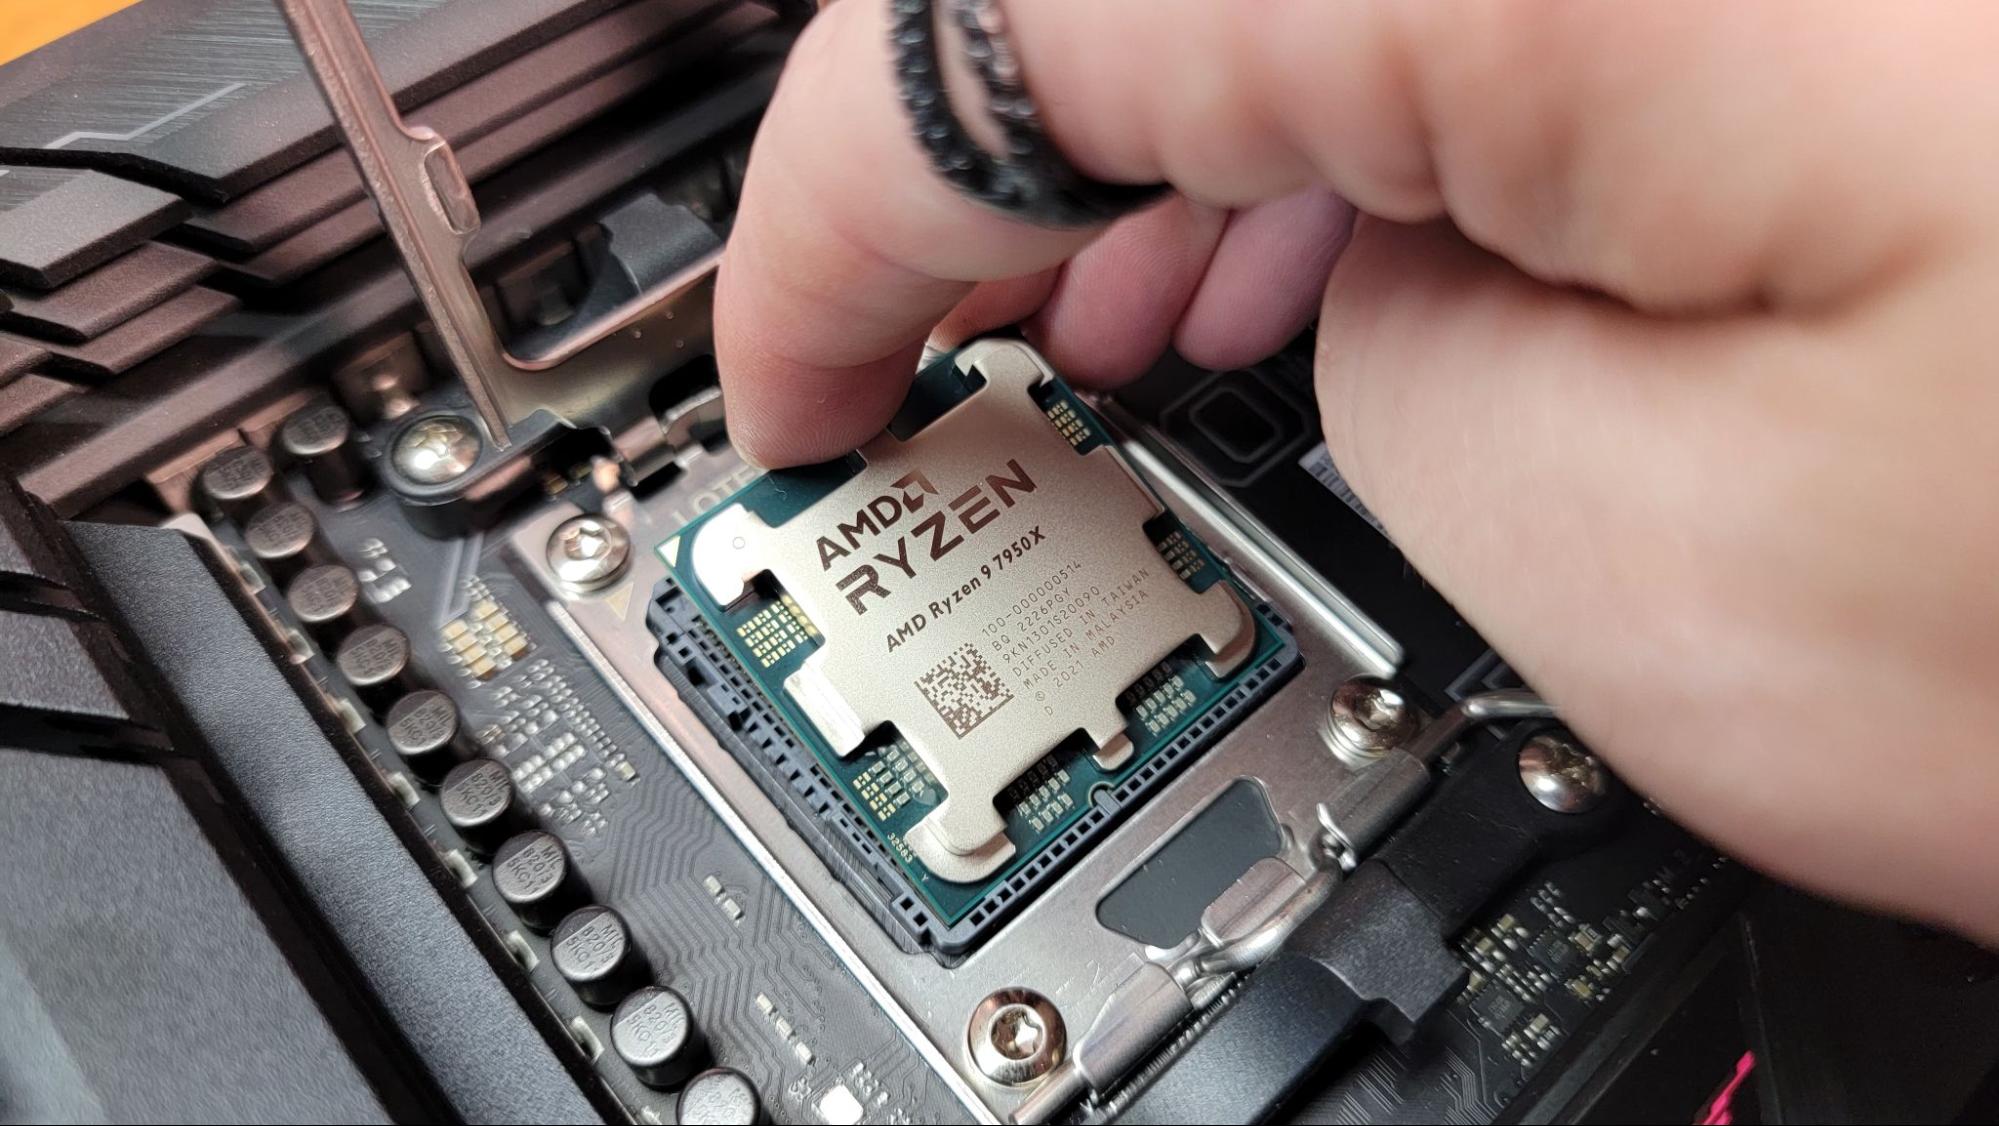
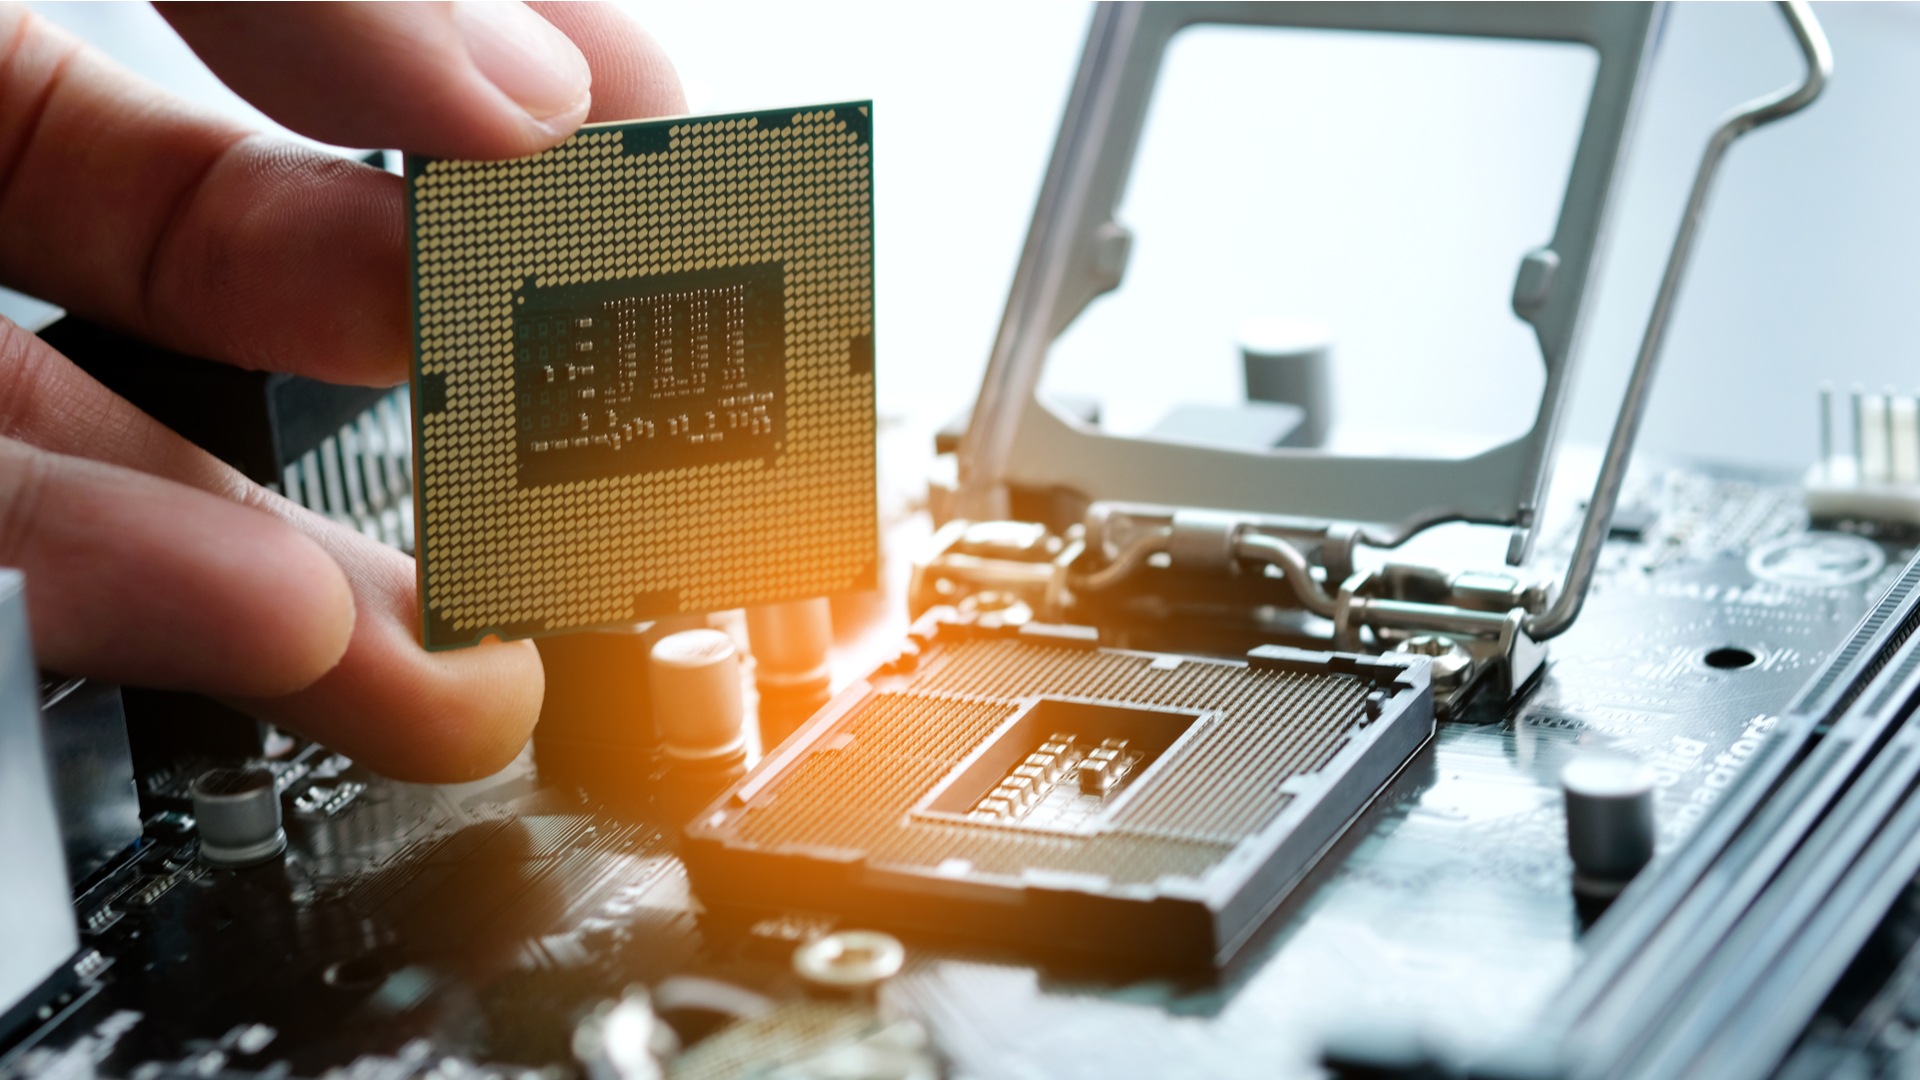
- Unbox the New CPU: Carefully remove your new processor from its packaging. Hold it only by the edges, avoiding contact with the pins (AMD) or the gold contact pads (Intel) on the bottom.
- Identify Orientation: This is a crucial step. CPUs are designed to fit into their sockets in only one specific orientation.
- Intel CPUs (LGA): Look for a small golden triangle or an arrow on one corner of the CPU. This triangle must align with a corresponding triangle or notch on the CPU socket. Also, there are usually two notches on the sides of the CPU that align with the load plate.
- AMD CPUs (PGA for AM4, LGA for AM5): For AM4, look for a golden triangle on one corner of the CPU’s top surface. This triangle must align with a matching triangle on the CPU socket. For AM5 (LGA), the orientation is similar to Intel with a triangle and notches.
- Open the Socket Latch (if not already open): If you’re installing into a fresh motherboard or if you closed the latch after removing the old CPU, repeat step 4 from the “Extracting the Old CPU” section to open the socket.
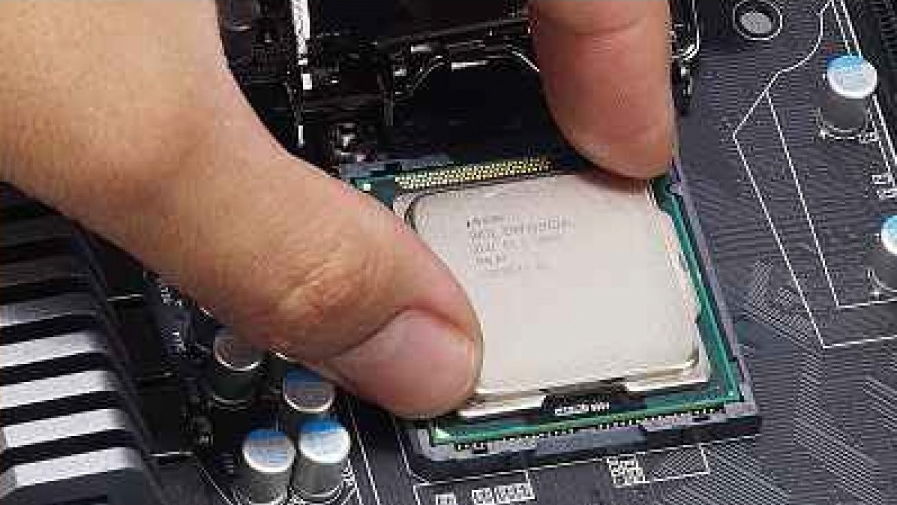
- Gently Place the CPU: Carefully lower the CPU straight down into the socket, aligning the identified triangles/notches. Do not apply any pressure. The CPU should drop perfectly into place under its own weight. If it doesn’t, do not force it. Lift it, re-check the orientation, and try again. Forcing it can bend pins, permanently damaging the CPU or motherboard.
- Secure the Socket Latch:
- Intel (LGA sockets): Lower the metal load plate back over the CPU. Then, push down on the metal retention arm and snap it back into place under the tab. There might be some resistance, which is normal as it firmly secures the CPU.
- AMD (AM4/AM5 sockets): Gently push the lever back down until it locks into its original closed position.
- Inspection: Once the CPU is seated and the socket is secured, visually inspect the area to ensure everything looks correct and the CPU is firmly in place. Do not touch the CPU surface again after this, especially where thermal paste will be applied.
This phase, though requiring delicate handling, is relatively straightforward as long as you prioritize precision over speed. With your new processor securely nestled in its socket, the hardest part is over, and you’re one step closer to booting up your upgraded machine.
The Vital Connection: Thermal Management and Cooler Installation
With your new CPU installed, the next critical step is ensuring it stays cool under pressure. Processors generate significant heat, and proper thermal management is essential for their performance, longevity, and stability. This involves applying thermal paste correctly and securely mounting the CPU cooler.
The Critical Role of Thermal Paste
Thermal paste, also known as thermal grease or thermal compound, is a heat-conductive material applied between the CPU’s integrated heat spreader (IHS) and the base of the CPU cooler. Its purpose is deceptively simple but incredibly vital: to fill microscopic air gaps and imperfections on the surfaces of both the CPU and the cooler.
- Why it’s essential: Even seemingly smooth metal surfaces are not perfectly flat at a microscopic level. These tiny air pockets act as insulators, hindering efficient heat transfer. Thermal paste, with its high thermal conductivity, fills these voids, creating a much more efficient pathway for heat to move from the CPU to the cooler’s heatsink. Without it, your CPU would quickly overheat and throttle its performance, or even shut down to prevent damage.
- Types of Thermal Paste: There are various types, each with different properties:
- Ceramic-based: Good all-rounder, non-conductive, and non-capacitive.
- Metal-based: Often offers superior thermal performance but can be electrically conductive, requiring careful application.
- Liquid Metal: The most thermally conductive but extremely challenging to apply (electrically conductive and corrosive to aluminum), generally reserved for advanced users seeking every last degree of cooling performance. For most users, a high-quality ceramic or metal-based paste is ideal.
Applying Thermal Paste with Confidence
Applying thermal paste correctly is crucial. Too much can hinder performance; too little can leave air gaps. Precision is key.
- Ensure Surfaces are Clean: Before applying new paste, ensure both the top of the CPU and the base of the cooler are absolutely free of dust, debris, and old thermal paste. Use isopropyl alcohol and a lint-free cloth/coffee filter as described earlier.
- Dispensing the Paste (Choose a method): A pea-sized amount is generally recommended for most modern CPUs, but the exact method can vary slightly.
- The “Pea” Method (Most Common): Dispense a single pea-sized (or rice-grain-sized for smaller CPUs) dot of thermal paste directly in the center of the CPU’s IHS. As the cooler is mounted, the pressure will spread the paste evenly.
- The “Line” Method: For rectangular CPUs, some prefer to apply a thin line of paste down the center of the CPU. This can sometimes be more effective for spreading on larger IHS surfaces.
- The “X” Method: Two diagonal lines forming an ‘X’ can also ensure good coverage.
- Spreading Method (Less Recommended): Some pastes or users prefer to spread a thin, even layer across the entire IHS using a small spreader or even a clean gloved finger. However, this risks introducing air bubbles and can be less consistent than pressure-based spreading.
- Avoid using an excessive amount. While non-conductive paste won’t short components, too much can create a thick layer that ironically insulates rather than conducts, or squeeze out onto the motherboard. A thin, even layer is what you’re aiming for.
Mounting Your CPU Cooler: The Final Touch
Once the thermal paste is applied, it’s time to secure the CPU cooler. This step varies significantly between cooler types. Always refer to your cooler’s specific instruction manual for the most accurate guidance.
- Prepare the Cooler: Ensure any protective film is removed from the cooler’s base (if it wasn’t already). Attach any necessary mounting brackets to the cooler or motherboard as per the cooler’s instructions. Often, this involves installing a backplate behind the motherboard and then attaching standoffs or screws from the front.
- Position the Cooler: Carefully lower the CPU cooler onto the CPU, aligning it with the mounting holes or clips. Try to avoid twisting or sliding the cooler once it makes contact with the thermal paste, as this can create air bubbles.
- Secure the Cooler:
- Screws: If your cooler uses screws, tighten them in an alternating X-pattern (e.g., top-left, bottom-right, top-right, bottom-left). Tighten each screw a few turns at a time, gradually applying even pressure until they are snug. Do not overtighten, as this can damage the motherboard or cooler.
- Clips/Levers: For stock coolers, follow the specific clipping or lever mechanisms. Ensure all clips are fully engaged and the cooler feels secure.
- Connect Fan/Pump Headers: Plug the CPU fan or pump cable back into the “CPUFAN” header on your motherboard. If you have an AIO cooler, also connect any pump power (often to a “PUMPFAN” or “AIO_PUMP” header) and RGB cables. Ensure cables are routed neatly to avoid interfering with fan blades or airflow.
- Cable Management: Use zip ties or Velcro straps to bundle and route the cooler’s cables and any other loose wires. Good cable management not only makes your PC look cleaner but also improves airflow within the case, contributing to better overall cooling and system longevity.
With the CPU cooler securely mounted and connected, the physical installation of your new processor is complete. You’ve established the critical thermal bridge that will keep your CPU performing optimally, setting the stage for the system’s first power-up and configuration.
The Grand Finale: Post-Installation Checks and First Boot
You’re in the home stretch! With the new processor and cooler physically installed, the final phase involves meticulous checks, powering on your system for the first time, and configuring it for optimal performance. This is where your careful work pays off.
The Double-Check Protocol
Before you even think about hitting that power button, a thorough visual inspection can save you from potential headaches. This “double-check” is an essential part of any technical installation.
- All Cables Connected? Systematically review every cable connection.
- Motherboard Power: Ensure the 24-pin ATX power connector and the 4/8-pin CPU (EPS) power connector are firmly seated.
- CPU Fan/Pump: Confirm the CPU fan or AIO pump cable is securely plugged into the correct header (CPUFAN, PUMPFAN).
- RAM: Check that all RAM sticks are fully seated in their slots, with both clips engaged.
- Storage: Verify SATA data and power cables are connected to your SSDs/HDDs.
- Graphics Card: Ensure the GPU is firmly seated in its PCIe slot and all necessary PCIe power cables are connected.
- Front Panel Connectors: While you likely didn’t disconnect these, quickly ensure they’re all snug (power button, reset, USB, audio).
- No Loose Screws or Tools: Scan the inside of your case for any stray screws, zip tie clippings, or forgotten tools. Even a tiny screw can cause a short circuit.
- Proper Component Seating: Gently press down on all components (RAM, graphics card) to ensure they are fully seated in their respective slots. Give the CPU cooler a gentle wiggle (if it’s an air cooler) to confirm it’s firm and not loose.
- Clearance and Airflow: Ensure no cables are obstructing fan blades or airflow pathways. Re-verify that your new CPU cooler has adequate clearance from RAM sticks or case panels.
The Moment of Truth: First Boot and BIOS Configuration
This is arguably the most exciting – and nerve-wracking – part of the process.
- Reconnect Peripherals: Plug in your monitor, keyboard, mouse, and any other essential peripherals. Reconnect the main power cable to your PSU.
- Power On: Take a deep breath and press the power button on your PC.
- What to Look For:
- Fans Spinning: Do the CPU cooler fan(s), case fans, and GPU fans spin up?
- Lights On: Do any motherboard or component LEDs illuminate?
- POST (Power-On Self-Test): Does your monitor display anything? Ideally, you’ll see your motherboard’s splash screen or hear a single beep (if your motherboard has a speaker and successful POST). If you get no display or error codes/beeps, immediately refer to the troubleshooting section of your motherboard manual.
- What to Look For:
- Enter BIOS/UEFI: As soon as you see the motherboard splash screen, repeatedly press the designated key (commonly DEL, F2, F10) to enter the BIOS/UEFI firmware.
- Verify CPU Detection: Once in the BIOS, navigate to the system information or main screen. Confirm that your new processor is correctly identified by model name and speed.
- Check Temperatures: Look for CPU temperature readings. While idle, it should be well within safe limits (typically below 50-60°C). If it’s alarmingly high, immediately power down and re-check your cooler mounting and thermal paste application.
- Enable XMP/DOCP: If you have high-speed RAM, navigate to the memory settings and enable the XMP (Intel) or DOCP/EXPO (AMD) profile. This ensures your RAM runs at its advertised speed, not the slower default JEDEC speed, maximizing your new CPU’s performance potential.
- Save and Exit: Save your BIOS settings and exit. Your PC will restart.
Software & Drivers: Optimizing Your New Brain
Even with a successful boot, your new processor isn’t fully optimized until the software layer catches up.
- Operating System Updates: Once Windows (or your OS) loads, immediately check for and install all available operating system updates. Newer CPUs often benefit from OS patches that optimize their scheduling and power management features.
- Chipset Drivers: This is crucial. Visit your motherboard manufacturer’s website and download the latest chipset drivers specifically for your motherboard model and operating system. Chipset drivers ensure proper communication between your CPU, motherboard, and other components. Install these before anything else.
- CPU-Specific Drivers/Software: While less common for the CPU itself, some processors might have specific utility software (e.g., Intel Extreme Tuning Utility, AMD Ryzen Master) that allows for monitoring, tuning, or specific feature activation.
- GPU Drivers: Although not directly related to the CPU installation, a fresh install of your graphics card drivers from NVIDIA or AMD is always a good practice after significant hardware changes, ensuring peak gaming and application performance.
- Stress Testing (Optional but Recommended): To truly verify the stability of your new CPU and cooler, consider running a stress test for an hour or two using software like Prime95 (small FFTs) or Cinebench (multi-core benchmark loop). Monitor your CPU temperatures closely during this time using tools like HWMonitor or Core Temp. This helps identify any instability or cooling issues under sustained load.
By completing these post-installation checks and software optimizations, you’ve not only physically installed a new processor but also fully integrated it into your system’s ecosystem. You’re now ready to experience the enhanced performance, increased productivity, and extended lifespan that a well-executed CPU upgrade brings, solidifying your PC as a powerhouse for both work and play.
Conclusion
Congratulations! You’ve successfully navigated the intricate process of installing a new processor, transforming your PC and injecting it with a significant boost in performance. This journey, from meticulous compatibility checks to the delicate art of mounting and the final software optimizations, is a testament to the power of DIY tech upgrades. You’ve not only saved money compared to purchasing a whole new system but also gained invaluable insight into the inner workings of your machine, embodying the spirit of smart tech utilization that our community champions.
A processor upgrade is more than just a component swap; it’s an investment in your digital future. It empowers you with faster application loading, smoother multitasking, quicker content creation, and an overall more responsive computing experience. Whether your goal was to conquer the latest demanding games, accelerate your professional workflows, or simply extend the useful life of a beloved system, you’ve now unlocked a new level of efficiency and capability.
Remember, the world of PC building and upgrading is an iterative one. This experience has likely equipped you with the confidence to tackle further enhancements, optimize your system for specific needs, and stay ahead of technology trends. Keep your drivers updated, monitor your temperatures, and continue to explore the vast potential your upgraded system now offers. Enjoy the fruits of your labor – a PC that’s faster, more powerful, and perfectly tuned to meet your demands.
aViewFromTheCave is a participant in the Amazon Services LLC Associates Program, an affiliate advertising program designed to provide a means for sites to earn advertising fees by advertising and linking to Amazon.com. Amazon, the Amazon logo, AmazonSupply, and the AmazonSupply logo are trademarks of Amazon.com, Inc. or its affiliates. As an Amazon Associate we earn affiliate commissions from qualifying purchases.