
In today’s hyper-connected world, a robust and reliable Wi-Fi signal isn’t just a luxury; it’s a fundamental necessity. From streaming 4K movies in the living room to participating in video conferences from your home office, or even smart home devices managing your environment, every aspect of our digital lives hinges on consistent internet access. Yet, almost everyone has experienced the frustration of a Wi-Fi dead zone – that one corner of the house where the signal mysteriously drops, or the garden where your music streaming falters. These frustrating pockets of poor connectivity can severely impede productivity, entertainment, and overall digital peace of mind.
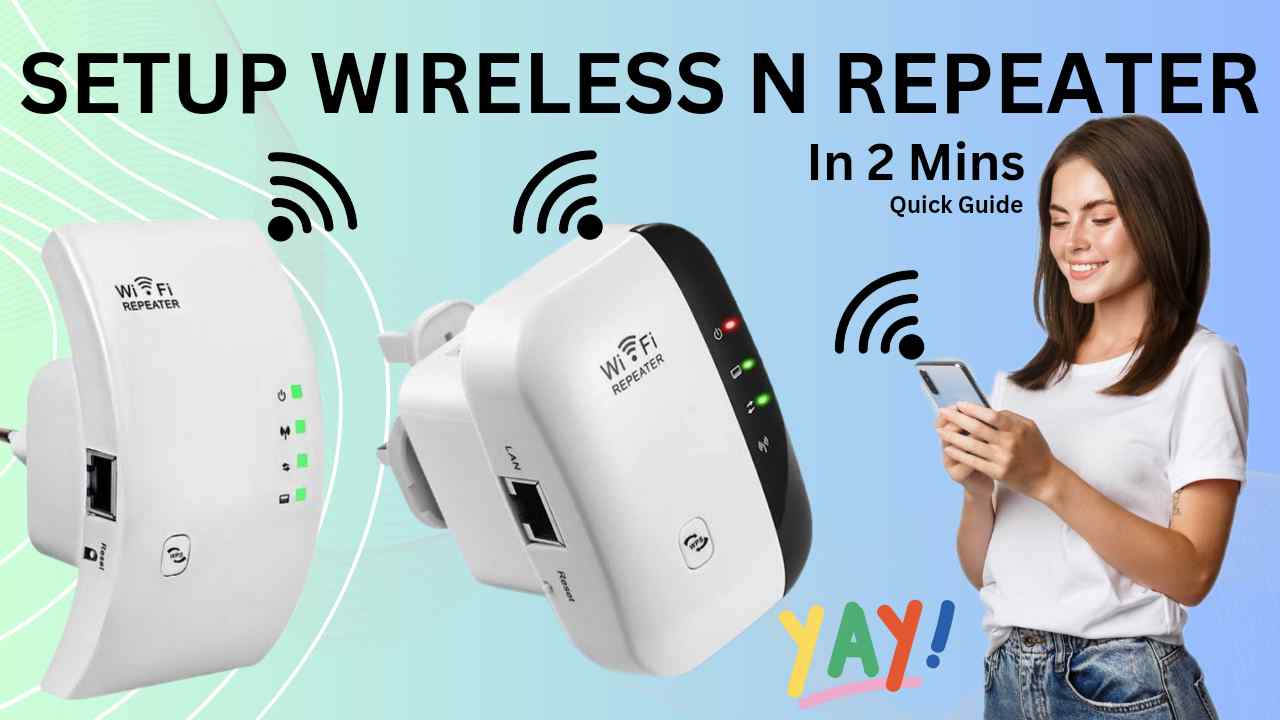
This is where a Wi-Fi repeater, also known as a Wi-Fi extender or booster, comes into play as a remarkably effective and often overlooked solution. Far from a complex piece of enterprise-grade networking equipment, a Wi-Fi repeater is an accessible gadget designed to pick up your existing Wi-Fi signal, amplify it, and retransmit it, effectively expanding your network’s coverage area. Think of it as a digital relay race runner, extending the baton of your internet connection to areas your primary router simply can’t reach with full strength.
Whether you’re battling thick walls, multiple floors, or simply a sprawling property, learning how to install a Wi-Fi repeater is a foundational skill for any modern homeowner or tech enthusiast looking to optimize their digital environment. This comprehensive guide will walk you through everything you need to know, from understanding what these devices do to a step-by-step breakdown of various installation methods, culminating in tips for post-setup optimization and troubleshooting. Get ready to banish those dead zones and embrace seamless, wall-to-wall connectivity.
Understanding WiFi Repeaters: Your Solution to Dead Zones
Before diving into the nuts and bolts of installation, it’s crucial to grasp what a Wi-Fi repeater is, how it works, and why it might be the perfect solution for your connectivity woes. Understanding the technology will not only help you set it up correctly but also empower you to make informed decisions about your network’s health.
What Exactly is a WiFi Repeater?
A Wi-Fi repeater is a networking device that takes an existing Wi-Fi signal from your main router, amplifies it, and then broadcasts the boosted signal to a wider area. Unlike a Wi-Fi mesh system, which creates a unified network across multiple access points, a repeater typically creates a separate, extended network with a slightly different (or sometimes identical) SSID (network name). Its primary function is to extend the range of your existing Wi-Fi network, filling in dead spots where your router’s signal is weak or nonexistent.
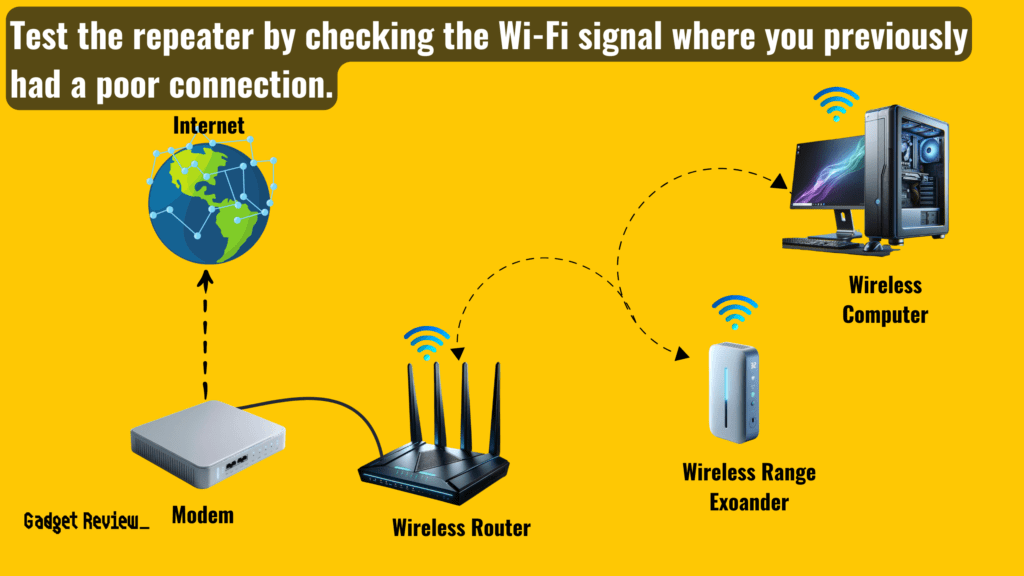
The technology behind it is relatively straightforward. The repeater contains two wireless antennas: one to capture the signal from your router and another to retransmit the amplified signal. This process, while effective, can sometimes introduce a slight latency or reduce bandwidth, as the repeater is essentially doing double duty – receiving and then sending data over the same wireless channel. However, for most home users experiencing dead zones or weak signals, the benefits of extended coverage far outweigh these minor trade-offs. Modern repeaters often feature dual-band capabilities (2.4 GHz and 5 GHz) and intelligent signal processing to minimize performance degradation.
Why Do You Need a WiFi Repeater?
The reasons for needing a Wi-Fi repeater are numerous and common in many households and small offices. Identifying the root cause of your poor Wi-Fi can help you determine if a repeater is indeed the right tool for the job.
- Eliminating Wi-Fi Dead Zones: This is the most prevalent reason. Large homes, multi-story buildings, or spaces with thick walls, concrete, or metal structures can block or severely degrade Wi-Fi signals, creating areas where devices struggle to connect or experience constant dropouts. A repeater strategically placed can bridge these gaps.
- Extending Coverage to Outdoor Areas: Want reliable Wi-Fi on your patio, in the garden, or in an outdoor office? Your main router might not have the power or line of sight to reach these external spaces. A repeater can effectively push your network beyond the physical confines of your building.
- Improving Signal Strength for Distant Devices: Even if a device can technically connect in a far-flung room, a weak signal means slower speeds, higher latency, and more frequent disconnections. A repeater strengthens the signal, ensuring devices receive adequate bandwidth for demanding tasks like online gaming or high-definition streaming.
- Overcoming Obstacles: Furniture, appliances (especially microwaves and cordless phones that operate on the 2.4 GHz band), and even water pipes can interfere with Wi-Fi signals. A repeater can bypass or mitigate these interferences by establishing a stronger link closer to the affected area.
- Cost-Effective Solution: Compared to upgrading to a more powerful (and often more expensive) router or investing in a full-fledged mesh Wi-Fi system, a single Wi-Fi repeater offers a budget-friendly way to solve specific coverage issues. It’s an excellent entry-level solution for many users.
By understanding these benefits, you can appreciate how a relatively simple gadget can dramatically enhance your home’s digital landscape, ensuring every device, from your smart thermostat to your work laptop, enjoys consistent and robust connectivity.
Pre-Installation Preparations: Setting the Stage for Success
Successful Wi-Fi repeater installation isn’t just about plugging it in; it requires a bit of foresight and preparation. Taking these preliminary steps will save you time and frustration, ensuring a smooth setup process and optimal performance from your new network extension.
Choosing the Right WiFi Repeater
The market is flooded with various Wi-Fi repeaters, and selecting the right one can feel daunting. Consider these factors:
- Compatibility: Most repeaters are universal and work with any standard Wi-Fi router (802.11 b/g/n/ac/ax). However, check for specific compatibility notes, especially if you have an older or very new router.
- Speed and Standards: Match the repeater’s Wi-Fi standard (e.g., Wi-Fi 5 / 802.11ac or Wi-Fi 6 / 802.11ax) to your router’s capabilities for best performance. A Wi-Fi 6 repeater paired with a Wi-Fi 5 router will still work, but you won’t get Wi-Fi 6 speeds. Look for dual-band (2.4 GHz and 5 GHz) models for flexibility and reduced interference.
- Features:
- Ethernet Ports: Some repeaters include Ethernet ports, allowing you to connect wired devices (like gaming consoles or smart TVs) to your extended network.
- External Antennas: Repeaters with adjustable external antennas can sometimes offer better signal reception and transmission.
- WPS Button: A WPS (Wi-Fi Protected Setup) button simplifies pairing with compatible routers.
- Mobile App Support: Many brands offer companion apps for easier setup and management.
- AP Mode (Access Point Mode): Some repeaters can also function as access points, turning a wired connection into a Wi-Fi hotspot, which is useful if you have an Ethernet port in a dead zone.
- Brand Reputation and Reviews: Stick to reputable brands known for networking equipment (e.g., TP-Link, Netgear, Linksys, D-Link, Asus). Read user reviews to gauge real-world performance and ease of use.
Finding the Optimal Placement
The location of your Wi-Fi repeater is paramount to its effectiveness. A poorly placed repeater can actually worsen your Wi-Fi experience.
- Midway Point: The ideal spot is roughly halfway between your main Wi-Fi router and the area you want to extend the signal to (the dead zone). The repeater needs to receive a strong, stable signal from your router to effectively retransmit it. If it’s too far from the router, it will simply amplify a weak signal, resulting in a weak extended network.
- Line of Sight: Try to minimize physical obstructions (walls, large appliances, metal objects) between the repeater and both your router and the target dead zone. Elevating the repeater can sometimes help, especially if your router is also elevated.
- Away from Interference: Avoid placing the repeater near other devices that emit electromagnetic interference, such as microwaves, cordless phones, Bluetooth devices, and even large metal objects like refrigerators.
- Power Outlet Accessibility: Repeaters require a power outlet, so ensure your chosen location has one conveniently available. Many repeaters plug directly into a wall outlet.
- Test Signal Strength: Before committing to a spot, you can use a Wi-Fi analyzer app on your smartphone (e.g., Wi-Fi Analyzer for Android, Network Analyzer Lite for iOS) to measure signal strength from your main router at various points. Aim to place the repeater where the signal is still strong (e.g., -50 dBm to -60 dBm is generally good).
Essential Information You’ll Need
Gathering this information beforehand will streamline the setup process:
- Your Main Wi-Fi Network Name (SSID): This is the name you see when you search for Wi-Fi networks (e.g., “MyHomeWiFi” or “SmithFamilyNetwork”).
- Your Main Wi-Fi Network Password (Security Key/Passphrase): This is the password you use to connect devices to your main router.
- Your Router’s Admin Credentials (Optional but Recommended): While not always necessary for repeater setup, knowing your router’s default IP address (often 192.168.1.1 or 192.168.0.1) and its admin username and password can be useful for advanced configurations or troubleshooting. You can usually find these on a sticker on the router itself or in its manual.
- Repeater’s Default Login Information (for manual setup): If you’re using the web browser method, you’ll need the repeater’s default IP address or web address (e.g., tplinkrepeater.net) and its default username and password. This information is typically printed on a sticker on the repeater or found in its quick start guide.
With these preparations complete, you’re ready to proceed to the actual installation, confident that you’ve laid the groundwork for a successful and robust network extension.
Step-by-Step Installation Guides: Multiple Paths to a Stronger Signal
Installing a Wi-Fi repeater is generally a straightforward process, and most modern devices offer multiple ways to connect to your existing network. We’ll cover the most common methods: WPS (Wi-Fi Protected Setup) for quick pairing, manual configuration via a web browser for more control, and the increasingly popular mobile app setup for specific brands.
Method 1: The Quick-Connect WPS Setup
WPS is the fastest and easiest way to connect your repeater to your router, provided both devices support it.
- Power On the Repeater: Plug your Wi-Fi repeater into a power outlet at your chosen optimal location (roughly midway between your router and the dead zone). Wait a minute or two for it to fully boot up. You’ll usually see indicator lights come on.
- Activate WPS on the Repeater: Locate the WPS button on your Wi-Fi repeater. It’s often labeled with the WPS logo (two arrows chasing each other) or simply “WPS” or “Range Extender.” Press this button. The WPS light on the repeater should start blinking, indicating it’s in pairing mode. You typically have about two minutes to complete the next step.
- Activate WPS on Your Router: Within the timeframe, go to your main Wi-Fi router and locate its WPS button. Press and hold it for a few seconds until its WPS light also starts blinking.
- Wait for Connection: The repeater and router will now attempt to establish a secure connection automatically. This usually takes about 1-2 minutes.
- Verify Connection: Once connected, the WPS light on both the router and repeater should become solid, or the repeater’s signal indicator lights will turn solid green or blue, confirming a successful connection.
- Relocate and Test (if necessary): If you initially set up the repeater close to the router for WPS pairing, now is the time to move it to your optimal location. Once powered on at the new location, ensure the signal indicator lights still show a strong connection to your router. Connect a device (like your phone or laptop) to the repeater’s network (it usually has the same SSID as your main network with “EXT” or “Plus” added, e.g., “MyHomeWiFi_EXT”) and test the internet connection in the previously dead zone.
Method 2: Manual Configuration via Web Browser
This method offers more control and is essential if your router or repeater doesn’t support WPS, or if you prefer a more customized setup.
- Power On the Repeater: Plug the repeater into a power outlet close to your router for the initial setup. This ensures a strong temporary connection. Wait for it to boot up.
- Connect to the Repeater’s Default Wi-Fi: On your computer, tablet, or smartphone, open your Wi-Fi settings. You should see a new, open Wi-Fi network broadcast by the repeater (e.g., “TP-LinkExtender,” “NETGEAREXT,” or similar, often without a password). Connect to this network. Alternatively, some repeaters allow you to connect your computer to an Ethernet port on the repeater using an Ethernet cable.
- Access the Repeater’s Web Interface: Open a web browser (Chrome, Firefox, Edge, Safari) and type the repeater’s default IP address or web address into the address bar (e.g.,
192.168.0.254,192.168.1.254, or a web address liketplinkrepeater.net,extender.linksys.com). This information is typically found on a sticker on the repeater or in its quick start guide. - Log In: You’ll be prompted to log in. Use the default username and password (often “admin” for both, or specified in the manual). Some repeaters might guide you to create a new admin password immediately, which is a good security practice.
- Follow the Setup Wizard: Most repeaters have an intuitive “Quick Setup” or “Setup Wizard.”
- Scan for Networks: The repeater will scan for available Wi-Fi networks in its vicinity.
- Select Your Main Network: Choose your primary Wi-Fi network (SSID) from the list.
- Enter Password: Input the password for your main Wi-Fi network.
- Configure Repeater’s SSID: You’ll usually have the option to use the same SSID as your main network (creating a single network name) or create a new one (e.g., “MyHomeWiFi_EXT”). Creating a new SSID can sometimes be helpful to explicitly know which network you’re connected to, but using the same SSID can offer a more seamless experience (though devices might not always switch optimally).
- Confirm Settings: Review your settings and apply them. The repeater will usually reboot.
- Relocate and Test: Once the repeater reboots and its indicator lights confirm a strong connection to your router, unplug it and move it to your optimal location. Power it back on, wait for it to boot, and ensure the signal lights are strong. Connect a device to the extended network and test internet connectivity in the target area.
Method 3: Leveraging Mobile Apps for Seamless Setup
Many modern Wi-Fi repeaters from brands like TP-Link (Tether app), Netgear (Nighthawk app, formerly Netgear Genie), and Linksys (Linksys app) offer dedicated mobile applications that simplify the setup process, often guiding you with visual cues and easy-to-understand instructions.
- Download the App: Search for your repeater’s brand-specific app in your smartphone’s app store (Google Play Store for Android, Apple App Store for iOS).
- Power On the Repeater: Plug the repeater into a power outlet near your router.
- Connect to the Repeater’s Default Wi-Fi: Connect your smartphone to the repeater’s temporary, open Wi-Fi network, just like in Method 2.
- Launch the App: Open the downloaded app. It should automatically detect your new repeater.
- Follow In-App Instructions: The app will guide you through the setup process, which typically involves:
- Creating an account or logging in (if required by the brand).
- Scanning for your main Wi-Fi network.
- Entering your main Wi-Fi password.
- Configuring the repeater’s network name (SSID) and password.
- Applying settings and waiting for the repeater to restart.
- Relocate and Test: After successful setup via the app, unplug the repeater and move it to its optimal location. Ensure it powers on and indicates a strong connection. Test the extended network with a device in your desired area. The app often provides tools to help you find the best placement by showing real-time signal strength.
Regardless of the method you choose, the goal remains the same: to create a robust extension of your existing Wi-Fi network, pushing connectivity into every corner of your home or office.
Post-Installation Optimization and Troubleshooting: Maximizing Your Extended Network
Once your Wi-Fi repeater is up and running, a few final steps can ensure it’s performing at its best and remains secure. Even with careful setup, occasional issues can arise, so knowing how to troubleshoot them is invaluable.
Verifying Your Connection and Signal Strength
The immediate aftermath of installation involves confirming that your repeater is doing its job effectively.
- Check Repeater Indicator Lights: Most repeaters have LED indicators that show the status of the connection to your router. A solid green or blue light usually signifies a strong connection, while orange or red might indicate a weak signal or no connection. If the signal is weak, you may need to adjust the repeater’s placement closer to your main router.
- Test Connectivity in Dead Zones: Go to the areas where you previously experienced weak or no Wi-Fi. Connect your devices to the repeater’s network (if it has a different SSID) or allow them to automatically roam (if it shares the same SSID). Perform speed tests using online tools (e.g., Speedtest.net) or stream high-definition video to ensure stable and adequate bandwidth.
- Use Wi-Fi Analyzer Apps: For a more technical verification, use a Wi-Fi analyzer app on your smartphone or a Wi-Fi scanning utility on your computer. These apps can show you the signal strength (dBm), channel usage, and presence of your main and extended networks, helping you confirm that the repeater is broadcasting a strong signal where needed. Aim for a signal strength of at least -70 dBm for reliable connectivity.
Enhancing Security and Performance
A few proactive steps can improve both the security and performance of your newly extended network.
- Change Default Admin Credentials: This is a critical security step, especially if you used the web browser method and the default “admin/admin” credentials. Log back into your repeater’s web interface or mobile app and change the default username and password for accessing its settings. This prevents unauthorized users from altering your network configuration.
- Update Firmware: Like any networking device, repeaters receive firmware updates that can improve performance, add features, and patch security vulnerabilities. Check your repeater’s web interface or mobile app for a firmware update section and install any available updates. This is often an automated process.
- Consider a Dedicated Repeater Password (Optional): While many repeaters are configured to use the same password as your main Wi-Fi network, some allow you to set a separate password for the extended network. This can add an extra layer of segmentation if desired, though it’s often more convenient to keep them the same.
- Optimize Channel Selection: If you experience interference or slow speeds, your repeater might be operating on a crowded Wi-Fi channel. Use a Wi-Fi analyzer app to identify less congested channels on both the 2.4 GHz and 5 GHz bands. You might be able to manually change the channel in your repeater’s settings (and sometimes your main router’s settings) to improve performance. Many modern repeaters have an “Auto” channel selection that tries to optimize this for you.
Common Troubleshooting Tips
Even with the best preparation, issues can arise. Here’s how to address some common problems:
- No Connection or Weak Signal:
- Relocation: The most common culprit. Move the repeater closer to your main router. Remember, it needs a strong signal from the router to function correctly.
- Obstacles: Ensure there are no major physical obstructions (thick walls, large metal objects, appliances) directly between the repeater and the router, or between the repeater and your devices.
- Interference: Move the repeater away from microwaves, cordless phones, and other electronics.
- Power Cycle: Unplug the repeater (and your router, if necessary) for 30 seconds, then plug them back in. This can resolve temporary glitches.
- Slow Speeds on the Extended Network:
- Placement: As above, a weak signal to the repeater will result in weak extended Wi-Fi.
- Bandwidth Halving: Repeaters, by nature, can reduce bandwidth as they receive and retransmit on the same channel. If you need maximum speed, consider a mesh Wi-Fi system or a powerline adapter with Wi-Fi.
- Channel Congestion: Use a Wi-Fi analyzer to check for crowded channels and manually select a less used one in your repeater’s settings.
- Firmware: Ensure your repeater’s firmware is up to date.
- Cannot Access Repeater’s Web Interface:
- IP Address: Double-check the default IP address or web URL.
- Connection: Ensure your device is connected to the repeater’s temporary setup Wi-Fi network (or via Ethernet to the repeater) before attempting to access its interface.
- Power Cycle: Reboot the repeater.
- Devices Not Connecting or Dropping Frequently:
- Password: Verify you entered the correct password for your main Wi-Fi network during setup.
- SSID Conflict: If your repeater uses the same SSID as your main network, some devices might struggle to seamlessly switch between the two. Try giving your repeater a unique SSID (e.g., “MyHomeWiFi_EXT”) to see if that resolves the issue.
- Firmware: Again, ensure firmware is updated.
- Reset: As a last resort, use the reset button on the repeater (often a small pinhole that requires a paperclip) to revert it to factory settings and start the setup process over.
By meticulously following these steps for installation, optimization, and troubleshooting, you can confidently integrate a Wi-Fi repeater into your home network, effectively banishing dead zones and enjoying robust, uninterrupted internet access throughout your entire property.

Conclusion: Embrace Uninterrupted Connectivity
The era of frustrating Wi-Fi dead zones is officially over. By understanding the simple yet powerful technology behind a Wi-Fi repeater and following the practical steps outlined in this guide, you now possess the knowledge to transform your home’s connectivity. No longer will you be confined to specific rooms for reliable internet access; instead, you’ve empowered your network to reach every corner, from the basement to the backyard.
Whether you opted for the lightning-fast WPS setup, the detailed control of the web browser method, or the streamlined experience of a mobile app, the result is the same: an extended, more resilient Wi-Fi signal. Remember, the journey doesn’t end with a successful setup. Regular firmware updates, astute placement, and proactive security measures like changing default credentials are key to maintaining an optimal and secure extended network.
In a world increasingly reliant on seamless digital integration, ensuring robust connectivity isn’t just about convenience; it’s about enabling productivity, facilitating entertainment, and maintaining communication. A well-installed and optimized Wi-Fi repeater is an intelligent investment in your digital infrastructure, bringing consistent, high-speed internet to every device, everywhere you need it. So go ahead, plug it in, set it up, and finally experience the joy of truly uninterrupted connectivity.
aViewFromTheCave is a participant in the Amazon Services LLC Associates Program, an affiliate advertising program designed to provide a means for sites to earn advertising fees by advertising and linking to Amazon.com. Amazon, the Amazon logo, AmazonSupply, and the AmazonSupply logo are trademarks of Amazon.com, Inc. or its affiliates. As an Amazon Associate we earn affiliate commissions from qualifying purchases.