In the vast and ever-evolving landscape of operating systems, Ubuntu stands out as a beacon of stability, security, and open-source innovation. For anyone navigating the complexities of modern tech – from software enthusiasts and developers to everyday users seeking a robust and privacy-focused alternative to proprietary systems – mastering Ubuntu installation is a foundational skill. This comprehensive guide will walk you through every step of getting Ubuntu up and running, transforming your computer into a powerful platform for productivity, digital security, and exploration of cutting-edge AI tools and applications.
Ubuntu, a popular Linux distribution, offers a user-friendly interface combined with the unparalleled flexibility and power of the Linux kernel. It’s an ideal choice for reviving older hardware, setting up development environments, enhancing digital security, or simply exploring an operating system that champions community and transparency. Whether you’re considering a full switch, exploring dual-boot options, or setting up a dedicated machine for specialized tasks, understanding the installation process is your first step into a world of open-source possibilities. This article is structured to provide clear, actionable steps, ensuring a smooth transition or addition of Ubuntu to your tech arsenal.
Preparing for Your Ubuntu Installation
Before diving headfirst into the installation process, a thorough preparation phase is crucial. This ensures not only a successful installation but also safeguards your existing data and optimizes your system for its new operating environment. Skipping these preliminary steps can lead to unnecessary complications or, worse, data loss.
Essential Pre-Installation Checklist
Every great project begins with a solid plan, and installing an operating system is no exception. Here’s what you need to gather and consider before you begin:
-
System Requirements: While Ubuntu is renowned for its efficiency, particularly the lightweight variants like Xubuntu or Lubuntu, the standard Ubuntu Desktop requires a minimum of:
- 2 GHz dual-core processor (or better)
- 4 GB RAM (8 GB recommended for optimal performance, especially if you plan to run memory-intensive AI tools or virtual machines)
- 25 GB of free hard disk space (SSD recommended for speed)
- Internet access (highly recommended during installation for updates and third-party software)
- USB port for the installation media.
Ensure your hardware meets or exceeds these specifications for a smooth experience.
-
Data Backup: A Crucial First Step: This cannot be stressed enough. Regardless of whether you plan a fresh installation or a dual-boot setup, always back up your important files. If you’re installing Ubuntu alongside an existing operating system like Windows, there’s always a slim chance of accidental data loss due to partitioning errors. Use external hard drives, cloud storage services, or network-attached storage (NAS) to secure your documents, photos, videos, and any other irreplaceable data. This step embodies a fundamental principle of digital security and productivity: robust backup strategies protect your valuable assets.
-
Stable Internet Connection & Power Supply: A reliable internet connection during installation allows Ubuntu to download essential updates and third-party software (like graphics drivers, Wi-Fi firmware, and media codecs) right out of the gate. This saves time post-installation and ensures full hardware compatibility from the start. Equally important, ensure your laptop is plugged into a stable power source or your desktop is connected to an uninterruptible power supply (UPS). An unexpected power outage during installation can corrupt your hard drive and necessitate starting over.
-
Understanding Disk Space and Partitioning: If you’re installing Ubuntu as the sole operating system, you’ll likely use the “Erase disk and install Ubuntu” option, which automatically handles partitioning. However, if you’re aiming for a dual-boot setup (e.g., alongside Windows), you’ll need free, unallocated space on your hard drive. This typically involves shrinking an existing partition (like your Windows C: drive) using disk management tools within your current OS. Familiarize yourself with basic partitioning concepts (root, swap, home directories) if you plan to use the “Something else” option for manual partitioning – a path often chosen by advanced users for fine-grained control.
Obtaining the Ubuntu ISO Image
With your system prepared and data secured, the next step is to acquire the Ubuntu installation file. This comes in the form of an ISO image, which is essentially a digital snapshot of the entire installation disc.
-
Where to Download (Official Ubuntu Website): Always download Ubuntu from its official source: ubuntu.com/download/desktop. This ensures you get a legitimate, unadulterated version, free from malware or unauthorized modifications. Avoid third-party websites offering Ubuntu downloads, as these could potentially compromise your digital security.
-
Choosing the Right Version (LTS vs. Latest Release): Ubuntu offers two primary release types:
- LTS (Long Term Support) Releases: These are released every two years (e.g., Ubuntu 22.04 LTS) and are supported for five years. LTS versions are known for their stability and are highly recommended for most users, especially those seeking a reliable system for professional work, server deployments, or environments where frequent upgrades are undesirable. They are a solid foundation for long-term productivity.
- Standard Releases: These are released every six months (e.g., 23.04, 23.10) and are supported for nine months. Standard releases offer the very latest software packages and features, making them ideal for users who want to experiment with bleeding-edge technology, new AI tools, or specific software updates not yet available in LTS. However, they require more frequent upgrades. For this guide, we’ll focus on the LTS version due to its widespread applicability and stability.
-
Verifying the Download Integrity (Checksums): While optional, verifying the integrity of your downloaded ISO file is a good practice for digital security. After downloading, Ubuntu provides a SHA256 checksum on its download page. You can compute the checksum of your downloaded file using a utility (like
certutil -hashfile [path_to_iso] SHA256on Windows, orsha256sum [path_to_iso]on Linux/macOS) and compare it against the official one. If they match, your download is complete and untampered.
Crafting a Bootable USB Drive
Once you have the Ubuntu ISO, you need to “burn” it onto a USB flash drive, transforming it into a bootable installation medium. This will allow your computer to start from the USB drive and initiate the Ubuntu installer.
-
Selecting Your Tool: Several excellent tools are available for creating bootable USB drives:
- Rufus (Windows): A popular, lightweight, and incredibly effective utility for Windows users. It’s known for its speed and reliability.
- Etcher (BalenaEtcher) (Cross-platform – Windows, macOS, Linux): A user-friendly, open-source tool with a clean interface. It’s an excellent choice if you’re already on a different OS or prefer a unified experience.
dd(Linux/macOS): A powerful command-line utility for advanced users. While highly effective, it requires precision as incorrect commands can lead to data loss.
-
Step-by-Step Guide: Using a Popular Tool (e.g., Rufus):
- Download Rufus: Go to the official Rufus website (rufus.ie) and download the latest portable version.
- Insert USB Drive: Plug a USB flash drive (at least 8 GB) into your computer. Ensure there is no important data on it, as the process will erase everything.
- Launch Rufus: Run the downloaded Rufus executable.
- Select Device: In Rufus, ensure your USB drive is selected under the “Device” dropdown. Double-check this to prevent accidentally wiping the wrong drive.
- Select Boot Selection: Click the “SELECT” button next to “Boot selection” and browse to your downloaded Ubuntu ISO file.
- Partition Scheme and Target System (typically leave defaults): Rufus will usually detect the correct settings based on your ISO. For modern systems, “GPT” partition scheme and “UEFI (non CSM)” target system are common. If you’re unsure, consult your computer’s manual or stick with the default.
- Volume Label and File System (optional): You can rename the “Volume label” if you wish. Leave “File system” and “Cluster size” as default.
- Start the Process: Click the “START” button. Rufus will warn you that all data on the USB drive will be destroyed. Confirm to proceed.
- Wait for Completion: The process can take several minutes. Once it completes, Rufus will display “READY.” You can now close Rufus and safely eject the USB drive.
For Etcher users, the process is even simpler: select the ISO, select the USB drive, and click “Flash.”
The Installation Journey: From Boot to Desktop
With your bootable USB drive ready, the next phase involves telling your computer to start from this drive and then navigating the Ubuntu installer. This is where the magic happens, transforming raw hardware into a functional Ubuntu system.
Booting from Your Installation Media
Your computer typically tries to boot from its internal hard drive first. To install Ubuntu, you need to override this default and instruct it to boot from your newly created USB drive.

-
Accessing BIOS/UEFI Settings:
- Restart your computer.
- As soon as it starts, repeatedly press the key to enter your BIOS/UEFI firmware settings. Common keys include
F2,F10,F12,DEL, orESC. The exact key varies by manufacturer (Dell, HP, Lenovo, Asus, Acer, etc.). Look for a message on the screen during startup like “Press F2 for Setup” or “Press DEL to enter BIOS.” - If you miss it, restart and try again.
-
Adjusting the Boot Order:
- Once in the BIOS/UEFI settings, navigate to the “Boot,” “Boot Options,” or “Startup” tab/menu.
- Locate “Boot Order” or “Boot Priority.”
- You’ll see a list of bootable devices. Move your USB drive (it might be listed by its brand name, “USB-HDD,” or “UEFI: [USB Drive Name]”) to the top of the boot order.
- Save your changes and exit (often by pressing
F10and confirming). Your computer will then restart and attempt to boot from the USB drive.
-
Navigating Secure Boot and Fast Boot Settings:
- Secure Boot: Many modern UEFI systems have “Secure Boot” enabled by default. While newer Ubuntu versions generally support Secure Boot, you might encounter issues, especially with third-party drivers or older Ubuntu releases. If you face problems booting, you might need to temporarily disable Secure Boot in your BIOS/UEFI settings (usually found under “Security” or “Boot” options). Remember to re-enable it after installation if desired.
- Fast Boot: Similarly, “Fast Boot” or “Ultra-Fast Boot” settings in Windows and some UEFI firmwares can interfere with dual-booting or accessing the boot menu. It’s advisable to disable Fast Boot in both your Windows power options and your UEFI firmware settings before installing Ubuntu, especially if you plan to dual-boot.
Navigating the Ubuntu Installer
Once you successfully boot from the USB, you’ll be greeted by the Ubuntu installer. It’s designed to be user-friendly, but careful attention to each step is essential.
-
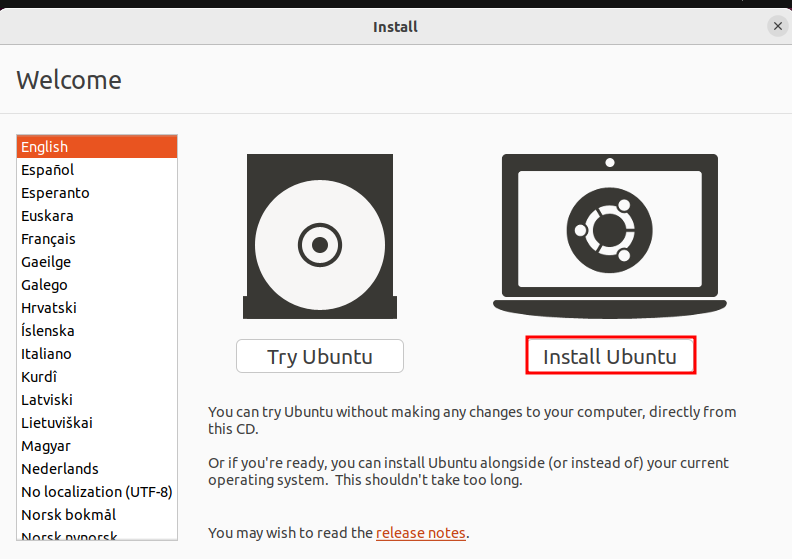
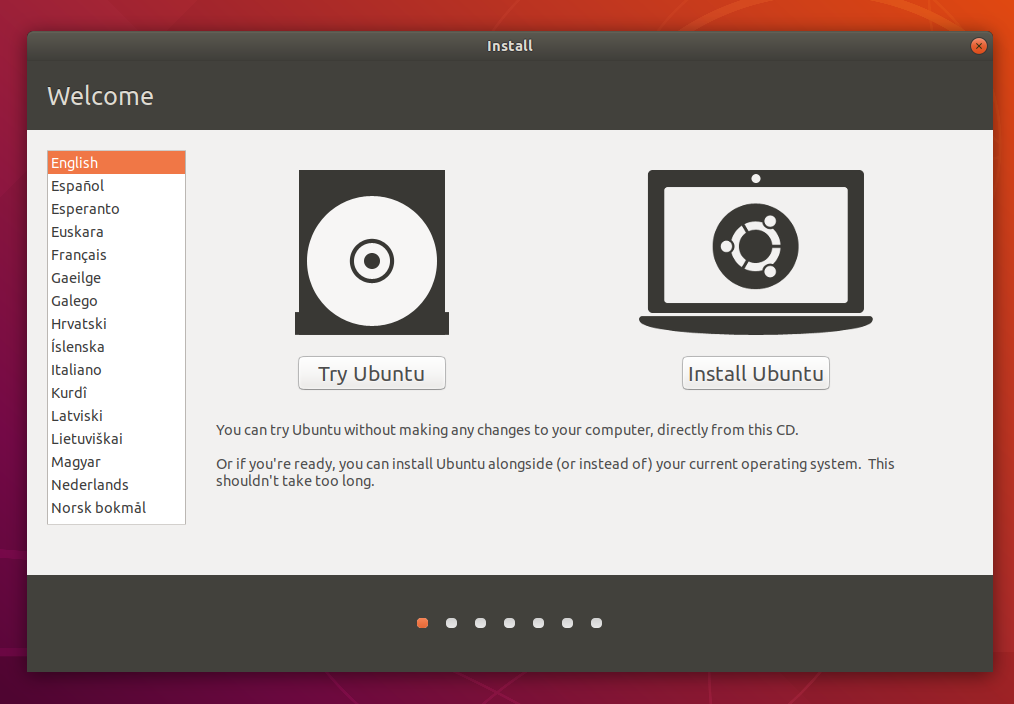
The Welcome Screen: Try vs. Install:
- After loading, you’ll see a screen asking you to “Try Ubuntu” or “Install Ubuntu.”
- “Try Ubuntu” allows you to boot into a live environment directly from the USB. This is excellent for testing hardware compatibility, experiencing the desktop environment, and making sure Wi-Fi, graphics, and other peripherals work before committing to an installation. It’s also a powerful tool for data recovery or troubleshooting.
- “Install Ubuntu” launches the installer wizard directly. If you’ve already tested the live environment or are confident in your system’s compatibility, you can choose this option. For this guide, we’ll proceed with “Install Ubuntu.”
-
Keyboard Layout and Network Configuration:
- Keyboard Layout: Select your preferred keyboard layout. The installer will often auto-detect, but confirm it matches your physical keyboard. You can test it in the provided text box.
- Network Connection: Connect to your Wi-Fi network or plug in an Ethernet cable. An internet connection at this stage is highly recommended as it allows the installer to download updates and third-party software packages during the installation process, streamlining your post-installation setup.
-
Installation Type: Choosing Your Path: This is one of the most critical steps, especially if you have other operating systems installed.
- “Erase disk and install Ubuntu”: This option dedicates your entire hard drive to Ubuntu. It will wipe all existing data and operating systems, so use this only if you intend to have Ubuntu as your sole OS and have backed up all important data. This is the simplest option for a fresh, single-boot setup.
- “Install Ubuntu alongside Windows Boot Manager” (or other existing OS): This is the ideal choice for creating a dual-boot system. The installer will automatically shrink your existing OS partition (e.g., Windows) and create new partitions for Ubuntu in the free space. You’ll usually see a slider to adjust how much space to allocate to each OS. This is often the most straightforward way to run two operating systems on one machine.
- “Something else”: This option gives you full manual control over partitioning. It’s for advanced users who want custom partition layouts (e.g., separate
/home,/var, orswappartitions), or for those installing on specific drive configurations. If you are unsure, avoid this option unless you have a clear understanding of disk partitioning. For beginners, the automatic options are safer and sufficient.
-
Updates and Third-Party Software:
- “Download updates while installing Ubuntu”: Highly recommended. This ensures your newly installed system is up-to-date with the latest security patches and bug fixes from the moment it boots.
- “Install third-party software for graphics and Wi-Fi hardware and additional media formats”: Also highly recommended. This option installs proprietary drivers (like Nvidia or AMD graphics drivers) and media codecs (for MP3, H.264 video, etc.) that aren’t open-source but are often essential for full hardware functionality and multimedia playback. This significantly reduces post-installation tweaking.
Finalizing Setup and User Creation
With the critical choices made, the installer will move to personalize your system.
- Time Zone Selection: Click on your location on the map or type it in. This ensures your system clock is accurate.
- Creating Your User Account:
- Your Name: Your full name.
- Your Computer’s Name: This is the hostname for your computer on the network. Choose something descriptive (e.g., “MyUbuntuDesktop”).
- Pick a Username: A short, lowercase username used for logging in.
- Choose a Password: Create a strong, memorable password. It’s critical for digital security and is required for administrative tasks.
- Login Options: You can choose “Require my password to log in” (recommended for security) or “Log in automatically.”
- The Installation Process: After confirming these details, the installation will begin. The installer will copy files, configure settings, and install software packages. This can take anywhere from 15 minutes to an hour, depending on your system’s speed and internet connection. A slideshow will often display key features of Ubuntu during this time.
- Restarting Your System: Once the installation is complete, a prompt will appear asking you to “Restart Now.” Remove your USB drive when prompted, and your computer will reboot into your freshly installed Ubuntu system. Congratulations!
Post-Installation: Optimizing Your Ubuntu Experience
Installing Ubuntu is just the beginning. The steps that follow are crucial for optimizing performance, enhancing digital security, and tailoring the system to your personal workflow and tech needs, whether it’s for advanced AI tools or day-to-day productivity.
Initial Updates and Driver Installation
Even if you downloaded updates during installation, it’s good practice to perform a full system update immediately after your first boot.
-
Running System Updates:
- Open the “Terminal” (you can search for it in the Activities overview or press
Ctrl+Alt+T). - Run the following commands, pressing Enter after each and entering your password when prompted:
bash

sudo apt update

sudo apt upgrade -y
sudo apt updaterefreshes the list of available packages, andsudo apt upgrade -ydownloads and installs any newer versions of the software you have installed. This ensures your system is fully patched against vulnerabilities and has the latest features. - Consider running
sudo apt autoremove -yto remove any unnecessary dependencies that were installed with previous versions of software.
- Open the “Terminal” (you can search for it in the Activities overview or press
-
Installing Proprietary Drivers (Graphics, Wi-Fi):
- While the installer tries to get most drivers, sometimes proprietary drivers (especially for high-performance graphics cards like Nvidia or specific Wi-Fi chipsets) need a bit more attention.
- Open the “Software & Updates” application (search for it).
- Go to the “Additional Drivers” tab. The system will search for available proprietary drivers.
- If any are found, you’ll see a list. Select the recommended driver (e.g., for your Nvidia card) and click “Apply Changes.” This might require a restart. Correct drivers are vital for optimal performance, especially for tasks involving graphics rendering or AI/machine learning frameworks.
Exploring Essential Software and Customization
Ubuntu comes with a solid suite of pre-installed applications, but its true power lies in its vast software ecosystem and customization capabilities.
-
The Ubuntu Software Center: This is your one-stop shop for discovering and installing new applications. It’s similar to app stores on other platforms.
- Finding Apps: Browse categories like “Productivity,” “Games,” “Utilities,” “Developer Tools,” or search for specific software. You’ll find popular browsers (Firefox is pre-installed, Chrome/Brave available), office suites (LibreOffice is pre-installed), media players (VLC), image editors (GIMP), and a wealth of developer tools.
- AI Tools: As AI becomes more integrated into daily workflows, you’ll find various AI-related tools, libraries (like TensorFlow, PyTorch via pip), and applications. Ubuntu is a preferred OS for many AI/ML developers due to its Linux foundation and powerful command-line interface.
- Digital Security Tools: Explore tools for VPNs, password managers, encryption utilities, and firewalls to bolster your digital security.
- Snap Packages: The Software Center largely features “Snap” packages, a universal packaging system developed by Canonical (the creators of Ubuntu). Snaps are containerized applications that include all their dependencies, ensuring they run consistently across different Linux distributions and simplifying updates.
-
Personalizing Your Desktop Environment: Ubuntu uses the GNOME desktop environment by default, known for its clean, modern interface.
- Appearance: Go to “Settings” -> “Appearance” to change wallpapers, switch between light and dark themes, adjust icon sizes, and modify the dock (launcher) position and size.
- Extensions: For deeper customization, install the “GNOME Tweaks” tool (available in the Software Center) and the “Browser Integration” extension for your web browser (e.g., Firefox GNOME Shell Integration). This allows you to install GNOME extensions from extensions.gnome.org to add new functionalities, modify the user interface, or improve productivity (e.g., weather widgets, system monitors, window tiling managers).
- Software Choices: Don’t hesitate to replace default applications if they don’t meet your needs. For instance, if you prefer KDE Plasma over GNOME, you can install
kubuntu-desktop.
-
Setting Up a Robust Backup Strategy:
- Just as you backed up before installation, it’s critical to establish a regular backup routine for your Ubuntu system.
- Timeshift: Ubuntu typically includes
Timeshift, a powerful system restore tool. It creates incremental snapshots of your system files, allowing you to roll back to a previous working state if an update or configuration change goes wrong. Think of it as a Linux version of System Restore. - Personal Data Backups: For your personal files, consider cloud sync services (Nextcloud, Dropbox, Google Drive via web browser or third-party clients), external drives, or network shares. Automate these backups to maintain peak digital security and ensure your productivity is never hampered by data loss.
Conclusion: Embracing Your New Ubuntu System
Installing Ubuntu is more than just loading an operating system; it’s an entry point into a vibrant ecosystem that champions open-source principles, user control, and continuous innovation. From its robust digital security features and a vast array of free productivity tools to its potential as a development powerhouse for the latest AI tools, Ubuntu offers a compelling alternative or complement to traditional operating systems.
By meticulously following the steps outlined in this guide, you’ve not only set up a new system but also gained valuable insights into managing your digital environment. Embrace the journey of exploration – delve into the Software Center, experiment with customization, and leverage the powerful command line. With Ubuntu, your tech experience is now more secure, more versatile, and truly yours to define. Welcome to the world of Linux!
aViewFromTheCave is a participant in the Amazon Services LLC Associates Program, an affiliate advertising program designed to provide a means for sites to earn advertising fees by advertising and linking to Amazon.com. Amazon, the Amazon logo, AmazonSupply, and the AmazonSupply logo are trademarks of Amazon.com, Inc. or its affiliates. As an Amazon Associate we earn affiliate commissions from qualifying purchases.