
Minecraft, the sandbox game that has captivated millions worldwide, offers a virtually limitless canvas for creativity and adventure. While the vanilla experience is incredibly rich, the true magic for many lies in its vibrant modding community. Mods, or modifications, allow players to introduce new items, creatures, mechanics, and even entirely new dimensions, transforming Minecraft into something entirely unique. At the heart of this modding ecosystem sits Forge, a powerful and widely adopted modding API that acts as the essential bridge between your Minecraft installation and the vast library of mods available. If you’re eager to dive into a world of custom content, understanding how to install Forge is your first, crucial step.

This guide will walk you through the process of installing Forge on Minecraft, ensuring you have a stable and functional platform for all your modding adventures. We’ll cover everything from understanding what Forge is and why it’s important, to the step-by-step installation process, and even some essential troubleshooting tips. Whether you’re a seasoned gamer looking to expand your horizons or a newcomer eager to explore the endless possibilities of modded Minecraft, this tutorial is designed to make the installation process clear and straightforward.
Understanding Forge: The Modding Backbone
Before we delve into the installation itself, it’s important to understand what Forge is and why it’s become the de facto standard for Minecraft modding. Forge is not a mod in itself, but rather an application programming interface (API) and a framework. Think of it as a specialized set of tools and guidelines that mod developers use to create mods that are compatible with Minecraft.
Why Use Forge?
The primary benefit of using Forge is its ability to manage multiple mods simultaneously. Without an API like Forge, installing several mods would be a chaotic and often impossible endeavor. Forge standardizes how mods interact with Minecraft’s code, preventing conflicts and ensuring that different mods can coexist peacefully.
- Compatibility: Forge ensures that mods designed for a specific version of Forge will work together and with that particular version of Minecraft. This saves players from the headache of manually patching and debugging incompatible mods.
- Ease of Installation: Once Forge is installed, adding new mods typically becomes as simple as dropping
.jarfiles into a designated “mods” folder. Forge handles the rest, loading and integrating the mods into your game. - Community Support: The vast majority of Minecraft mods are developed with Forge in mind. This means you’ll have access to a much larger selection of mods and a more active community for support and troubleshooting.
- Performance and Stability: Forge is generally well-optimized, contributing to a smoother gaming experience even with a significant number of mods installed.
Forge vs. Fabric: A Brief Comparison
It’s worth noting that Forge isn’t the only modding API for Minecraft. Fabric is another popular alternative that has gained traction, particularly for its lightweight nature and faster update times for newer Minecraft versions. While both are excellent, Forge has a longer history and a more extensive library of established mods. For most players new to modding, Forge remains the most common and recommended starting point due to its widespread adoption and compatibility with a vast catalog of mods.
Installing Forge: A Step-by-Step Guide
Installing Forge is a relatively simple process, but it requires careful attention to detail. The exact steps may vary slightly depending on your operating system, but the core principles remain the same.
Prerequisites: What You’ll Need
Before you begin, ensure you have the following:
- A Clean Minecraft Installation: It’s highly recommended to have a fresh, unmodded installation of the Minecraft version for which you intend to install Forge. This helps prevent potential conflicts with existing mods or settings.
- Java Runtime Environment (JRE): Minecraft and Forge both run on Java. You’ll need a compatible version of the JRE installed on your computer. Most modern operating systems come with Java pre-installed, but if you encounter errors, you might need to download and install the latest version from the official Oracle Java website. Make sure you install the 64-bit version if your system is 64-bit.
- The Forge Installer: You’ll need to download the Forge installer file specifically for the Minecraft version you want to mod.
Step 1: Download the Forge Installer
- Visit the Official Forge Website: Navigate to the official Minecraft Forge download page. You can usually find this by searching for “Minecraft Forge download” on your preferred search engine.
- Select Your Minecraft Version: On the Forge website, you’ll see a list of supported Minecraft versions. Crucially, select the exact Minecraft version you have installed and want to play with mods. For example, if you want to play with mods on Minecraft 1.19.2, you must download the Forge installer for 1.19.2.
- Choose the Recommended or Latest Version: Forge typically offers two types of installers: “Recommended” and “Latest.” The “Recommended” version is generally more stable and has undergone more testing, making it the safer choice for most users. The “Latest” version might include newer features or bug fixes but could be less stable. For your first installation, stick with “Recommended.”
- Download the Installer: Click the download link for the installer. You’ll likely be taken to an ad page. Wait for the “Skip” button to appear in the top right corner of the ad page, and then click it. Do not click on any other ads or download buttons on that page. This will download the Forge installer file, which is usually a
.jarfile.
Step 2: Run the Forge Installer
- Locate the Downloaded File: Find the downloaded Forge installer
.jarfile in your computer’s “Downloads” folder or wherever you saved it. - Run the Installer:
- Windows: Right-click on the Forge installer
.jarfile and select “Open with” > “Java(TM) Platform SE binary.” If you don’t see “Java(TM) Platform SE binary,” you may need to ensure Java is correctly installed and associated with.jarfiles. You can also try running it from the command line by navigating to the file’s directory and typingjava -jar forge-installer-version.jar(replaceforge-installer-version.jarwith the actual filename). - macOS: Double-click the Forge installer
.jarfile. macOS typically has Java integrated, so this should launch the installer directly. - Linux: Open a terminal, navigate to the directory where you downloaded the file, and run the command
java -jar forge-installer-version.jar.
- Windows: Right-click on the Forge installer
Step 3: Configure the Forge Installation
Once the installer window pops up, you’ll see a few options.
- Select Installation Type: You will typically have two options:
- Install client: This is the option you want for playing modded Minecraft on your own computer.
- Install server: This is for setting up a modded Minecraft server.
- Extract: This option is generally not needed for typical installations.
- Choose Installation Location (Optional but Recommended): The installer will usually detect your default Minecraft installation directory. In most cases, you can leave this as is. However, if you have multiple Minecraft installations or custom directories, ensure it’s pointing to the correct location.
- Click “OK”: After selecting “Install client,” click “OK” to begin the installation process.
The installer will now download necessary files and set up Forge within your Minecraft installation. You’ll see a progress bar indicating the installation’s status.
Step 4: Launch Minecraft with Forge
Once the installer has successfully completed, you’re ready to launch Minecraft with Forge.
- Open the Minecraft Launcher: Launch the official Minecraft Launcher.
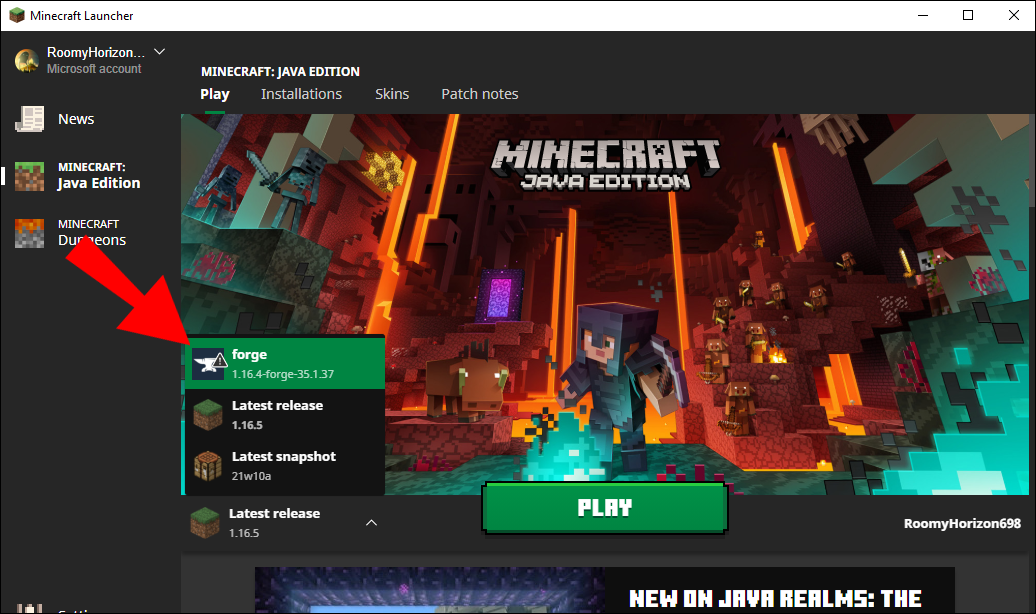
- Select the Forge Profile: In the bottom-left corner of the launcher, next to the “Play” button, you’ll see a dropdown menu that lists your available Minecraft profiles. Click on this dropdown. You should now see a new profile named something like “forge” or “forge-
“. Select this profile. - Click “Play”: With the Forge profile selected, click the “Play” button.
Minecraft will now launch with Forge loaded. You’ll notice a slightly different loading screen, and in the main menu, you should see “Forge” displayed in the bottom-left corner, along with information about the number of mods loaded (initially, this will be 0).
Adding Mods to Forge
With Forge successfully installed, the real fun begins: adding mods! This is where you transform your vanilla Minecraft experience into something entirely new.
The “mods” Folder
Forge creates a special folder within your Minecraft directory specifically for mods.
- Locate Your Minecraft Directory:
- Windows: Press
Windows Key + R, type%appdata%.minecraft, and press Enter. - macOS: Open Finder, press
Command + Shift + G, and type~/Library/Application Support/minecraft. - Linux: Navigate to
~/.minecraft.
- Windows: Press
- Find the “mods” Folder: Inside your
.minecraftfolder, you’ll find a folder named “mods.” If it doesn’t exist, you can create it manually by right-clicking in the.minecraftfolder and selecting “New Folder,” then naming itmods. - Download Mods: You’ll need to download mods from reputable sources. Popular websites like CurseForge are excellent places to find a vast array of mods for various Minecraft versions. Always ensure that the mod you download is compatible with the exact version of Minecraft and Forge you are using.
- Install Mods: To install a mod, simply download the mod file (usually a
.jarfile) and drag and drop it directly into the “mods” folder you located in step 2. - Restart Minecraft: After adding mods to the “mods” folder, close and restart Minecraft (making sure to select the Forge profile again). The mods should now be loaded and active in your game.
Important Note: Some complex mods may have their own specific installation instructions, so always read any accompanying documentation or README files provided by the mod author.
Troubleshooting Common Issues
While the Forge installation process is generally smooth, you might occasionally encounter problems. Here are some common issues and their solutions.
Game Crashes on Launch
- Incorrect Minecraft/Forge Version: The most common cause of crashes is using a mod or Forge version that doesn’t match your Minecraft version. Double-check that all your components are for the same Minecraft version.
- Corrupted Download: Try re-downloading the Forge installer and the mods you are trying to use.
- Conflicting Mods: If you’ve added multiple mods, one or more might be conflicting with each other. Try removing half of your mods, then launching the game. If it works, the conflicting mod is in the removed half. Repeat this process by halving the remaining mods until you pinpoint the culprit.
- Outdated Java: Ensure you have the latest compatible version of Java installed.
Forge Profile Not Appearing in Launcher
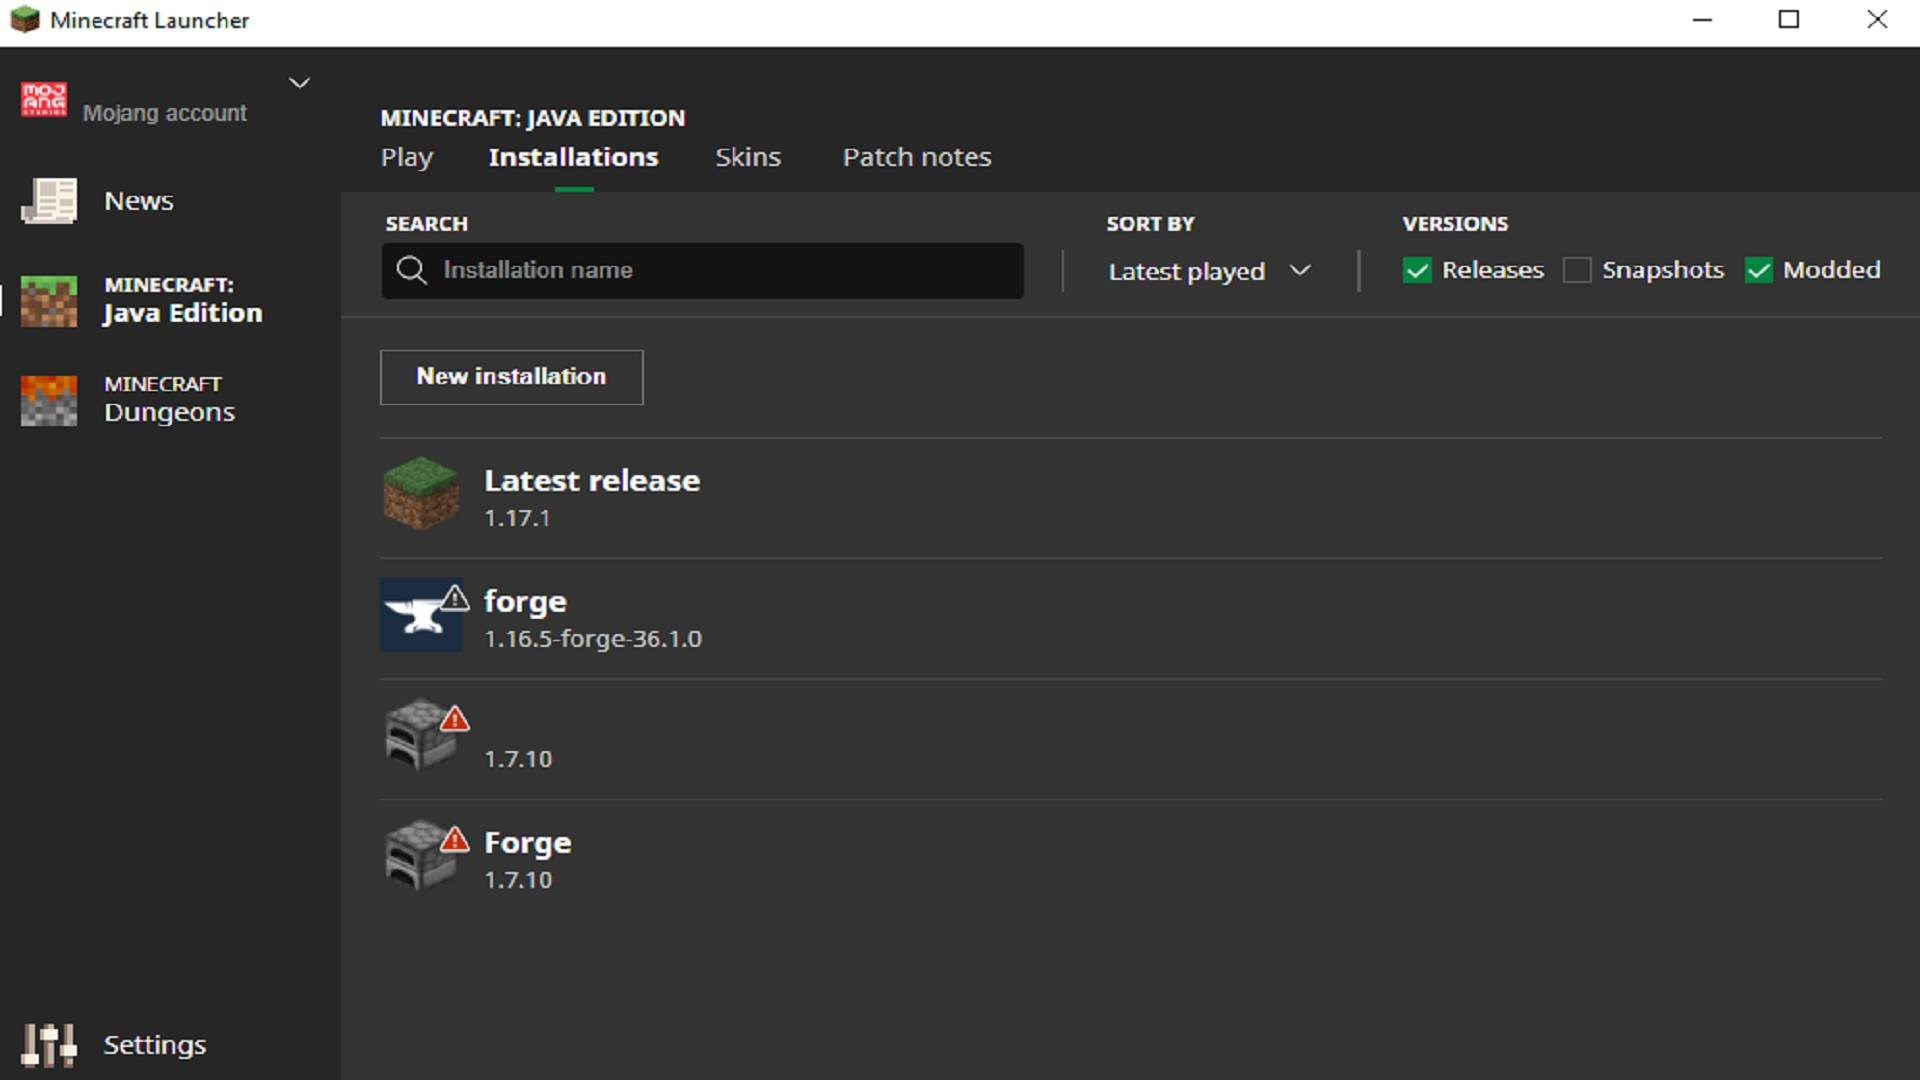
- Corrupted Forge Installation: If the Forge profile doesn’t show up, the installation might have failed. Try running the Forge installer again.
- Minecraft Installation Issues: Ensure your base Minecraft installation is working correctly without any mods. You might need to delete and re-download the vanilla Minecraft game files.
Mods Not Appearing in Game
- Incorrect “mods” Folder Location: Verify that you are placing the mod files in the correct “mods” folder within your
.minecraftdirectory. - Mod Incompatibility: As mentioned, ensure the mod is compatible with your Minecraft and Forge versions.
- Mod Requires Another Mod (Dependency): Some mods require other mods to function. Check the mod’s download page for any listed dependencies and install them as well.
By following these steps and understanding the fundamental principles of Forge, you’ll be well on your way to enjoying a personalized and enhanced Minecraft experience. The world of modding is vast and exciting, and Forge is your key to unlocking it. Happy modding!
aViewFromTheCave is a participant in the Amazon Services LLC Associates Program, an affiliate advertising program designed to provide a means for sites to earn advertising fees by advertising and linking to Amazon.com. Amazon, the Amazon logo, AmazonSupply, and the AmazonSupply logo are trademarks of Amazon.com, Inc. or its affiliates. As an Amazon Associate we earn affiliate commissions from qualifying purchases.