
Random Access Memory (RAM) is often described as the “short-term memory” of your computer. Unlike your hard drive or SSD, which stores files permanently, RAM handles the data your computer is actively using. Whether you are browsing dozens of tabs in Google Chrome, editing a high-resolution video, or playing a modern AAA game, your RAM dictates how smoothly your system can multitask.
Understanding exactly what RAM you have—its capacity, speed, type, and configuration—is a fundamental skill for any technology enthusiast or professional. This knowledge is essential when troubleshooting performance bottlenecks, planning hardware upgrades, or ensuring software compatibility. This guide provides a deep dive into the various methods for checking your RAM across different operating systems and explains why these specifications matter in the modern tech landscape.

Why Understanding Your RAM Is Essential for System Performance
Before diving into the “how,” it is crucial to understand the “what.” RAM specifications are not just arbitrary numbers; they are the primary indicators of your system’s potential for high-speed computation. When a system runs out of available RAM, it begins using “swap space” or “virtual memory” on the much slower hard drive or SSD, leading to the dreaded system lag.
The Role of RAM in Modern Computing
In today’s software ecosystem, applications are more memory-intensive than ever. Web browsers, particularly those based on the Chromium engine, are notorious for their memory consumption. Professional software suites like Adobe Creative Cloud or CAD tools require significant “overhead” to maintain stability. By knowing your RAM specs, you can determine if your system meets the recommended requirements for new software or if your hardware is the reason behind frequent crashes and slowdowns.
Capacity vs. Speed vs. Type: What to Look For
When checking your memory, you need to look for three primary metrics:
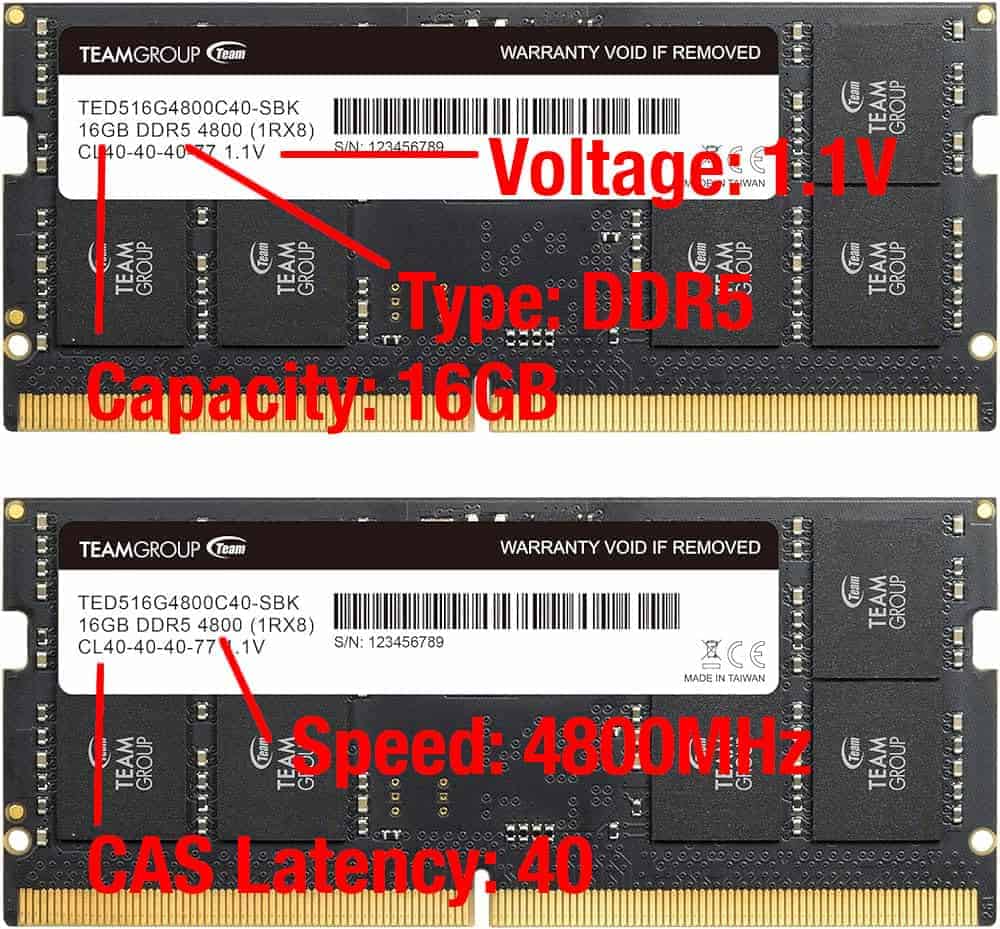
- Capacity (GB): Total volume of memory (e.g., 8GB, 16GB, 32GB).
- Generation (Type): The technology version, such as DDR4 or the newer DDR5. Different generations are physically incompatible with the same motherboard slots.
- Frequency (Speed): Measured in Megatransfers per second (MT/s) or Megahertz (MHz). Higher speeds allow for faster data transfer between the CPU and memory.
- Form Factor: Desktop computers typically use DIMM (Dual In-line Memory Module) sticks, while laptops use the smaller SO-DIMM version.
How to Check RAM on Windows 10 and 11
Windows provides several built-in tools that cater to everyone from the casual user to the advanced system administrator. You do not need to open your computer case to find out what is under the hood.
Using Task Manager for Quick Stats
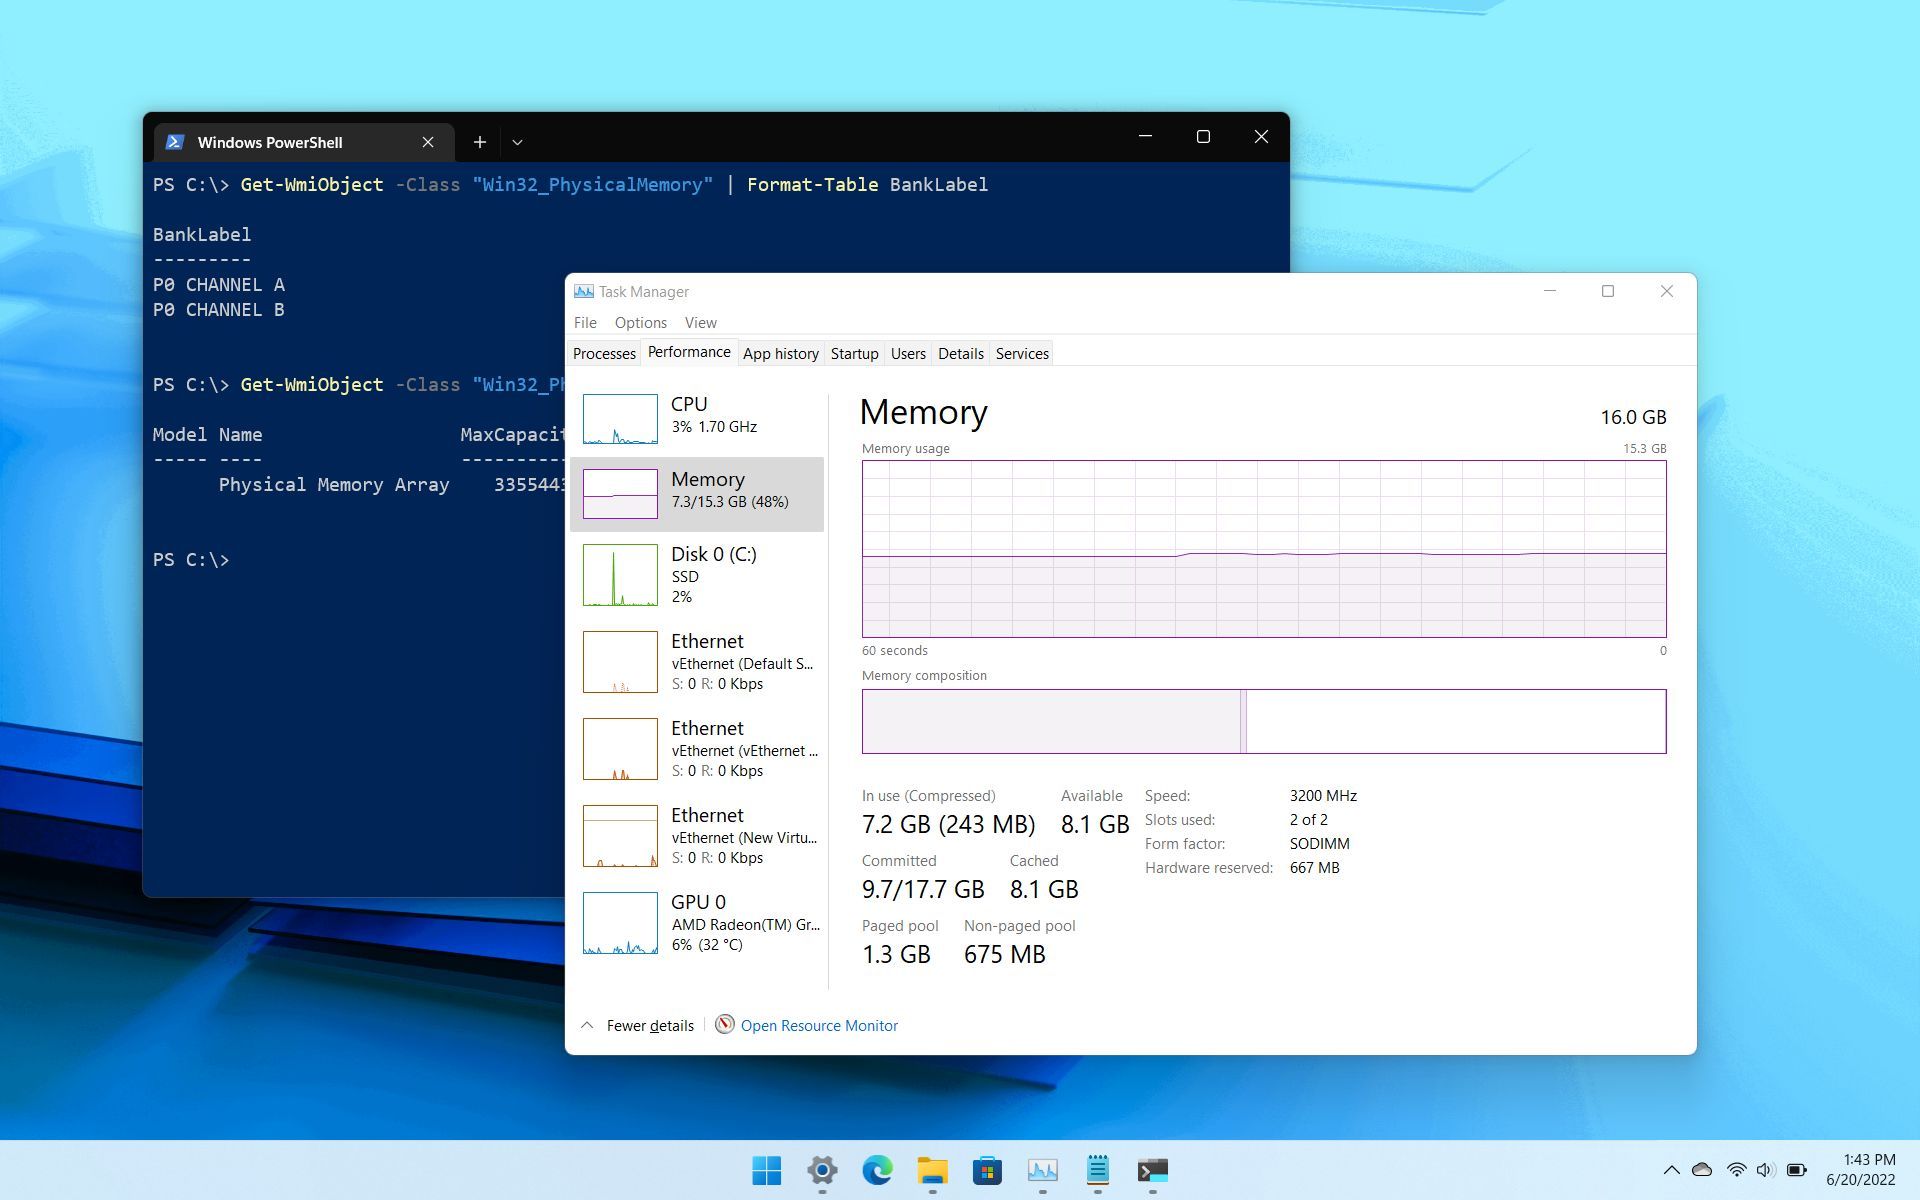
The fastest way to get a snapshot of your memory usage and basic specs is through the Task Manager.
- Access: Press
Ctrl + Shift + Escon your keyboard. - Navigation: Click the “Performance” tab and then select “Memory” from the sidebar.
- What you see: Here, Windows displays your total capacity (e.g., 16.0 GB DDR4). Crucially, it also shows the “Speed” currently being utilized and the number of “Slots used.” If you have 2 out of 4 slots used, you know you have room for an easy upgrade.
Accessing Detailed Specifications via System Information
If you need more technical details without the real-time movement of the Task Manager, the “System Information” tool is your best bet.
- Access: Press the Windows Key, type
msinfo32, and hit Enter. - Navigation: On the main “System Summary” page, scroll down to find “Installed Physical Memory (RAM),” “Total Physical Memory,” and “Available Physical Memory.”
- Insight: This tool is particularly useful for identifying how much of your RAM is hardware-reserved, which can sometimes explain why a system feels slower than its specs suggest.
Advanced Methods: Command Prompt and PowerShell
For those who prefer a text-based interface or need to pull serial numbers for warranty purposes, the Command Prompt is highly effective.
- Open Command Prompt (cmd) and type the following command:
wmic memorychip get devicelocator, capacity, speed, manufacturer, partnumber - This command returns the exact part number and manufacturer (such as Corsair, Kingston, or Samsung). This is incredibly helpful if you want to buy an identical stick to ensure “Dual-Channel” compatibility, which significantly boosts memory bandwidth.
Identifying RAM Specifications on macOS and Linux
While Windows dominates the desktop market, macOS and Linux users have equally powerful—though different—methods for auditing their hardware.
The macOS Approach: “About This Mac” and System Report
Apple makes hardware identification exceptionally streamlined, which is necessary given that many modern MacBooks have integrated (soldered) RAM that cannot be upgraded.
- The Quick View: Click the Apple icon in the top-left corner and select “About This Mac.” A window will appear showing your processor and memory (e.g., 16 GB 2133 MHz LPDDR3).
- The Deep Dive: For more detail, click “System Report” (or “More Info” in newer macOS versions). Navigate to the “Memory” section under Hardware. This will show you exactly what is in each slot, the status (OK or Fail), and whether the memory is ECC (Error Correction Code) or non-ECC.
Linux Terminal Commands for Hardware Auditing
Linux users often need to know RAM specs for server management or kernel optimization. Since Linux runs on everything from Raspberry Pis to massive data centers, the tools are robust.
- The
freeCommand: Typingfree -hin the terminal gives a human-readable summary of used and available memory. - The
dmidecodeTool: This is the most powerful tool for Linux hardware identification. Run:
sudo dmidecode --type 17 - This output provides everything from the voltage of the RAM sticks to the maximum supported capacity of the motherboard. It is the gold standard for Linux hardware enthusiasts.
Third-Party Tools for In-Depth Memory Analysis
Sometimes, built-in operating system tools don’t tell the whole story. If you are an overclocker or a PC builder, you likely want to know about CAS Latency, timings, and XMP profiles.
CPU-Z: The Gold Standard for Hardware Enthusiasts
CPU-Z is a lightweight, freeware utility that has been a staple in the tech community for decades. While its name suggests a focus on the processor, its “Memory” and “SPD” tabs are unparalleled for RAM analysis.
- The Memory Tab: Shows the real-time frequency and timings (latency). Note that for DDR (Double Data Rate) memory, the frequency shown here is usually half the advertised speed (e.g., 1600MHz in CPU-Z means your RAM is running at 3200MT/s).
- The SPD Tab: SPD stands for Serial Presence Detect. This tab allows you to look at each individual slot. It tells you the module’s “Check Style,” the week/year it was manufactured, and the various frequency tables it supports.
HWInfo: Monitoring Performance and Health
If you are concerned about your RAM overheating—a rare but possible issue in high-performance workstations—HWInfo provides real-time sensor monitoring. It tracks voltages and temperatures, ensuring that your memory is operating within the safe parameters defined by the manufacturer.
Using Your Findings: When and How to Upgrade
Once you have successfully identified your RAM, the next logical step is often determining whether it is sufficient for your needs. The tech landscape changes rapidly; what was plenty of RAM five years ago is the bare minimum today.
Deciphering Form Factors (DIMM vs. SO-DIMM)
If you discover you have 8GB of RAM and want to move to 16GB, you must match the form factor.
- DIMM: Long sticks meant for desktop motherboards.
- SO-DIMM: Small Outline sticks for laptops, NUCs, and some iMacs.
- Soldered RAM: If your search reveals “Onboard” memory, your RAM is likely soldered to the motherboard. In this case, an upgrade is not physically possible, and performance must be managed through software optimization.
Ensuring Compatibility with Motherboard and CPU
Checking your RAM isn’t just about the sticks themselves; it’s about the “Memory Controller” in your CPU and the “Chipset” on your motherboard.
- The Bottleneck: If you buy 3600MHz RAM but your motherboard only supports up to 2666MHz, the RAM will automatically “downclock” to the lower speed.
- Dual-Channel Configuration: For optimal tech performance, RAM should be installed in pairs. If you find your system has a single 16GB stick, adding a second identical 16GB stick doesn’t just double your capacity; it doubles the “bus width” (from 64-bit to 128-bit), providing a massive boost in data-heavy tasks like video rendering and gaming.
In conclusion, knowing how to check your RAM is the first step toward taking full control of your computing environment. Whether you use the native Task Manager on Windows, the System Report on a Mac, or the powerful dmidecode on Linux, the information you gather is the key to maintaining a fast, efficient, and future-proof machine. In an era where software demands are constantly rising, staying informed about your hardware is the best way to ensure your technology continues to work for you, rather than against you.