
Typography is the silent ambassador of your digital presence. Whether you are a graphic designer polishing a layout, a professional drafting a high-stakes presentation, or a creative hobbyist customizing your digital workspace, the ability to manipulate typefaces is a fundamental technical skill. While the default system fonts provide a baseline for readability, they often fail to capture the specific aesthetic or functional requirements of modern projects. Installing custom fonts allows you to transcend these limitations, giving you full control over the visual identity of your documents and software.
This guide provides a comprehensive walkthrough for managing, installing, and troubleshooting font files on both Windows and macOS systems. By mastering these workflows, you can expand your creative toolkit and ensure your digital environment is perfectly tailored to your needs.

Understanding Font Formats and Compatibility
Before diving into the installation process, it is essential to understand what you are actually downloading. Not all font files are created equal, and knowing the difference between formats will save you significant frustration during the setup process.
Common Font Extensions
- TrueType (.ttf): The most common format, developed by Apple and Microsoft. It is widely supported across almost every operating system and application.
- OpenType (.otf): A more advanced evolution of TrueType. OpenType fonts often contain superior typographical features, such as ligatures, alternate characters, and extended language support. They are generally preferred by designers.
- Web Open Font Format (.woff/.woff2): These are optimized for web browsers. While you can technically install these on a computer, they are intended for website development and CSS integration. If you download a font package, always look for .ttf or .otf files for local installation.
Where to Find Quality Fonts
Not all free fonts are safe. To avoid security risks or corrupted files, stick to reputable sources. Platforms like Google Fonts offer open-source libraries that are verified for safety and quality. Other premium marketplaces, such as Adobe Fonts (accessible via Creative Cloud), provide high-end, professional-grade typefaces that are automatically managed by software, removing the need for manual installation. Always ensure you have the appropriate licensing rights for the fonts you intend to use, especially for commercial projects.
Installing Fonts on Windows (Windows 10 and 11)
Windows has streamlined its font management system over the years, making it easier than ever to integrate new typefaces into the OS. There are three primary ways to handle this, ranging from drag-and-drop simplicity to administrative management.
The Drag-and-Drop Method
This is the fastest route for casual users.
- Download your chosen font files and extract them if they are in a compressed .zip folder.
- Open the File Explorer and navigate to the folder containing your fonts.
- Select the font files, right-click, and choose “Install” (for the current user) or “Install for all users” (which requires administrative privileges).
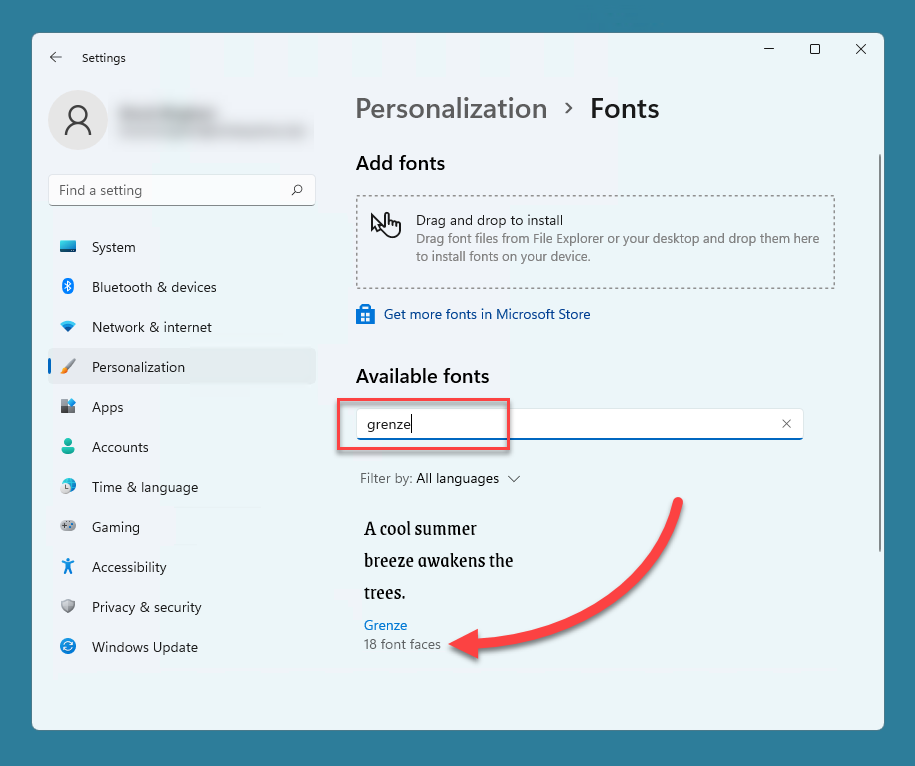
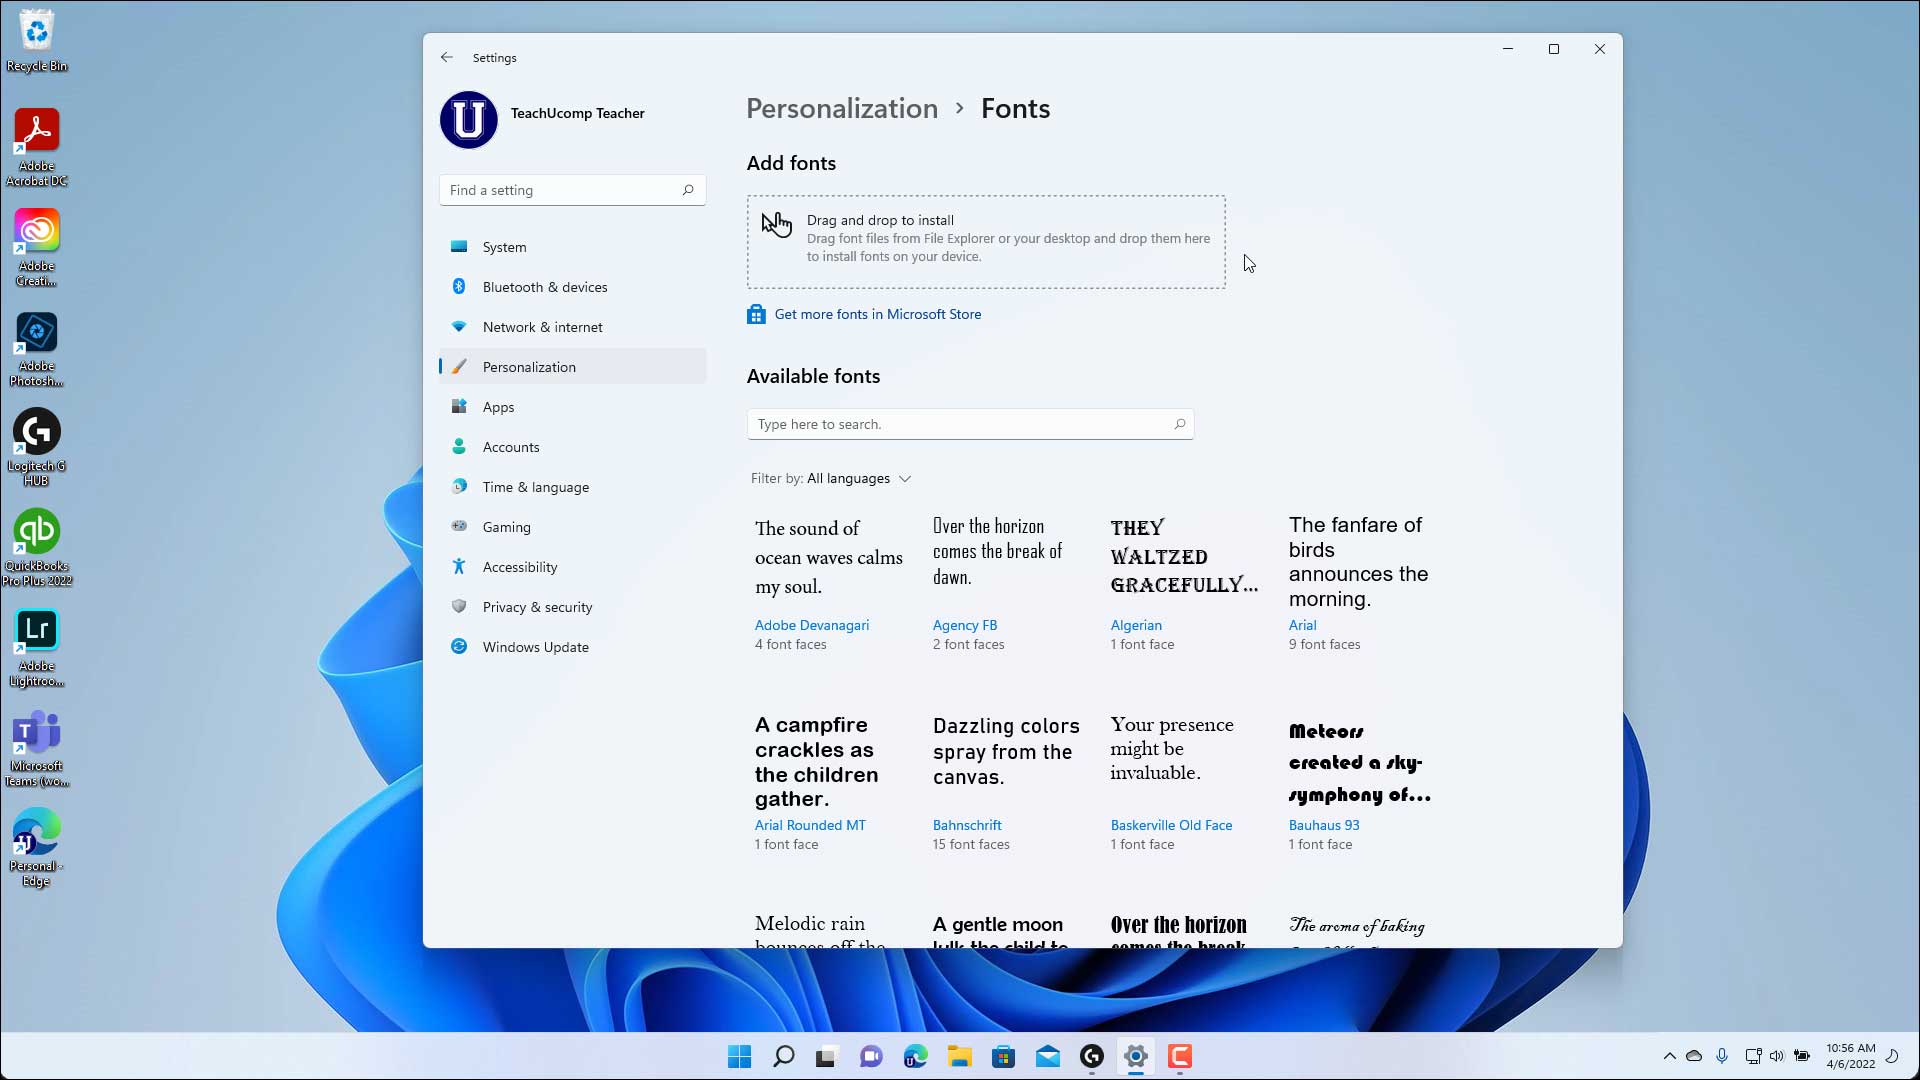
- Alternatively, you can navigate to Settings > Personalization > Fonts. You will see a box that says “Drag and drop to install.” Simply drag your files directly into that area, and Windows will automatically register them.
Managing Fonts via the Control Panel
For users who prefer the traditional interface or need to manage large collections, the legacy Control Panel remains highly effective.
- Open the Control Panel and switch the view to “Large icons.”
- Click on “Fonts.” This will open the system font directory.
- Simply drag your new font files into this window. Windows will trigger the installation process and automatically display the new entries in your application font menus.
Installing Fonts on macOS
Apple’s macOS handles typography with a focus on organization, utilizing a built-in utility called “Font Book.” This application acts as a central hub for viewing, installing, and disabling typefaces across the system.
Using the Font Book Application
The Font Book is the native interface for font management on a Mac.
- Locate your font files in Finder.
- Double-click the font file. This will open a preview window showing the typeface style.
- Click the “Install” button at the bottom of the window.
- If you have multiple fonts to install, open the Font Book app (via Spotlight search or the Applications folder). Click the “+” (plus) icon in the top toolbar, select the fonts you wish to add, and click “Open.”
Managing System-Wide vs. User-Specific Fonts
By default, Font Book installs fonts to the “User” library, meaning they are only available to your specific account. If you are part of an organization or share your computer with other users, you may want to install fonts so they are accessible to everyone. In the Font Book app, you can drag your files into the “Computer” collection in the sidebar. You may be prompted to enter your administrator password to authorize this change.
Troubleshooting Common Font Issues
Even with a straightforward installation, you may occasionally run into issues where a font does not appear in your favorite application. Before assuming the font is broken, run through this troubleshooting checklist.
Restart Your Applications
The most common mistake is failing to restart software. Most professional applications, such as Adobe Photoshop, Microsoft Word, or Affinity Designer, load their font caches upon startup. If you install a font while an application is running, the app likely won’t detect the change until it is closed and relaunched. Save your work and restart the program to refresh the font list.
Dealing with Corrupted Files
If a font refuses to install or displays as a generic icon, the file may be corrupted. This often happens if the download was interrupted or if the source file is improperly formatted. Delete the file, clear your computer’s “Downloads” folder, and attempt to re-download the font from the original source.
Font Conflicts
If you have multiple versions of the same font family (for example, an old version and a newer version of Helvetica), your computer might struggle to decide which one to load. Use Font Book (macOS) or the Font settings (Windows) to identify and remove duplicates. Both systems will usually highlight potential conflicts with a warning icon.
Compatibility Limitations
Some applications, particularly older software or specific mobile-focused apps, have limited support for modern font features like OpenType variable fonts. If a specific font is not showing up, check the application’s documentation to ensure it supports the file type (.otf vs .ttf).
Organizing and Maintaining Your Font Library
As you grow your collection, it is easy for your font folder to become cluttered and unmanageable. Professionals often use dedicated font management software to keep their digital workspaces efficient.
The Power of Font Managers
If you find yourself managing hundreds or thousands of fonts, native OS tools may become cumbersome. Third-party font managers (such as Suitcase Fusion or FontBase) allow you to create “sets” or “collections.” This means you can activate specific fonts only when you are working on a specific project, which keeps your system font menu lean and prevents software performance lag caused by loading too many typefaces simultaneously.
Regular Cleanup
Every six months, take the time to audit your font library. Remove fonts you no longer use and archive them in a cloud storage folder. A clean font system not only makes it easier to find the right typeface for your next project, but it also ensures that your computer boots and operates with maximum efficiency. By following these steps and maintaining a disciplined approach to your font library, you ensure that your computer remains a powerful, high-functioning tool for all your design and professional tasks.
aViewFromTheCave is a participant in the Amazon Services LLC Associates Program, an affiliate advertising program designed to provide a means for sites to earn advertising fees by advertising and linking to Amazon.com. Amazon, the Amazon logo, AmazonSupply, and the AmazonSupply logo are trademarks of Amazon.com, Inc. or its affiliates. As an Amazon Associate we earn affiliate commissions from qualifying purchases.