
Windows 11, with its refreshed user interface, enhanced security features, and improved performance, represents a significant leap forward for Microsoft’s venerable operating system. However, for many users eagerly anticipating the upgrade, the journey from desire to successful installation can be fraught with unexpected hurdles. The seemingly straightforward process can quickly become a frustrating odyssey when faced with cryptic error messages, incompatible hardware warnings, or inexplicable installation failures. This article aims to demystify the common reasons behind Windows 11 installation woes, providing a comprehensive guide to diagnosing and resolving these issues, ensuring your path to Microsoft’s latest OS is as smooth as possible.
The Foundational Hurdles: Meeting Windows 11’s Strict System Requirements
Microsoft made it clear from the outset that Windows 11 would impose stricter system requirements than its predecessor, Windows 10. While this decision was driven by a commitment to security and performance, it also created a compatibility barrier for a substantial number of older, yet still functional, PCs. Understanding these core requirements is the first, and often most critical, step in troubleshooting installation problems.
The Crucial Role of TPM 2.0 and Secure Boot
Perhaps the most talked-about and frequently misunderstood requirements are the necessity of a Trusted Platform Module (TPM) version 2.0 and Secure Boot capability. These are not merely optional features but fundamental security enhancements that Windows 11 relies upon.
-
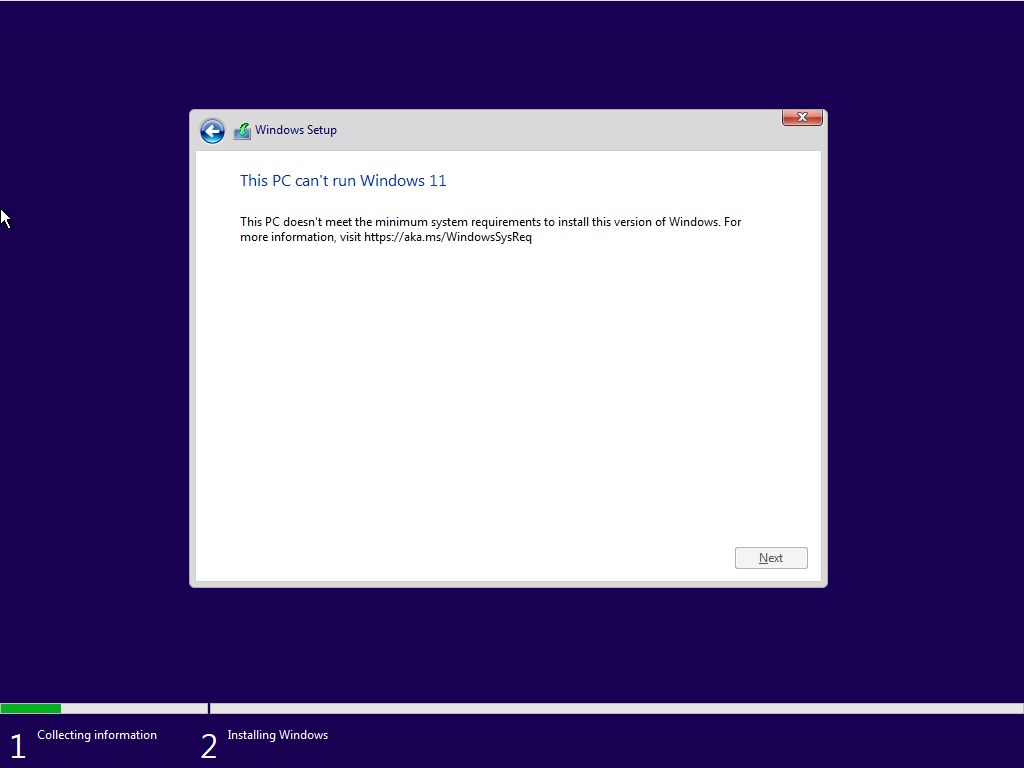
TPM 2.0: A TPM is a secure cryptoprocessor that stores cryptographic keys and protects the integrity of the system by verifying that the boot process hasn’t been tampered with. While many modern PCs have a TPM, it might be disabled by default in the BIOS/UEFI settings. Older machines might have TPM 1.2 or lack a TPM altogether, rendering them incompatible. Verifying and enabling TPM 2.0 is often the solution to installation roadblocks, particularly the “This PC can’t run Windows 11” message.
-
Secure Boot: This is a security standard developed by members of the PC industry to help ensure that a device boots using only software that is trusted by the Original Equipment Manufacturer (OEM). When Secure Boot is enabled, the PC checks the signature of each piece of boot software, including drivers and the operating system itself. If the signatures are valid, the PC boots. If not, the PC might not boot, or will prompt the user with a warning. Like TPM, Secure Boot is typically a UEFI firmware feature that often needs to be manually enabled in your motherboard’s settings.
The absence or disablement of either TPM 2.0 or Secure Boot can be an immediate showstopper for Windows 11 installation. It’s imperative to delve into your PC’s UEFI firmware settings (often accessible by pressing F2, Del, F10, or F12 during startup) to confirm these features are active.
Processor Compatibility: Is Your CPU on the List?
Beyond security modules, Windows 11 also introduced a stringent list of supported CPUs. While most Intel 8th generation and newer processors, and AMD Ryzen 2000 series and newer processors, are compatible, many older CPUs, even high-performing ones, are officially excluded.
-
Checking Your CPU: Microsoft provides a detailed list of supported processors on its website. If your CPU isn’t on this list, you’ll likely encounter an incompatibility message during the installation process. This is a hard requirement, and generally, there are no official workarounds for unsupported CPUs if you wish to maintain a fully supported and updated Windows 11 installation. While community-driven methods exist to bypass this check, they come with risks regarding stability, updates, and security, and are not recommended for most users.
-
Performance vs. Compatibility: It’s important to note that a CPU’s exclusion isn’t always about raw processing power. It often relates to specific architectural features, security extensions, and optimizations that Microsoft deemed essential for Windows 11’s long-term vision.
RAM, Storage, and Graphics: The Other Essentials
While TPM and CPU often grab the headlines, the more traditional hardware requirements also play a crucial role.
-
RAM: Windows 11 requires a minimum of 4 GB of RAM. While some older systems might have less, most modern PCs meet or exceed this. However, just meeting the minimum might lead to a sluggish experience, so 8 GB or more is generally recommended for optimal performance.
-
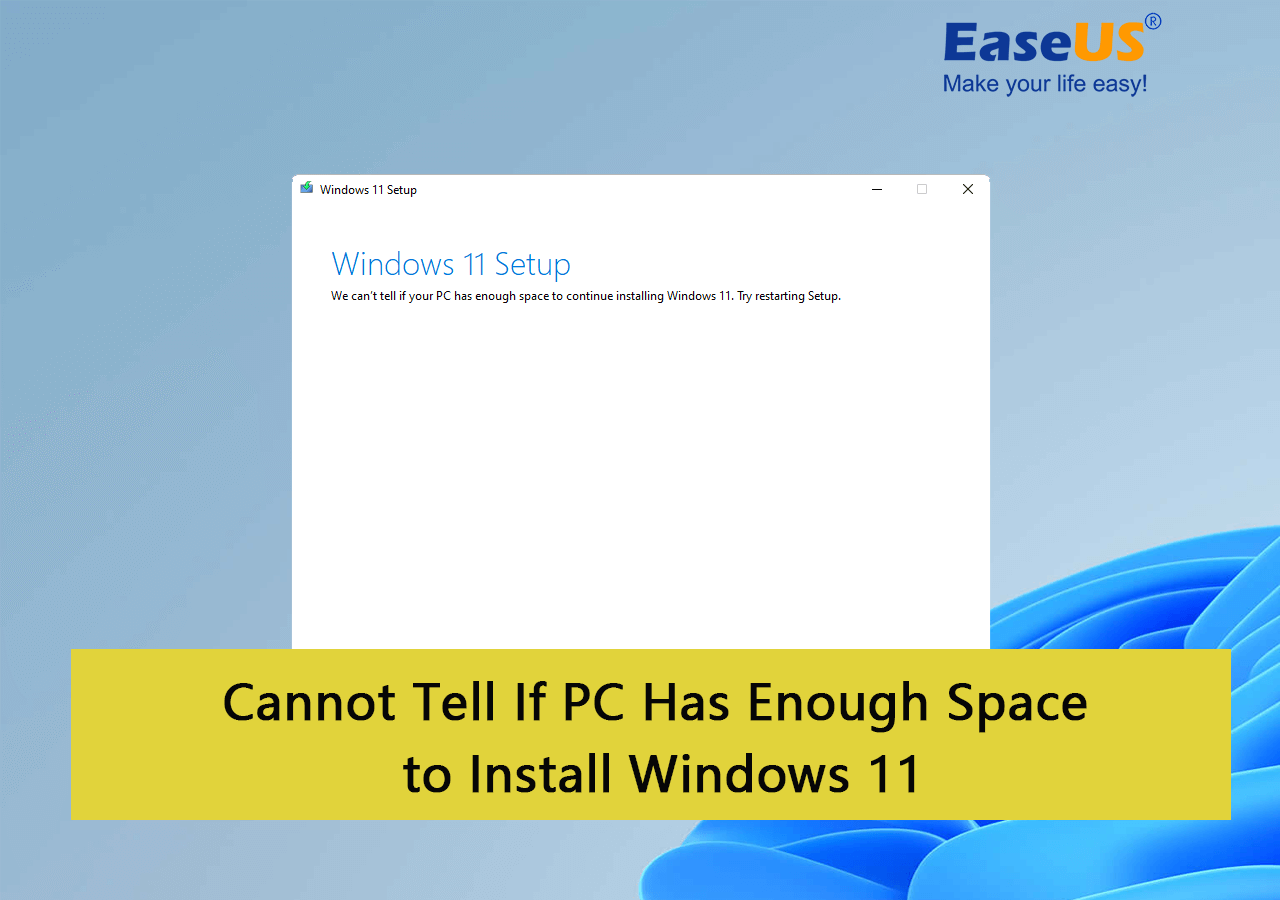
Storage: A minimum of 64 GB of storage space is required for the OS installation. This space must be available on the primary drive. For an upgrade, you’ll need additional temporary space. Lack of sufficient free space is a common, yet easily overlooked, problem. Furthermore, the storage drive must be partitioned using the GPT (GUID Partition Table) format, not the older MBR (Master Boot Record) format, especially for Secure Boot and UEFI systems.
-
Graphics Card: Your graphics card must be compatible with DirectX 12 or later and have a WDDM 2.0 driver. Most integrated and dedicated GPUs from the last decade meet this criterion, but very old systems might fall short.
Ensuring all these foundational components align with Microsoft’s specifications is the cornerstone of a successful Windows 11 installation. The PC Health Check app, available from Microsoft, is an invaluable tool for quickly assessing your system’s readiness.
Preparing for Installation: Media, BIOS, and Drive Configuration
Once you’ve confirmed your hardware meets the minimum requirements, the next set of potential pitfalls arises during the preparation and execution phases of the installation. Issues with installation media, incorrect BIOS/UEFI settings, or improper drive configuration can halt the process before it even truly begins.
Creating Reliable Installation Media
Whether you’re performing a clean install or attempting an upgrade, you’ll likely need Windows 11 installation media, typically a bootable USB drive or a DVD. Errors in its creation can lead to frustrating and inexplicable failures.
-
Using Official Tools: Always use Microsoft’s official Media Creation Tool to download the Windows 11 ISO and create a bootable USB drive. This tool ensures the ISO is genuine, uncorrupted, and correctly formatted for booting. Third-party tools might not always create a properly formatted bootable drive or could introduce issues.
-
USB Drive Health: Ensure the USB drive itself is healthy and free of errors. A faulty USB stick, or one with corrupted sectors, can lead to data integrity issues during the copying process, resulting in an unbootable or flawed installation medium. Consider using a new, high-quality USB 3.0 drive (at least 8GB capacity) for faster and more reliable creation.
-
Checking the ISO: If you’ve downloaded the ISO directly, verify its integrity using a checksum (e.g., SHA256) against the value provided by Microsoft. A corrupted download can cause installation to fail without clear indications of the root cause.
Navigating Your BIOS/UEFI Settings
The BIOS (Basic Input/Output System) or its modern successor, UEFI (Unified Extensible Firmware Interface), is the firmware that initializes your hardware and launches the operating system. Correctly configuring these settings is paramount for Windows 11.
-
Boot Order: Ensure your PC is configured to boot from the USB drive (or DVD) containing the installation media. You might need to temporarily change the boot order or use a one-time boot menu (often F12, F10, or Esc during startup) to select your media.
-
UEFI Mode: Windows 11 strictly requires your system to be booted in UEFI mode, not the legacy BIOS (CSM) mode. Confirm that your motherboard is set to UEFI mode in its firmware settings. Disabling CSM (Compatibility Support Module) or enabling “UEFI Boot” explicitly is often necessary.
-
Secure Boot and TPM: As discussed, these must be enabled within the BIOS/UEFI. Sometimes, enabling Secure Boot requires first setting a “Windows UEFI mode” or similar option, and then enabling Secure Boot itself. Some motherboards might also require you to set a “Supervisor Password” or clear existing Secure Boot keys before you can enable it.
Incorrect or conflicting BIOS/UEFI settings are a leading cause of the “This PC can’t run Windows 11” message, even if your hardware theoretically meets the requirements.
Disk Partitioning: GPT and UEFI Are Key
Windows 11, in conjunction with UEFI and Secure Boot, mandates the use of the GUID Partition Table (GPT) partitioning scheme for the system drive. Older systems often use the Master Boot Record (MBR) scheme.
-
MBR to GPT Conversion: If your existing Windows installation drive is MBR, you’ll need to convert it to GPT. For a clean install, this is straightforward: simply delete all existing partitions during the installation process, and Windows will automatically create new GPT partitions. For an upgrade, you can use Microsoft’s
MBR2GPTtool (a command-line utility) to convert your drive without data loss, but it’s a complex process and always requires a full backup. -
Understanding Partitions: Ensure you have enough unallocated space if performing an upgrade. For a clean install, it’s generally best to delete all existing partitions on the target drive to start fresh, allowing Windows Setup to configure the necessary system partitions (EFI System Partition, Recovery Partition, etc.) correctly.
Ignoring these drive configuration requirements will inevitably lead to installation errors, particularly those related to booting in UEFI mode or Secure Boot.
Troubleshooting Common Installation Errors
Even after meticulously checking requirements and preparing your environment, you might still encounter specific error messages or unexpected behavior. These often point to more specific underlying issues.
Error Codes Decoded: What Are They Telling You?
Windows installation errors often manifest as numerical codes or brief descriptions. While sometimes vague, these codes are crucial clues.
-
0xC1900101 – 0x20004, 0x4000D, 0x40017: These are common upgrade-related errors, often indicating a problem during the driver migration phase. They can stem from incompatible drivers, third-party antivirus software, or even faulty hardware.
-
0x8007007F: Often related to file corruption or download issues. Re-downloading the ISO or re-creating the installation media can help.
-
“We couldn’t install Windows 11” (with no specific code): This generic message usually means the setup failed to identify the root cause. It could be due to any of the aforementioned hardware or BIOS/UEFI configuration issues.
-
Logs are Your Friend: For more advanced troubleshooting, delve into the setup logs (e.g.,
setuperr.log,setupact.login theC:$WINDOWS.~BTSourcesPantherdirectory for upgrades, or on the USB drive for clean installs). These logs contain detailed information about where the installation failed.
Searching for specific error codes online, especially on Microsoft’s support forums or tech communities, can often quickly lead to known solutions.
Driver Conflicts and Windows Update Glitches
During an upgrade, existing drivers from your current Windows installation can conflict with the Windows 11 setup process.
-
Outdated Drivers: Ensure all your hardware drivers (especially for chipset, graphics, and network adapters) are updated to their latest versions, preferably ones specifically designed for Windows 11 if available. Outdated drivers can cause system instability that prevents the upgrade from completing.
-
Third-Party Software: Aggressive antivirus programs, VPN software, or other system-level utilities can sometimes interfere with the upgrade process. Temporarily uninstalling or disabling these before initiating the upgrade can resolve conflicts. You can reinstall them after Windows 11 is successfully installed.
-
Windows Update Cache: For upgrades initiated via Windows Update, a corrupted update cache can cause failures. Running the Windows Update Troubleshooter or manually clearing the update cache (by stopping the Windows Update service, deleting files in
C:WindowsSoftwareDistribution, and restarting the service) can sometimes fix the issue.
Insufficient Storage Space and Drive Health
While seemingly simple, inadequate storage space is a frequent cause of installation failures.
-
Free Up Space: Ensure you have well over the 64 GB minimum requirement, especially for upgrades, as the process requires temporary files. Aim for 20-30 GB of free space above the OS requirement. Use Disk Cleanup, uninstall unnecessary programs, and move large files to external drives.
-
Drive Errors: A failing hard drive or SSD can cause read/write errors during installation, leading to corruption and failure. Run
chkdsk /f /ron your primary drive from an elevated Command Prompt in Windows 10 before attempting the upgrade. For a new drive, ensure it’s properly initialized and formatted. -
SATA Controller Issues: In rare cases, especially with custom builds or older motherboards, incorrect SATA controller drivers or modes (e.g., RAID mode when not using RAID, or IDE mode instead of AHCI) can cause the Windows installer to not detect the drive or encounter errors. Ensure your SATA controller is set to AHCI mode in the BIOS/UEFI.
Addressing these specific technical aspects systematically will significantly improve your chances of a successful Windows 11 installation.
Beyond the Basics: Advanced Solutions and Considerations
When standard troubleshooting fails, a few advanced strategies and considerations can help you overcome persistent installation blockers. Sometimes, the solution isn’t just about fixing a problem, but choosing the right installation approach.
The PC Health Check App: Your First Diagnostic Tool
Before embarking on any extensive troubleshooting, always run Microsoft’s official PC Health Check app. While it doesn’t provide granular detail on every single incompatibility, it’s designed to give you a quick “go/no-go” assessment for Windows 11.
-
Understanding the Results: If it reports incompatibility, pay close attention to the specific areas highlighted (e.g., TPM, Secure Boot, CPU). This immediately narrows down your focus. If it says your PC can run Windows 11 but you’re still having issues, then the problem likely lies in the installation process itself rather than the core hardware requirements.
-
Starting Point: Consider the PC Health Check app as your preliminary diagnostic. It saves you time by quickly identifying the most common barriers.
Clean Install vs. Upgrade: When to Choose Which
The choice between upgrading your existing Windows 10 installation and performing a clean install is a critical decision that can profoundly impact the success and quality of your Windows 11 experience.
-
Upgrade (In-Place Upgrade): This method attempts to preserve your existing files, applications, and settings. It’s convenient but more prone to failure due to conflicts with outdated drivers, third-party software, or underlying corruption in the existing Windows 10 installation. If you’re repeatedly facing upgrade errors, especially those pointing to driver or software conflicts, an upgrade might not be the best path.
-
Clean Install: This involves formatting your primary drive and installing Windows 11 from scratch. It’s the most reliable method for ensuring a fresh, stable operating system, free from previous issues. While it requires backing up all your personal data and reinstalling applications, it bypasses many of the upgrade-specific hurdles. For persistent installation failures, a clean install is often the recommended solution. It also guarantees your system starts with a clean slate, optimized for Windows 11.
-
Hybrid Approach: Sometimes, preparing for an upgrade involves a “mini-clean-up” of your existing system – uninstalling unnecessary software, updating all drivers, running disk cleanup, and performing system file checks (
sfc /scannow,DISM /Online /Cleanup-Image /RestoreHealth). This can sometimes resolve conflicts that hinder an in-place upgrade.
Seeking Community Support and Microsoft Resources
If you’ve exhausted all immediate troubleshooting steps, don’t despair. The vast global tech community and Microsoft itself offer numerous avenues for support.
-
Online Forums and Communities: Websites like Reddit (e.g., r/Windows11), TenForums, BleepingComputer, and various hardware-specific forums are treasure troves of information. Posting your specific error codes, hardware configuration, and the steps you’ve already taken can often yield tailored advice from experienced users.
-
Microsoft Support: Microsoft’s official documentation, support articles, and community forums (answers.microsoft.com) are excellent resources. For persistent or complex issues, reaching out to Microsoft Support directly might be necessary, especially if you suspect a very specific hardware or software interaction that isn’t widely documented.
-
Hardware Manufacturer Support: If the issue appears to be related to specific hardware (e.g., BIOS/UEFI settings, particular drivers), consulting your motherboard or PC manufacturer’s support website or contact channels can provide critical, device-specific guidance.
In conclusion, the inability to install Windows 11, while frustrating, is rarely an insurmountable problem. By systematically checking system requirements, meticulously preparing your installation media and BIOS/UEFI settings, understanding common error codes, and considering the best installation approach for your situation, you can navigate the complexities of the upgrade process. Patience, attention to detail, and leveraging the wealth of available resources are your best allies in successfully transitioning to the new era of Windows.
aViewFromTheCave is a participant in the Amazon Services LLC Associates Program, an affiliate advertising program designed to provide a means for sites to earn advertising fees by advertising and linking to Amazon.com. Amazon, the Amazon logo, AmazonSupply, and the AmazonSupply logo are trademarks of Amazon.com, Inc. or its affiliates. As an Amazon Associate we earn affiliate commissions from qualifying purchases.